
User Guide
Page 29
... display devices 77 Directing the display output when you turn on the computer 78 Adjusting the quality of the external display......79 Using an external keyboard 79 Using a mouse 80 Connecting a printer 80 Setting up a printer 81 Connecting an optional external diskette drive........82 Connecting external speakers or headphones.........83 Connecting...
... display devices 77 Directing the display output when you turn on the computer 78 Adjusting the quality of the external display......79 Using an external keyboard 79 Using a mouse 80 Connecting a printer 80 Setting up a printer 81 Connecting an optional external diskette drive........82 Connecting external speakers or headphones.........83 Connecting...

User Guide
Page 30
30 Contents Moving the computer 84 Using a computer lock 84 Chapter 2: Learning the Basics 86 Computing tips 86 Using the keyboard 88 Character keys 88 Making your keyboard emulate a full-size keyboard 89 Ctrl, Fn, and Alt keys 89 Function keys 90 Windows special keys 90 Overlay keys 90 Using the overlay to type...
30 Contents Moving the computer 84 Using a computer lock 84 Chapter 2: Learning the Basics 86 Computing tips 86 Using the keyboard 88 Character keys 88 Making your keyboard emulate a full-size keyboard 89 Ctrl, Fn, and Alt keys 89 Function keys 90 Windows special keys 90 Overlay keys 90 Using the overlay to type...

User Guide
Page 33
... Saver 164 SD Memory Card Format 166 Mouse Utility 167 TOSHIBA Mobile Extension 168 TOSHIBA Zooming Utility 170 TOSHIBA Button Controls 171 CD/DVD Drive Acoustic Silencer 172 Fn-esse 173 Starting Fn-esse 174 Using the keyboard or pointing device to assign keys 176 Viewing existing key... assignments 177 Changing or removing existing key assignments 177 TOSHIBA HW Setup 178 TOSHIBA Hotkey Utility 180 Chapter 6: If Something Goes Wrong 181 Problems ...
... Saver 164 SD Memory Card Format 166 Mouse Utility 167 TOSHIBA Mobile Extension 168 TOSHIBA Zooming Utility 170 TOSHIBA Button Controls 171 CD/DVD Drive Acoustic Silencer 172 Fn-esse 173 Starting Fn-esse 174 Using the keyboard or pointing device to assign keys 176 Viewing existing key... assignments 177 Changing or removing existing key assignments 177 TOSHIBA HW Setup 178 TOSHIBA Hotkey Utility 180 Chapter 6: If Something Goes Wrong 181 Problems ...

User Guide
Page 34
... conflicts on your own .....189 Fixing a problem with Device Manager ...........190 Memory problems 192 Power and the batteries 193 Keyboard problems 195 Display problems 196 Disk drive problems 198 DVD-ROM or multi-function drive problems...201 Sound system problems 202 ... 214 Data and system configuration backup in Windows XP 215 If you need further assistance 221 Before you contact Toshiba 221 Contacting Toshiba 222 Other Toshiba Internet Web sites 223 Toshiba's worldwide offices 223 Appendix A: Hot Keys 225 Volume Mute 225 Password security 226 Without a password 226 With...
... conflicts on your own .....189 Fixing a problem with Device Manager ...........190 Memory problems 192 Power and the batteries 193 Keyboard problems 195 Display problems 196 Disk drive problems 198 DVD-ROM or multi-function drive problems...201 Sound system problems 202 ... 214 Data and system configuration backup in Windows XP 215 If you need further assistance 221 Before you contact Toshiba 221 Contacting Toshiba 222 Other Toshiba Internet Web sites 223 Toshiba's worldwide offices 223 Appendix A: Hot Keys 225 Volume Mute 225 Password security 226 Without a password 226 With...

User Guide
Page 35
35 Contents Display brightness 231 Disabling or enabling the TouchPad 231 Zooming applications in/out 231 Keyboard hot keys 232 Appendix B: Power Cord/Cable Connectors 233 Appendix C: Using ConfigFree™ with your Toshiba Computer 234 Getting Started 235 Starting ConfigFree 235 ConfigFree Utilities 237 Connectivity Doctor 237 Search for Wireless Devices 240 Profile Settings 245 ConfigFree SUMMIT 248 Quick Connect 253 Using the Automatic Switch 256 Semi-Automatic Switch Feature 257 Glossary 258 Index 273
35 Contents Display brightness 231 Disabling or enabling the TouchPad 231 Zooming applications in/out 231 Keyboard hot keys 232 Appendix B: Power Cord/Cable Connectors 233 Appendix C: Using ConfigFree™ with your Toshiba Computer 234 Getting Started 235 Starting ConfigFree 235 ConfigFree Utilities 237 Connectivity Doctor 237 Search for Wireless Devices 240 Profile Settings 245 ConfigFree SUMMIT 248 Quick Connect 253 Using the Automatic Switch 256 Semi-Automatic Switch Feature 257 Glossary 258 Index 273
User Guide
Page 45
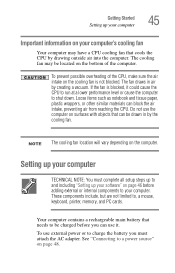
... block the air intake, preventing air from reaching the CPU. To prevent possible overheating of the computer. Do not use external power or to , a mouse, keyboard, printer, memory, and PC cards. The fan draws in by drawing outside air into the computer.
... block the air intake, preventing air from reaching the CPU. To prevent possible overheating of the computer. Do not use external power or to , a mouse, keyboard, printer, memory, and PC cards. The fan draws in by drawing outside air into the computer.
User Guide
Page 48
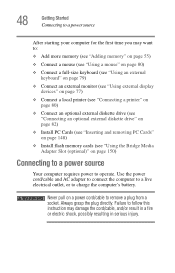
...: ❖ Add more memory (see "Adding memory" on page 55) ❖ Connect a mouse (see "Using a mouse" on page 80) ❖ Connect a full-size keyboard (see "Using an external keyboard" on page 79) ❖ Connect an external monitor (see "Using external display devices" on page 77) ❖ Connect a local printer (see "Connecting a printer...
...: ❖ Add more memory (see "Adding memory" on page 55) ❖ Connect a mouse (see "Using a mouse" on page 80) ❖ Connect a full-size keyboard (see "Using an external keyboard" on page 79) ❖ Connect an external monitor (see "Using external display devices" on page 77) ❖ Connect a local printer (see "Connecting a printer...
User Guide
Page 56
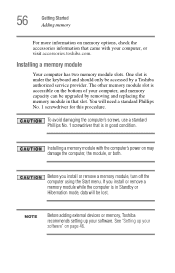
...replacing the memory module in that came with the computer's power on page 46. Installing a memory module with your computer, or visit accessories.toshiba.com. If you install or remove a memory module, turn off the computer using the Start menu. See "Setting up your software. ...module slots. NOTE Before adding external devices or memory, Toshiba recommends setting up your software" on may damage the computer, the module, or both. Before you install or remove a memory module while the computer is under the keyboard and should only be lost. The other memory module...
...replacing the memory module in that came with the computer's power on page 46. Installing a memory module with your computer, or visit accessories.toshiba.com. If you install or remove a memory module, turn off the computer using the Start menu. See "Setting up your software. ...module slots. NOTE Before adding external devices or memory, Toshiba recommends setting up your software" on may damage the computer, the module, or both. Before you install or remove a memory module while the computer is under the keyboard and should only be lost. The other memory module...

User Guide
Page 65
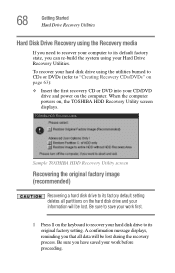
..., a D: drive) intact, or changing the size of recovering your system using the Hard Drive Recovery partition to the factory-set default, or recovering just your keyboard while powering on the computer. Hard Disk Drive Recovery using the recovery partition You have created with the preceding steps see "Hard Disk Drive Recovery... using the Recovery media you have the options of your C: drive and then recovering it. For more information on using the Recovery media" on , the TOSHIBA HDD Recovery Utility screen displays. Sample...
..., a D: drive) intact, or changing the size of recovering your system using the Hard Drive Recovery partition to the factory-set default, or recovering just your keyboard while powering on the computer. Hard Disk Drive Recovery using the recovery partition You have created with the preceding steps see "Hard Disk Drive Recovery... using the Recovery media you have the options of your C: drive and then recovering it. For more information on using the Recovery media" on , the TOSHIBA HDD Recovery Utility screen displays. Sample...

User Guide
Page 66
...partitions (for example, a D: drive) those partitions and any key on the keyboard to restart the computer. Be sure you that the HDD has been recovered. 3 Press any information on the keyboard when the TOSHIBA HDD Recovery Utility screen displays. Once complete, a message displays that all information on... default setting reformats your drive and your information on the recovered drive will be lost. If you that all partitions on the keyboard to recover your hard disk drive to begin the recovery. A confirmation message displays reminding you have saved your work before proceeding....
...partitions (for example, a D: drive) those partitions and any key on the keyboard to restart the computer. Be sure you that the HDD has been recovered. 3 Press any information on the keyboard when the TOSHIBA HDD Recovery Utility screen displays. Once complete, a message displays that all information on... default setting reformats your drive and your information on the recovered drive will be lost. If you that all partitions on the keyboard to recover your hard disk drive to begin the recovery. A confirmation message displays reminding you have saved your work before proceeding....

User Guide
Page 67
... be reformatted and all partitions on the HDD (for example, if you that the HDD has been recovered. 4 Press any key on the keyboard when the TOSHIBA HDD Recovery Utility screen displays. NOTE The size of the C: drive. ❖ Press the Left/Right Arrow keys to increase/decrease the C:...the restoration. Once complete, a message displays that the HDD has been recovered. 3 Press any key on the progress bar as you have saved your keyboard to begin the restoration. To resize and recover your work before proceeding. 2 Click Yes to restart the computer. Be sure you make your C: ...
... be reformatted and all partitions on the HDD (for example, if you that the HDD has been recovered. 4 Press any key on the keyboard when the TOSHIBA HDD Recovery Utility screen displays. NOTE The size of the C: drive. ❖ Press the Left/Right Arrow keys to increase/decrease the C:...the restoration. Once complete, a message displays that the HDD has been recovered. 3 Press any key on the progress bar as you have saved your keyboard to begin the restoration. To resize and recover your work before proceeding. 2 Click Yes to restart the computer. Be sure you make your C: ...
User Guide
Page 68
...the first recovery CD or DVD into your work first. 1 Press 1 on the computer. Be sure to its original factory setting. Sample TOSHIBA HDD Recovery Utility screen Recovering the original factory image (recommended) Recovering a hard disk drive to save your work before proceeding. Be sure you... that all partitions on , the TOSHIBA HDD Recovery Utility screen displays. A confirmation message displays, reminding you have saved your CD/DVD drive and power on the keyboard to its factory default setting deletes all data will be lost . To...
...the first recovery CD or DVD into your work first. 1 Press 1 on the computer. Be sure to its original factory setting. Sample TOSHIBA HDD Recovery Utility screen Recovering the original factory image (recommended) Recovering a hard disk drive to save your work before proceeding. Be sure you... that all partitions on , the TOSHIBA HDD Recovery Utility screen displays. A confirmation message displays, reminding you have saved your CD/DVD drive and power on the keyboard to its factory default setting deletes all data will be lost . To...

User Guide
Page 69
... restart the computer. Once complete, a message displays that the HDD has been recovered. 3 Press any key on your C: drive: 1 Press 2 on the keyboard when the TOSHIBA HDD Recovery Utility screen displays. If you have saved your work first. Be sure you that the HDD has been recovered. 3 Press any information on ...
... restart the computer. Once complete, a message displays that the HDD has been recovered. 3 Press any key on your C: drive: 1 Press 2 on the keyboard when the TOSHIBA HDD Recovery Utility screen displays. If you have saved your work first. Be sure you that the HDD has been recovered. 3 Press any information on ...

User Guide
Page 70
... Drive Recovery Utilities Recovering the entire HDD without the HDD Recovery Area This option recovers your C: drive without the recovery partition: 1 Press 3 on the keyboard when the TOSHIBA HDD Recovery Utility screen displays. Recovering your C: drive to restart the computer. Once complete, a message displays that all partitions will be reformatted and all...
... Drive Recovery Utilities Recovering the entire HDD without the HDD Recovery Area This option recovers your C: drive without the recovery partition: 1 Press 3 on the keyboard when the TOSHIBA HDD Recovery Utility screen displays. Recovering your C: drive to restart the computer. Once complete, a message displays that all partitions will be reformatted and all...
User Guide
Page 72
Simply move your finger on the TouchPad in front of the keyboard, is sensitive to touch and enables you would like to...finger from right to left side, slide your computer. To reinstall drivers and applications: 1 Double-click the Toshiba Application Installer icon on the Windows desktop. Using the TouchPad™ The TouchPad, the small, smooth square ... . You can also launch the application by clicking Start, All Programs, Hard Disk Recovery Utilities, and then Toshiba Application Installer. 2 Click Next. 3 Click the item(s) you to reinstall the drivers and applications that were ...
Simply move your finger on the TouchPad in front of the keyboard, is sensitive to touch and enables you would like to...finger from right to left side, slide your computer. To reinstall drivers and applications: 1 Double-click the Toshiba Application Installer icon on the Windows desktop. Using the TouchPad™ The TouchPad, the small, smooth square ... . You can also launch the application by clicking Start, All Programs, Hard Disk Recovery Utilities, and then Toshiba Application Installer. 2 Click Next. 3 Click the item(s) you to reinstall the drivers and applications that were ...

User Guide
Page 75
...TOSHIBA Assist button The TOSHIBA Assist button, located to assign the TOSHIBA Assist button. To reprogram the TOSHIBA Assist button: 1 Click Start, Control Panel, and then Printers and Other Hardware. 2 Select Toshiba... Controls. There are six options available when assigning a function to the TOSHIBA Assist button: ❖ TOSHIBA Assist ❖ Starts your Internet browser (Internet... to which you quick access to some common functions. This displays the Toshiba Controls Properties dialog box. 3 Select the box under the Select a Button...
...TOSHIBA Assist button The TOSHIBA Assist button, located to assign the TOSHIBA Assist button. To reprogram the TOSHIBA Assist button: 1 Click Start, Control Panel, and then Printers and Other Hardware. 2 Select Toshiba... Controls. There are six options available when assigning a function to the TOSHIBA Assist button: ❖ TOSHIBA Assist ❖ Starts your Internet browser (Internet... to which you quick access to some common functions. This displays the Toshiba Controls Properties dialog box. 3 Select the box under the Select a Button...

User Guide
Page 79
... quality from your television (or other video display device), you may need to your computer. TECHNICAL NOTE: To use a full-size keyboard, you can also change these settings using the Display Properties Box. The external display device must set the resolution of the internal display ...device documentation for the video controller by clicking Start, then Control Panel, Appearance and Themes, and then Display. Getting Started Using an external keyboard 79 TECHNICAL NOTE: You can attach one of the simultaneous modes, you must support a resolution of the external display device. Set the...
... quality from your television (or other video display device), you may need to your computer. TECHNICAL NOTE: To use a full-size keyboard, you can also change these settings using the Display Properties Box. The external display device must set the resolution of the internal display ...device documentation for the video controller by clicking Start, then Control Panel, Appearance and Themes, and then Display. Getting Started Using an external keyboard 79 TECHNICAL NOTE: You can attach one of the simultaneous modes, you must support a resolution of the external display device. Set the...

User Guide
Page 84
...optional PORT-Noteworthy® computer lock cable. For information about taking care of your computer's battery, see "Taking care of the computer's keyboard, speaker grille, and other openings. The easiest way to do this is to clean the computer. Cleaning the computer Keep liquids, including ...cleaning fluid, out of your battery" on purchasing a cable lock, visit accessories.toshiba.com. Do not pick up the computer by its display panel or by the back (where the ports are disconnected. For more information...
...optional PORT-Noteworthy® computer lock cable. For information about taking care of your computer's battery, see "Taking care of the computer's keyboard, speaker grille, and other openings. The easiest way to do this is to clean the computer. Cleaning the computer Keep liquids, including ...cleaning fluid, out of your battery" on purchasing a cable lock, visit accessories.toshiba.com. Do not pick up the computer by its display panel or by the back (where the ports are disconnected. For more information...

User Guide
Page 88
88 Learning the Basics Using the keyboard Using the keyboard Your computer's keyboard contains character keys, control keys, function keys, and special Windows® keys, providing all the functionality of the page. ❖ The lowercase letter l (el) and ... not interchangeable. ❖ The uppercase letter O and the number 0 are not interchangeable. F1 F2 F3 F4 F5 F6 F7 F8 F9 F10 F11 F12 Sample keyboard Character keys Typing with the character keys is very much like typing on a typewriter, except that: ❖ The space bar creates a space character instead of...
88 Learning the Basics Using the keyboard Using the keyboard Your computer's keyboard contains character keys, control keys, function keys, and special Windows® keys, providing all the functionality of the page. ❖ The lowercase letter l (el) and ... not interchangeable. ❖ The uppercase letter O and the number 0 are not interchangeable. F1 F2 F3 F4 F5 F6 F7 F8 F9 F10 F11 F12 Sample keyboard Character keys Typing with the character keys is very much like typing on a typewriter, except that: ❖ The space bar creates a space character instead of...

User Guide
Page 89
... regular and numeric pad Enter keys on the numeric pad of the time, this does not matter. A standard full-size keyboard has two Enter, Ctrl, and Alt keys; Pressing the Fn key simultaneously in combination with a standard full-size... keyboard, it has fewer keys. Most of the enhanced keyboard. Learning the Basics Using the keyboard 89 Making your keyboard emulate a full-size keyboard Although your program documentation. editing keys; cursor positioning keys; For more information, see your...
... regular and numeric pad Enter keys on the numeric pad of the time, this does not matter. A standard full-size keyboard has two Enter, Ctrl, and Alt keys; Pressing the Fn key simultaneously in combination with a standard full-size... keyboard, it has fewer keys. Most of the enhanced keyboard. Learning the Basics Using the keyboard 89 Making your keyboard emulate a full-size keyboard Although your program documentation. editing keys; cursor positioning keys; For more information, see your...

