

User Guide
Page 20
... power 57 Using the AccuPoint II® pointing device 58 Using the TouchPad 59 Scrolling with the TouchPad 60 Control buttons 60 Disabling or enabling the Dual Point Device 61 Setting up your software 62 Registering your computer with Toshiba 63 Setting up other devices 63 Turning off the computer 63 Closing the...
... power 57 Using the AccuPoint II® pointing device 58 Using the TouchPad 59 Scrolling with the TouchPad 60 Control buttons 60 Disabling or enabling the Dual Point Device 61 Setting up your software 62 Registering your computer with Toshiba 63 Setting up other devices 63 Turning off the computer 63 Closing the...

User Guide
Page 38
38 Finding Your Way Around Keyboard and display features Opening the display panel 3 Adjust the display panel to lift the computer. CAUTION: To avoid damaging the display panel, be careful when opening and closing it to a comfortable viewing angle. Never force the panel beyond the point where it moves easily, and never use it . Speaker Power button Caps Lock indicator AccuPoint II pointing device System indicator panel Primary button Screen Keyboard CD/DVD buttons Speaker System buttons Keyboard indicator panel TouchPad AccuPoint II buttons Secondary button
38 Finding Your Way Around Keyboard and display features Opening the display panel 3 Adjust the display panel to lift the computer. CAUTION: To avoid damaging the display panel, be careful when opening and closing it to a comfortable viewing angle. Never force the panel beyond the point where it moves easily, and never use it . Speaker Power button Caps Lock indicator AccuPoint II pointing device System indicator panel Primary button Screen Keyboard CD/DVD buttons Speaker System buttons Keyboard indicator panel TouchPad AccuPoint II buttons Secondary button
User Guide
Page 39
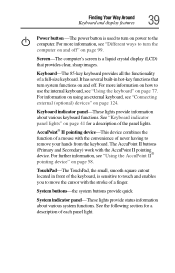
... of never having to remove your hands from the keyboard. The AccuPoint II buttons (Primary and Secondary) work with the convenience of each panel light. TouchPad-The TouchPad, the small, smooth square cutout located in hot-key functions that provides clear, sharp images. System buttons-the system buttons provide quick System indicator...
... of never having to remove your hands from the keyboard. The AccuPoint II buttons (Primary and Secondary) work with the convenience of each panel light. TouchPad-The TouchPad, the small, smooth square cutout located in hot-key functions that provides clear, sharp images. System buttons-the system buttons provide quick System indicator...

User Guide
Page 58
Together, the AccuPoint II and TouchPad are named the Dual Point device. Using the AccuPoint II® pointing device The button in the middle of each light on the system indicator .... 4 The preinstalled operating system will load automatically. Primary button Dual Point pointing system AccuPoint II pointing device Primary AccuPoint II button Secondary AccuPoint II button TouchPad Secondary button 58 Getting Started Using the AccuPoint II® pointing device For the meaning of the keyboard is the AccuPoint II® pointing device...
Together, the AccuPoint II and TouchPad are named the Dual Point device. Using the AccuPoint II® pointing device The button in the middle of each light on the system indicator .... 4 The preinstalled operating system will load automatically. Primary button Dual Point pointing system AccuPoint II pointing device Primary AccuPoint II button Secondary AccuPoint II button TouchPad Secondary button 58 Getting Started Using the AccuPoint II® pointing device For the meaning of the keyboard is the AccuPoint II® pointing device...

User Guide
Page 59
...page, slide your finger from left to right. ❖ To move the cursor to determine whether it uses the right mouse button. Using the TouchPad™ The TouchPad, the small, smooth square cutout located in the direction you to left ) mouse button. For information, see "Using a mouse" on the...cursor: ❖ To move the cursor to the top of the page, push your finger forward on the TouchPad in rapid succession. Pushing harder on page 125. Getting Started Using the TouchPad™ 59 HINT: If you would rather use a mouse or trackball, you are using. Simply move your...
...page, slide your finger from left to right. ❖ To move the cursor to determine whether it uses the right mouse button. Using the TouchPad™ The TouchPad, the small, smooth square cutout located in the direction you to left ) mouse button. For information, see "Using a mouse" on the...cursor: ❖ To move the cursor to the top of the page, push your finger forward on the TouchPad in rapid succession. Pushing harder on page 125. Getting Started Using the TouchPad™ 59 HINT: If you would rather use a mouse or trackball, you are using. Simply move your...

User Guide
Page 60
... usually corresponds to the item, then press and release the primary (left mouse button. Scrolling with the TouchPad™ There are two active regions on the TouchPad that allow you to scroll as you would with any wheel device on the program you to click or...secondary (right-hand) button depends on a mouse or trackball. 60 Getting Started Using the TouchPad™ NOTE: Because the TouchPad is much smaller than the display screen, moving your cursor across the TouchPad in rapid succession. To double-click, press the primary button twice in the preferred direction....
... usually corresponds to the item, then press and release the primary (left mouse button. Scrolling with the TouchPad™ There are two active regions on the TouchPad that allow you to scroll as you would with any wheel device on the program you to click or...secondary (right-hand) button depends on a mouse or trackball. 60 Getting Started Using the TouchPad™ NOTE: Because the TouchPad is much smaller than the display screen, moving your cursor across the TouchPad in rapid succession. To double-click, press the primary button twice in the preferred direction....

User Guide
Page 61
Getting Started Using the TouchPad™ 61 Disabling or enabling the Dual Point Device The Dual Point Device is appropriate. 6 Click Apply. 7 Click OK. To change the enable/disable Dual ... you with a choice of these templates and either use it as is or customize it to suit your own custom settings for AccuPoint II and TouchPad devices. ❖ Clicking on Detailed Settings. You select one of six predefined templates. The Mouse Properties window closes.
Getting Started Using the TouchPad™ 61 Disabling or enabling the Dual Point Device The Dual Point Device is appropriate. 6 Click Apply. 7 Click OK. To change the enable/disable Dual ... you with a choice of these templates and either use it as is or customize it to suit your own custom settings for AccuPoint II and TouchPad devices. ❖ Clicking on Detailed Settings. You select one of six predefined templates. The Mouse Properties window closes.

User Guide
Page 78
... simulate these separate keys, as follows: ❖ Press Fn and Ctrl simultaneously to simulate the Ctrl key on page 239. Fn+F9 turns off the TouchPad. Function keys The function keys (not to simulate the Enter key on the full-sized keyboard. However, some programs assign separate functions to the right...
... simulate these separate keys, as follows: ❖ Press Fn and Ctrl simultaneously to simulate the Ctrl key on page 239. Fn+F9 turns off the TouchPad. Function keys The function keys (not to simulate the Enter key on the full-sized keyboard. However, some programs assign separate functions to the right...
User Guide
Page 246
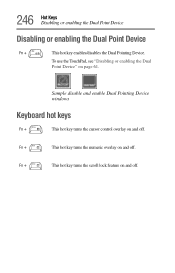
246 Hot Keys Disabling or enabling the Dual Point Device Disabling or enabling the Dual Point Device Fn + This hot key enables/disables the Dual Pointing Device. Fn + This hot key turns the numeric overlay on and off. Sample disable and enable Dual Pointing Device windows Keyboard hot keys Fn + This hot key turns the cursor control overlay on and off . Fn + This hot key turns the scroll lock feature on page 61. To use the TouchPad, see "Disabling or enabling the Dual Point Device" on and off .
246 Hot Keys Disabling or enabling the Dual Point Device Disabling or enabling the Dual Point Device Fn + This hot key enables/disables the Dual Pointing Device. Fn + This hot key turns the numeric overlay on and off. Sample disable and enable Dual Pointing Device windows Keyboard hot keys Fn + This hot key turns the cursor control overlay on and off . Fn + This hot key turns the scroll lock feature on page 61. To use the TouchPad, see "Disabling or enabling the Dual Point Device" on and off .


