User Manual
Page 9
... to 5.25 GHz frequency range. Equipment (or its operation in excess of Health Canada limits for harmful interference to co-channel Mobile Satellite systems. High power radars are allocated as primary users of Industry Canada. NOTE The above caution applies to licensing. Pour empecher que ... for the general population; Industry Canada (IC) This device complies with an 802.11a radio device. consult Safety Code 6, obtainable from windows to the licensed service, this device. This device is restricted to indoor use due to its transmit antenna) that is installed outdoors is...
... to 5.25 GHz frequency range. Equipment (or its operation in excess of Health Canada limits for harmful interference to co-channel Mobile Satellite systems. High power radars are allocated as primary users of Industry Canada. NOTE The above caution applies to licensing. Pour empecher que ... for the general population; Industry Canada (IC) This device complies with an 802.11a radio device. consult Safety Code 6, obtainable from windows to the licensed service, this device. This device is restricted to indoor use due to its transmit antenna) that is installed outdoors is...
User Manual
Page 29
...registered trademark of MultiMediaCard Association. Wi-Fi is a registered trademark of Sony Corporation. All other countries. Microsoft, Outlook, Windows, and Windows Vista are either registered trademarks or trademarks of SD Card Association. MultiMediaCard and MMC are registered trademarks of the Wi-Fi ... and/or other countries. As part of their respective companies. 29 Trademarks Satellite and ConfigFree are registered trademarks of Fuji Photo Film, Co., Ltd. and/or Toshiba Corporation. Adobe and Photoshop are either registered trademarks or trademarks of this product...
...registered trademark of MultiMediaCard Association. Wi-Fi is a registered trademark of Sony Corporation. All other countries. Microsoft, Outlook, Windows, and Windows Vista are either registered trademarks or trademarks of SD Card Association. MultiMediaCard and MMC are registered trademarks of the Wi-Fi ... and/or other countries. As part of their respective companies. 29 Trademarks Satellite and ConfigFree are registered trademarks of Fuji Photo Film, Co., Ltd. and/or Toshiba Corporation. Adobe and Photoshop are either registered trademarks or trademarks of this product...
User Manual
Page 32
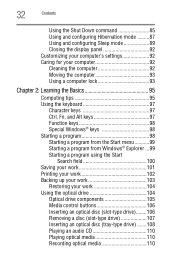
... Using the keyboard 97 Character keys 97 Ctrl, Fn, and Alt keys 97 Function keys 98 Special Windows® keys 98 Starting a program 98 Starting a program from the Start menu...........99 Starting a program from Windows® Explorer ...99 Starting a program using the Start Search field 100 Saving your work 101 Printing your...
... Using the keyboard 97 Character keys 97 Ctrl, Fn, and Alt keys 97 Function keys 98 Special Windows® keys 98 Starting a program 98 Starting a program from the Start menu...........99 Starting a program from Windows® Explorer ...99 Starting a program using the Start Search field 100 Saving your work 101 Printing your...
User Manual
Page 36
... easy to fix 184 Problems when you turn on the computer............185 The Windows® operating system is not working ..188 Using Startup options to fix problems 188 Internet problems 189 The Windows® operating system can help you 190 Resolving a hardware conflict 190 A...206 Data and system configuration backup in the Windows® operating system 207 If you need further assistance 212 Before you contact Toshiba 212 Contacting Toshiba 213 Other Toshiba Internet Web sites 214 Toshiba's worldwide offices 214 Appendix A: Hot Keys/TOSHIBA Cards 216 Hot Key Cards 216 Using the...
... easy to fix 184 Problems when you turn on the computer............185 The Windows® operating system is not working ..188 Using Startup options to fix problems 188 Internet problems 189 The Windows® operating system can help you 190 Resolving a hardware conflict 190 A...206 Data and system configuration backup in the Windows® operating system 207 If you need further assistance 212 Before you contact Toshiba 212 Contacting Toshiba 213 Other Toshiba Internet Web sites 214 Toshiba's worldwide offices 214 Appendix A: Hot Keys/TOSHIBA Cards 216 Hot Key Cards 216 Using the...
User Manual
Page 52
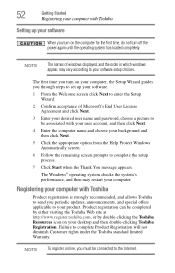
The Windows® operating system checks the system's performance, and then may vary according to your computer. Failure to complete Product Registration will not diminish Customer rights under the Toshiba standard limited Warranty. NOTE The names of Microsoft's End User License Agreement and click Next. 3 Enter ...clicking the Toshiba Resources icon on the computer for the first time, do not turn on your computer, the Setup Wizard guides you through steps to set up your software. 1 From the Welcome screen click Next to enter the Setup Wizard. 2 Confirm acceptance of windows displayed, ...
The Windows® operating system checks the system's performance, and then may vary according to your computer. Failure to complete Product Registration will not diminish Customer rights under the Toshiba standard limited Warranty. NOTE The names of Microsoft's End User License Agreement and click Next. 3 Enter ...clicking the Toshiba Resources icon on the computer for the first time, do not turn on your computer, the Setup Wizard guides you through steps to set up your software. 1 From the Welcome screen click Next to enter the Setup Wizard. 2 Confirm acceptance of windows displayed, ...
User Manual
Page 60
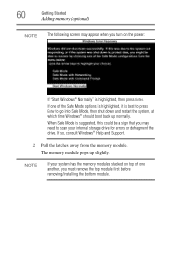
If so, consult Windows® Help and Support. 2 Pull the latches away from the memory module. The memory module pops up normally. When Safe Mode is...Mode options is highlighted, it is best to press Enter to scan your system has the memory modules stacked on the power: If "Start Windows® Normally" is suggested, this could be a sign that you may appear when you must remove the top module first before removing/...optional) NOTE The following screen may need to go into Safe Mode, then shut down and restart the system, at which time Windows® should boot back up slightly.
If so, consult Windows® Help and Support. 2 Pull the latches away from the memory module. The memory module pops up normally. When Safe Mode is...Mode options is highlighted, it is best to press Enter to scan your system has the memory modules stacked on the power: If "Start Windows® Normally" is suggested, this could be a sign that you may appear when you must remove the top module first before removing/...optional) NOTE The following screen may need to go into Safe Mode, then shut down and restart the system, at which time Windows® should boot back up slightly.
User Manual
Page 61
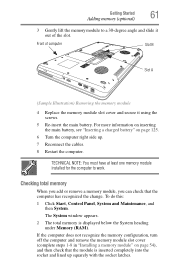
... memory When you add or remove a memory module, you can check that the module is displayed below the System heading under Memory (RAM). The System window appears. 2 The total memory is inserted completely into the socket and lined up . 7 Reconnect the cables. 8 Restart the computer. If the computer does not recognize...
... memory When you add or remove a memory module, you can check that the module is displayed below the System heading under Memory (RAM). The System window appears. 2 The total memory is inserted completely into the socket and lined up . 7 Reconnect the cables. 8 Restart the computer. If the computer does not recognize...
User Manual
Page 62
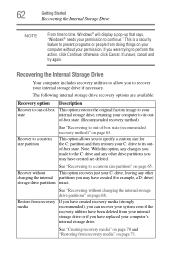
.... The following internal storage drive recovery options are deleted. 62 Getting Started Recovering the Internal Storage Drive NOTE From time to time, Windows® will display a pop-up that says, "Windows® needs your computer's internal storage drive. Recover without your computer to perform the action, click Continue; Restore from recovery If...
.... The following internal storage drive recovery options are deleted. 62 Getting Started Recovering the Internal Storage Drive NOTE From time to time, Windows® will display a pop-up that says, "Windows® needs your computer's internal storage drive. Recover without your computer to perform the action, click Continue; Restore from recovery If...
User Manual
Page 63
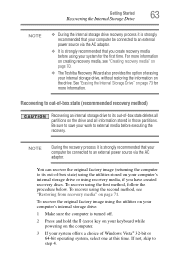
...without restoring the information on the drive. For more information. You can recover the original factory image (returning the computer to its out-of Windows Vista® 32-bit or 64-bit operating system, select one at this time. If not, skip to external media before using your system...an external power source via the AC adaptor. To recover using the second method, see "Creating recovery media" on page 70. ❖ The Toshiba Recovery Wizard also provides the option of -box state) using recovery media, if you create recovery media before executing the recovery. To recover the ...
...without restoring the information on the drive. For more information. You can recover the original factory image (returning the computer to its out-of Windows Vista® 32-bit or 64-bit operating system, select one at this time. If not, skip to external media before using your system...an external power source via the AC adaptor. To recover using the second method, see "Creating recovery media" on page 70. ❖ The Toshiba Recovery Wizard also provides the option of -box state) using recovery media, if you create recovery media before executing the recovery. To recover the ...
User Manual
Page 66
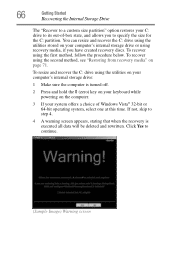
... -box state, and allows you have created recovery discs. To resize and recover the C: drive using the utilities on your C: drive to its out-of Windows Vista® 32-bit or 64-bit operating system, select one at this time. To recover using the first method, follow the procedure below. Click...
... -box state, and allows you have created recovery discs. To resize and recover the C: drive using the utilities on your C: drive to its out-of Windows Vista® 32-bit or 64-bit operating system, select one at this time. To recover using the first method, follow the procedure below. Click...

User Manual
Page 68
... been recovered. 10 Press any information on your computer's internal storage drive: 1 Make sure the computer is strongly recommended that your system offers a choice of Windows Vista® 32-bit or 64-bit operating system, select one at this time. 68 Getting Started Recovering the Internal Storage Drive 8 Click Next. A confirmation...
... been recovered. 10 Press any information on your computer's internal storage drive: 1 Make sure the computer is strongly recommended that your system offers a choice of Windows Vista® 32-bit or 64-bit operating system, select one at this time. 68 Getting Started Recovering the Internal Storage Drive 8 Click Next. A confirmation...

User Manual
Page 72
To recover your internal storage drive using the utilities burned to DVDs: 1 Insert the first recovery DVD into your system offers a choice of Windows Vista® 32-bit or 64-bit operating system, select one of the following options: ❖ Recover to out-of-box state-...Enter. 4 The Selecting a Process screen appears. Note: This option deletes all data will be deleted and rewritten. Click Yes to continue. 7 When the Toshiba Recovery Wizard opens and the Selecting a Process screen displays, select Recovery of Factory Default Software and then click Next. 8 Select one at this time. ...
To recover your internal storage drive using the utilities burned to DVDs: 1 Insert the first recovery DVD into your system offers a choice of Windows Vista® 32-bit or 64-bit operating system, select one of the following options: ❖ Recover to out-of-box state-...Enter. 4 The Selecting a Process screen appears. Note: This option deletes all data will be deleted and rewritten. Click Yes to continue. 7 When the Toshiba Recovery Wizard opens and the Selecting a Process screen displays, select Recovery of Factory Default Software and then click Next. 8 Select one at this time. ...
User Manual
Page 73
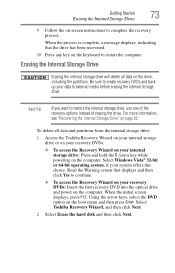
.... Erasing the Internal Storage Drive Erasing the internal storage drive will delete all data and partitions from the internal storage drive: 1 Access the Toshiba Recovery Wizard on your internal storage drive or on your recovery DVDs. ❖ To access the Recovery Wizard on your recovery DVDs: Insert ... to complete the recovery process. For more information, see "Recovering the Internal Storage Drive" on the boot menu and then press Enter. Select Windows Vista® 32-bit or 64-bit operating system, if your data to continue. ❖ To access the Recovery Wizard on your internal ...
.... Erasing the Internal Storage Drive Erasing the internal storage drive will delete all data and partitions from the internal storage drive: 1 Access the Toshiba Recovery Wizard on your internal storage drive or on your recovery DVDs. ❖ To access the Recovery Wizard on your recovery DVDs: Insert ... to complete the recovery process. For more information, see "Recovering the Internal Storage Drive" on the boot menu and then press Enter. Select Windows Vista® 32-bit or 64-bit operating system, if your data to continue. ❖ To access the Recovery Wizard on your internal ...

User Manual
Page 80
... Getting Started Using an external keyboard ❖ Swap-Switch primary display between internal display and external monitor when using extended desktop (Sample Image) Display options window 3 Release the Fn key.
... Getting Started Using an external keyboard ❖ Swap-Switch primary display between internal display and external monitor when using extended desktop (Sample Image) Display options window 3 Release the Fn key.
User Manual
Page 82
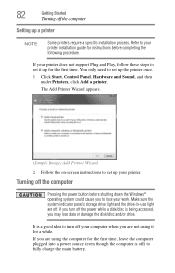
..., Hardware and Sound, and then under Printers, click Add a printer. 82 Getting Started Turning off the computer Setting up for instructions before shutting down the Windows® operating system could cause you to fully charge the main battery. It is being accessed, you may lose data or damage the disk/disc...
..., Hardware and Sound, and then under Printers, click Add a printer. 82 Getting Started Turning off the computer Setting up for instructions before shutting down the Windows® operating system could cause you to fully charge the main battery. It is being accessed, you may lose data or damage the disk/disc...
User Manual
Page 84
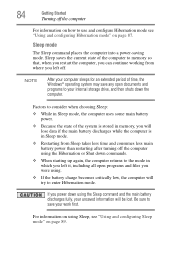
... using the Sleep command and the main battery discharges fully, your work first. NOTE After your computer sleeps for an extended period of time, the Windows® operating system may save your unsaved information will lose data if the main battery discharges while the computer is in which you power down...
... using the Sleep command and the main battery discharges fully, your work first. NOTE After your computer sleeps for an extended period of time, the Windows® operating system may save your unsaved information will lose data if the main battery discharges while the computer is in which you power down...
User Manual
Page 85
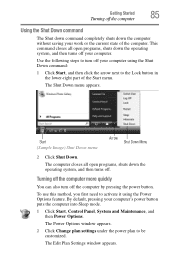
...Arrow Shut Down Menu 2 Click Shut Down. By default, pressing your work or the current state of the Start menu. The Power Options window appears. 2 Click Change plan settings under the power plan to the Lock button in the lower-right part of the computer. The Shut Down... menu appears. Turning off the computer more quickly You can also turn off the computer by pressing the power button. The Edit Plan Settings window appears. Getting Started Turning off . This command closes all open programs, shuts down the computer without saving your computer's power button puts the...
...Arrow Shut Down Menu 2 Click Shut Down. By default, pressing your work or the current state of the Start menu. The Power Options window appears. 2 Click Change plan settings under the power plan to the Lock button in the lower-right part of the computer. The Shut Down... menu appears. Turning off the computer more quickly You can also turn off the computer by pressing the power button. The Edit Plan Settings window appears. Getting Started Turning off . This command closes all open programs, shuts down the computer without saving your computer's power button puts the...

User Manual
Page 86
The Advanced settings tab of the Power Options window appears. (Sample Image) Advanced settings tab of Power Options screen 4 Click Power buttons and lid to display the actions that you can be set separately ...
The Advanced settings tab of the Power Options window appears. (Sample Image) Advanced settings tab of Power Options screen 4 Click Power buttons and lid to display the actions that you can be set separately ...
User Manual
Page 88
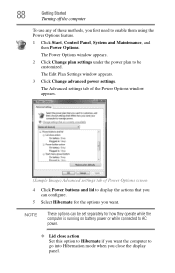
... screen 4 Click Power buttons and lid to display the actions that you can be customized. The Advanced settings tab of the Power Options window appears. (Sample Image) Advanced settings tab of these methods, you close action Set this option to Hibernate if you want . The Edit Plan... Settings window appears. 3 Click Change advanced power settings. The Power Options window appears. 2 Click Change plan settings under the power plan to be set separately for the options you want the...
... screen 4 Click Power buttons and lid to display the actions that you can be customized. The Advanced settings tab of the Power Options window appears. (Sample Image) Advanced settings tab of these methods, you close action Set this option to Hibernate if you want . The Edit Plan... Settings window appears. 3 Click Change advanced power settings. The Power Options window appears. 2 Click Change plan settings under the power plan to be set separately for the options you want the...

User Manual
Page 90
The Edit Plan Settings window appears. (Sample Image) Edit Plan Settings screen 3 To change the amount of time in both the On battery and Plugged in Sleep mode. 90 Getting ... of time after which the computer automatically goes into Sleep mode by either pressing the power button or closing the display panel. The Power Options window appears. 2 Click Change plan settings under the power plan to enable them using the Power Options feature. 1 Click Start, Control Panel, System and Maintenance, and...
The Edit Plan Settings window appears. (Sample Image) Edit Plan Settings screen 3 To change the amount of time in both the On battery and Plugged in Sleep mode. 90 Getting ... of time after which the computer automatically goes into Sleep mode by either pressing the power button or closing the display panel. The Power Options window appears. 2 Click Change plan settings under the power plan to enable them using the Power Options feature. 1 Click Start, Control Panel, System and Maintenance, and...


