User Guide
Page 5
... can. 5 Connection to party line service is only applicable if your computer has the capability to send and receive fax transmissions. Contact the state public utility commission, public service commission or corporation commission for which charges exceed local or long-distance transmission charges.) If Problems Arise If this change. But if advanced notice is causing harm to make changes in...
... can. 5 Connection to party line service is only applicable if your computer has the capability to send and receive fax transmissions. Contact the state public utility commission, public service commission or corporation commission for which charges exceed local or long-distance transmission charges.) If Problems Arise If this change. But if advanced notice is causing harm to make changes in...
User Guide
Page 29
... custom size partition 64 Recovering without changing the internal storage drive partitions 67 Creating recovery DVDs/media 69 Restoring from recovery DVDs/media 72 Erasing the Internal Storage Drive 74 Checking the internal storage drive operating status 75 Installing drivers and applications 76 Using the TouchPad 76 Adjusting TouchPad™ settings 79 Disabling or enabling the TouchPad 80 Using external display devices 80 Selecting video cables 80 Connecting an HDMI™-compatible television or external display device............81 Connecting an external monitor or projector...
... custom size partition 64 Recovering without changing the internal storage drive partitions 67 Creating recovery DVDs/media 69 Restoring from recovery DVDs/media 72 Erasing the Internal Storage Drive 74 Checking the internal storage drive operating status 75 Installing drivers and applications 76 Using the TouchPad 76 Adjusting TouchPad™ settings 79 Disabling or enabling the TouchPad 80 Using external display devices 80 Selecting video cables 80 Connecting an HDMI™-compatible television or external display device............81 Connecting an external monitor or projector...
User Guide
Page 33
... 33 Deleting a user password 158 TOSHIBA Face Recognition Utility 159 TOSHIBA PC Diagnostic Tool Utility 160 TOSHIBA HDD Protection Utility 161 Mouse Utility 162 TOSHIBA Hardware Setup 163 USB Sleep and Charge Utility 165 Starting the USB Sleep and Charge Utility.......165 USB Sleep and Charge 165 Enabling USB Sleep and Charge 167 Power supply mode settings 167 TOSHIBA Zooming Utility 169 TOSHIBA Button Support 170 TOSHIBA Accessibility 171 Fingerprint Authentication Utility 172 Fingerprint utility limitations 172 Using the Fingerprint Authentication Utility 172 Fingerprint...
... 33 Deleting a user password 158 TOSHIBA Face Recognition Utility 159 TOSHIBA PC Diagnostic Tool Utility 160 TOSHIBA HDD Protection Utility 161 Mouse Utility 162 TOSHIBA Hardware Setup 163 USB Sleep and Charge Utility 165 Starting the USB Sleep and Charge Utility.......165 USB Sleep and Charge 165 Enabling USB Sleep and Charge 167 Power supply mode settings 167 TOSHIBA Zooming Utility 169 TOSHIBA Button Support 170 TOSHIBA Accessibility 171 Fingerprint Authentication Utility 172 Fingerprint utility limitations 172 Using the Fingerprint Authentication Utility 172 Fingerprint...

User Guide
Page 52
... computer using the Start menu. The computer closes all open programs, shuts down on the work surface to step 3. 1 Click Start. If only one memory module is on page 128. NOTE For this model, Slot A is the top slot. If you install or remove a memory module, turn off . 3 Unplug and remove any cables connected to the computer, including the AC adaptor. 4 Place a soft cloth on the cloth. 5 Remove the main battery. Start button...
... computer using the Start menu. The computer closes all open programs, shuts down on the work surface to step 3. 1 Click Start. If only one memory module is on page 128. NOTE For this model, Slot A is the top slot. If you install or remove a memory module, turn off . 3 Unplug and remove any cables connected to the computer, including the AC adaptor. 4 Place a soft cloth on the cloth. 5 Remove the main battery. Start button...

User Guide
Page 56
... in Slot A. 14 Replace the memory module slot cover and secure it must be installed, it using the screw. 15 Re-insert the main battery. If only one memory module is to be installed in serious injury. In this model, Slot A is the top slot. 56 Getting Started Adding memory (optional) Back of the computer. Using your computer on a carpet or other soft material can block the vents located at...
... in Slot A. 14 Replace the memory module slot cover and secure it must be installed, it using the screw. 15 Re-insert the main battery. If only one memory module is to be installed in serious injury. In this model, Slot A is the top slot. 56 Getting Started Adding memory (optional) Back of the computer. Using your computer on a carpet or other soft material can block the vents located at...

User Guide
Page 59
... AC adaptor is connected to remove the soft cloth from overheating when the power is turned on a carpet or other soft material can block the vents located at the base of computer Slot B Slot A (Sample Illustration) Removing the memory module 4 Replace the memory module slot cover and secure it out of the computer. For more information on inserting the main battery, see "Inserting a charged battery" on a hard flat surface...
... AC adaptor is connected to remove the soft cloth from overheating when the power is turned on a carpet or other soft material can block the vents located at the base of computer Slot B Slot A (Sample Illustration) Removing the memory module 4 Replace the memory module slot cover and secure it out of the computer. For more information on inserting the main battery, see "Inserting a charged battery" on a hard flat surface...
User Guide
Page 80
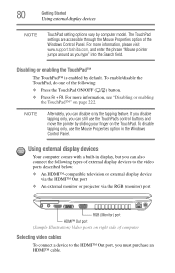
... can still use the TouchPad's control buttons and move the pointer by default. Using external display devices Your computer comes with a built-in the Windows Control Panel. For more information, see "Disabling or enabling the TouchPad™" on right side of computer Selecting video cables To connect a device to the HDMI™ Out port, you can disable only the tapping feature. To enable/disable the TouchPad, do one of the Windows Control Panel. 80 Getting Started Using external display devices NOTE TouchPad setting options vary by...
... can still use the TouchPad's control buttons and move the pointer by default. Using external display devices Your computer comes with a built-in the Windows Control Panel. For more information, see "Disabling or enabling the TouchPad™" on right side of computer Selecting video cables To connect a device to the HDMI™ Out port, you can disable only the tapping feature. To enable/disable the TouchPad, do one of the Windows Control Panel. 80 Getting Started Using external display devices NOTE TouchPad setting options vary by...

User Guide
Page 81
... configuring the display properties settings. To do this: 1 Read the directions that came with the monitor to see if you need to install new software. 2 Connect the monitor's video cable to the RGB (monitor) port on the side of the cable to a live electrical outlet. 4 Turn on the external device. NOTE Some modes are only available with the appropriate device attached and turned on. Getting Started 81 Using external display devices Connecting an HDMI™-compatible television or external display device...
... configuring the display properties settings. To do this: 1 Read the directions that came with the monitor to see if you need to install new software. 2 Connect the monitor's video cable to the RGB (monitor) port on the side of the cable to a live electrical outlet. 4 Turn on the external device. NOTE Some modes are only available with the appropriate device attached and turned on. Getting Started 81 Using external display devices Connecting an HDMI™-compatible television or external display device...
User Guide
Page 114
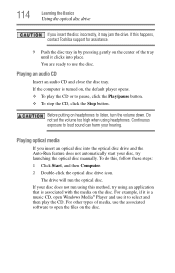
You are ready to use it may jam the drive. Do not set the volume too high when using this method, try launching the optical disc manually. For other types of media, use the associated software to listen, turn the volume down. 114 Learning the Basics Using the optical disc drive If you insert an optical disc into place. To do this happens, contact Toshiba support for assistance. 9 Push the...
You are ready to use it may jam the drive. Do not set the volume too high when using this method, try launching the optical disc manually. For other types of media, use the associated software to listen, turn the volume down. 114 Learning the Basics Using the optical disc drive If you insert an optical disc into place. To do this happens, contact Toshiba support for assistance. 9 Push the...
User Guide
Page 158
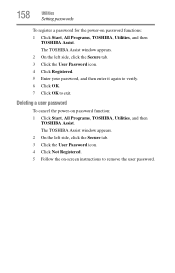
... Utilities Setting passwords To register a password for the power-on password function: 1 Click Start, All Programs, TOSHIBA, Utilities, and then TOSHIBA Assist. Deleting a user password To cancel the power-on password functions: 1 Click Start, All Programs, TOSHIBA, Utilities, and then TOSHIBA Assist. The TOSHIBA Assist window appears. 2 On the left side, click the Secure tab. 3 Click the User Password icon. 4 Click Registered. 5 Enter your password, and then enter it again to verify. 6 Click OK. 7 Click OK to remove...
... Utilities Setting passwords To register a password for the power-on password function: 1 Click Start, All Programs, TOSHIBA, Utilities, and then TOSHIBA Assist. Deleting a user password To cancel the power-on password functions: 1 Click Start, All Programs, TOSHIBA, Utilities, and then TOSHIBA Assist. The TOSHIBA Assist window appears. 2 On the left side, click the Secure tab. 3 Click the User Password icon. 4 Click Registered. 5 Enter your password, and then enter it again to verify. 6 Click OK. 7 Click OK to remove...
User Guide
Page 177
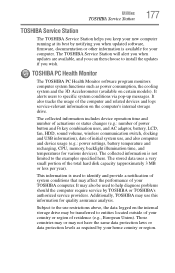
...'s internal storage drive. Utilities TOSHIBA Service Station 177 TOSHIBA Service Station The TOSHIBA Service Station helps you keep your new computer running at its best by your home country or region. The TOSHIBA Service Station will alert you when updates are available, and you wish. The collected information includes device operation time and number of actuations or status changes (e.g.: number of power button and Fn key combination uses, and AC adaptor, battery, LCD, fan, HDD, sound volume, wireless communication switch...
...'s internal storage drive. Utilities TOSHIBA Service Station 177 TOSHIBA Service Station The TOSHIBA Service Station helps you keep your new computer running at its best by your home country or region. The TOSHIBA Service Station will alert you when updates are available, and you wish. The collected information includes device operation time and number of actuations or status changes (e.g.: number of power button and Fn key combination uses, and AC adaptor, battery, LCD, fan, HDD, sound volume, wireless communication switch...
User Guide
Page 183
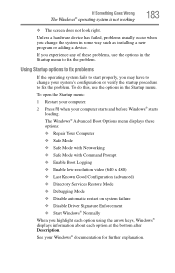
... Services Restore Mode ❖ Debugging Mode ❖ Disable automatic restart on system failure ❖ Disable Driver Signature Enforcement ❖ Start Windows® Normally When you change your system's configuration or verify the startup procedure to fix the problem. To do this, use the options in the Startup menu. If you may have to change the system in some way such as installing a new program or adding a device. The Windows® Advanced Boot Options menu displays these problems, use the options...
... Services Restore Mode ❖ Debugging Mode ❖ Disable automatic restart on system failure ❖ Disable Driver Signature Enforcement ❖ Start Windows® Normally When you change your system's configuration or verify the startup procedure to fix the problem. To do this, use the options in the Startup menu. If you may have to change the system in some way such as installing a new program or adding a device. The Windows® Advanced Boot Options menu displays these problems, use the options...
User Guide
Page 188
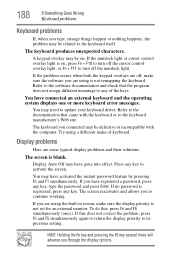
... connected an external keyboard and the operating system displays one or more keyboard error messages. To do this does not correct the problem, press Fn and F5 simultaneously again to return the display priority to turn off , make of the keys. HINT: Holding the Fn key and pressing the F5 key several times will advance you through the display options. If the numlock light or cursor control overlay light...
... connected an external keyboard and the operating system displays one or more keyboard error messages. To do this does not correct the problem, press Fn and F5 simultaneously again to return the display priority to turn off , make of the keys. HINT: Holding the Fn key and pressing the F5 key several times will advance you through the display options. If the numlock light or cursor control overlay light...

User Guide
Page 194
... with an operating system driver, it may apply. 194 If Something Goes Wrong Sound system problems Sound system problems No sound is turned up. Adjust the volume control. Check that they are having trouble getting one or more of devices, such as a removable hard disk, additional memory, or a pager. Contact the manufacturer of new cards. If the card malfunctions again, it may not work together, several sections in any sound system when...
... with an operating system driver, it may apply. 194 If Something Goes Wrong Sound system problems Sound system problems No sound is turned up. Adjust the volume control. Check that they are having trouble getting one or more of devices, such as a removable hard disk, additional memory, or a pager. Contact the manufacturer of new cards. If the card malfunctions again, it may not work together, several sections in any sound system when...

User Guide
Page 205
... to use the "USB Sleep and Charge function." ❖ The setting of "USB Sleep and Charge function" may be used, change the setting to Disabled. ❖ Make sure that important devices are connected. ❖ Connect external devices after each successive installation. In this case, please try one item of hardware or software. 4 Restart the Windows® operating system. 5 Use the new hardware or software for a while, noting any new problems. Make sure that your critical applications (email, business applications, etc.) are working correctly...
... to use the "USB Sleep and Charge function." ❖ The setting of "USB Sleep and Charge function" may be used, change the setting to Disabled. ❖ Make sure that important devices are connected. ❖ Connect external devices after each successive installation. In this case, please try one item of hardware or software. 4 Restart the Windows® operating system. 5 Use the new hardware or software for a while, noting any new problems. Make sure that your critical applications (email, business applications, etc.) are working correctly...

User Guide
Page 234
... remove devices from a computer while the computer is slower than L1 cache and faster than main memory. LAN (Local Area Network) - The ability to interact with the Fn key can set system options or control system parameters, such as a mouse. A group of using a pointing device such as the battery save mode. (2) A key or combination of your work , including all open files and programs, when you use to create a complete screen...
... remove devices from a computer while the computer is slower than L1 cache and faster than main memory. LAN (Local Area Network) - The ability to interact with the Fn key can set system options or control system parameters, such as a mouse. A group of using a pointing device such as the battery save mode. (2) A key or combination of your work , including all open files and programs, when you use to create a complete screen...
User Guide
Page 241
... removing 128 RTC memory 118 running computer on battery power 117 safety precautions 131 setting notifications 123 battery indicator light 122 BIOS Setup see TOSHIBA Hardware Setup Blu-ray Disc™ using 108 button eco Utility™ 127 eject, optical disc drive 110 Illumination ON/OFF button 111 mute button 111 play/pause button 111 power 49 Shut down 52, 87 start 137 volume increase/decrease buttons 111 Wireless antenna ON/OFF button 111 buttons manual eject hole, optical disc drive 110 media control buttons...
... removing 128 RTC memory 118 running computer on battery power 117 safety precautions 131 setting notifications 123 battery indicator light 122 BIOS Setup see TOSHIBA Hardware Setup Blu-ray Disc™ using 108 button eco Utility™ 127 eject, optical disc drive 110 Illumination ON/OFF button 111 mute button 111 play/pause button 111 power 49 Shut down 52, 87 start 137 volume increase/decrease buttons 111 Wireless antenna ON/OFF button 111 buttons manual eject hole, optical disc drive 110 media control buttons...

User Guide
Page 243
... using 142 Help and Support Windows® operating system 184 Hibernation mode 85 configuring 89 configuring options 90 hot key 218 powering down 90 Shut down 90 starting again from 92 using 89 hot key disabling or enabling wireless devices 221 display brightness 220 Hibernation mode 218 keyboard overlays 224 Lock (Instant security) 215 Output (Display switch) 219 power plan 216 Sleep mode 217 using to set a power plan 126 volume mute 214 Zoom (Display resolution) 223 zooming in 224 zooming out 224 Hot Key Cards 210 Hot key functions...
... using 142 Help and Support Windows® operating system 184 Hibernation mode 85 configuring 89 configuring options 90 hot key 218 powering down 90 Shut down 90 starting again from 92 using 89 hot key disabling or enabling wireless devices 221 display brightness 220 Hibernation mode 218 keyboard overlays 224 Lock (Instant security) 215 Output (Display switch) 219 power plan 216 Sleep mode 217 using to set a power plan 126 volume mute 214 Zoom (Display resolution) 223 zooming in 224 zooming out 224 Hot Key Cards 210 Hot key functions...
User Guide
Page 246
... found 184 USB Sleep and Charge cannot use 205 USB Wakeup function does not work 206 warning resume failure 181 Windows® operating system not working 182 program, starting 101 program, starting from Start menu 101 programs not running correctly 191 projector connecting 81 R real-time clock (RTC) battery 118 recording sounds 141 recovery checking internal storage drive operating status 75 creating recovery DVDs/media 69 erasing internal storage drive 74 installing drivers and applications 76 internal storage drive 61 out...
... found 184 USB Sleep and Charge cannot use 205 USB Wakeup function does not work 206 warning resume failure 181 Windows® operating system not working 182 program, starting 101 program, starting from Start menu 101 programs not running correctly 191 projector connecting 81 R real-time clock (RTC) battery 118 recording sounds 141 recovery checking internal storage drive operating status 75 creating recovery DVDs/media 69 erasing internal storage drive 74 installing drivers and applications 76 internal storage drive 61 out...
User Guide
Page 248
... TOSHIBA Zooming Utility 169 TouchPad™ using 76 traveling tips 134 troubleshooting DVD player general problems 199 external keyboard 188 keyboard 188 optical disc drive 191 turning off computer 84 computer more quickly 87 options 85 turning on power 49 U USB Sleep and Charge cannot use 205 USB Sleep and Charge Utility 165 USB Wakeup function does not work 206 USB-compatible printer 83 user password, deleting 158 user password, setting 157 using a microphone 141 computer lock 96 DVDs 107 ExpressCard® 143 Hibernation mode 89 hot key to set a power plan 126 Memory card reader...
... TOSHIBA Zooming Utility 169 TouchPad™ using 76 traveling tips 134 troubleshooting DVD player general problems 199 external keyboard 188 keyboard 188 optical disc drive 191 turning off computer 84 computer more quickly 87 options 85 turning on power 49 U USB Sleep and Charge cannot use 205 USB Sleep and Charge Utility 165 USB Wakeup function does not work 206 USB-compatible printer 83 user password, deleting 158 user password, setting 157 using a microphone 141 computer lock 96 DVDs 107 ExpressCard® 143 Hibernation mode 89 hot key to set a power plan 126 Memory card reader...


