User Guide
Page 33
... height as air conditioner vents or heaters. ❖ Extreme heat, cold, or humidity. ❖ Liquids and corrosive chemicals. However, if the notebook is on the screen is above your elbow height you . ❖ The keyboard and pointing device should be free of your back and provide comfortable back support. ❖ Adjust...
... height as air conditioner vents or heaters. ❖ Extreme heat, cold, or humidity. ❖ Liquids and corrosive chemicals. However, if the notebook is on the screen is above your elbow height you . ❖ The keyboard and pointing device should be free of your back and provide comfortable back support. ❖ Adjust...

User Guide
Page 34
... the font size of a TV device. 34 Getting Started Selecting a place to work ❖ Avoid glare: position the notebook so that of text on your screen to make viewing comfortable. ❖ Rest your eyes. We recommend that are farther away. Glare on the notebook display may be more comfortable to dock...
... the font size of a TV device. 34 Getting Started Selecting a place to work ❖ Avoid glare: position the notebook so that of text on your screen to make viewing comfortable. ❖ Rest your eyes. We recommend that are farther away. Glare on the notebook display may be more comfortable to dock...
User Guide
Page 43
...able to charge a fully charged battery can damage the battery. Small bright dots may appear on your display are an intrinsic characteristic of the screen while on your computer. Getting Started 43 Charging the main battery Charging the main battery Before using it moves easily and never lift the computer...by the display panel. Over a period of time, and depending on the usage of the computer, the brightness of the screen will dim and you may appear on your screen display when you turn it on and begin using the battery to power the computer, you to power the computer. NOTE...
...able to charge a fully charged battery can damage the battery. Small bright dots may appear on your display are an intrinsic characteristic of the screen while on your computer. Getting Started 43 Charging the main battery Charging the main battery Before using it moves easily and never lift the computer...by the display panel. Over a period of time, and depending on the usage of the computer, the brightness of the screen will dim and you may appear on your screen display when you turn it on and begin using the battery to power the computer, you to power the computer. NOTE...

User Guide
Page 44
... off the power again until the operating system has loaded completely. Adding optional external devices NOTE Before adding external devices or memory, Toshiba recommends setting up your software When you turn on the computer for the first time you may vary according to your software setup ...Connect an external monitor (see "Using external display devices" on your computer, the Setup Wizard guides you through steps to your software" on -screen instructions. In the list that appears above, click on your computer for the first time, do not turn on page 76) 44 Getting Started...
... off the power again until the operating system has loaded completely. Adding optional external devices NOTE Before adding external devices or memory, Toshiba recommends setting up your software When you turn on the computer for the first time you may vary according to your software setup ...Connect an external monitor (see "Using external display devices" on your computer, the Setup Wizard guides you through steps to your software" on -screen instructions. In the list that appears above, click on your computer for the first time, do not turn on page 76) 44 Getting Started...
User Guide
Page 51
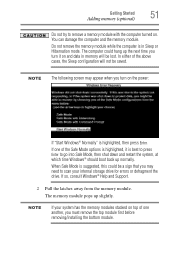
.... The memory module pops up normally. If so, consult Windows® Help and Support. 2 Pull the latches away from the memory module. NOTE The following screen may need to scan your system has the memory modules stacked on and data in Sleep or Hibernation mode. Getting Started 51 Adding memory (optional...
.... The memory module pops up normally. If so, consult Windows® Help and Support. 2 Pull the latches away from the memory module. NOTE The following screen may need to scan your system has the memory modules stacked on and data in Sleep or Hibernation mode. Getting Started 51 Adding memory (optional...
User Guide
Page 55
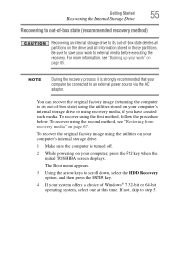
... operating system, select one at this time. To recover using the second method, see "Backing up your computer, press the F12 key when the initial TOSHIBA screen displays. The Boot menu appears. 3 Using the arrow keys to an external power source via the AC adaptor. To recover using the utilities on page...
... operating system, select one at this time. To recover using the second method, see "Backing up your computer, press the F12 key when the initial TOSHIBA screen displays. The Boot menu appears. 3 Using the arrow keys to an external power source via the AC adaptor. To recover using the utilities on page...
User Guide
Page 56
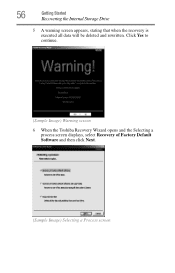
Click Yes to continue. (Sample Image) Warning screen 6 When the Toshiba Recovery Wizard opens and the Selecting a process screen displays, select Recovery of Factory Default Software and then click Next. (Sample Image) Selecting a Process screen 56 Getting Started Recovering the Internal Storage Drive 5 A warning screen appears, stating that when the recovery is executed all data will be deleted and rewritten.
Click Yes to continue. (Sample Image) Warning screen 6 When the Toshiba Recovery Wizard opens and the Selecting a process screen displays, select Recovery of Factory Default Software and then click Next. (Sample Image) Selecting a Process screen 56 Getting Started Recovering the Internal Storage Drive 5 A warning screen appears, stating that when the recovery is executed all data will be deleted and rewritten.
User Guide
Page 57
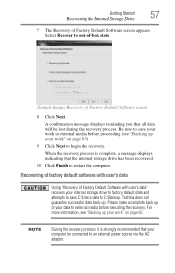
... the internal storage drive has been recovered. 10 Click Finish to out-of-box state. (Sample Image) Recovery of Factory Default Software screen appears. When the recovery process is strongly recommended that your computer be lost during the recovery process. For more information, see "Backing... up your work" on page 85. Toshiba does not guarantee successful data back-up of Factory Default Software with user's data Using "Recovery of your internal storage drive to factory...
... the internal storage drive has been recovered. 10 Click Finish to out-of-box state. (Sample Image) Recovery of Factory Default Software screen appears. When the recovery process is strongly recommended that your computer be lost during the recovery process. For more information, see "Backing... up your work" on page 85. Toshiba does not guarantee successful data back-up of Factory Default Software with user's data Using "Recovery of your internal storage drive to factory...
User Guide
Page 58
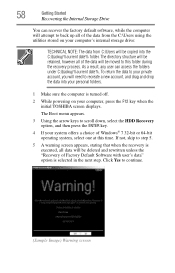
... software, while the computer will attempt to back up all data will need to continue. (Sample Image) Warning screen To return the data to this time. 58 Getting Started Recovering the Internal Storage Drive You can access the folders... under C:\backup%current date%. If not, skip to step 5. 5 A warning screen appears, stating that when the recovery is executed, all of the data from C:\Users will be moved to your private ... using the utilities stored on your computer, press the F12 key when the initial TOSHIBA screen displays.
... software, while the computer will attempt to back up all data will need to continue. (Sample Image) Warning screen To return the data to this time. 58 Getting Started Recovering the Internal Storage Drive You can access the folders... under C:\backup%current date%. If not, skip to step 5. 5 A warning screen appears, stating that when the recovery is executed, all of the data from C:\Users will be moved to your private ... using the utilities stored on your computer, press the F12 key when the initial TOSHIBA screen displays.
User Guide
Page 59
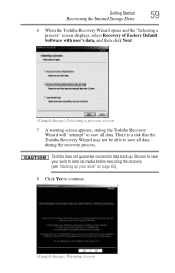
..., select Recovery of Factory Default Software with user's data, and then click Next. (Sample Image) Selecting a process screen 7 A warning screen appears, stating the Toshiba Recovery Wizard will "attempt" to save all data during the recovery process. Toshiba does not guarantee successful data back up your work " on page 85). 8 Click Yes to continue. (Sample...
..., select Recovery of Factory Default Software with user's data, and then click Next. (Sample Image) Selecting a process screen 7 A warning screen appears, stating the Toshiba Recovery Wizard will "attempt" to save all data during the recovery process. Toshiba does not guarantee successful data back up your work " on page 85). 8 Click Yes to continue. (Sample...
User Guide
Page 60
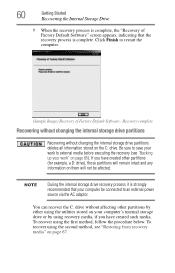
... Factory Default Software - Click Finish to save your work " on the C: drive. Be sure to restart the computer. (Sample Image) Recovery of Factory Default Software" screen appears, indicating that your work to an external power source via the AC adaptor. You can recover the C: drive without changing the internal storage drive...
... Factory Default Software - Click Finish to save your work " on the C: drive. Be sure to restart the computer. (Sample Image) Recovery of Factory Default Software" screen appears, indicating that your work to an external power source via the AC adaptor. You can recover the C: drive without changing the internal storage drive...
User Guide
Page 61
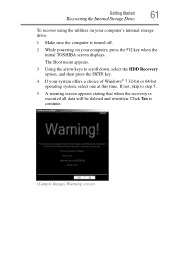
The Boot menu appears. 3 Using the arrow keys to continue. (Sample Image) Warning screen Getting Started 61 Recovering the Internal Storage Drive To recover using the utilities on your computer's internal storage drive: 1 Make sure the computer is executed ... down, select the HDD Recovery option, and then press the ENTER key. 4 If your computer, press the F12 key when the initial TOSHIBA screen displays. If not, skip to step 5. 5 A warning screen appears stating that when the recovery is turned off. 2 While powering on your system offers a choice of Windows® 7 32-bit...
The Boot menu appears. 3 Using the arrow keys to continue. (Sample Image) Warning screen Getting Started 61 Recovering the Internal Storage Drive To recover using the utilities on your computer's internal storage drive: 1 Make sure the computer is executed ... down, select the HDD Recovery option, and then press the ENTER key. 4 If your computer, press the F12 key when the initial TOSHIBA screen displays. If not, skip to step 5. 5 A warning screen appears stating that when the recovery is turned off. 2 While powering on your system offers a choice of Windows® 7 32-bit...
User Guide
Page 62
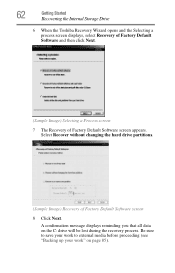
... process. 62 Getting Started Recovering the Internal Storage Drive 6 When the Toshiba Recovery Wizard opens and the Selecting a process screen displays, select Recovery of Factory Default Software and then click Next. (Sample Image) Selecting a Process screen 7 The Recovery of Factory Default Software screen 8 Click Next. Select Recover without changing the hard drive partitions. (Sample...
... process. 62 Getting Started Recovering the Internal Storage Drive 6 When the Toshiba Recovery Wizard opens and the Selecting a process screen displays, select Recovery of Factory Default Software and then click Next. (Sample Image) Selecting a Process screen 7 The Recovery of Factory Default Software screen 8 Click Next. Select Recover without changing the hard drive partitions. (Sample...
User Guide
Page 63
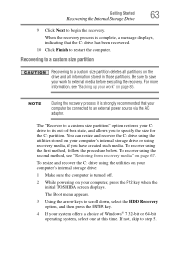
... 5. To recover using the utilities on your work to a custom size partition deletes all partitions on your computer, press the F12 key when the initial TOSHIBA screen displays. Recovering to a custom size partition Recovering to external media before executing the recovery. To recover using the second method, see "Backing up your computer...
... 5. To recover using the utilities on your work to a custom size partition deletes all partitions on your computer, press the F12 key when the initial TOSHIBA screen displays. Recovering to a custom size partition Recovering to external media before executing the recovery. To recover using the second method, see "Backing up your computer...
User Guide
Page 64
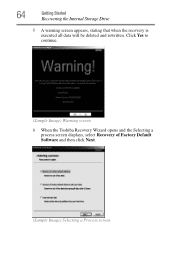
Click Yes to continue. (Sample Image) Warning screen 6 When the Toshiba Recovery Wizard opens and the Selecting a process screen displays, select Recovery of Factory Default Software and then click Next. (Sample Image) Selecting a Process screen 64 Getting Started Recovering the Internal Storage Drive 5 A warning screen appears, stating that when the recovery is executed all data will be deleted and rewritten.
Click Yes to continue. (Sample Image) Warning screen 6 When the Toshiba Recovery Wizard opens and the Selecting a process screen displays, select Recovery of Factory Default Software and then click Next. (Sample Image) Selecting a Process screen 64 Getting Started Recovering the Internal Storage Drive 5 A warning screen appears, stating that when the recovery is executed all data will be deleted and rewritten.
User Guide
Page 65
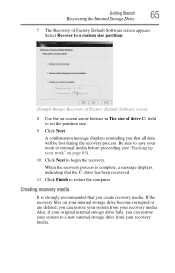
...the recovery process is strongly recommended that you can restore your system to a custom size partition. (Sample Image) Recovery of Factory Default Software screen appears. Also, if your original internal storage drive fails, you that the C: drive has been recovered. 11 Click Finish to begin the ... data will be lost during the recovery process. Getting Started 65 Recovering the Internal Storage Drive 7 The Recovery of Factory Default Software screen 8 Use the on your internal storage drive become corrupted or are deleted, you create recovery media. Be sure to save your work...
...the recovery process is strongly recommended that you can restore your system to a custom size partition. (Sample Image) Recovery of Factory Default Software screen appears. Also, if your original internal storage drive fails, you that the C: drive has been recovered. 11 Click Finish to begin the ... data will be lost during the recovery process. Getting Started 65 Recovering the Internal Storage Drive 7 The Recovery of Factory Default Software screen 8 Use the on your internal storage drive become corrupted or are deleted, you create recovery media. Be sure to save your work...
User Guide
Page 67
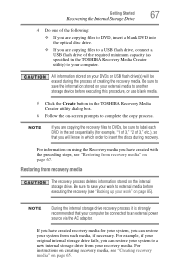
...(see "Backing up your work to external media before executing this procedure, or use blank media. 5 Click the Create button in the TOSHIBA Recovery Media Creator utility dialog box. 6 Follow the on the internal storage drive. For instructions on creating recovery media, see "Restoring from ...recovery media" on your system to a new internal storage drive from recovery media The recovery process deletes information stored on -screen prompts to insert the discs during the process of creating the recovery media. Restoring from your recovery media. If you have created with...
...(see "Backing up your work to external media before executing this procedure, or use blank media. 5 Click the Create button in the TOSHIBA Recovery Media Creator utility dialog box. 6 Follow the on the internal storage drive. For instructions on creating recovery media, see "Restoring from ...recovery media" on your system to a new internal storage drive from recovery media The recovery process deletes information stored on -screen prompts to insert the discs during the process of creating the recovery media. Restoring from your recovery media. If you have created with...
User Guide
Page 68
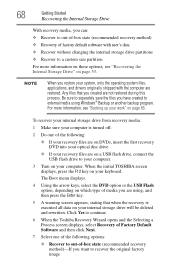
... have created to external media using , and then press the Enter key. 5 A warning screen appears, stating that you created are not restored during this process. When the initial TOSHIBA screen displays, press the F12 key on your keyboard. The Boot menu displays. 4 Using the arrow... internal storage drive partitions ❖ Recover to recover the original factory image Click Yes to continue. 6 When the Toshiba Recovery Wizard opens and the Selecting a Process screen displays, select Recovery of Factory Default Software and then click Next. 7 Select one of the following options: ❖...
... have created to external media using , and then press the Enter key. 5 A warning screen appears, stating that you created are not restored during this process. When the initial TOSHIBA screen displays, press the F12 key on your keyboard. The Boot menu displays. 4 Using the arrow... internal storage drive partitions ❖ Recover to recover the original factory image Click Yes to continue. 6 When the Toshiba Recovery Wizard opens and the Selecting a Process screen displays, select Recovery of Factory Default Software and then click Next. 7 Select one of the following options: ❖...
User Guide
Page 69
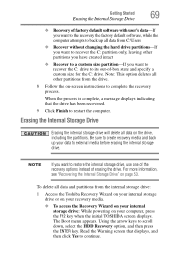
... changing the hard drive partitions-If you want to recover the C: partition only, leaving other partitions from the internal storage drive: 1 Access the Toshiba Recovery Wizard on your internal storage drive or on your recovery media. ❖ To access the Recovery Wizard on your computer, press the F12 ...key when the initial TOSHIBA screen displays. Using the arrow keys to its out-of-box state and specify a custom size for the C: drive. Getting Started 69 Erasing the...
... changing the hard drive partitions-If you want to recover the C: partition only, leaving other partitions from the internal storage drive: 1 Access the Toshiba Recovery Wizard on your internal storage drive or on your recovery media. ❖ To access the Recovery Wizard on your computer, press the F12 ...key when the initial TOSHIBA screen displays. Using the arrow keys to its out-of-box state and specify a custom size for the C: drive. Getting Started 69 Erasing the...

User Guide
Page 70
...initial TOSHIBA screen displays, press F12. A confirmation message displays reminding you are using, and then press the Enter key. Be sure you have saved your work to your computer, and then power on your recovery media: Turn off your internal storage drive. (Sample Image) Erase the hard disk screen 4...which type of your computer. 70 Getting Started Erasing the Internal Storage Drive ❖ To access the Recovery Wizard on the computer. Select Toshiba Recovery Wizard, and then click Next. 2 Select Erase the hard disk and then click Next. 3 Choose one of the following options ...
...initial TOSHIBA screen displays, press F12. A confirmation message displays reminding you are using, and then press the Enter key. Be sure you have saved your work to your computer, and then power on your recovery media: Turn off your internal storage drive. (Sample Image) Erase the hard disk screen 4...which type of your computer. 70 Getting Started Erasing the Internal Storage Drive ❖ To access the Recovery Wizard on the computer. Select Toshiba Recovery Wizard, and then click Next. 2 Select Erase the hard disk and then click Next. 3 Choose one of the following options ...


