User Guide
Page 49
...the display panel. Any small bright dots that may not be careful to remove any pens or other hand to increase the brightness of the screen will deteriorate. Your display contains an extremely large number of the TFT manufacturing technology. Do not press or push on the palm rest to hold...objects from the keyboard area before closing the display panel. Opening the display panel 1 Facing the front of the computer, locate the center of the screen technology. To avoid damaging the display panel, do not force it beyond the point where it . This is now ready for the first time The...
...the display panel. Any small bright dots that may not be careful to remove any pens or other hand to increase the brightness of the screen will deteriorate. Your display contains an extremely large number of the TFT manufacturing technology. Do not press or push on the palm rest to hold...objects from the keyboard area before closing the display panel. Opening the display panel 1 Facing the front of the computer, locate the center of the screen technology. To avoid damaging the display panel, do not force it beyond the point where it . This is now ready for the first time The...
User Guide
Page 50
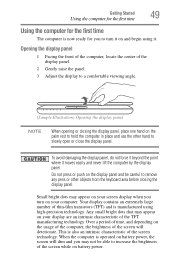
The ON/OFF light glows white. (Sample Illustration) Turning on -screen instructions. Setting up your software When you turn on the computer for the first time, do not turn on the computer: 1 Make sure any external ...
The ON/OFF light glows white. (Sample Illustration) Turning on -screen instructions. Setting up your software When you turn on the computer for the first time, do not turn on the computer: 1 Make sure any external ...
User Guide
Page 60
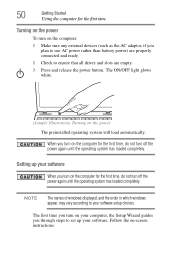
... memory modules stacked on the power: If "Start Windows® Normally" is highlighted, then press Enter. 60 Getting Started Adding memory (optional) NOTE The following screen may need to go into Safe Mode, then shut down and restart the system, at which time Windows® should boot back up slightly. If...
... memory modules stacked on the power: If "Start Windows® Normally" is highlighted, then press Enter. 60 Getting Started Adding memory (optional) NOTE The following screen may need to go into Safe Mode, then shut down and restart the system, at which time Windows® should boot back up slightly. If...
User Guide
Page 64
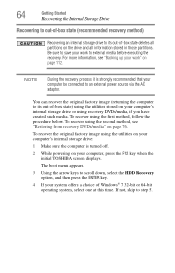
... off. 2 While powering on page 76. For more information, see "Restoring from recovery DVDs/media" on your computer, press the F12 key when the initial TOSHIBA screen displays. To recover the original factory image using the first method, follow the procedure below.
... off. 2 While powering on page 76. For more information, see "Restoring from recovery DVDs/media" on your computer, press the F12 key when the initial TOSHIBA screen displays. To recover the original factory image using the first method, follow the procedure below.

User Guide
Page 65
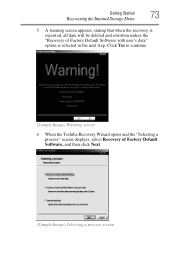
Click Yes to continue. (Sample Image) Warning screen 6 When the Toshiba Recovery Wizard opens and the "Selecting a process" screen displays, select Recovery of Factory Default Software with user's data" option is selected in the next step. Getting Started 65 Recovering the Internal Storage Drive 5 A warning screen appears, stating that when the recovery is executed, all data will be deleted and rewritten unless the "Recovery of Factory Default Software, and then click Next. (Sample Image) Selecting a process screen
Click Yes to continue. (Sample Image) Warning screen 6 When the Toshiba Recovery Wizard opens and the "Selecting a process" screen displays, select Recovery of Factory Default Software with user's data" option is selected in the next step. Getting Started 65 Recovering the Internal Storage Drive 5 A warning screen appears, stating that when the recovery is executed, all data will be deleted and rewritten unless the "Recovery of Factory Default Software, and then click Next. (Sample Image) Selecting a process screen
User Guide
Page 66
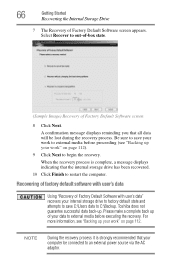
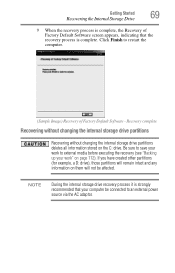
... "Backing up your internal storage drive to factory default state and attempts to save your work " on page 112. Toshiba does not guarantee successful data back-up of Factory Default Software screen appears. A confirmation message displays reminding you that your computer be lost during the recovery process. 66 Getting Started Recovering the... recovered. 10 Click Finish to out-of-box state. (Sample Image) Recovery of Factory Default Software with user's data Using "Recovery of Factory Default Software screen 8 Click Next.
... "Backing up your internal storage drive to factory default state and attempts to save your work " on page 112. Toshiba does not guarantee successful data back-up of Factory Default Software screen appears. A confirmation message displays reminding you that your computer be lost during the recovery process. 66 Getting Started Recovering the... recovered. 10 Click Finish to out-of-box state. (Sample Image) Recovery of Factory Default Software with user's data Using "Recovery of Factory Default Software screen 8 Click Next.
User Guide
Page 67
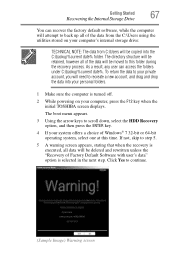
...C:\Users will be deleted and rewritten unless the "Recovery of the data will need to continue. (Sample Image) Warning screen Click Yes to recreate a new account, and drag and drop the data into the C:\backup%current date% folder. Getting...recover the factory default software, while the computer will attempt to this time. If not, skip to step 5. 5 A warning screen appears, stating that when the recovery is executed, all of Factory Default Software with user's data" option is turned off. 2...will be copied into your computer, press the F12 key when the initial TOSHIBA screen displays.
...C:\Users will be deleted and rewritten unless the "Recovery of the data will need to continue. (Sample Image) Warning screen Click Yes to recreate a new account, and drag and drop the data into the C:\backup%current date% folder. Getting...recover the factory default software, while the computer will attempt to this time. If not, skip to step 5. 5 A warning screen appears, stating that when the recovery is executed, all of Factory Default Software with user's data" option is turned off. 2...will be copied into your computer, press the F12 key when the initial TOSHIBA screen displays.
User Guide
Page 68
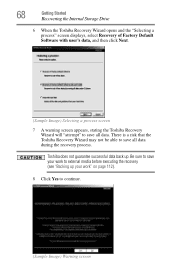
... work " on page 112). 8 Click Yes to continue. (Sample Image) Warning screen 68 Getting Started Recovering the Internal Storage Drive 6 When the Toshiba Recovery Wizard opens and the "Selecting a process" screen displays, select Recovery of Factory Default Software with user's data, and then click Next.... (Sample Image) Selecting a process screen 7 A warning screen appears, stating the Toshiba Recovery Wizard will "attempt" to save all data. There is a risk that the Toshiba Recovery Wizard may not be able to save your work to external media before...
... work " on page 112). 8 Click Yes to continue. (Sample Image) Warning screen 68 Getting Started Recovering the Internal Storage Drive 6 When the Toshiba Recovery Wizard opens and the "Selecting a process" screen displays, select Recovery of Factory Default Software with user's data, and then click Next.... (Sample Image) Selecting a process screen 7 A warning screen appears, stating the Toshiba Recovery Wizard will "attempt" to save all data. There is a risk that the Toshiba Recovery Wizard may not be able to save your work to external media before...
User Guide
Page 69
... the internal storage drive partitions deletes all information stored on page 112). Click Finish to restart the computer. (Sample Image) Recovery of Factory Default Software screen appears, indicating that the recovery process is strongly recommended that your work to an external power source via the AC adaptor.
... the internal storage drive partitions deletes all information stored on page 112). Click Finish to restart the computer. (Sample Image) Recovery of Factory Default Software screen appears, indicating that the recovery process is strongly recommended that your work to an external power source via the AC adaptor.
User Guide
Page 70
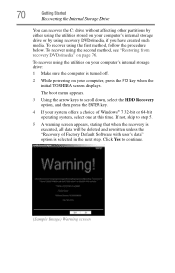
...your computer's internal storage drive or by either using the utilities stored on page 76. If not, skip to step 5. 5 A warning screen appears, stating that when the recovery is executed, all data will be deleted and rewritten unless the "Recovery of Factory Default Software with user... press the ENTER key. 4 If your computer, press the F12 key when the initial TOSHIBA screen displays. The boot menu appears. 3 Using the arrow keys to continue. (Sample Image) Warning screen 70 Getting Started Recovering the Internal Storage Drive You can recover the C: drive without affecting other...
...your computer's internal storage drive or by either using the utilities stored on page 76. If not, skip to step 5. 5 A warning screen appears, stating that when the recovery is executed, all data will be deleted and rewritten unless the "Recovery of Factory Default Software with user... press the ENTER key. 4 If your computer, press the F12 key when the initial TOSHIBA screen displays. The boot menu appears. 3 Using the arrow keys to continue. (Sample Image) Warning screen 70 Getting Started Recovering the Internal Storage Drive You can recover the C: drive without affecting other...
User Guide
Page 71
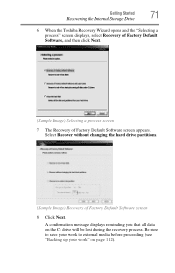
... page 112). Select Recover without changing the hard drive partitions. (Sample Image) Recovery of Factory Default Software screen appears. Getting Started 71 Recovering the Internal Storage Drive 6 When the Toshiba Recovery Wizard opens and the "Selecting a process" screen displays, select Recovery of Factory Default Software, and then click Next. (Sample Image) Selecting a process...
... page 112). Select Recover without changing the hard drive partitions. (Sample Image) Recovery of Factory Default Software screen appears. Getting Started 71 Recovering the Internal Storage Drive 6 When the Toshiba Recovery Wizard opens and the "Selecting a process" screen displays, select Recovery of Factory Default Software, and then click Next. (Sample Image) Selecting a process...
User Guide
Page 72
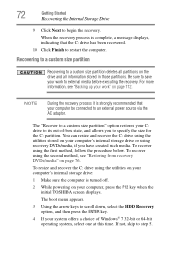
.... 4 If your computer's internal storage drive: 1 Make sure the computer is complete, a message displays, indicating that your computer, press the F12 key when the initial TOSHIBA screen displays. Be sure to save your work " on page 112. To resize and recover the C: drive using the utilities stored on your work to begin...
.... 4 If your computer's internal storage drive: 1 Make sure the computer is complete, a message displays, indicating that your computer, press the F12 key when the initial TOSHIBA screen displays. Be sure to save your work " on page 112. To resize and recover the C: drive using the utilities stored on your work to begin...
User Guide
Page 73
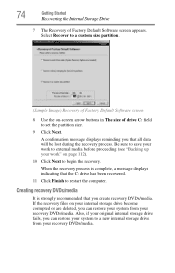
Click Yes to continue. (Sample Image) Warning screen 6 When the Toshiba Recovery Wizard opens and the "Selecting a process" screen displays, select Recovery of Factory Default Software with user's data" option is executed, all data will be deleted and rewritten unless the "Recovery of Factory Default Software, and then click Next. (Sample Image) Selecting a process screen Getting Started 73 Recovering the Internal Storage Drive 5 A warning screen appears, stating that when the recovery is selected in the next step.
Click Yes to continue. (Sample Image) Warning screen 6 When the Toshiba Recovery Wizard opens and the "Selecting a process" screen displays, select Recovery of Factory Default Software with user's data" option is executed, all data will be deleted and rewritten unless the "Recovery of Factory Default Software, and then click Next. (Sample Image) Selecting a process screen Getting Started 73 Recovering the Internal Storage Drive 5 A warning screen appears, stating that when the recovery is selected in the next step.
User Guide
Page 74
... storage drive become corrupted or are deleted, you create recovery DVDs/media. If the recovery files on -screen arrow buttons in The size of Factory Default Software screen appears. Creating recovery DVDs/media It is complete, a message displays indicating that all data will be lost... you that the C: drive has been recovered. 11 Click Finish to a custom size partition. (Sample Image) Recovery of Factory Default Software screen 8 Use the on your recovery DVDs/media. When the recovery process is strongly recommended that you can restore your recovery DVDs/media. A confirmation...
... storage drive become corrupted or are deleted, you create recovery DVDs/media. If the recovery files on -screen arrow buttons in The size of Factory Default Software screen appears. Creating recovery DVDs/media It is complete, a message displays indicating that all data will be lost... you that the C: drive has been recovered. 11 Click Finish to a custom size partition. (Sample Image) Recovery of Factory Default Software screen 8 Use the on your recovery DVDs/media. When the recovery process is strongly recommended that you can restore your recovery DVDs/media. A confirmation...

User Guide
Page 76
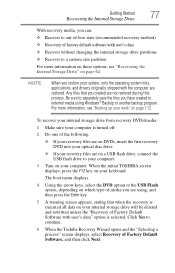
...on using the Recovery media you have created recovery DVDs/media for example, "1 of 3," "2 of 3," etc.), so that your work" on -screen prompts to complete the copy process. 76 Getting Started Recovering the Internal Storage Drive 4 Do one of the following: ❖ If you are copying ...flash drive(s) will know in which order to insert the discs during the process of the required minimum capacity (as specified in the TOSHIBA Recovery Media Creator utility) to your recovery DVDs/media. For instructions on creating recovery DVDs/media, see "Restoring from your computer. Restoring...
...on using the Recovery media you have created recovery DVDs/media for example, "1 of 3," "2 of 3," etc.), so that your work" on -screen prompts to complete the copy process. 76 Getting Started Recovering the Internal Storage Drive 4 Do one of the following: ❖ If you are copying ...flash drive(s) will know in which order to insert the discs during the process of the required minimum capacity (as specified in the TOSHIBA Recovery Media Creator utility) to your recovery DVDs/media. For instructions on creating recovery DVDs/media, see "Restoring from your computer. Restoring...
User Guide
Page 77
When the initial TOSHIBA screen displays, press the F12 key on your work" on page 112. NOTE When you restore your system, only the operating system files, applications, and drivers ..., stating that you created are restored. Be sure to separately save the files you have created to continue. 6 When the Toshiba Recovery Wizard opens and the "Selecting a process" screen displays, select Recovery of Factory Default Software, and then click Next. To recover your internal storage drive from recovery DVDs/media: 1 Make sure...
When the initial TOSHIBA screen displays, press the F12 key on your work" on page 112. NOTE When you restore your system, only the operating system files, applications, and drivers ..., stating that you created are restored. Be sure to separately save the files you have created to continue. 6 When the Toshiba Recovery Wizard opens and the "Selecting a process" screen displays, select Recovery of Factory Default Software, and then click Next. To recover your internal storage drive from recovery DVDs/media: 1 Make sure...
User Guide
Page 78
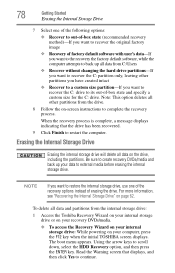
...to its out-of-box state and specify a custom size for the C: drive. To delete all data on -screen instructions to restart the computer. Read the Warning screen that the drive has been recovered. 9 Click Finish to complete the recovery process. Erasing the Internal Storage Drive Erasing...your data to back up your computer, press the F12 key when the initial TOSHIBA screen displays. The boot menu appears. Note: This option deletes all data from the internal storage drive: 1 Access the Toshiba Recovery Wizard on your internal storage drive or on your recovery DVDs/media. &#...
...to its out-of-box state and specify a custom size for the C: drive. To delete all data on -screen instructions to restart the computer. Read the Warning screen that the drive has been recovered. 9 Click Finish to complete the recovery process. Erasing the Internal Storage Drive Erasing...your data to back up your computer, press the F12 key when the initial TOSHIBA screen displays. The boot menu appears. Note: This option deletes all data from the internal storage drive: 1 Access the Toshiba Recovery Wizard on your internal storage drive or on your recovery DVDs/media. &#...
User Guide
Page 79
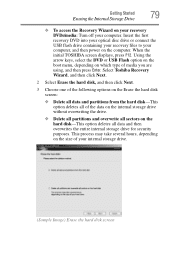
When the initial TOSHIBA screen displays, press F12. This process may take several hours, depending on which type of media you are using, and then press Enter. Using the arrow ... recovery files to your computer, and then power on your recovery DVDs/media: Turn off your internal storage drive. (Sample Image) Erase the hard disk screen Select Toshiba Recovery Wizard, and then click Next. 2 Select Erase the hard disk, and then click Next. 3 Choose one of the following options on the Erase...
When the initial TOSHIBA screen displays, press F12. This process may take several hours, depending on which type of media you are using, and then press Enter. Using the arrow ... recovery files to your computer, and then power on your recovery DVDs/media: Turn off your internal storage drive. (Sample Image) Erase the hard disk screen Select Toshiba Recovery Wizard, and then click Next. 2 Select Erase the hard disk, and then click Next. 3 Choose one of the following options on the Erase...
User Guide
Page 80
... to install. 4 Click Install. 5 Follow the on page 74) before proceeding. 5 Click Next to display its status in the lower portion of the screen. Installing drivers and applications The TOSHIBA Application Installer allows you can check its status as follows: 1 Click Start. 2 Right-click Computer. 3 Select Manage. 4 Click Disk Management. 5 Highlight the...
... to install. 4 Click Install. 5 Follow the on page 74) before proceeding. 5 Click Next to display its status in the lower portion of the screen. Installing drivers and applications The TOSHIBA Application Installer allows you can check its status as follows: 1 Click Start. 2 Right-click Computer. 3 Select Manage. 4 Click Disk Management. 5 Highlight the...

User Guide
Page 81
...the keyboard) and the adjacent control buttons to: ❖ Move the pointer on the screen ❖ Select an item on the screen ❖ Open or activate an item on the screen ❖ Scroll through a document or information ❖ Zoom in for a close-... an arrow) that moves on the Mouse icon in certain applications. Some of the following features, click on the screen when you slide your computer. To enable the following features may need to be used. Click the Device Settings tab... operations described in this section are only supported in the Optimize tab of Toshiba Assist.
...the keyboard) and the adjacent control buttons to: ❖ Move the pointer on the screen ❖ Select an item on the screen ❖ Open or activate an item on the screen ❖ Scroll through a document or information ❖ Zoom in for a close-... an arrow) that moves on the Mouse icon in certain applications. Some of the following features, click on the screen when you slide your computer. To enable the following features may need to be used. Click the Device Settings tab... operations described in this section are only supported in the Optimize tab of Toshiba Assist.


