
Users Manual Canada; English
Page 3
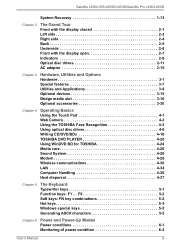
...6-1 Monitoring of power condition 6-2 User's Manual iii Satellite L650/L655/L650D/L655D/Satellite Pro L650/L650D System Recovery 1-13 Chapter 2 The Grand Tour Front with the display closed 2-1 Left side 2-2 Right side 2-4 Back 2-5 Underside 2-6 Front with the display open 2-7 Indicators 2-9 Optical disc drives 2-11 AC adaptor 2-15 Chapter 3 Hardware, Utilities and Options Hardware 3-1 Special features 3-7 Utilities and Applications 3-9 Optional devices 3-15 Bridge media slot 3-16 Optional accessories 3-30 Chapter 4 Operating Basics Using the Touch Pad 4-1 Web Camera...
...6-1 Monitoring of power condition 6-2 User's Manual iii Satellite L650/L655/L650D/L655D/Satellite Pro L650/L650D System Recovery 1-13 Chapter 2 The Grand Tour Front with the display closed 2-1 Left side 2-2 Right side 2-4 Back 2-5 Underside 2-6 Front with the display open 2-7 Indicators 2-9 Optical disc drives 2-11 AC adaptor 2-15 Chapter 3 Hardware, Utilities and Options Hardware 3-1 Special features 3-7 Utilities and Applications 3-9 Optional devices 3-15 Bridge media slot 3-16 Optional accessories 3-30 Chapter 4 Operating Basics Using the Touch Pad 4-1 Web Camera...
Users Manual Canada; English
Page 4
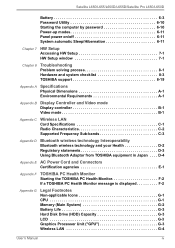
...G-1 CPU G-1 Memory (Main System G-2 Battery Life G-3 Hard Disk Drive (HDD) Capacity G-3 LCD G-3 Graphics Processor Unit ("GPU G-3 Wireless LAN G-4 User's Manual iv Satellite L650/L655/L650D/L655D/Satellite Pro L650/L650D Battery 6-3 Password Utility 6-10 Starting the computer by password 6-10 Power-up modes 6-11 Panel power on/off 6-11 System automatic Sleep/Hibernation 6-11 Chapter 7 HW Setup Accessing HW Setup 7-1 HW Setup window 7-1 Chapter 8 Troubleshooting Problem solving process 8-1 Hardware and system checklist 8-3 TOSHIBA support 8-19 Appendix A Specifications...
...G-1 CPU G-1 Memory (Main System G-2 Battery Life G-3 Hard Disk Drive (HDD) Capacity G-3 LCD G-3 Graphics Processor Unit ("GPU G-3 Wireless LAN G-4 User's Manual iv Satellite L650/L655/L650D/L655D/Satellite Pro L650/L650D Battery 6-3 Password Utility 6-10 Starting the computer by password 6-10 Power-up modes 6-11 Panel power on/off 6-11 System automatic Sleep/Hibernation 6-11 Chapter 7 HW Setup Accessing HW Setup 7-1 HW Setup window 7-1 Chapter 8 Troubleshooting Problem solving process 8-1 Hardware and system checklist 8-3 TOSHIBA support 8-19 Appendix A Specifications...
Users Manual Canada; English
Page 6
... without the prior written permission of Advanced Micro Devices, Inc. All rights reserved. The instructions and descriptions it contains are trademarks or registered trademarks of this manual cannot be reproduced only for the TOSHIBA Satellite L650/L655/L650D/L655D/Satellite Pro L650/L650D Series Portable Personal Computer at the time of HDMI Licensing LLC. Trademarks IBM is a registered trademark and...
... without the prior written permission of Advanced Micro Devices, Inc. All rights reserved. The instructions and descriptions it contains are trademarks or registered trademarks of this manual cannot be reproduced only for the TOSHIBA Satellite L650/L655/L650D/L655D/Satellite Pro L650/L650D Series Portable Personal Computer at the time of HDMI Licensing LLC. Trademarks IBM is a registered trademark and...
Users Manual Canada; English
Page 16
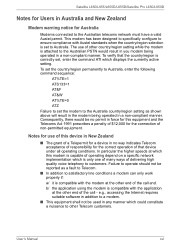
... way indicates Telecom acceptance of responsibility for the correct operation of operating depend on a specific network implementation which displays the currently active setting. The use of this modem is only one of many ways of delivering high quality voice telephony to other end of the call and. User's Manual xvi Satellite L650/L655/L650D/L655D/Satellite Pro L650/L650D Notes for Users in Australia and New Zealand...
... way indicates Telecom acceptance of responsibility for the correct operation of operating depend on a specific network implementation which displays the currently active setting. The use of this modem is only one of many ways of delivering high quality voice telephony to other end of the call and. User's Manual xvi Satellite L650/L655/L650D/L655D/Satellite Pro L650/L650D Notes for Users in Australia and New Zealand...
Users Manual Canada; English
Page 24
...-performance computing. Read Chapter 3, Hardware, Utilities and Options if connecting optional products or external devices. User's Manual xxii This powerful notebook computer provides excellent expansion capability, includes multimedia functionality, and is organized, then become acquainted with the computer's features, components and accessory devices. Preface Congratulations on your computer, basic operations and care, using your computer. For example: Read Only Memory (ROM). Acronyms are a new user of computers or if...
...-performance computing. Read Chapter 3, Hardware, Utilities and Options if connecting optional products or external devices. User's Manual xxii This powerful notebook computer provides excellent expansion capability, includes multimedia functionality, and is organized, then become acquainted with the computer's features, components and accessory devices. Preface Congratulations on your computer, basic operations and care, using your computer. For example: Read Only Memory (ROM). Acronyms are a new user of computers or if...
Users Manual Canada; English
Page 38
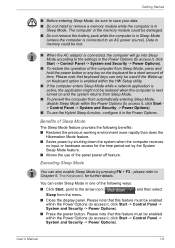
... keyboard keys can also enable Sleep Mode by the System Sleep Mode feature. ■ Allows the use the Hybrid Sleep function, configure it in the Power Options. The computer or the memory module could be sure to save your data. ■ Do not install or remove a memory module while the computer is in Sleep Mode. Data in memory could be enabled within the Power Options (to access it, click Start -> Control Panel -> System and Security -> Power Options). ■ Press the power button. Getting Started...
... keyboard keys can also enable Sleep Mode by the System Sleep Mode feature. ■ Allows the use the Hybrid Sleep function, configure it in the Power Options. The computer or the memory module could be sure to save your data. ■ Do not install or remove a memory module while the computer is in Sleep Mode. Data in memory could be enabled within the Power Options (to access it, click Start -> Control Panel -> System and Security -> Power Options). ■ Press the power button. Getting Started...
Users Manual Canada; English
Page 39
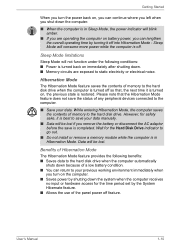
... contents of any peripheral devices connected to your data. Wait for the Hard Disk Drive indicator to static electricity or electrical noise. Sleep Mode will blink amber. ■ If you are exposed to go out. ■ Do not install or remove a memory module while the computer is in Sleep Mode, the power indicator will consume more power while the computer is restored. Getting Started When you turn on the computer. ■...
... contents of any peripheral devices connected to your data. Wait for the Hard Disk Drive indicator to static electricity or electrical noise. Sleep Mode will blink amber. ■ If you are exposed to go out. ■ Do not install or remove a memory module while the computer is in Sleep Mode, the power indicator will consume more power while the computer is restored. Getting Started When you turn on the computer. ■...
Users Manual Canada; English
Page 62
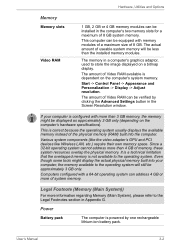
... the overlapped memory is powered by clicking the Advanced Settings button in Appendix G. Legal Footnote (Memory (Main System)) For more of system memory. Power Battery pack The computer is not available to the Legal Footnotes section in the Screen Resolution window. User's Manual 3-2 Various system components (like the video adapter's GPU and PCI devices like Wireless LAN, etc.) require their own memory space. Computers configured with a 64-bit operating system...
... the overlapped memory is powered by clicking the Advanced Settings button in Appendix G. Legal Footnote (Memory (Main System)) For more of system memory. Power Battery pack The computer is not available to the Legal Footnotes section in the Screen Resolution window. User's Manual 3-2 Various system components (like the video adapter's GPU and PCI devices like Wireless LAN, etc.) require their own memory space. Computers configured with a 64-bit operating system...
Users Manual Canada; English
Page 80
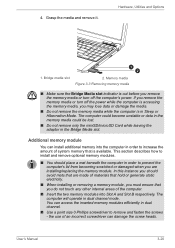
... remove the memory media while the computer is out before you remove the memory media or turn off the computer's power. Additional memory module You can install additional memory into Slot A and Slot B respectively. User's Manual 3-20 In this instance you should place a mat beneath the computer in order to increase the amount of an incorrect screwdriver can access the inserted memory modules efficiently in Sleep or Hibernation Mode. The computer will operate...
... remove the memory media while the computer is out before you remove the memory media or turn off the computer's power. Additional memory module You can install additional memory into Slot A and Slot B respectively. User's Manual 3-20 In this instance you should place a mat beneath the computer in order to increase the amount of an incorrect screwdriver can access the inserted memory modules efficiently in Sleep or Hibernation Mode. The computer will operate...
Users Manual Canada; English
Page 81
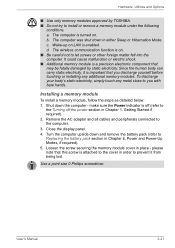
... 6, Power and Power-Up Modes, if required). 5. Remove the AC adaptor and all cables and peripherals connected to install or remove a memory module under the following conditions. Use a point size 0 Phillips screwdriver. c. b. make sure the Power indicator is a precision electronic component that you with bare hands. Close the display panel. 4. Wake-up on LAN is turned on . ■ Be careful not to Replacing the battery pack section in Chapter 1, Getting Started...
... 6, Power and Power-Up Modes, if required). 5. Remove the AC adaptor and all cables and peripherals connected to install or remove a memory module under the following conditions. Use a point size 0 Phillips screwdriver. c. b. make sure the Power indicator is a precision electronic component that you with bare hands. Close the display panel. 4. Wake-up on LAN is turned on . ■ Be careful not to Replacing the battery pack section in Chapter 1, Getting Started...
Users Manual Canada; English
Page 83
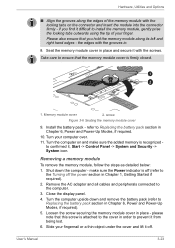
... this screw is firmly closed. 1 2 1. User's Manual 3-23 Seat the memory module cover in Chapter 1, Getting Started if required). 2. Take care to install the memory module, gently prise the locking tabs outwards using the tip of the memory module with the grooves in Chapter 6, Power and Power-Up Modes, if required. 10. Remove the AC adaptor and all cables and peripherals connected to Replacing the battery pack section in . 8. refer to...
... this screw is firmly closed. 1 2 1. User's Manual 3-23 Seat the memory module cover in Chapter 1, Getting Started if required). 2. Take care to install the memory module, gently prise the locking tabs outwards using the tip of the memory module with the grooves in Chapter 6, Power and Power-Up Modes, if required. 10. Remove the AC adaptor and all cables and peripherals connected to Replacing the battery pack section in . 8. refer to...
Users Manual Canada; English
Page 110
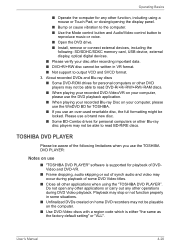
... DVD drive. ■ Install, remove or connect external devices, including the following limitations when you use ■ "TOSHIBA DVD PLAYER" software is either "the same as the factory default setting" or "ALL". Please use the DVD playback application. ■ When playing your recorded Blu-ray Disc on your disc after recording important data. ■ DVD+R/+RW disc cannot be written in some DVD Video titles. ■ Close all other applications when using a mouse or Touch Pad...
... DVD drive. ■ Install, remove or connect external devices, including the following limitations when you use ■ "TOSHIBA DVD PLAYER" software is either "the same as the factory default setting" or "ALL". Please use the DVD playback application. ■ When playing your recorded Blu-ray Disc on your disc after recording important data. ■ DVD+R/+RW disc cannot be written in some DVD Video titles. ■ Close all other applications when using a mouse or Touch Pad...
Users Manual Canada; English
Page 115
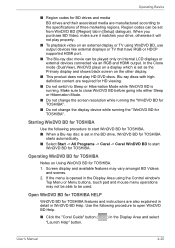
... to the specifications of three marketing regions. Region codes can be played only on an external display or TV using the Control window's Top Menu or Menu buttons, touch pad and mouse menu operations may vary amongst BD Videos and scenes. 2. Open WinDVD BD for TOSHIBA HELP WinDVD BD for TOSHIBA features and instructions are also explained in detail in the BD drive, WinDVD BD for TOSHIBA starts automatically. ■ Select Start -> All Programs...
... to the specifications of three marketing regions. Region codes can be played only on an external display or TV using the Control window's Top Menu or Menu buttons, touch pad and mouse menu operations may vary amongst BD Videos and scenes. 2. Open WinDVD BD for TOSHIBA HELP WinDVD BD for TOSHIBA features and instructions are also explained in detail in the BD drive, WinDVD BD for TOSHIBA starts automatically. ■ Select Start -> All Programs...
Users Manual Canada; English
Page 129
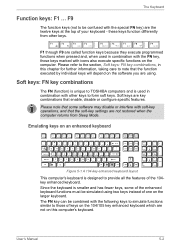
... key combinations that enable, disable or configure specific features. Soft keys: FN key combinations The FN (function) is unique to be confused with icons also execute specific functions on the larger keyboard. Please note that some of one on the computer. User's Manual 5-2 The FN key can be simulated using . Soft keys are using two keys instead of the enhanced keyboard functions must be combined with other keys. these keys function differently from Sleep Mode...
... key combinations that enable, disable or configure specific features. Soft keys: FN key combinations The FN (function) is unique to be confused with icons also execute specific functions on the larger keyboard. Please note that some of one on the computer. User's Manual 5-2 The FN key can be simulated using . Soft keys are using two keys instead of the enhanced keyboard functions must be combined with other keys. these keys function differently from Sleep Mode...
Users Manual Canada; English
Page 136
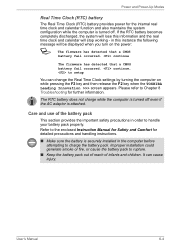
... refer to handle your battery pack properly. Care and use of infants and children. The RTC battery does not charge while the computer is securely installed in order to Chapter 8 Troubleshooting for detailed precautions and handling instructions. ■ Make sure the battery is turned off . User's Manual 6-4 continue The firmware has detected that a CMOS battery fail occurred. Refer to charge the battery pack. Improper installation could generate smoke or...
... refer to handle your battery pack properly. Care and use of infants and children. The RTC battery does not charge while the computer is securely installed in order to Chapter 8 Troubleshooting for detailed precautions and handling instructions. ■ Make sure the battery is turned off . User's Manual 6-4 continue The firmware has detected that a CMOS battery fail occurred. Refer to charge the battery pack. Improper installation could generate smoke or...
Users Manual Canada; English
Page 151
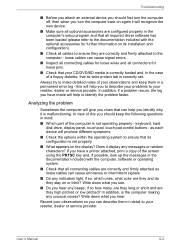
... on the display? keyboard, hard disk drive, display panel, touch pad, touch pad control buttons - In addition, is not operating properly - Analyzing the problem Sometimes the computer will help to identify the problem faster. Write down what you hear. Does it will recognize the new device. ■ Make sure all connectors for further information on or blink? User's Manual 8-2 loose cables can describe them in a permanent error log - Troubleshooting ■ Before you attach an external device you...
... on the display? keyboard, hard disk drive, display panel, touch pad, touch pad control buttons - In addition, is not operating properly - Analyzing the problem Sometimes the computer will help to identify the problem faster. Write down what you hear. Does it will recognize the new device. ■ Make sure all connectors for further information on or blink? User's Manual 8-2 loose cables can describe them in a permanent error log - Troubleshooting ■ Before you attach an external device you...

Users Manual Canada; English
Page 166
...'s tone can hear a dial tone but a Make sure that the cable connecting the external monitor to the computer is set correctly. You can 't hear a ring or pule dialling selection feature is firmly attached. Troubleshooting Problem Display error occurs Procedure When the display panel and an external monitor are set to clone mode and they are still unable to resolve the problem, contact your reseller, dealer or service provider.
...'s tone can hear a dial tone but a Make sure that the cable connecting the external monitor to the computer is set correctly. You can 't hear a ring or pule dialling selection feature is firmly attached. Troubleshooting Problem Display error occurs Procedure When the display panel and an external monitor are set to clone mode and they are still unable to resolve the problem, contact your reseller, dealer or service provider.
Users Manual Canada; English
Page 190
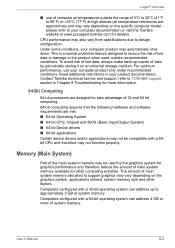
...-bit CPU, Chipset and BIOS (Basic Input/Output System) ■ 64-bit Device drivers ■ 64-bit applications Certain device drivers and/or applications may vary depending on the specific computer model please refer to support graphics may not be used outside the range of system memory. Contact Toshiba technical service and support, refer to design configuration. User's Manual G-2 CPU performance may automatically shutdown. Memory (Main System) Part of 32...
...-bit CPU, Chipset and BIOS (Basic Input/Output System) ■ 64-bit Device drivers ■ 64-bit applications Certain device drivers and/or applications may vary depending on the specific computer model please refer to support graphics may not be used outside the range of system memory. Contact Toshiba technical service and support, refer to design configuration. User's Manual G-2 CPU performance may automatically shutdown. Memory (Main System) Part of 32...
Users Manual Canada; English
Page 197
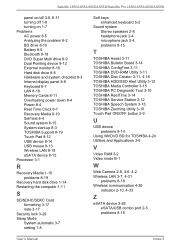
... start-up 8-3 TOSHIBA support 8-19 Touch Pad 8-12 USB device 8-14 USB mouse 8-13 Wireless LAN 8-18 eSATA device 8-15 Processor 3-1 R Recovery Media 1-15 problems 8-19 Recovery hard disk drive 1-14 Restarting the computer 1-11 S SD/SDHC/SDXC Card formatting 3-17 note 3-17 Security lock 3-29 Sleep Mode System automatic 3-7 setting 1-8 Soft keys enhanced keyboard 5-2 Sound system Stereo speakers 2-8 headphone jack 2-4 microphone jack 2-4 problems 8-15 T TOSHIBA Assist 3-11 TOSHIBA Bulletin Board 3-14 TOSHIBA ConfigFree 3-11 TOSHIBA DVD-RAM Utility 3-11 TOSHIBA Disc Creator 3-11, 4-16 TOSHIBA HDD...
... start-up 8-3 TOSHIBA support 8-19 Touch Pad 8-12 USB device 8-14 USB mouse 8-13 Wireless LAN 8-18 eSATA device 8-15 Processor 3-1 R Recovery Media 1-15 problems 8-19 Recovery hard disk drive 1-14 Restarting the computer 1-11 S SD/SDHC/SDXC Card formatting 3-17 note 3-17 Security lock 3-29 Sleep Mode System automatic 3-7 setting 1-8 Soft keys enhanced keyboard 5-2 Sound system Stereo speakers 2-8 headphone jack 2-4 microphone jack 2-4 problems 8-15 T TOSHIBA Assist 3-11 TOSHIBA Bulletin Board 3-14 TOSHIBA ConfigFree 3-11 TOSHIBA DVD-RAM Utility 3-11 TOSHIBA Disc Creator 3-11, 4-16 TOSHIBA HDD...
Detailed Specs for Satellite L655 PSK1EC-0DS00Q English
Page 1
... be filled with 2GB and 4GB modules Ports: Bridge Media Adaptor (SD Card, Mini SD Card, Micro SD Card, SDHC Card, Mult iMedia Card, Memory Stick Card, Memory Stick Pro Card), 2 USB 2.0, 1 USB 2.0/eSATA combo port, RJ45, external microphone port, headphone port, RGB, HDMI Keyboard Canadian Bilingual Keyboard 105 keys with 15 Function keys Color: Flat Half Glossy White Pointing Device Touchpad Pointing device with Gesture Additional Software Toshiba ConfigFree™ Toshiba PC Health Monitor Toshiba Disc Creator Norton Internet Security Trial Microsoft® Office Starter...
... be filled with 2GB and 4GB modules Ports: Bridge Media Adaptor (SD Card, Mini SD Card, Micro SD Card, SDHC Card, Mult iMedia Card, Memory Stick Card, Memory Stick Pro Card), 2 USB 2.0, 1 USB 2.0/eSATA combo port, RJ45, external microphone port, headphone port, RGB, HDMI Keyboard Canadian Bilingual Keyboard 105 keys with 15 Function keys Color: Flat Half Glossy White Pointing Device Touchpad Pointing device with Gesture Additional Software Toshiba ConfigFree™ Toshiba PC Health Monitor Toshiba Disc Creator Norton Internet Security Trial Microsoft® Office Starter...


