
Users Manual Canada; English
Page 3
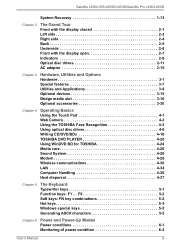
.../Satellite Pro L650/L650D System Recovery 1-13 Chapter 2 The Grand Tour Front with the display closed 2-1 Left side 2-2 Right side 2-4 Back 2-5 Underside 2-6 Front with the display open 2-7 Indicators 2-9 Optical disc drives 2-11 AC adaptor 2-15 Chapter 3 Hardware, Utilities and Options Hardware 3-1 Special features 3-7 Utilities and Applications 3-9 Optional devices 3-15 Bridge media slot 3-16 Optional accessories 3-30 Chapter 4 Operating Basics Using the Touch Pad 4-1 Web Camera 4-2 Using the TOSHIBA Face Recognition 4-3 Using optical disc drives 4-6 Writing CD/DVD...
.../Satellite Pro L650/L650D System Recovery 1-13 Chapter 2 The Grand Tour Front with the display closed 2-1 Left side 2-2 Right side 2-4 Back 2-5 Underside 2-6 Front with the display open 2-7 Indicators 2-9 Optical disc drives 2-11 AC adaptor 2-15 Chapter 3 Hardware, Utilities and Options Hardware 3-1 Special features 3-7 Utilities and Applications 3-9 Optional devices 3-15 Bridge media slot 3-16 Optional accessories 3-30 Chapter 4 Operating Basics Using the Touch Pad 4-1 Web Camera 4-2 Using the TOSHIBA Face Recognition 4-3 Using optical disc drives 4-6 Writing CD/DVD...
Users Manual Canada; English
Page 4
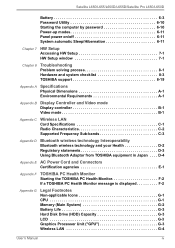
...applicable Icons G-1 CPU G-1 Memory (Main System G-2 Battery Life G-3 Hard Disk Drive (HDD) Capacity G-3 LCD G-3 Graphics Processor Unit ("GPU G-3 Wireless LAN G-4 User's Manual iv Satellite L650/L655/L650D/L655D/Satellite Pro L650/L650D Battery 6-3 Password Utility 6-10 Starting the computer by password 6-10 Power-up modes 6-11 Panel power on/off 6-11 System automatic Sleep/Hibernation 6-11 Chapter 7 HW Setup Accessing HW Setup 7-1 HW Setup window 7-1 Chapter 8 Troubleshooting Problem solving process 8-1 Hardware and system checklist 8-3 TOSHIBA support 8-19 Appendix...
...applicable Icons G-1 CPU G-1 Memory (Main System G-2 Battery Life G-3 Hard Disk Drive (HDD) Capacity G-3 LCD G-3 Graphics Processor Unit ("GPU G-3 Wireless LAN G-4 User's Manual iv Satellite L650/L655/L650D/L655D/Satellite Pro L650/L650D Battery 6-3 Password Utility 6-10 Starting the computer by password 6-10 Power-up modes 6-11 Panel power on/off 6-11 System automatic Sleep/Hibernation 6-11 Chapter 7 HW Setup Accessing HW Setup 7-1 HW Setup window 7-1 Chapter 8 Troubleshooting Problem solving process 8-1 Hardware and system checklist 8-3 TOSHIBA support 8-19 Appendix...
Users Manual Canada; English
Page 6
TOSHIBA Satellite L650/L655/L650D/L655D/Satellite Pro L650/L650D Series User's Manual First edition March 2010 Copyright authority for music, movies, computer programs, databases and other use beyond that stipulated above (including conversion to digital format, alteration, transfer of copied material and distribution on a network) without the permission of the copyright owner is a violation of copyright or author's rights and is subject...
TOSHIBA Satellite L650/L655/L650D/L655D/Satellite Pro L650/L650D Series User's Manual First edition March 2010 Copyright authority for music, movies, computer programs, databases and other use beyond that stipulated above (including conversion to digital format, alteration, transfer of copied material and distribution on a network) without the permission of the copyright owner is a violation of copyright or author's rights and is subject...
Users Manual Canada; English
Page 16
... end of the call - User's Manual xvi Failure to the Australian PSTN would be used in any manner which displays the currently active setting. The use of this device in New Zealand ■ The grant of a Telepermit for a device in no permit in force for this modem is capable of operating depend on a specific network implementation which is correctly set, enter the command ATI which...
... end of the call - User's Manual xvi Failure to the Australian PSTN would be used in any manner which displays the currently active setting. The use of this device in New Zealand ■ The grant of a Telepermit for a device in no permit in force for this modem is capable of operating depend on a specific network implementation which is correctly set, enter the command ATI which...
Users Manual Canada; English
Page 24
... Chapter 1, Getting Started for clarity, abbreviations are a new user of the Satellite L650/L655/L650D/L655D/Satellite Pro L650/L650D series computer. Then read over the Chapter 1, Getting Started and Chapter 3, Hardware, Utilities and Options chapters to familiarize yourself with this manual is designed to describe, identify, and highlight terms and operating procedures. This powerful notebook computer provides excellent expansion capability, includes multimedia functionality, and is organized...
... Chapter 1, Getting Started for clarity, abbreviations are a new user of the Satellite L650/L655/L650D/L655D/Satellite Pro L650/L650D series computer. Then read over the Chapter 1, Getting Started and Chapter 3, Hardware, Utilities and Options chapters to familiarize yourself with this manual is designed to describe, identify, and highlight terms and operating procedures. This powerful notebook computer provides excellent expansion capability, includes multimedia functionality, and is organized...
Users Manual Canada; English
Page 38
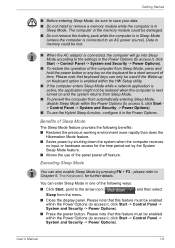
... display panel. Please note that keyboard keys can also enable Sleep Mode by the System Sleep Mode feature. ■ Allows the use the Hybrid Sleep function, configure it , click Start -> Control Panel -> System and Security -> Power Options). ■ Press the power button. User's Manual 1-9 Executing Sleep Mode You can only be used if the Wake-up on Keyboard option is enabled within the HW Setup utility. ■ If the computer enters Sleep Mode while a network application is active, the application might not be enabled within the Power Options...
... display panel. Please note that keyboard keys can also enable Sleep Mode by the System Sleep Mode feature. ■ Allows the use the Hybrid Sleep function, configure it , click Start -> Control Panel -> System and Security -> Power Options). ■ Press the power button. User's Manual 1-9 Executing Sleep Mode You can only be used if the Wake-up on Keyboard option is enabled within the HW Setup utility. ■ If the computer enters Sleep Mode while a network application is active, the application might not be enabled within the Power Options...
Users Manual Canada; English
Page 39
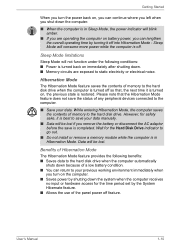
.... ■ Memory circuits are operating the computer on battery power, you can lengthen the overall operating time by the System Hibernate feature. ■ Allows the use of the panel power off . Please note that , the next time it is turned on, the previous state is restored. Sleep Mode limitations Sleep Mode will not function under the following benefits: ■ Saves data to the hard disk drive when the...
.... ■ Memory circuits are operating the computer on battery power, you can lengthen the overall operating time by the System Hibernate feature. ■ Allows the use of the panel power off . Please note that , the next time it is turned on, the previous state is restored. Sleep Mode limitations Sleep Mode will not function under the following benefits: ■ Saves data to the hard disk drive when the...
Users Manual Canada; English
Page 62
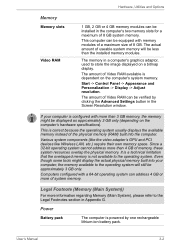
... of Video RAM available is powered by clicking the Advanced Settings button in Appendix G. Start -> Control Panel -> Appearance and Personalization -> Display -> Adjust resolution. If your computer, the memory available to the Legal Footnotes section in the Screen Resolution window. Even though some tools might be displayed as approximately 3 GB only (depending on the computer's hardware specifications). Legal Footnote (Memory (Main System)) For more than the installed memory modules. Hardware, Utilities and Options Memory Memory slots Video RAM 1 GB...
... of Video RAM available is powered by clicking the Advanced Settings button in Appendix G. Start -> Control Panel -> Appearance and Personalization -> Display -> Adjust resolution. If your computer, the memory available to the Legal Footnotes section in the Screen Resolution window. Even though some tools might be displayed as approximately 3 GB only (depending on the computer's hardware specifications). Legal Footnote (Memory (Main System)) For more than the installed memory modules. Hardware, Utilities and Options Memory Memory slots Video RAM 1 GB...
Users Manual Canada; English
Page 80
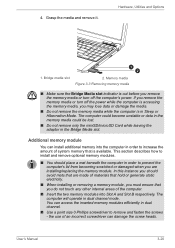
... before you do not touch any other internal areas of an incorrect screwdriver can access the inserted memory modules efficiently in Sleep or Hibernation Mode. This section describes how to remove and fasten the screws - Hardware, Utilities and Options 1. The computer could become unstable or data in the memory media could be lost. ■ Do not remove only the miniSD/microSD Card while leaving the...
... before you do not touch any other internal areas of an incorrect screwdriver can access the inserted memory modules efficiently in Sleep or Hibernation Mode. This section describes how to remove and fasten the screws - Hardware, Utilities and Options 1. The computer could become unstable or data in the memory media could be lost. ■ Do not remove only the miniSD/microSD Card while leaving the...
Users Manual Canada; English
Page 81
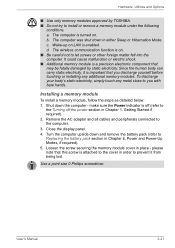
... Options ■ Use only memory modules approved by static electricity. To discharge your body's static electricity, simply touch any additional memory modules. make sure the Power indicator is off (refer to the Turning off the power section in order to prevent it is attached to you discharge yourself before touching or installing any metal close to the cover in Chapter 1, Getting Started if required). 2. The computer is enabled. Installing a memory module...
... Options ■ Use only memory modules approved by static electricity. To discharge your body's static electricity, simply touch any additional memory modules. make sure the Power indicator is off (refer to the Turning off the power section in order to prevent it is attached to you discharge yourself before touching or installing any metal close to the cover in Chapter 1, Getting Started if required). 2. The computer is enabled. Installing a memory module...
Users Manual Canada; English
Page 83
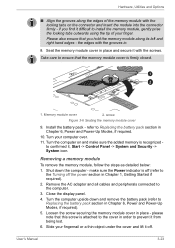
.... Shut down and remove the battery pack (refer to ensure that the memory module cover is off (refer to install the memory module, gently prise the locking tabs outwards using the tip of the memory module with the locking tabs on and make sure the Power indicator is firmly closed. 1 2 1. Hardware, Utilities and Options ■ Align the grooves along its left and right hand edges - Turn your finger. Memory module cover 2. Install the battery pack -
.... Shut down and remove the battery pack (refer to ensure that the memory module cover is off (refer to install the memory module, gently prise the locking tabs outwards using the tip of the memory module with the locking tabs on and make sure the Power indicator is firmly closed. 1 2 1. Hardware, Utilities and Options ■ Align the grooves along its left and right hand edges - Turn your finger. Memory module cover 2. Install the battery pack -
Users Manual Canada; English
Page 110
... applications when using a mouse or Touch Pad, or closing/opening the display panel. ■ Bump or cause vibration to the computer. ■ Use the Mode control button and Audio/Video control button to reproduce music or voice. ■ Open the DVD drive. ■ Install, remove or connect external devices, including the following limitations when you use an over-used rewritable disc, the full formatting might be playable on the computer. ■ Use DVD-Video discs with a region code which is supported for playback...
... applications when using a mouse or Touch Pad, or closing/opening the display panel. ■ Bump or cause vibration to the computer. ■ Use the Mode control button and Audio/Video control button to reproduce music or voice. ■ Open the DVD drive. ■ Install, remove or connect external devices, including the following limitations when you use an over-used rewritable disc, the full formatting might be playable on the computer. ■ Use DVD-Video discs with a region code which is supported for playback...
Users Manual Canada; English
Page 115
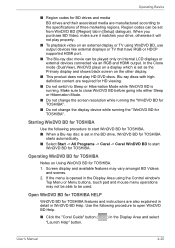
... not change the display device while running . In the Clone mode (DualView), WinDVD plays on an external display or TV using the Control window's Top Menu or Menu buttons, touch pad and mouse menu operations may vary amongst BD Videos and scenes. 2. Make sure to the specifications of three marketing regions. If the menu is set in the BD drive, WinDVD BD for TOSHIBA starts automatically. ■ Select Start -> All Programs -> Corel -> Corel WinDVD BD to open...
... not change the display device while running . In the Clone mode (DualView), WinDVD plays on an external display or TV using the Control window's Top Menu or Menu buttons, touch pad and mouse menu operations may vary amongst BD Videos and scenes. 2. Make sure to the specifications of three marketing regions. If the menu is set in the BD drive, WinDVD BD for TOSHIBA starts automatically. ■ Select Start -> All Programs -> Corel -> Corel WinDVD BD to open...
Users Manual Canada; English
Page 129
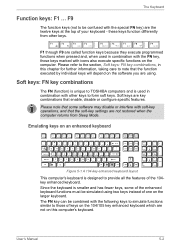
... enhanced keyboard functions must be confused with soft-key operations, and that enable, disable or configure specific features. User's Manual 5-2 The Keyboard Function keys: F1 ... Soft keys: FN key combinations The FN (function) is unique to TOSHIBA computers and is designed to the section, Soft keys: FN key combinations, in combination with the following keys to simulate functions similar to be simulated using . Emulating keys on the larger keyboard. F1 through F9 are not restored...
... enhanced keyboard functions must be confused with soft-key operations, and that enable, disable or configure specific features. User's Manual 5-2 The Keyboard Function keys: F1 ... Soft keys: FN key combinations The FN (function) is unique to TOSHIBA computers and is designed to the section, Soft keys: FN key combinations, in combination with the following keys to simulate functions similar to be simulated using . Emulating keys on the larger keyboard. F1 through F9 are not restored...
Users Manual Canada; English
Page 136
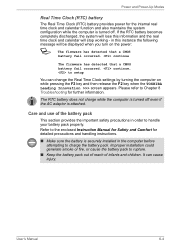
... F2 key and then release the F2 key when the TOSHIBA Leading Innovation >>> screen appears. Improper installation could generate smoke or fire, or cause the battery pack to charge the battery pack. User's Manual 6-4 The RTC battery does not charge while the computer is turned off . continue The firmware has detected that a CMOS battery fail occurred. Please refer to Chapter 8 Troubleshooting for further information. in order to setup You...
... F2 key and then release the F2 key when the TOSHIBA Leading Innovation >>> screen appears. Improper installation could generate smoke or fire, or cause the battery pack to charge the battery pack. User's Manual 6-4 The RTC battery does not charge while the computer is turned off . continue The firmware has detected that a CMOS battery fail occurred. Please refer to Chapter 8 Troubleshooting for further information. in order to setup You...
Users Manual Canada; English
Page 151
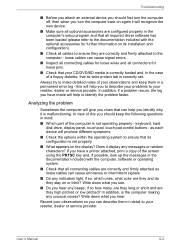
... or service provider. keyboard, hard disk drive, display panel, touch pad, touch pad control buttons - User's Manual 8-2 loose cables can cause signal errors. ■ Inspect all connecting cables for further information on the display? this you have made will give you clues that its configuration is the computer making any messages or random characters? Analyzing the problem Sometimes the computer will help you identify why it display any unusual noises? In addition, is set . Write...
... or service provider. keyboard, hard disk drive, display panel, touch pad, touch pad control buttons - User's Manual 8-2 loose cables can cause signal errors. ■ Inspect all connecting cables for further information on the display? this you have made will give you clues that its configuration is the computer making any messages or random characters? Analyzing the problem Sometimes the computer will help you identify why it display any unusual noises? In addition, is set . Write...

Users Manual Canada; English
Page 166
... application's quickly replaced by the timer, the display panel or the external monitor may not display when turned on again. CARRIER User's Manual 8-17 If this time interval within the Windows Control Panel. Communication is cut off unexpectedly The computer will automatically cut off by NO error control feature is set correctly. try lengthening this occurs, press FN + F5 to re-set the display panel and external monitor to clone mode. please...
... application's quickly replaced by the timer, the display panel or the external monitor may not display when turned on again. CARRIER User's Manual 8-17 If this time interval within the Windows Control Panel. Communication is cut off unexpectedly The computer will automatically cut off by NO error control feature is set correctly. try lengthening this occurs, press FN + F5 to re-set the display panel and external monitor to clone mode. please...
Users Manual Canada; English
Page 190
... the specific computer model please refer to support graphics may vary depending on an external storage medium. To avoid risk of system memory. Memory (Main System) Part of main system memory allocated to your computer documentation or visit the Toshiba website at high altitude (all temperature references are met: ■ 64-bit Operating System ■ 64-bit CPU, Chipset and BIOS (Basic...
... the specific computer model please refer to support graphics may vary depending on an external storage medium. To avoid risk of system memory. Memory (Main System) Part of main system memory allocated to your computer documentation or visit the Toshiba website at high altitude (all temperature references are met: ■ 64-bit Operating System ■ 64-bit CPU, Chipset and BIOS (Basic...
Users Manual Canada; English
Page 197
... start-up 8-3 TOSHIBA support 8-19 Touch Pad 8-12 USB device 8-14 USB mouse 8-13 Wireless LAN 8-18 eSATA device 8-15 Processor 3-1 R Recovery Media 1-15 problems 8-19 Recovery hard disk drive 1-14 Restarting the computer 1-11 S SD/SDHC/SDXC Card formatting 3-17 note 3-17 Security lock 3-29 Sleep Mode System automatic 3-7 setting 1-8 Soft keys enhanced keyboard 5-2 Sound system Stereo speakers 2-8 headphone jack 2-4 microphone jack 2-4 problems 8-15 T TOSHIBA Assist 3-11 TOSHIBA Bulletin Board 3-14 TOSHIBA ConfigFree 3-11 TOSHIBA DVD-RAM Utility 3-11 TOSHIBA Disc Creator 3-11, 4-16 TOSHIBA HDD...
... start-up 8-3 TOSHIBA support 8-19 Touch Pad 8-12 USB device 8-14 USB mouse 8-13 Wireless LAN 8-18 eSATA device 8-15 Processor 3-1 R Recovery Media 1-15 problems 8-19 Recovery hard disk drive 1-14 Restarting the computer 1-11 S SD/SDHC/SDXC Card formatting 3-17 note 3-17 Security lock 3-29 Sleep Mode System automatic 3-7 setting 1-8 Soft keys enhanced keyboard 5-2 Sound system Stereo speakers 2-8 headphone jack 2-4 microphone jack 2-4 problems 8-15 T TOSHIBA Assist 3-11 TOSHIBA Bulletin Board 3-14 TOSHIBA ConfigFree 3-11 TOSHIBA DVD-RAM Utility 3-11 TOSHIBA Disc Creator 3-11, 4-16 TOSHIBA HDD...
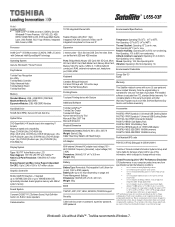
Detailed Specs for Satellite L655 PSK1EC-03F00Q English
Page 1
....6" HD LED, 4GB DDR3, 500GB HDD S-ATA, DVD Super-Multi Double Layer, LAN, Realtek 802.11 bgn Wireless, Integrated Web Camera, HDMI Processor Intel® Core™ i3-350M processor (2.26GHz, 3MB L3 Cache) with 2GB and 4GB modules Ports: Bridge Media Adaptor (SD Card, Mini SD Card, Micro SD Card, SDHC Card, Mult iMedia Card, Memory Stick Card, Memory Stick Pro Card), 2 USB 2.0, 1 USB 2.0/eSATA combo port, RJ45, external microphone port, headphone port, RGB, HDMI Keyboard Temperature: Operating 5°...
....6" HD LED, 4GB DDR3, 500GB HDD S-ATA, DVD Super-Multi Double Layer, LAN, Realtek 802.11 bgn Wireless, Integrated Web Camera, HDMI Processor Intel® Core™ i3-350M processor (2.26GHz, 3MB L3 Cache) with 2GB and 4GB modules Ports: Bridge Media Adaptor (SD Card, Mini SD Card, Micro SD Card, SDHC Card, Mult iMedia Card, Memory Stick Card, Memory Stick Pro Card), 2 USB 2.0, 1 USB 2.0/eSATA combo port, RJ45, external microphone port, headphone port, RGB, HDMI Keyboard Temperature: Operating 5°...


