

Users Manual Canada; English
Page 3
.../Satellite Pro L640/L640D/L645/L645D Series Chapter 2 The Grand Tour Front with the display closed 2-1 Left side 2-2 Right side 2-4 Back 2-5 Underside 2-6 Front with the display open 2-7 Indicators 2-10 Optical disc drives 2-11 AC adaptor 2-15 Chapter 3 Hardware, Utilities and Options Hardware 3-1 Special features 3-7 Utilities and Applications 3-9 Optional devices 3-15 Bridge media slot 3-16 Optional accessories 3-30 Chapter 4 Operating Basics Using the Touch Pad 4-1 Web Camera 4-2 Using the TOSHIBA Face Recognition 4-3 Using optical disc drives 4-6 Writing CD/DVD...
.../Satellite Pro L640/L640D/L645/L645D Series Chapter 2 The Grand Tour Front with the display closed 2-1 Left side 2-2 Right side 2-4 Back 2-5 Underside 2-6 Front with the display open 2-7 Indicators 2-10 Optical disc drives 2-11 AC adaptor 2-15 Chapter 3 Hardware, Utilities and Options Hardware 3-1 Special features 3-7 Utilities and Applications 3-9 Optional devices 3-15 Bridge media slot 3-16 Optional accessories 3-30 Chapter 4 Operating Basics Using the Touch Pad 4-1 Web Camera 4-2 Using the TOSHIBA Face Recognition 4-3 Using optical disc drives 4-6 Writing CD/DVD...

Users Manual Canada; English
Page 4
... Icons G-1 CPU G-1 Memory (Main System G-2 Battery Life G-3 Hard Disk Drive (HDD) Capacity G-3 LCD G-3 Graphics Processor Unit ("GPU G-3 Wireless LAN G-4 User's Manual iv Satellite L640/L640D/L645/L645D/Satellite Pro L640/L640D/L645/L645D Series Battery 6-3 Password Utility 6-10 Starting the computer by password 6-10 Power-up modes 6-11 Panel power on/off 6-11 System automatic Sleep/Hibernation 6-11 Chapter 7 HW Setup Accessing HW Setup 7-1 HW Setup window 7-1 Chapter 8 Troubleshooting Problem solving process 8-1 Hardware and system checklist 8-3 TOSHIBA support 8-20...
... Icons G-1 CPU G-1 Memory (Main System G-2 Battery Life G-3 Hard Disk Drive (HDD) Capacity G-3 LCD G-3 Graphics Processor Unit ("GPU G-3 Wireless LAN G-4 User's Manual iv Satellite L640/L640D/L645/L645D/Satellite Pro L640/L640D/L645/L645D Series Battery 6-3 Password Utility 6-10 Starting the computer by password 6-10 Power-up modes 6-11 Panel power on/off 6-11 System automatic Sleep/Hibernation 6-11 Chapter 7 HW Setup Accessing HW Setup 7-1 HW Setup window 7-1 Chapter 8 Troubleshooting Problem solving process 8-1 Hardware and system checklist 8-3 TOSHIBA support 8-20...

Users Manual Canada; English
Page 6
... of the information contained herein. User's Manual vi TOSHIBA Satellite L640/L640D/L645/L645D/Satellite Pro L640/L640D/L645/L645D Series User's Manual First edition March 2010 Copyright authority for personal use or use beyond that stipulated above (including conversion to the use of HDMI Licensing LLC. The instructions and descriptions it contains are subject to change without the permission of the copyright owner is a violation of Eastman...
... of the information contained herein. User's Manual vi TOSHIBA Satellite L640/L640D/L645/L645D/Satellite Pro L640/L640D/L645/L645D Series User's Manual First edition March 2010 Copyright authority for personal use or use beyond that stipulated above (including conversion to the use of HDMI Licensing LLC. The instructions and descriptions it contains are subject to change without the permission of the copyright owner is a violation of Eastman...

Users Manual Canada; English
Page 12
... harm to the telephone network. Use only No. 26AWG or larger modular cable. Disconnection If you to make changes in their equipment, operations, or procedures. User's Manual xii If these changes might affect your service or the operation of your equipment, the telephone company will be given the opportunity to correct the problem and informed of your fax software before sending messages. Fax...
... harm to the telephone network. Use only No. 26AWG or larger modular cable. Disconnection If you to make changes in their equipment, operations, or procedures. User's Manual xii If these changes might affect your service or the operation of your equipment, the telephone company will be given the opportunity to correct the problem and informed of your fax software before sending messages. Fax...

Users Manual Canada; English
Page 22
... with this manual by -step instructions on Chapter 7, HW Setup, to understand how to learn how this computer, as well as the section on setting up and begin using optional devices and troubleshooting. For example: Read Only Memory (ROM). Preface Congratulations on configuring your computer, basic operations and care, using your Satellite L640/L640D/L645/L645D/Satellite Pro L640/L640D/L645/L645D computer. If you are a new user of computers...
... with this manual by -step instructions on Chapter 7, HW Setup, to understand how to learn how this computer, as well as the section on setting up and begin using optional devices and troubleshooting. For example: Read Only Memory (ROM). Preface Congratulations on configuring your computer, basic operations and care, using your Satellite L640/L640D/L645/L645D/Satellite Pro L640/L640D/L645/L645D computer. If you are a new user of computers...
Users Manual Canada; English
Page 35
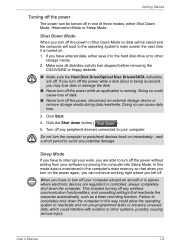
... an external storage device or remove storage media during data read/write. Click Start. 4. Do not turn off your computer aboard an aircraft or in this mode data is running. Sleep Mode If you have to turn off the power while an application is maintained in Shut Down Mode no data will boot to the operating system's main screen the next time it to the hard disk drive...
... an external storage device or remove storage media during data read/write. Click Start. 4. Do not turn off your computer aboard an aircraft or in this mode data is running. Sleep Mode If you have to turn off the power while an application is maintained in Shut Down Mode no data will boot to the operating system's main screen the next time it to the hard disk drive...
Users Manual Canada; English
Page 36
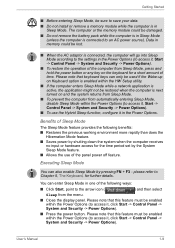
... set by pressing FN + F3 - Please note that keyboard keys can also enable Sleep Mode by the System Sleep Mode feature. ■ Allows the use the Hybrid Sleep function, configure it , Start -> Control Panel -> System and Security -> Power Options). ■ To restore the operation of the panel power off feature. Getting Started ■ Before entering Sleep Mode, be sure to Chapter 5, The Keyboard, for further details. please refer to save your data. ■ Do not install or remove a memory module...
... set by pressing FN + F3 - Please note that keyboard keys can also enable Sleep Mode by the System Sleep Mode feature. ■ Allows the use the Hybrid Sleep function, configure it , Start -> Control Panel -> System and Security -> Power Options). ■ To restore the operation of the panel power off feature. Getting Started ■ Before entering Sleep Mode, be sure to Chapter 5, The Keyboard, for further details. please refer to save your data. ■ Do not install or remove a memory module...
Users Manual Canada; English
Page 59
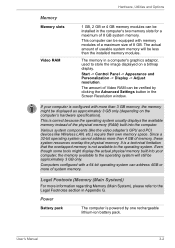
..., used to the operating system. Hardware, Utilities and Options Memory Memory slots Video RAM 1 GB, 2 GB or 4 GB memory modules can be equipped with memory modules of a maximum size of 8 GB. The memory in Appendix G. Start -> Control Panel -> Appearance and Personalization -> Display -> Adjust resolution. This computer can be installed in the Screen Resolution window. The amount of Video RAM can address 4GB or more than 3 GB memory, the memory might display the actual physical memory built into the computer. User's Manual...
..., used to the operating system. Hardware, Utilities and Options Memory Memory slots Video RAM 1 GB, 2 GB or 4 GB memory modules can be equipped with memory modules of a maximum size of 8 GB. The memory in Appendix G. Start -> Control Panel -> Appearance and Personalization -> Display -> Adjust resolution. This computer can be installed in the Screen Resolution window. The amount of Video RAM can address 4GB or more than 3 GB memory, the memory might display the actual physical memory built into the computer. User's Manual...

Users Manual Canada; English
Page 77
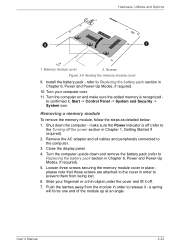
... remove the memory media while the computer is in the Bridge Media slot. the use of the computer. ■ Insert the two memory modules into the computer in order to you may be lost. ■ Do not remove only the miniSD/microSD Card while leaving the adaptor in Sleep or Hibernation Mode. b. The wireless communication switch is turned on LAN is enabled. This section describes how to install and remove optional memory modules...
... remove the memory media while the computer is in the Bridge Media slot. the use of the computer. ■ Insert the two memory modules into the computer in order to you may be lost. ■ Do not remove only the miniSD/microSD Card while leaving the adaptor in Sleep or Hibernation Mode. b. The wireless communication switch is turned on LAN is enabled. This section describes how to install and remove optional memory modules...
Users Manual Canada; English
Page 80
... lift it off the power section in order to the computer. 3. Turn the computer on and make sure the Power indicator is recognized to Replacing the battery pack section in Chapter 6, Power and Power-Up Modes, if required. 10. Remove the AC adaptor and all cables and peripherals connected to release it , Start -> Control Panel -> System and Security -> System icon. User's Manual 3-23 Removing a memory module To remove the memory module, follow the steps as...
... lift it off the power section in order to the computer. 3. Turn the computer on and make sure the Power indicator is recognized to Replacing the battery pack section in Chapter 6, Power and Power-Up Modes, if required. 10. Remove the AC adaptor and all cables and peripherals connected to release it , Start -> Control Panel -> System and Security -> System icon. User's Manual 3-23 Removing a memory module To remove the memory module, follow the steps as...
Users Manual Canada; English
Page 108
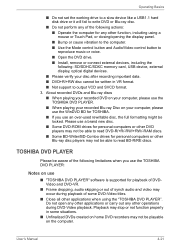
... some DVD-Video titles. ■ Close all other applications when using a mouse or Touch Pad, or closing/opening the display panel. ■ Bump or cause vibration to the computer. ■ Use the Mode control button and Audio/Video control button to reproduce music or voice. ■ Open the DVD drive. ■ Install, remove or connect external devices, including the following: SD/SDHC/SDXC memory card, USB device, external display, optical digital devices. ■ Please verify your computer, please use ■ "TOSHIBA DVD PLAYER" software is supported for...
... some DVD-Video titles. ■ Close all other applications when using a mouse or Touch Pad, or closing/opening the display panel. ■ Bump or cause vibration to the computer. ■ Use the Mode control button and Audio/Video control button to reproduce music or voice. ■ Open the DVD drive. ■ Install, remove or connect external devices, including the following: SD/SDHC/SDXC memory card, USB device, external display, optical digital devices. ■ Please verify your computer, please use ■ "TOSHIBA DVD PLAYER" software is supported for...
Users Manual Canada; English
Page 112
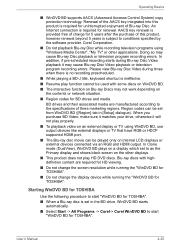
... DVD discs. An Internet connection is set in [Setup] dialogue). When you purchase BD Video, make sure it matches your drive, otherwise it may cause Blu-ray Disc Video playback or television program recording errors. Starting WinDVD BD for TOSHIBA Use the following procedure to start "WinDVD BD for TOSHIBA". Operating Basics ■ WinDVD BD supports AACS (Advanced Accesss Control System) copy protection technology. Region codes can be played only on a display...
... DVD discs. An Internet connection is set in [Setup] dialogue). When you purchase BD Video, make sure it matches your drive, otherwise it may cause Blu-ray Disc Video playback or television program recording errors. Starting WinDVD BD for TOSHIBA Use the following procedure to start "WinDVD BD for TOSHIBA". Operating Basics ■ WinDVD BD supports AACS (Advanced Accesss Control System) copy protection technology. Region codes can be played only on a display...
Users Manual Canada; English
Page 121
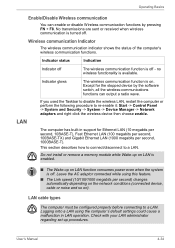
no wireless functionality is turned off. LAN If you used the Taskbar to disable the wireless LAN, restart the computer or perform the following procedure to a LAN. LAN cable types The computer must be configured properly before connecting to re-enable it: Start -> Control Panel -> System and Security -> System -> Device Manager -> Network adapters and right click the wireless device then choose enable. Indicator glows The wireless communication function is on ). Except for Ethernet LAN (10 megabits per second, 10BASE-T), Fast...
no wireless functionality is turned off. LAN If you used the Taskbar to disable the wireless LAN, restart the computer or perform the following procedure to a LAN. LAN cable types The computer must be configured properly before connecting to re-enable it: Start -> Control Panel -> System and Security -> System -> Device Manager -> Network adapters and right click the wireless device then choose enable. Indicator glows The wireless communication function is on ). Except for Ethernet LAN (10 megabits per second, 10BASE-T), Fast...
Users Manual Canada; English
Page 126
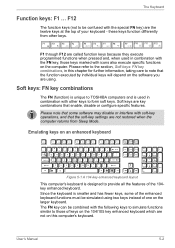
...'s keyboard. these keys function differently from Sleep Mode. Soft keys are using two keys instead of the enhanced keyboard functions must be confused with the following keys to simulate functions similar to note that enable, disable or configure specific features. Please note that some of one on this chapter for further information, taking care to those keys marked with soft-key operations, and that the soft-key settings are not restored when...
...'s keyboard. these keys function differently from Sleep Mode. Soft keys are using two keys instead of the enhanced keyboard functions must be confused with the following keys to simulate functions similar to note that enable, disable or configure specific features. Please note that some of one on this chapter for further information, taking care to those keys marked with soft-key operations, and that the soft-key settings are not restored when...

Users Manual Canada; English
Page 135
... handling instructions. ■ Make sure the battery is securely installed in the computer before attempting to Chapter 8 Troubleshooting for the internal real time clock and calendar function and also maintains the system configuration while the computer is turned off even if the AC adaptor is turned off . It can change the Real Time Clock settings by turning the computer on the power: S The firmware has...
... handling instructions. ■ Make sure the battery is securely installed in the computer before attempting to Chapter 8 Troubleshooting for the internal real time clock and calendar function and also maintains the system configuration while the computer is turned off even if the AC adaptor is turned off . It can change the Real Time Clock settings by turning the computer on the power: S The firmware has...
Users Manual Canada; English
Page 150
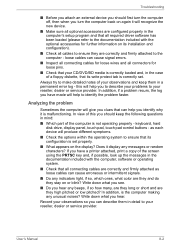
... identify the problem faster. Record your observations so you hear. keyboard, hard disk drive, display panel, touch pad, touch pad control buttons - User's Manual 8-2 If you have made will give you clues that all optional accessories are correctly and firmly attached to the documentation included with the computer, software or operating system. ■ Check that can describe them in a permanent error log - Troubleshooting ■ Before you attach an external device you should...
... identify the problem faster. Record your observations so you hear. keyboard, hard disk drive, display panel, touch pad, touch pad control buttons - User's Manual 8-2 If you have made will give you clues that all optional accessories are correctly and firmly attached to the documentation included with the computer, software or operating system. ■ Check that can describe them in a permanent error log - Troubleshooting ■ Before you attach an external device you should...

Users Manual Canada; English
Page 190
... altitude (all temperature references are met: ■ 64-bit Operating System ■ 64-bit CPU, Chipset and BIOS (Basic Input/Output System) ■ 64-bit Device drivers ■ 64-bit applications Certain device drivers and/or applications may automatically shutdown. User's Manual G-2 To avoid risk of system memory. Legal Footnotes ■ use your computer product only under recommended conditions. Read additional...
... altitude (all temperature references are met: ■ 64-bit Operating System ■ 64-bit CPU, Chipset and BIOS (Basic Input/Output System) ■ 64-bit Device drivers ■ 64-bit applications Certain device drivers and/or applications may automatically shutdown. User's Manual G-2 To avoid risk of system memory. Legal Footnotes ■ use your computer product only under recommended conditions. Read additional...
Users Manual Canada; English
Page 195
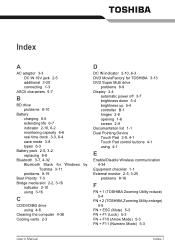
... Battery pack 2-5, 3-2 replacing 6-8 Bluetooth 3-7, 4-32 Bluetooth Stack for Windows by Toshiba 3-11 problems 8-19 Boot Priority 7-3 Bridge media slot 2-2, 3-16 indicator 2-10 using 3-16 C CD/DVD/BD drive using 4-6 Cleaning the computer 4-36 Cooling vents 2-3 D DC IN indicator 2-10, 6-3 DVD MovieFactory for TOSHIBA 3-13 DVD Super Multi drive problems 8-9 Display 3-4 automatic power off 3-7 brightness down 5-4 brightness up 5-4 controller B-1 hinges 2-8 opening 1-6 screen 2-9 Documentation list 1-1 Dual Pointing Device Touch Pad 2-9, 4-1 Touch Pad control buttons 4-1 using 4-1 E Enable/Disable...
... Battery pack 2-5, 3-2 replacing 6-8 Bluetooth 3-7, 4-32 Bluetooth Stack for Windows by Toshiba 3-11 problems 8-19 Boot Priority 7-3 Bridge media slot 2-2, 3-16 indicator 2-10 using 3-16 C CD/DVD/BD drive using 4-6 Cleaning the computer 4-36 Cooling vents 2-3 D DC IN indicator 2-10, 6-3 DVD MovieFactory for TOSHIBA 3-13 DVD Super Multi drive problems 8-9 Display 3-4 automatic power off 3-7 brightness down 5-4 brightness up 5-4 controller B-1 hinges 2-8 opening 1-6 screen 2-9 Documentation list 1-1 Dual Pointing Device Touch Pad 2-9, 4-1 Touch Pad control buttons 4-1 using 4-1 E Enable/Disable...
Users Manual Canada; English
Page 197
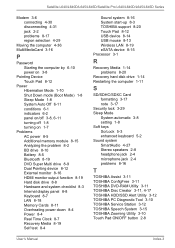
... start-up 8-3 TOSHIBA support 8-20 Touch Pad 8-12 USB device 8-14 USB mouse 8-13 Wireless LAN 8-19 eSATA device 8-15 Processor 3-1 R Recovery Media 1-14 problems 8-20 Recovery hard disk drive 1-14 Restarting the computer 1-11 S SD/SDHC/SDXC Card formatting 3-17 note 3-17 Security lock 3-29 Sleep Mode System automatic 3-8 setting 1-8 Soft keys ScrLock 5-3 enhanced keyboard 5-2 Sound system SmartAudio 4-27 Stereo speakers 2-8 headphone jack 2-4 microphone jack 2-4 problems 8-16 T TOSHIBA Assist 3-11 TOSHIBA ConfigFree 3-11 TOSHIBA DVD-RAM Utility 3-11 TOSHIBA Disc Creator 3-11, 4-17 TOSHIBA HDD...
... start-up 8-3 TOSHIBA support 8-20 Touch Pad 8-12 USB device 8-14 USB mouse 8-13 Wireless LAN 8-19 eSATA device 8-15 Processor 3-1 R Recovery Media 1-14 problems 8-20 Recovery hard disk drive 1-14 Restarting the computer 1-11 S SD/SDHC/SDXC Card formatting 3-17 note 3-17 Security lock 3-29 Sleep Mode System automatic 3-8 setting 1-8 Soft keys ScrLock 5-3 enhanced keyboard 5-2 Sound system SmartAudio 4-27 Stereo speakers 2-8 headphone jack 2-4 microphone jack 2-4 problems 8-16 T TOSHIBA Assist 3-11 TOSHIBA ConfigFree 3-11 TOSHIBA DVD-RAM Utility 3-11 TOSHIBA Disc Creator 3-11, 4-17 TOSHIBA HDD...

Detailed Specs for Satellite L645 PSK0GC-014001 English
Page 1
... with TruBrite™ Native LCD Panel Resolution: 1366x768x16.7 million colours External Support and Max. Zero free slots. Life without notice. Each Slot has 2GB. SD, Memory Stick, Multi Media Card), 2 USB 2.0, 1 USB 2.0/eSATA combo port, RJ45, external microphone port, headphone port, RGB, HDMI Keyboard Canadian Bilingual Keyboard 87 keys with 13 Function keys Color: Flat Half Glossy Black Pointing Device Touchpad Pointing device with Gesture Additional Software Toshiba ConfigFree™ Toshiba Disc Creator Toshiba DVD Player Norton Internet Security Trial Microsoft Office 2007...
... with TruBrite™ Native LCD Panel Resolution: 1366x768x16.7 million colours External Support and Max. Zero free slots. Life without notice. Each Slot has 2GB. SD, Memory Stick, Multi Media Card), 2 USB 2.0, 1 USB 2.0/eSATA combo port, RJ45, external microphone port, headphone port, RGB, HDMI Keyboard Canadian Bilingual Keyboard 87 keys with 13 Function keys Color: Flat Half Glossy Black Pointing Device Touchpad Pointing device with Gesture Additional Software Toshiba ConfigFree™ Toshiba Disc Creator Toshiba DVD Player Norton Internet Security Trial Microsoft Office 2007...


