User Manual
Page 5
... let them to make any changes necessary to send any other electronic device, including Fax machines, to maintain uninterrupted service. If the equipment is causing harm to the telephone network, the telephone company may occasionally be necessary for any person to use a computer or other number for which charges exceed local or long-distance transmission charges.) 5 Connection to party line...
... let them to make any changes necessary to send any other electronic device, including Fax machines, to maintain uninterrupted service. If the equipment is causing harm to the telephone network, the telephone company may occasionally be necessary for any person to use a computer or other number for which charges exceed local or long-distance transmission charges.) 5 Connection to party line...
User Manual
Page 30
... without changing the internal storage drive partitions 68 Creating recovery DVDs/media 70 Restoring from recovery DVDs/media 73 Erasing the Internal Storage Drive 75 Checking the internal storage drive operating status 76 Installing drivers and applications 77 Using the TouchPad 77 Adjusting TouchPad™ settings 80 Disabling or enabling the TouchPad 81 Using external display devices 81 Selecting video cables 82 Connecting an HDMI™-compatible television or external display device............82 Connecting to a TV using HDMI™-CEC 82 Connecting an external monitor or...
... without changing the internal storage drive partitions 68 Creating recovery DVDs/media 70 Restoring from recovery DVDs/media 73 Erasing the Internal Storage Drive 75 Checking the internal storage drive operating status 76 Installing drivers and applications 77 Using the TouchPad 77 Adjusting TouchPad™ settings 80 Disabling or enabling the TouchPad 81 Using external display devices 81 Selecting video cables 82 Connecting an HDMI™-compatible television or external display device............82 Connecting to a TV using HDMI™-CEC 82 Connecting an external monitor or...
User Manual
Page 34
34 Contents Using a user password 158 Deleting a user password 159 TOSHIBA Face Recognition Utility 160 TOSHIBA PC Diagnostic Tool Utility 161 TOSHIBA HDD Protection Utility 162 Mouse Utility 163 TOSHIBA Hardware Setup 164 USB Sleep and Charge Utility 166 Starting the USB Sleep and Charge Utility.......166 USB Sleep and Charge 166 Enabling USB Sleep and Charge 168 Power supply mode settings 168 TOSHIBA Zooming Utility 170 TOSHIBA Button Support 171 TOSHIBA Accessibility 172 Fingerprint Authentication Utility 173 Fingerprint utility limitations 173 Using the Fingerprint ...
34 Contents Using a user password 158 Deleting a user password 159 TOSHIBA Face Recognition Utility 160 TOSHIBA PC Diagnostic Tool Utility 161 TOSHIBA HDD Protection Utility 162 Mouse Utility 163 TOSHIBA Hardware Setup 164 USB Sleep and Charge Utility 166 Starting the USB Sleep and Charge Utility.......166 USB Sleep and Charge 166 Enabling USB Sleep and Charge 168 Power supply mode settings 168 TOSHIBA Zooming Utility 170 TOSHIBA Button Support 171 TOSHIBA Accessibility 172 Fingerprint Authentication Utility 173 Fingerprint utility limitations 173 Using the Fingerprint ...
User Manual
Page 53
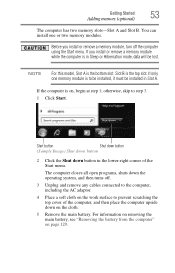
... closes all open programs, shuts down the operating system, and then turns off the computer using the Start menu. Getting Started 53 Adding memory (optional) The computer has two memory slots-Slot A and Slot B. Slot B is the bottom slot. If the computer is in Sleep or Hibernation mode, data will be installed in the lower-right corner of the Start menu. If you install or remove a memory module, turn off . 3 Unplug and remove any cables connected to the...
... closes all open programs, shuts down the operating system, and then turns off the computer using the Start menu. Getting Started 53 Adding memory (optional) The computer has two memory slots-Slot A and Slot B. Slot B is the bottom slot. If the computer is in Sleep or Hibernation mode, data will be installed in the lower-right corner of the Start menu. If you install or remove a memory module, turn off . 3 Unplug and remove any cables connected to the...
User Manual
Page 57
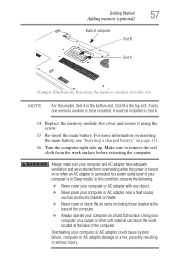
... one memory module is turned on a hard flat surface. Make sure to remove the soft cloth from overheating when the power is to a power outlet (even if your computer and AC adaptor have adequate ventilation and are protected from the work surface before restarting the computer. Always make sure your computer is connected to be installed, it must be installed in Slot A. 14 Replace the memory module slot cover...
... one memory module is turned on a hard flat surface. Make sure to remove the soft cloth from overheating when the power is to a power outlet (even if your computer and AC adaptor have adequate ventilation and are protected from the work surface before restarting the computer. Always make sure your computer is connected to be installed, it must be installed in Slot A. 14 Replace the memory module slot cover...
User Manual
Page 60
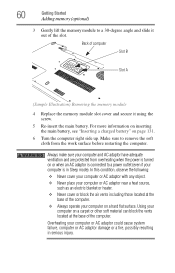
... computer. Make sure to a power outlet (even if your computer on a hard flat surface. Back of computer Slot B Slot A (Sample Illustration) Removing the memory module 4 Replace the memory module slot cover and secure it out of the slot. Overheating your computer and AC adaptor have adequate ventilation and are protected from overheating when the power is turned on page 131. 6 Turn the computer right side up. Using your...
... computer. Make sure to a power outlet (even if your computer on a hard flat surface. Back of computer Slot B Slot A (Sample Illustration) Removing the memory module 4 Replace the memory module slot cover and secure it out of the slot. Overheating your computer and AC adaptor have adequate ventilation and are protected from overheating when the power is turned on page 131. 6 Turn the computer right side up. Using your...

User Manual
Page 61
... option restores the original factory image to your internal storage drive, returning your computer to its out-of-box state. (Recommended recovery method) See "Recovering to this : ❖ Click Start, Control Panel, System and Security, and then System. Getting Started 61 Recovering the Internal Storage Drive 7 Reconnect the cables. 8 Restart the computer. otherwise, click Cancel. Checking total memory When you add or remove a memory module, you were trying to work. Installed memory (RAM...
... option restores the original factory image to your internal storage drive, returning your computer to its out-of-box state. (Recommended recovery method) See "Recovering to this : ❖ Click Start, Control Panel, System and Security, and then System. Getting Started 61 Recovering the Internal Storage Drive 7 Reconnect the cables. 8 Restart the computer. otherwise, click Cancel. Checking total memory When you add or remove a memory module, you were trying to work. Installed memory (RAM...
User Manual
Page 82
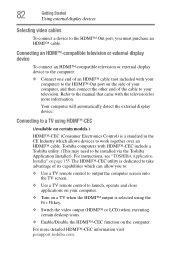
... external display device. For instructions, see "TOSHIBA Application Installer" on page 155. Refer to the manual that came with HDMI™-CEC include a Toshiba utility. (This may need to be installed via the Toshiba Application Installer). Connecting to a TV using HDMI™-CEC (Available on certain models.) HDMI™-CEC (Consumer Electronics Control) is selected using the Fn + F5 key. ❖ Switch the video output (HDMI™ or LCD) when executing certain desktop icons. ❖ Enable/Disable the HDMI...
... external display device. For instructions, see "TOSHIBA Application Installer" on page 155. Refer to the manual that came with HDMI™-CEC include a Toshiba utility. (This may need to be installed via the Toshiba Application Installer). Connecting to a TV using HDMI™-CEC (Available on certain models.) HDMI™-CEC (Consumer Electronics Control) is selected using the Fn + F5 key. ❖ Switch the video output (HDMI™ or LCD) when executing certain desktop icons. ❖ Enable/Disable the HDMI...

User Manual
Page 83
... the computer. 3 Connect the device's power cable to your computer if you want takes effect. This hot key cycles through the settings in the following order (the last two options are only available with the monitor to see if you first need to install new software. 2 Connect the monitor's video cable to the RGB (monitor) port on the computer Once you have connected an external display device, you can choose to use the display hot key (Fn + F5...
... the computer. 3 Connect the device's power cable to your computer if you want takes effect. This hot key cycles through the settings in the following order (the last two options are only available with the monitor to see if you first need to install new software. 2 Connect the monitor's video cable to the RGB (monitor) port on the computer Once you have connected an external display device, you can choose to use the display hot key (Fn + F5...
User Manual
Page 115
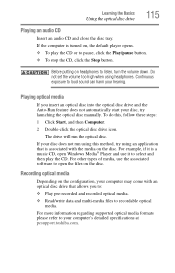
..., open Windows Media® Player and use the associated software to loud sound can harm your computer's detailed specifications at pcsupport.toshiba.com. Before putting on the disc. To do this method, try launching the optical disc manually. For example, if it is associated with the media on headphones to your hearing. For more information regarding supported optical media formats please refer to listen, turn the volume...
..., open Windows Media® Player and use the associated software to loud sound can harm your computer's detailed specifications at pcsupport.toshiba.com. Before putting on the disc. To do this method, try launching the optical disc manually. For example, if it is associated with the media on headphones to your hearing. For more information regarding supported optical media formats please refer to listen, turn the volume...
User Manual
Page 159
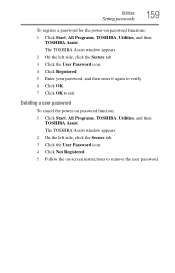
... on-screen instructions to exit. The TOSHIBA Assist window appears. 2 On the left side, click the Secure tab. 3 Click the User Password icon. 4 Click Registered. 5 Enter your password, and then enter it again to verify. 6 Click OK. 7 Click OK to remove the user password. Deleting a user password To cancel the power-on password functions: 1 Click Start, All Programs, TOSHIBA, Utilities, and then TOSHIBA Assist. Utilities Setting passwords 159 To register a password for the power-on password function: 1 Click Start...
... on-screen instructions to exit. The TOSHIBA Assist window appears. 2 On the left side, click the Secure tab. 3 Click the User Password icon. 4 Click Registered. 5 Enter your password, and then enter it again to verify. 6 Click OK. 7 Click OK to remove the user password. Deleting a user password To cancel the power-on password functions: 1 Click Start, All Programs, TOSHIBA, Utilities, and then TOSHIBA Assist. Utilities Setting passwords 159 To register a password for the power-on password function: 1 Click Start...
User Manual
Page 177
... TOSHIBA's authorized service providers. The collected information includes device operation time and number of actuations or status changes (e.g.: number of power button and Fn key combination uses, and AC adaptor, battery, LCD, fan, HDD, sound volume, wireless communication switch, docking and USB information), date of residence (e.g., European Union). This information is used to entities located outside of your country or region of initial system use, and also computer and device usage (e.g.: power settings, battery temperature and recharging, CPU, memory...
... TOSHIBA's authorized service providers. The collected information includes device operation time and number of actuations or status changes (e.g.: number of power button and Fn key combination uses, and AC adaptor, battery, LCD, fan, HDD, sound volume, wireless communication switch, docking and USB information), date of residence (e.g., European Union). This information is used to entities located outside of your country or region of initial system use, and also computer and device usage (e.g.: power settings, battery temperature and recharging, CPU, memory...
User Manual
Page 183
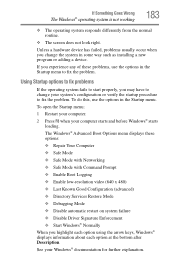
... Known Good Configuration (advanced) ❖ Directory Services Restore Mode ❖ Debugging Mode ❖ Disable automatic restart on system failure ❖ Disable Driver Signature Enforcement ❖ Start Windows® Normally When you change your system's configuration or verify the startup procedure to fix the problem. See your computer starts and before Windows® starts loading. The Windows® Advanced Boot Options menu displays these problems, use the options in some way such as installing a new program or adding a device. If...
... Known Good Configuration (advanced) ❖ Directory Services Restore Mode ❖ Debugging Mode ❖ Disable automatic restart on system failure ❖ Disable Driver Signature Enforcement ❖ Start Windows® Normally When you change your system's configuration or verify the startup procedure to fix the problem. See your computer starts and before Windows® starts loading. The Windows® Advanced Boot Options menu displays these problems, use the options in some way such as installing a new program or adding a device. If...
User Manual
Page 188
... the display options. Display problems Here are using a different make sure the display priority is blank. The screen reactivates and allows you type, strange things happen or nothing happens, the problem may have connected an external keyboard and the operating system displays one or more keyboard error messages. You may have registered a password, press any key to update your keyboard driver. If no password is turned on. Refer to the keyboard itself. If you have activated...
... the display options. Display problems Here are using a different make sure the display priority is blank. The screen reactivates and allows you type, strange things happen or nothing happens, the problem may have connected an external keyboard and the operating system displays one or more keyboard error messages. You may have registered a password, press any key to update your keyboard driver. If no password is turned on. Refer to the keyboard itself. If you have activated...

User Manual
Page 205
... software. 4 Restart the Windows® operating system. 5 Use the new hardware or software for ports that support the "USB Sleep and Charge function." If Something Goes Wrong Develop good computing habits 205 3 Install one or more information, see "USB Sleep and Charge Utility" on certain models.) ❖ The setting of "USB Sleep and Charge function" may be used, change the setting to Disabled. ❖ Make sure that you have the "USB Sleep and Charge function"-compatible icon ( ), if you are connected to Enabled the "USB Wakeup function...
... software. 4 Restart the Windows® operating system. 5 Use the new hardware or software for ports that support the "USB Sleep and Charge function." If Something Goes Wrong Develop good computing habits 205 3 Install one or more information, see "USB Sleep and Charge Utility" on certain models.) ❖ The setting of "USB Sleep and Charge function" may be used, change the setting to Disabled. ❖ Make sure that you have the "USB Sleep and Charge function"-compatible icon ( ), if you are connected to Enabled the "USB Wakeup function...
User Manual
Page 234
... used to create a complete screen image. See also Sleep, Suspend. A small image displayed on the screen that provides electronic mail, the World Wide Web, and other line of computers that represents a function, file, or program. internal device - See also cache, CPU cache, L1 cache. Memory cache installed on the computer again, your work is running and have the operating system automatically recognize the change. HDMI-CEC (HDMI...
... used to create a complete screen image. See also Sleep, Suspend. A small image displayed on the screen that provides electronic mail, the World Wide Web, and other line of computers that represents a function, file, or program. internal device - See also cache, CPU cache, L1 cache. Memory cache installed on the computer again, your work is running and have the operating system automatically recognize the change. HDMI-CEC (HDMI...
User Manual
Page 242
... removing 129 RTC memory 119 running computer on battery power 118 safety precautions 132 setting notifications 125 battery indicator light 123 BIOS Setup see TOSHIBA Hardware Setup Blu-ray Disc™ using 109 button eco Utility™ 128 Illumination ON/OFF button 112 mute button 112 play/pause button 112 power 50 Shut down 53, 89 start 138 volume increase/decrease buttons 112 Wireless antenna ON/OFF button 112 buttons eject, optical disc drive 111 manual eject hole, optical disc drive 111 media control buttons...
... removing 129 RTC memory 119 running computer on battery power 118 safety precautions 132 setting notifications 125 battery indicator light 123 BIOS Setup see TOSHIBA Hardware Setup Blu-ray Disc™ using 109 button eco Utility™ 128 Illumination ON/OFF button 112 mute button 112 play/pause button 112 power 50 Shut down 53, 89 start 138 volume increase/decrease buttons 112 Wireless antenna ON/OFF button 112 buttons eject, optical disc drive 111 manual eject hole, optical disc drive 111 media control buttons...

User Manual
Page 244
... using 143 Help and Support Windows® operating system 184 Hibernation mode 87 configuring 91 configuring options 92 hot key 218 powering down 92 Shut down 92 starting again from 94 using 91 hot key disabling or enabling wireless devices 221 display brightness 220 Hibernation mode 218 keyboard overlays 224 Lock (Instant security) 215 Output (Display switch) 219 power plan 216 Sleep mode 217 using to set a power plan 127 volume mute 214 Zoom (Display resolution) 223 zooming in 224 zooming out 224 Hot Key Cards 210 Hot key functions...
... using 143 Help and Support Windows® operating system 184 Hibernation mode 87 configuring 91 configuring options 92 hot key 218 powering down 92 Shut down 92 starting again from 94 using 91 hot key disabling or enabling wireless devices 221 display brightness 220 Hibernation mode 218 keyboard overlays 224 Lock (Instant security) 215 Output (Display switch) 219 power plan 216 Sleep mode 217 using to set a power plan 127 volume mute 214 Zoom (Display resolution) 223 zooming in 224 zooming out 224 Hot Key Cards 210 Hot key functions...
User Manual
Page 247
... found 184 USB Sleep and Charge cannot use 205 USB Wakeup function does not work 205 warning resume failure 181 Windows® operating system not working 182 program, starting 102 program, starting from Start menu 103 programs not running correctly 191 projector connecting 83 R real-time clock (RTC) battery 119 recording sounds 142 recovery checking internal storage drive operating status 76 creating recovery DVDs/media 70 erasing internal storage drive 75 installing drivers and applications 77 internal storage drive 61 out...
... found 184 USB Sleep and Charge cannot use 205 USB Wakeup function does not work 205 warning resume failure 181 Windows® operating system not working 182 program, starting 102 program, starting from Start menu 103 programs not running correctly 191 projector connecting 83 R real-time clock (RTC) battery 119 recording sounds 142 recovery checking internal storage drive operating status 76 creating recovery DVDs/media 70 erasing internal storage drive 75 installing drivers and applications 77 internal storage drive 61 out...
User Manual
Page 249
... quickly 89 options 87 turning on power 50 U USB Sleep and Charge cannot use 205 USB Sleep and Charge Utility 166 USB Wakeup function does not work 205 USB-compatible printer 85 user password, deleting 159 user password, setting 158 using a microphone 142 computer lock 98 DVDs 108 ExpressCard® 144 Hibernation mode 91 hot key to set a power plan 127 Memory card reader 145 optical disc drive 108 Shut down command 89 Sleep mode 94 TOSHIBA eco power plan 128 TouchPad™ 77 Web Camera 143 using the keyboard 100 Utilities 149 V video projector adjusting display...
... quickly 89 options 87 turning on power 50 U USB Sleep and Charge cannot use 205 USB Sleep and Charge Utility 166 USB Wakeup function does not work 205 USB-compatible printer 85 user password, deleting 159 user password, setting 158 using a microphone 142 computer lock 98 DVDs 108 ExpressCard® 144 Hibernation mode 91 hot key to set a power plan 127 Memory card reader 145 optical disc drive 108 Shut down command 89 Sleep mode 94 TOSHIBA eco power plan 128 TouchPad™ 77 Web Camera 143 using the keyboard 100 Utilities 149 V video projector adjusting display...


