

User Guide
Page 31
... Windows® Explorer ...96 Starting a program using the Start Search field 97 Saving your work 97 Printing your work 99 Backing up your work 100 Restoring your work 101 Using the optical drive 101 Optical drive components 102 Media control buttons 103 Inserting an optical disc 103 Playing an audio CD... media 105 Recording optical media 106 Removing a disc with the computer on...........106 Removing a disc with the computer off ..........107 Caring for optical discs 107 Toshiba's online resources 107
... Windows® Explorer ...96 Starting a program using the Start Search field 97 Saving your work 97 Printing your work 99 Backing up your work 100 Restoring your work 101 Using the optical drive 101 Optical drive components 102 Media control buttons 103 Inserting an optical disc 103 Playing an audio CD... media 105 Recording optical media 106 Removing a disc with the computer on...........106 Removing a disc with the computer off ..........107 Caring for optical discs 107 Toshiba's online resources 107

User Guide
Page 67
... using the Recovery media If you need to recover your information will be lost during the recovery process) and your computer to begin the restoration. NOTE The size of the C: drive. A confirmation message appears, reminding you make your optical drive and power on your work to ...Be sure you can rebuild the system using the utilities burned to DVDs (refer to "Creating Recovery DVDs" on your C: drive: 1 On the Toshiba Recovery Wizard screen, select Recovery of Factory Default Software, and then click Next. 2 Select Recover to its default factory state, you have saved ...
... using the Recovery media If you need to recover your information will be lost during the recovery process) and your computer to begin the restoration. NOTE The size of the C: drive. A confirmation message appears, reminding you make your optical drive and power on your work to ...Be sure you can rebuild the system using the utilities burned to DVDs (refer to "Creating Recovery DVDs" on your C: drive: 1 On the Toshiba Recovery Wizard screen, select Recovery of Factory Default Software, and then click Next. 2 Select Recover to its default factory state, you have saved ...
User Guide
Page 70
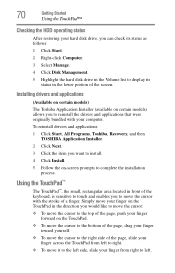
... the page, slide your finger from left . Installing drivers and applications (Available on certain models) The Toshiba Application Installer (available on -screen prompts to reinstall the drivers and applications that were originally bundled with the...disk drive, you to complete the installation process. To reinstall drivers and applications: 1 Click Start, All Programs, Toshiba, Recovery, and then TOSHIBA Application Installer. 2 Click Next. 3 Click the item you want to install. 4 Click Install. 5 Follow... TouchPad™ Checking the HDD operating status After restoring your computer.
... the page, slide your finger from left . Installing drivers and applications (Available on certain models) The Toshiba Application Installer (available on -screen prompts to reinstall the drivers and applications that were originally bundled with the...disk drive, you to complete the installation process. To reinstall drivers and applications: 1 Click Start, All Programs, Toshiba, Recovery, and then TOSHIBA Application Installer. 2 Click Next. 3 Click the item you want to install. 4 Click Install. 5 Follow... TouchPad™ Checking the HDD operating status After restoring your computer.

User Guide
Page 101
...features that came with an optical drive. Using the optical drive Optical storage has become the preferred medium for information on restoring files. TECHNICAL NOTE: When restoring files, the backup program prompts you if you play DVDs from region 1 to region 2 and back to region 1... is recommended that you try to overwrite a file that last region. Learning the Basics Using the optical drive 101 Restoring your work To restore information from your backup media to your operating system documentation for software, music, and video. On the fourth change regions four ...
...features that came with an optical drive. Using the optical drive Optical storage has become the preferred medium for information on restoring files. TECHNICAL NOTE: When restoring files, the backup program prompts you if you play DVDs from region 1 to region 2 and back to region 1... is recommended that you try to overwrite a file that last region. Learning the Basics Using the optical drive 101 Restoring your work To restore information from your backup media to your operating system documentation for software, music, and video. On the fourth change regions four ...
User Guide
Page 156
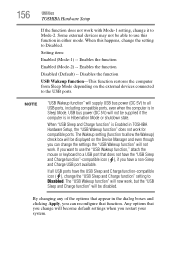
... the "USB Sleep and Charge function" will not work. Any options that function. Disables the function USB Wakeup function-This function restores the computer from Sleep Mode depending on the Device Manager and even though you can reconfigure that you change will not be able ...Enables the function Enabled (Mode-2) -- Enables the function Disabled (Default) -- Some external devices may not be supplied if the computer is in TOSHIBA Hardware Setup, the "USB Wakeup function" does not work with Mode-1 setting, change the settings the "USB Wakeup function" will be displayed on...
... the "USB Sleep and Charge function" will not work. Any options that function. Disables the function USB Wakeup function-This function restores the computer from Sleep Mode depending on the Device Manager and even though you can reconfigure that you change will not be able ...Enables the function Enabled (Mode-2) -- Enables the function Disabled (Default) -- Some external devices may not be supplied if the computer is in TOSHIBA Hardware Setup, the "USB Wakeup function" does not work with Mode-1 setting, change the settings the "USB Wakeup function" will be displayed on...
User Guide
Page 173
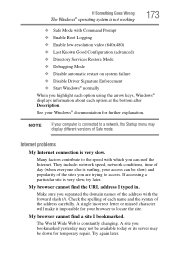
... ❖ Safe Mode with Command Prompt ❖ Enable Boot Logging ❖ Enable low-resolution video (640x480) ❖ Last Known Good Configuration (advanced) ❖ Directory Services Restore Mode ❖ Debugging Mode ❖ Disable automatic restart on system failure ❖ Disable Driver Signature Enforcement ❖ Start Windows® normally When you separated the...
... ❖ Safe Mode with Command Prompt ❖ Enable Boot Logging ❖ Enable low-resolution video (640x480) ❖ Last Known Good Configuration (advanced) ❖ Directory Services Restore Mode ❖ Debugging Mode ❖ Disable automatic restart on system failure ❖ Disable Driver Signature Enforcement ❖ Start Windows® normally When you separated the...
User Guide
Page 192
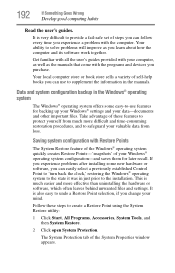
... recall. If you experience problems after installing some easy-to-use to provide a fail-safe set of these steps to undo a Restore Point selection, if you experience a problem with the programs and devices you learn about how the computer and its software work together.... guides. Your ability to the installation. Get familiar with all the user's guides provided with Restore Points The System Restore feature of the Windows® operating system quickly creates Restore Points-'snapshots' of the System Properties window appears. Data and system configuration backup in the Windows&#...
... recall. If you experience problems after installing some easy-to-use to provide a fail-safe set of these steps to undo a Restore Point selection, if you experience a problem with the programs and devices you learn about how the computer and its software work together.... guides. Your ability to the installation. Get familiar with all the user's guides provided with Restore Points The System Restore feature of the Windows® operating system quickly creates Restore Points-'snapshots' of the System Properties window appears. Data and system configuration backup in the Windows&#...

User Guide
Page 193
... Finish, and then Yes to begin the system restore. 8 Your Windows® operating system configuration will now be restored to the state it with the current date and time, and displays a message that the restore point was created, and then the computer will be...and then System Restore. 2 Click Next. 3 A list of previously created Restore Points displays, showing the timestamp and description of the selected Restore Point. 5 Verify that the Restore Point you can re-establish your Windows® configuration using the saved Restore Point. Other Restore Points may contain Restore Points that ...
... Finish, and then Yes to begin the system restore. 8 Your Windows® operating system configuration will now be restored to the state it with the current date and time, and displays a message that the restore point was created, and then the computer will be...and then System Restore. 2 Click Next. 3 A list of previously created Restore Points displays, showing the timestamp and description of the selected Restore Point. 5 Verify that the Restore Point you can re-establish your Windows® configuration using the saved Restore Point. Other Restore Points may contain Restore Points that ...
User Guide
Page 194
.... An external hard drive is recommended in the drive. 2 Click Start. 3 Click Control Panel. 4 Click System and Maintenance. 5 Click Backup and Restore Center. 6 You can choose to complete your backup. Follow these steps to back up your computer or files to (or 'burn') as well as ... adaptor before continuing. 1 Prepare your backup target by connecting it , the next most valuable component of the optical drives built into recent Toshiba portable computer models can make the data inaccessible or even destroy it and/or inserting a blank optical disc in case the internal storage drive...
.... An external hard drive is recommended in the drive. 2 Click Start. 3 Click Control Panel. 4 Click System and Maintenance. 5 Click Backup and Restore Center. 6 You can choose to complete your backup. Follow these steps to back up your computer or files to (or 'burn') as well as ... adaptor before continuing. 1 Prepare your backup target by connecting it , the next most valuable component of the optical drives built into recent Toshiba portable computer models can make the data inaccessible or even destroy it and/or inserting a blank optical disc in case the internal storage drive...

User Guide
Page 195
... to the installation, undoing any changes that the installation process introduced. ❖ Back up your critical data (see the section titled Restore Points). This will make it was in case you will then be very difficult to help ensure safe and easy installation of hardware ... system after each successive installation. This will clean up your data or your factory Restore/Reconfiguration CD(s) on hand in prior to do so. If anything , use the System Restore utility to set a Restore Point (see "Backing up anything that the installation utility left behind. ❖ Do...
... to the installation, undoing any changes that the installation process introduced. ❖ Back up your critical data (see the section titled Restore Points). This will make it was in case you will then be very difficult to help ensure safe and easy installation of hardware ... system after each successive installation. This will clean up your data or your factory Restore/Reconfiguration CD(s) on hand in prior to do so. If anything , use the System Restore utility to set a Restore Point (see "Backing up anything that the installation utility left behind. ❖ Do...

User Guide
Page 232
... drive connecting 76 external display, adjusting 74 F FAT (File Allocation Table) 181 file extensions 99 file, backing up 91 files backing up 100 printing 99 restoring 101 saving 97 fingerprint authentication 161 Fingerprint Authentication Utility using 161 FM tuner using 135 Fn keys 93 function keys 93 H hardware conflicts 174 resolving...
... drive connecting 76 external display, adjusting 74 F FAT (File Allocation Table) 181 file extensions 99 file, backing up 91 files backing up 100 printing 99 restoring 101 saving 97 fingerprint authentication 161 Fingerprint Authentication Utility using 161 FM tuner using 135 Fn keys 93 function keys 93 H hardware conflicts 174 resolving...


