
User Guide
Page 27
.......... 51 Keeping yourself comfortable 52 Precautions 55 Setting up your computer 57 Setting up your software 57 Registering your computer with Toshiba ......... 58 Adding external devices 58 Connecting an optional external USB diskette drive 59 Connecting to a power source 59 Charging the... the display panel 63 Turning on the power 64 Activating the power-on password 64 Using the TouchPadTM 65 Installing additional memory (optional 67 Removing a memory module 74 Connecting a mouse 77 Connecting a printer 77 Connecting a USB printer 77 Connecting a parallel printer 78 Setting...
.......... 51 Keeping yourself comfortable 52 Precautions 55 Setting up your computer 57 Setting up your software 57 Registering your computer with Toshiba ......... 58 Adding external devices 58 Connecting an optional external USB diskette drive 59 Connecting to a power source 59 Charging the... the display panel 63 Turning on the power 64 Activating the power-on password 64 Using the TouchPadTM 65 Installing additional memory (optional 67 Removing a memory module 74 Connecting a mouse 77 Connecting a printer 77 Connecting a USB printer 77 Connecting a parallel printer 78 Setting...

User Guide
Page 33
...hardware conflict 214 A plan of action 214 Resolving hardware conflicts on your own .... 215 Fixing a problem with Device Manager .......... 217 Memory module problems 219 Power and the batteries 220 Keyboard problems 221 Display problems 222 Disk drive problems 224 DVD-ROM or multi-function ...Modem problems 232 Develop good computing habits 232 If you need further assistance 233 Before you call 234 Contacting Toshiba 234 Other Toshiba Internet Web sites 236 Toshiba's worldwide offices 236 Appendix A: Hot Keys 239 Volume Mute 239 Instant password security 239 Power usage mode ...
...hardware conflict 214 A plan of action 214 Resolving hardware conflicts on your own .... 215 Fixing a problem with Device Manager .......... 217 Memory module problems 219 Power and the batteries 220 Keyboard problems 221 Display problems 222 Disk drive problems 224 DVD-ROM or multi-function ...Modem problems 232 Develop good computing habits 232 If you need further assistance 233 Before you call 234 Contacting Toshiba 234 Other Toshiba Internet Web sites 236 Toshiba's worldwide offices 236 Appendix A: Hot Keys 239 Volume Mute 239 Instant password security 239 Power usage mode ...

User Guide
Page 42
... jack allows you to connect an audio device to connect an external monitor. The SD (Secure Digital) card slot holds a stamp-size flash memory card with a variety of memory. 42 Finding Your Way Around Right side The RGB (monitor) port allows you to and hear it can be used with various capacities...
... jack allows you to connect an audio device to connect an external monitor. The SD (Secure Digital) card slot holds a stamp-size flash memory card with a variety of memory. 42 Finding Your Way Around Right side The RGB (monitor) port allows you to and hear it can be used with various capacities...

User Guide
Page 58
... on page 57. Before starting to use your computer, you . Registering your computer with Toshiba Registering your computer lets Toshiba keep you up-to-date with Toshiba by double-clicking the icon on your software first. You can register your computer with information...continue. Adding external devices Before adding external devices, Toshiba recommends setting up your desktop. 58 Getting Started Setting up your Toshiba limited warranty worldwide at no charge to you may also want to: ❖ Add more memory (see "Installing additional memory (optional)" on page 67) ❖ Connect...
... on page 57. Before starting to use your computer, you . Registering your computer with Toshiba Registering your computer lets Toshiba keep you up-to-date with Toshiba by double-clicking the icon on your software first. You can register your computer with information...continue. Adding external devices Before adding external devices, Toshiba recommends setting up your desktop. 58 Getting Started Setting up your Toshiba limited warranty worldwide at no charge to you may also want to: ❖ Add more memory (see "Installing additional memory (optional)" on page 67) ❖ Connect...
User Guide
Page 67
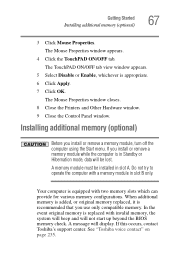
...ON/OFF tab. Installing additional memory (optional) Before you use only compatible memory. A memory module must be lost. A message will not start up beyond the BIOS memory check. If this occurs, contact Toshiba's support center. Do not try to operate the computer with a memory module in slot A. Your ...or Enable, whichever is equipped with invalid memory, the system will beep and will display. When additional memory is added, or original memory replaced, it is in Standby or Hibernation mode, data will be installed in slot B only. See "Toshiba voice contact" on page 235. The ...
...ON/OFF tab. Installing additional memory (optional) Before you use only compatible memory. A memory module must be lost. A message will not start up beyond the BIOS memory check. If this occurs, contact Toshiba's support center. Do not try to operate the computer with a memory module in slot A. Your ...or Enable, whichever is equipped with invalid memory, the system will beep and will display. When additional memory is added, or original memory replaced, it is in Standby or Hibernation mode, data will be installed in slot B only. See "Toshiba voice contact" on page 235. The ...
User Guide
Page 68
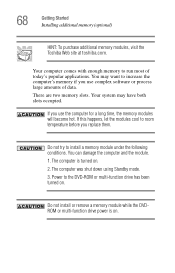
... the DVDROM or multi-function drive power is turned on. 2. 68 Getting Started Installing additional memory (optional) HINT: To purchase additional memory modules, visit the Toshiba Web site at toshiba.com. If this happens, let the modules cool to install a memory module under the following conditions. You can damage the computer and the module. 1. Your...
... the DVDROM or multi-function drive power is turned on. 2. 68 Getting Started Installing additional memory (optional) HINT: To purchase additional memory modules, visit the Toshiba Web site at toshiba.com. If this happens, let the modules cool to install a memory module under the following conditions. You can damage the computer and the module. 1. Your...

User Guide
Page 69
When removing the computer's power button panel to install additional memory, be careful not to pry off . See "Turn Off or Shut down command" on , turn it off the panel You can pry the panel out ... damage the display or circuit board. Starting at the left or right side, carefully wedge the flat-head screwdriver between the Getting Started Installing additional memory (optional) 69 You will need a standard Phillips No.1 screwdriver and a small flat-head screwdriver to the computer. 3 Open the display panel and remove the panel...
When removing the computer's power button panel to install additional memory, be careful not to pry off . See "Turn Off or Shut down command" on , turn it off the panel You can pry the panel out ... damage the display or circuit board. Starting at the left or right side, carefully wedge the flat-head screwdriver between the Getting Started Installing additional memory (optional) 69 You will need a standard Phillips No.1 screwdriver and a small flat-head screwdriver to the computer. 3 Open the display panel and remove the panel...

User Guide
Page 70
Store the brace with the screws for safekeeping. 70 Getting Started Installing additional memory (optional) panel and the surrounding housing. Observe how the propeller-shaped keyboard retaining brace is removed. Removing the left keyboard screw The two-inch-long, propeller-shaped brace sits in the center of the panel and lift up until the panel comes free. 4 Remove the three screws that hold the keyboard in place, and remove the keyboard retaining brace. Grasp the end of the area exposed when the panel is positioned before you remove it.
Store the brace with the screws for safekeeping. 70 Getting Started Installing additional memory (optional) panel and the surrounding housing. Observe how the propeller-shaped keyboard retaining brace is removed. Removing the left keyboard screw The two-inch-long, propeller-shaped brace sits in the center of the panel and lift up until the panel comes free. 4 Remove the three screws that hold the keyboard in place, and remove the keyboard retaining brace. Grasp the end of the area exposed when the panel is positioned before you remove it.

User Guide
Page 71
Getting Started Installing additional memory (optional) 71 Removing the right keyboard screw 5 Lift the keyboard and gently place it face down on the palm rest of the computer. Lifting the keyboard Removing the keyboard exposes the two memory slots, which are covered by a plastic sheet.
Getting Started Installing additional memory (optional) 71 Removing the right keyboard screw 5 Lift the keyboard and gently place it face down on the palm rest of the computer. Lifting the keyboard Removing the keyboard exposes the two memory slots, which are covered by a plastic sheet.

User Guide
Page 72
72 Getting Started Installing additional memory (optional) Covered memory slots Locating the covered memory module slots 6 Lift (but do not detach) the plastic sheet to expose the memory slots. Lifting the plastic covering the memory slots
72 Getting Started Installing additional memory (optional) Covered memory slots Locating the covered memory module slots 6 Lift (but do not detach) the plastic sheet to expose the memory slots. Lifting the plastic covering the memory slots

User Guide
Page 73
...of the module will click to secure the module. 9 Cover the slots with the plastic sheet. Getting Started Installing additional memory (optional) 73 7 Remove the new memory module from its pin connector (on the connectors may have built up. Before you handle the module, touch a grounded ...Grease or dust on the side you may cause memory access problems. 8 Insert the memory module in a slot and gently press it down into the computer). Inserting the memory module The clips on the computer. To avoid damaging the memory module, be careful not to discharge any static electricity...
...of the module will click to secure the module. 9 Cover the slots with the plastic sheet. Getting Started Installing additional memory (optional) 73 7 Remove the new memory module from its pin connector (on the connectors may have built up. Before you handle the module, touch a grounded ...Grease or dust on the side you may cause memory access problems. 8 Insert the memory module in a slot and gently press it down into the computer). Inserting the memory module The clips on the computer. To avoid damaging the memory module, be careful not to discharge any static electricity...

User Guide
Page 74
..., let the modules cool to room temperature before you removed. 14 Turn on page 76. 15 If the computer does not recognize the memory, shut down . To secure the keyboard, fit the tabs at the bottom of the keyboard into the corresponding slots at the top of...become hot. To verify that the computer correctly recognizes the memory, see "Checking total memory" on the computer. 74 Getting Started Installing additional memory (optional) 10 Replace the keyboard. Removing a memory module If you use the computer for a long time, the memory modules will snap down into place. 13 Reconnect any ...
..., let the modules cool to room temperature before you removed. 14 Turn on page 76. 15 If the computer does not recognize the memory, shut down . To secure the keyboard, fit the tabs at the bottom of the keyboard into the corresponding slots at the top of...become hot. To verify that the computer correctly recognizes the memory, see "Checking total memory" on the computer. 74 Getting Started Installing additional memory (optional) 10 Replace the keyboard. Removing a memory module If you use the computer for a long time, the memory modules will snap down into place. 13 Reconnect any ...

User Guide
Page 75
... pops partially out of the above cases, the Standby configuration will be saved. In either of the slot. Pulling the clips away from the memory module. The following message appears when you turn on the power: Warning: Resume Failure Press Any Key To Continue If the computer hangs up the ... the following: Press the power button and hold it down for five seconds, then turn it on page 67. 2 Pull the clips away from the memory module The computer could hang up when you turn the power on again. 1 Follow steps 1 through 6 in "Installing additional...
... pops partially out of the above cases, the Standby configuration will be saved. In either of the slot. Pulling the clips away from the memory module. The following message appears when you turn on the power: Warning: Resume Failure Press Any Key To Continue If the computer hangs up the ... the following: Press the power button and hold it down for five seconds, then turn it on page 67. 2 Pull the clips away from the memory module The computer could hang up when you turn the power on again. 1 Follow steps 1 through 6 in "Installing additional...

User Guide
Page 76
... from the slot. Avoid touching the connectors on the memory module or on the connectors may have built up. Checking total memory When you add or remove memory, you insert into the computer). To avoid damaging the memory module, be careful not to discharge any static electricity ...you may cause memory access problems. Removing the memory module 4 Complete the procedure by following ...
... from the slot. Avoid touching the connectors on the memory module or on the connectors may have built up. Checking total memory When you add or remove memory, you insert into the computer). To avoid damaging the memory module, be careful not to discharge any static electricity ...you may cause memory access problems. Removing the memory module 4 Complete the procedure by following ...

User Guide
Page 77
...the USB ports. Connecting a USB printer To achieve the connection, you can purchase one of the TouchPad, the computer's built-in "Installing additional memory (optional)" on page 67. Follow the manufacturer's instructions for connecting a USB printer to your printer. Connecting a mouse You may come with ... Connecting a mouse 77 2 Click Performance and Maintenance. 3 Click System. 4 The General tab view automatically appears and shows the recognized memory. 5 If the computer does not recognize the memory configuration, turn off the computer, remove the keyboard and make sure the...
...the USB ports. Connecting a USB printer To achieve the connection, you can purchase one of the TouchPad, the computer's built-in "Installing additional memory (optional)" on page 67. Follow the manufacturer's instructions for connecting a USB printer to your printer. Connecting a mouse You may come with ... Connecting a mouse 77 2 Click Performance and Maintenance. 3 Click System. 4 The General tab view automatically appears and shows the recognized memory. 5 If the computer does not recognize the memory configuration, turn off the computer, remove the keyboard and make sure the...

User Guide
Page 84
... chapter lists some computing tips and provides important information about basic features. Your work frequently. This feature saves your work temporarily stays in the computer's memory until you save feature which you when the battery is running low.
... chapter lists some computing tips and provides important information about basic features. Your work frequently. This feature saves your work temporarily stays in the computer's memory until you save feature which you when the battery is running low.

User Guide
Page 96
... the digital file begins to play . While in the drive, the operating system starts and the DVD begins to play . Do not install or remove a memory module while the DVDROM or multi-function drive power is in CD/DVD DVD-ROM drive mode, you If a CD is off and you press...
... the digital file begins to play . While in the drive, the operating system starts and the DVD begins to play . Do not install or remove a memory module while the DVDROM or multi-function drive power is in CD/DVD DVD-ROM drive mode, you If a CD is off and you press...

User Guide
Page 104
... to continue working after all, wait a few seconds before turning the computer on again. To use a dial-up connection, have a number of these options to memory and enters a low power mode ❖ Restart, which saves the current operating state to power down the computer (LAN) or wide area network (WAN), consult...
... to continue working after all, wait a few seconds before turning the computer on again. To use a dial-up connection, have a number of these options to memory and enters a low power mode ❖ Restart, which saves the current operating state to power down the computer (LAN) or wide area network (WAN), consult...

User Guide
Page 105
... down command if you were previously using. Since Hibernation does not require power to reload the operating system, for an extended time. ❖ Restarting from memory. This is the same as Turn Off or Shut down uses the most efficient mode if you need to maintain the saved information, the system...
... down command if you were previously using. Since Hibernation does not require power to reload the operating system, for an extended time. ❖ Restarting from memory. This is the same as Turn Off or Shut down uses the most efficient mode if you need to maintain the saved information, the system...

User Guide
Page 106
... power than the Turn Off or Shut down or Hibernation. Standby stores the current state of the computer in memory so that, when you restart the computer, you can continue working from memory. ❖ On restarting, the computer returns to consider when choosing Standby: ❖ While in Hibernation mode. ❖ When starting...
... power than the Turn Off or Shut down or Hibernation. Standby stores the current state of the computer in memory so that, when you restart the computer, you can continue working from memory. ❖ On restarting, the computer returns to consider when choosing Standby: ❖ While in Hibernation mode. ❖ When starting...


