User Manual
Page 45
... on page 133). Getting Started Setting up your computer 45 To register your computer online or to sign up your software. 1 From the welcome screen click Next to enter the Setup Wizard. 2 Confirm acceptance of windows displayed, and the order in modem to a telephone line (see "Connecting...setup choices. NOTE The names of Microsoft's End User License Agreement and click Next. 3 Select the appropriate option from the Help protect your computer screen and click Next. 4 Enter the computer name and description and click Next or Skip. 5 Select how your computer will pause for a moment ...
... on page 133). Getting Started Setting up your computer 45 To register your computer online or to sign up your software. 1 From the welcome screen click Next to enter the Setup Wizard. 2 Confirm acceptance of windows displayed, and the order in modem to a telephone line (see "Connecting...setup choices. NOTE The names of Microsoft's End User License Agreement and click Next. 3 Select the appropriate option from the Help protect your computer screen and click Next. 4 Enter the computer name and description and click Next or Skip. 5 Select how your computer will pause for a moment ...
User Manual
Page 46
Registering your computer with Toshiba If an Internet connection could not be completed during the initial start up process of your computer name and network settings. 6 Follow the remaining screen prompts to complete the setup process. NOTE If you are connecting your computer to a network, consult your ...to the Internet via your printer. If you opt not to register at that time, you click the final screen, your desktop or go to the Toshiba Web site at www.register.toshiba.com. For more information, see "Setting up your computer's modem and a voice-grade telephone line, or...
Registering your computer with Toshiba If an Internet connection could not be completed during the initial start up process of your computer name and network settings. 6 Follow the remaining screen prompts to complete the setup process. NOTE If you are connecting your computer to a network, consult your ...to the Internet via your printer. If you opt not to register at that time, you click the final screen, your desktop or go to the Toshiba Web site at www.register.toshiba.com. For more information, see "Setting up your computer's modem and a voice-grade telephone line, or...
User Manual
Page 51
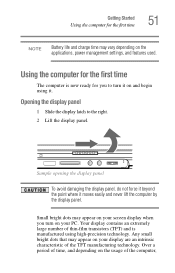
... using high-precision technology. Your display contains an extremely large number of the TFT manufacturing technology. Any small bright dots that may appear on your screen display when you to the right. 2 Lift the display panel. Opening the display panel 1 Slide the display latch to turn on your PC. Sample opening...
... using high-precision technology. Your display contains an extremely large number of the TFT manufacturing technology. Any small bright dots that may appear on your screen display when you to the right. 2 Lift the display panel. Opening the display panel 1 Slide the display latch to turn on your PC. Sample opening...
User Manual
Page 52
... deteriorate. This information applies to accommodate all those features. Below are examples of some of the screen technology. When the computer is also an intrinsic characteristic of the many possible icons used on your model-about one second. Your computer's features and ... guide. 52 Getting Started Using the computer for an entire product Series. Your select model may not be able to increase the brightness of the screen will dim and you may not have all the features and specifications corresponding to all of the icons or switches shown on the notebook chassis...
... deteriorate. This information applies to accommodate all those features. Below are examples of some of the screen technology. When the computer is also an intrinsic characteristic of the many possible icons used on your model-about one second. Your computer's features and ... guide. 52 Getting Started Using the computer for an entire product Series. Your select model may not be able to increase the brightness of the screen will dim and you may not have all the features and specifications corresponding to all of the icons or switches shown on the notebook chassis...
User Manual
Page 62
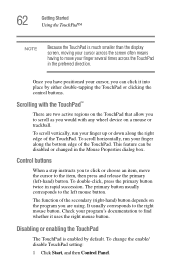
... (right-hand) button depends on a mouse or trackball. Disabling or enabling the TouchPad The TouchPad is much smaller than the display screen, moving your finger several times across the screen often means having to move the cursor to click or choose an item, move your cursor across the TouchPad in the preferred...
... (right-hand) button depends on a mouse or trackball. Disabling or enabling the TouchPad The TouchPad is much smaller than the display screen, moving your finger several times across the screen often means having to move the cursor to click or choose an item, move your cursor across the TouchPad in the preferred...
User Manual
Page 63
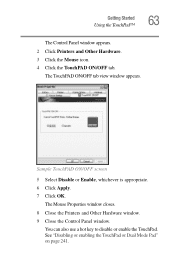
The Mouse Properties window closes. 8 Close the Printers and Other Hardware window. 9 Close the Control Panel window. Getting Started Using the TouchPad™ 63 The Control Panel window appears. 2 Click Printers and Other Hardware. 3 Click the Mouse icon. 4 Click the TouchPAD ON/OFF tab. See "Disabling or enabling the TouchPad or Dual Mode Pad" on page 241. The TouchPAD ON/OFF tab view window appears. You can also use a hot key to disable or enable the TouchPad. Sample TouchPAD ON/OFF screen 5 Select Disable or Enable, whichever is appropriate. 6 Click Apply. 7 Click OK.
The Mouse Properties window closes. 8 Close the Printers and Other Hardware window. 9 Close the Control Panel window. Getting Started Using the TouchPad™ 63 The Control Panel window appears. 2 Click Printers and Other Hardware. 3 Click the Mouse icon. 4 Click the TouchPAD ON/OFF tab. See "Disabling or enabling the TouchPad or Dual Mode Pad" on page 241. The TouchPAD ON/OFF tab view window appears. You can also use a hot key to disable or enable the TouchPad. Sample TouchPAD ON/OFF screen 5 Select Disable or Enable, whichever is appropriate. 6 Click Apply. 7 Click OK.
User Manual
Page 64
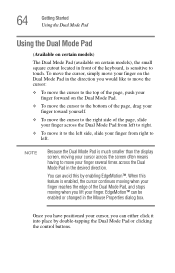
... can either click it to the left side, slide your finger from left . NOTE Because the Dual Mode Pad is much smaller than the display screen, moving your cursor across the Dual Mode Pad in the desired direction. When this by double-tapping the Dual Mode Pad or clicking the control... the page, slide your finger across the Dual Mode Pad from right to left to right. ❖ To move your finger several times across the screen often means having to move it into place by enabling EdgeMotion™.
... can either click it to the left side, slide your finger from left . NOTE Because the Dual Mode Pad is much smaller than the display screen, moving your cursor across the Dual Mode Pad in the desired direction. When this by double-tapping the Dual Mode Pad or clicking the control... the page, slide your finger across the Dual Mode Pad from right to left to right. ❖ To move your finger several times across the screen often means having to move it into place by enabling EdgeMotion™.
User Manual
Page 68
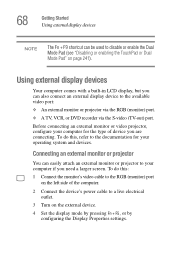
... on page 241). To do this : 1 Connect the monitor's video cable to the RGB (monitor) port on the left side of device you need a larger screen.
... on page 241). To do this : 1 Connect the monitor's video cable to the RGB (monitor) port on the left side of device you need a larger screen.
User Manual
Page 70
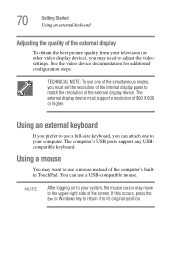
... modes, you must support a resolution of 800 X 600 or higher. Using a mouse You may want to use one to the upper-right side of the screen. Using an external keyboard If you prefer to use a full-size keyboard, you may move to your computer. If this occurs, press the Esc or...
... modes, you must support a resolution of 800 X 600 or higher. Using a mouse You may want to use one to the upper-right side of the screen. Using an external keyboard If you prefer to use a full-size keyboard, you may move to your computer. If this occurs, press the Esc or...
User Manual
Page 72
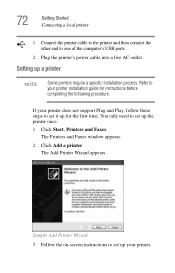
... window appears. 2 Click Add a printer. You only need to set up for instructions before completing the following procedure. Sample Add Printer Wizard 3 Follow the on-screen instructions to set it up your printer installation guide for the first time. Refer to set up a printer NOTE Some printers require a specific installation process...
... window appears. 2 Click Add a printer. You only need to set up for instructions before completing the following procedure. Sample Add Printer Wizard 3 Follow the on-screen instructions to set it up your printer installation guide for the first time. Refer to set up a printer NOTE Some printers require a specific installation process...

User Manual
Page 78
... off the computer Turning off the computer more quickly You can also turn off the computer by pressing the power button. Sample setup action settings screen 4 Select the options you want from the drop-down lists. ❖ When I press the power button Set this option to Shut down if you want... to shut down if you close the display panel. To use this option to Shut down when you want the computer to activate it using Toshiba's Power Saver utility. 1 Click Start, Control Panel, then click Performance and Maintenance. 2 Click the...
... off the computer Turning off the computer more quickly You can also turn off the computer by pressing the power button. Sample setup action settings screen 4 Select the options you want from the drop-down lists. ❖ When I press the power button Set this option to Shut down if you want... to shut down if you close the display panel. To use this option to Shut down when you want the computer to activate it using Toshiba's Power Saver utility. 1 Click Start, Control Panel, then click Performance and Maintenance. 2 Click the...
User Manual
Page 81
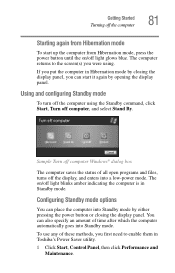
To use any of these methods, you first need to the screen(s) you were using the Standby command, click Start, Turn off computer, and select Stand By. Sample Turn off computer Windows® dialog box The computer ... off the computer 81 Starting again from Hibernation mode To start it again by opening the display panel. The computer returns to enable them in Toshiba's Power Saver utility. 1 Click Start, Control Panel, then click Performance and Maintenance. If you can place the computer into Standby mode by closing the display...
To use any of these methods, you first need to the screen(s) you were using the Standby command, click Start, Turn off computer, and select Stand By. Sample Turn off computer Windows® dialog box The computer ... off the computer 81 Starting again from Hibernation mode To start it again by opening the display panel. The computer returns to enable them in Toshiba's Power Saver utility. 1 Click Start, Control Panel, then click Performance and Maintenance. If you can place the computer into Standby mode by closing the display...

User Manual
Page 82
... the computer in Standby mode by closing the display panel, depending on page 165. NOTE For more information about the Power Saver utility, see "TOSHIBA Power Saver" on the Standby options set. If you have turned off light glows blue. Once the computer is configured, you can place it ...into Standby mode when you close the display panel to the screen(s) you were using. Starting again from Standby mode To start it again by either pressing the power button or closing the display panel, you...
... the computer in Standby mode by closing the display panel, depending on page 165. NOTE For more information about the Power Saver utility, see "TOSHIBA Power Saver" on the Standby options set. If you have turned off light glows blue. Once the computer is configured, you can place it ...into Standby mode when you close the display panel to the screen(s) you were using. Starting again from Standby mode To start it again by either pressing the power button or closing the display panel, you...

User Manual
Page 93
... work 93 2 In the Run dialog box: ❖ If you know the location, you can search for it has an automatic save your work on -screen instructions.
... work 93 2 In the Run dialog box: ❖ If you know the location, you can search for it has an automatic save your work on -screen instructions.
User Manual
Page 97
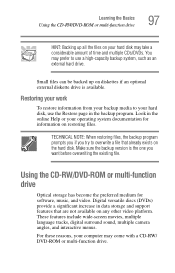
... To restore information from your backup media to your computer may come with a CD-RW/ DVD-ROM or multi-function drive. These features include wide-screen movies, multiple language tracks, digital surround sound, multiple camera angles, and interactive menus. Look in the online Help or your hard disk may prefer to...
... To restore information from your backup media to your computer may come with a CD-RW/ DVD-ROM or multi-function drive. These features include wide-screen movies, multiple language tracks, digital surround sound, multiple camera angles, and interactive menus. Look in the online Help or your hard disk may prefer to...
User Manual
Page 103
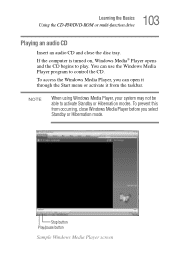
Stop button Play/pause button Sample Windows Media Player screen To prevent this from the taskbar. If the computer is turned on, Windows Media® Player opens and the CD begins to activate Standby or ...
Stop button Play/pause button Sample Windows Media Player screen To prevent this from the taskbar. If the computer is turned on, Windows Media® Player opens and the CD begins to activate Standby or ...
User Manual
Page 128
Chapter 4 Exploring Your Computer's Features In this guide may appear slightly different from the screens displayed by your system. 128 The differences are not significant and do in the functionality of your notebook computer. HINT: The illustrated examples in this ...
Chapter 4 Exploring Your Computer's Features In this guide may appear slightly different from the screens displayed by your system. 128 The differences are not significant and do in the functionality of your notebook computer. HINT: The illustrated examples in this ...

User Manual
Page 139
... to help you need a mailbox on the Web or an email address. To visit a desired Web site, type in groups, by others on their computer screens.
... to help you need a mailbox on the Web or an email address. To visit a desired Web site, type in groups, by others on their computer screens.
User Manual
Page 141
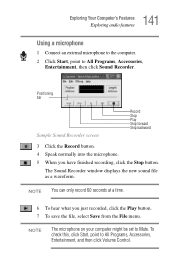
.... NOTE You can only record 60 seconds at a time. 6 To hear what you have finished recording, click the Stop button. Positioning bar Sample Sound Recorder screen Record Stop Play Skip forward Skip backward 3 Click the Record button. 4 Speak normally into the microphone. 5 When you just recorded, click the Play button. 7 To...
.... NOTE You can only record 60 seconds at a time. 6 To hear what you have finished recording, click the Stop button. Positioning bar Sample Sound Recorder screen Record Stop Play Skip forward Skip backward 3 Click the Record button. 4 Speak normally into the microphone. 5 When you just recorded, click the Play button. 7 To...
User Manual
Page 156
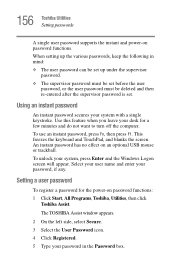
...the user password must be deleted and then re-entered after the supervisor password is set. This freezes the keyboard and TouchPad, and blanks the screen. Select your user name and enter your system with a single keystroke. Setting a user password To register a password for a few minutes and... the various passwords, keep the following in the Password box. Use this feature when you leave your desk for the power-on password functions. The TOSHIBA Assist window appears. 2 On the left side, select Secure. 3 Select the User Password icon. 4 Click Registered. 5 Type your system, press Enter...
...the user password must be deleted and then re-entered after the supervisor password is set. This freezes the keyboard and TouchPad, and blanks the screen. Select your user name and enter your system with a single keystroke. Setting a user password To register a password for a few minutes and... the various passwords, keep the following in the Password box. Use this feature when you leave your desk for the power-on password functions. The TOSHIBA Assist window appears. 2 On the left side, select Secure. 3 Select the User Password icon. 4 Click Registered. 5 Type your system, press Enter...


