User Guide
Page 5
...charges.) In order to program this information into your fax transmission, refer to the fax software instructions installed on the first page of the transmission, the date and time it can. If these changes might affect your service or the operation of your modem from its present line, please call the telephone company and let them to make changes..., operations or procedures. If trouble is experienced with the FCC if you believe it unlawful for any person to use a computer or other number for repair or limited warranty information, please contact Toshiba Corporation, Toshiba America...
...charges.) In order to program this information into your fax transmission, refer to the fax software instructions installed on the first page of the transmission, the date and time it can. If these changes might affect your service or the operation of your modem from its present line, please call the telephone company and let them to make changes..., operations or procedures. If trouble is experienced with the FCC if you believe it unlawful for any person to use a computer or other number for repair or limited warranty information, please contact Toshiba Corporation, Toshiba America...

User Guide
Page 29
... first time 56 Opening the display panel 56 Your computer's features and specifications ....57 Turning on the power 57 Using the TouchPad 58 Scrolling with the TouchPad 59 Using the Scroll button 59 Using the Control buttons 59 Disabling or enabling the TouchPad 60 Installing additional memory (optional 61 Removing a memory module 65 Using an external keyboard 67 Using a mouse 67 Connecting a local printer 67 Setting up your printer 68 Connecting an optional external diskette drive........72 Connecting external display devices 73 Connecting the display device 73 Directing the...
... first time 56 Opening the display panel 56 Your computer's features and specifications ....57 Turning on the power 57 Using the TouchPad 58 Scrolling with the TouchPad 59 Using the Scroll button 59 Using the Control buttons 59 Disabling or enabling the TouchPad 60 Installing additional memory (optional 61 Removing a memory module 65 Using an external keyboard 67 Using a mouse 67 Connecting a local printer 67 Setting up your printer 68 Connecting an optional external diskette drive........72 Connecting external display devices 73 Connecting the display device 73 Directing the...

User Guide
Page 31
... Toshiba's energy-saver design 114 Running the computer on battery power 115 Battery Notice 115 Power management 116 Using additional batteries 117 Charging the batteries 117 Charging the main battery 118 Charging the RTC battery 118 Monitoring battery power 120 Determining remaining battery power 120 What to do when the battery runs low 122 Setting battery alarms 122 Conserving battery power 123 Power profiles in Windows XP 124 Using a hot key to set the power profile..........124 Changing the main battery 125 Removing the battery...
... Toshiba's energy-saver design 114 Running the computer on battery power 115 Battery Notice 115 Power management 116 Using additional batteries 117 Charging the batteries 117 Charging the main battery 118 Charging the RTC battery 118 Monitoring battery power 120 Determining remaining battery power 120 What to do when the battery runs low 122 Setting battery alarms 122 Conserving battery power 123 Power profiles in Windows XP 124 Using a hot key to set the power profile..........124 Changing the main battery 125 Removing the battery...

User Guide
Page 61
... recent software and hardware options for your computer, and for a long time, the memory modules become hot. There are two memory slots. Installing additional memory (optional) Before you replace them. If you install or remove a memory module while the computer is in various capacities (to disable or enable the TouchPad (see "Disabling or enabling the TouchPad" on the most of data. Additional memory comes in Stand by or Hibernation mode, data will be used to...
... recent software and hardware options for your computer, and for a long time, the memory modules become hot. There are two memory slots. Installing additional memory (optional) Before you replace them. If you install or remove a memory module while the computer is in various capacities (to disable or enable the TouchPad (see "Disabling or enabling the TouchPad" on the most of data. Additional memory comes in Stand by or Hibernation mode, data will be used to...

User Guide
Page 63
... (on page 125). 6 Using a standard Phillips no. 1 screwdriver, unscrew the captive screw that the gold connector bar faces the slot, fit the memory module into the computer). 8 Remove the new memory module from its antistatic packaging. 9 Holding the memory module by its edges so that secures the memory module slot cover, then remove the memory module slot cover. Getting Started Installing additional memory (optional) 63 5 Remove the battery (see "Changing the main battery" on the side you...
... (on page 125). 6 Using a standard Phillips no. 1 screwdriver, unscrew the captive screw that the gold connector bar faces the slot, fit the memory module into the computer). 8 Remove the new memory module from its antistatic packaging. 9 Holding the memory module by its edges so that secures the memory module slot cover, then remove the memory module slot cover. Getting Started Installing additional memory (optional) 63 5 Remove the battery (see "Changing the main battery" on the side you...

User Guide
Page 66
66 Getting Started Installing additional memory (optional) Sample removing the memory module 4 Replace the memory module slot cover and fasten the screw. 5 Turn the computer over and restart it. To do this: 1 Click Start, then click Control Panel. 2 Click Performance and Maintenance. 3 Click System. 4 The General tab view automatically appears and shows total memory. If the computer does not recognize the memory configuration, turn off the computer, remove the memory slot cover, and make sure the memory module is...
66 Getting Started Installing additional memory (optional) Sample removing the memory module 4 Replace the memory module slot cover and fasten the screw. 5 Turn the computer over and restart it. To do this: 1 Click Start, then click Control Panel. 2 Click Performance and Maintenance. 3 Click System. 4 The General tab view automatically appears and shows total memory. If the computer does not recognize the memory configuration, turn off the computer, remove the memory slot cover, and make sure the memory module is...

User Guide
Page 73
... television or VCR/DVD player via the Component Video Out port. ❖ A standard television, projector, or VCR/DVD player via the S-video Out port. ❖ An external monitor or projector via the RGB (monitor) Out port. Getting Started Connecting external display devices 73 Connecting external display devices Your computer comes with a built-in LCD display, but you can also connect the following types of external display devices to "Connecting an external monitor or projector" on choosing a video cable, then refer to...
... television or VCR/DVD player via the Component Video Out port. ❖ A standard television, projector, or VCR/DVD player via the S-video Out port. ❖ An external monitor or projector via the RGB (monitor) Out port. Getting Started Connecting external display devices 73 Connecting external display devices Your computer comes with a built-in LCD display, but you can also connect the following types of external display devices to "Connecting an external monitor or projector" on choosing a video cable, then refer to...

User Guide
Page 76
... need a larger screen or to display anything on the computer Once you connect an external display device, you can easily attach an external monitor or projector to your computer screen. 76 Getting Started Connecting external display devices Connecting an external monitor or projector You can choose to use the internal display only, the external device only, or both simultaneously. To do this: 1 Connect the monitor's video cable to the RGB (monitor) port on the back of the computer. 2 Connect the device's power cable...
... need a larger screen or to display anything on the computer Once you connect an external display device, you can easily attach an external monitor or projector to your computer screen. 76 Getting Started Connecting external display devices Connecting an external monitor or projector You can choose to use the internal display only, the external device only, or both simultaneously. To do this: 1 Connect the monitor's video cable to the RGB (monitor) port on the back of the computer. 2 Connect the device's power cable...

User Guide
Page 162
... scroll forward through inputs to establish the connection with the external device. F1 Press the F1 key to access the Setup menu. See the documentation for the external device you to use your keyboard to watch home movies, play video games, and so on the back of the computer. 2 Press the Monitor button to the TV tuner: S- F2 Press the F2 key to view the television guide. Connecting...
... scroll forward through inputs to establish the connection with the external device. F1 Press the F1 key to access the Setup menu. See the documentation for the external device you to use your keyboard to watch home movies, play video games, and so on the back of the computer. 2 Press the Monitor button to the TV tuner: S- F2 Press the F2 key to view the television guide. Connecting...
User Guide
Page 244
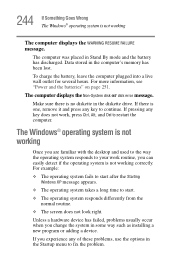
...-System disk or disk error message. Unless a hardware device has failed, problems usually occur when you change the system in Stand By mode and the battery has discharged. The computer was placed in some way such as installing a new program or adding a device. Make sure there is one, remove it and press any key to fix the problem. If pressing any of these problems, use the options in the Startup menu to...
...-System disk or disk error message. Unless a hardware device has failed, problems usually occur when you change the system in Stand By mode and the battery has discharged. The computer was placed in some way such as installing a new program or adding a device. Make sure there is one, remove it and press any key to fix the problem. If pressing any of these problems, use the options in the Startup menu to...

User Guide
Page 246
... other mistake makes it impossible for further explanation. A site you can be down for temporary repair. The Windows® XP operating system can assist you still have a problem using your browser to locate the site. Internet problems My Internet connection is very slow. 246 If Something Goes Wrong The Windows® operating system is not working See your computer is connected to a network, the Startup menu may be...
... other mistake makes it impossible for further explanation. A site you can be down for temporary repair. The Windows® XP operating system can assist you still have a problem using your browser to locate the site. Internet problems My Internet connection is very slow. 246 If Something Goes Wrong The Windows® operating system is not working See your computer is connected to a network, the Startup menu may be...

User Guide
Page 254
... allows you to continue working power outlet. ❖ Check that the cable connecting the external monitor to the computer is firmly attached. ❖ Try adjusting the contrast and brightness controls on . ❖ Check that the monitor's power cable is firmly plugged into a working . A window with the secondary button. 2 Click Properties, and then the Settings tab. 3 Change the Colors option and click OK. This opens the Display Properties dialog box. Some...
... allows you to continue working power outlet. ❖ Check that the cable connecting the external monitor to the computer is firmly attached. ❖ Try adjusting the contrast and brightness controls on . ❖ Check that the monitor's power cable is firmly plugged into a working . A window with the secondary button. 2 Click Properties, and then the Settings tab. 3 Change the Colors option and click OK. This opens the Display Properties dialog box. Some...

User Guide
Page 275
Fn + This hot key turns the scroll lock feature on and off . Fn + This hot key turns the numeric overlay on and off . To use the TouchPad, see "Disabling or enabling the TouchPad" on and off. Sample disable and enable TouchPad windows Keyboard hot keys Fn + This hot key turns the cursor control overlay on page 60. 275 Hot Keys Disabling or enabling the TouchPad Disabling or enabling the TouchPad Fn + This hot key enables/disables the TouchPad.
Fn + This hot key turns the scroll lock feature on and off . Fn + This hot key turns the numeric overlay on and off . To use the TouchPad, see "Disabling or enabling the TouchPad" on and off. Sample disable and enable TouchPad windows Keyboard hot keys Fn + This hot key turns the cursor control overlay on page 60. 275 Hot Keys Disabling or enabling the TouchPad Disabling or enabling the TouchPad Fn + This hot key enables/disables the TouchPad.

User Guide
Page 278
... information on your Toshiba Computer Getting Started Getting Started This section contains information about the ConfigFree main screen, and how to start ConfigFree, be sure the computer has a wired or wireless connection. on the Launcher to start a search for wireless devices, ConfigFree Launcher displays on setting up and using ConfigFree, see the Help File included in the application. When you start and setup ConfigFree. You...
... information on your Toshiba Computer Getting Started Getting Started This section contains information about the ConfigFree main screen, and how to start ConfigFree, be sure the computer has a wired or wireless connection. on the Launcher to start a search for wireless devices, ConfigFree Launcher displays on setting up and using ConfigFree, see the Help File included in the application. When you start and setup ConfigFree. You...

User Guide
Page 284
... your own computer at home can set the power status of Bluetooth antennas. ❖ TCP/IP settings - Devices not yet configured launch the Add New Connection Wizard, where you enable or disable settings of wired and wireless network devices, infrared devices, and set up a profile to match that opens automatically when Internet Explorer starts. ❖ Devices - ConfigFree profiles are automatically connected. Similarly, users who access networks in a profile: ❖ Internet settings - lets you can be saved...
... your own computer at home can set the power status of Bluetooth antennas. ❖ TCP/IP settings - Devices not yet configured launch the Add New Connection Wizard, where you enable or disable settings of wired and wireless network devices, infrared devices, and set up a profile to match that opens automatically when Internet Explorer starts. ❖ Devices - ConfigFree profiles are automatically connected. Similarly, users who access networks in a profile: ❖ Internet settings - lets you can be saved...
User Guide
Page 300
...-Memory cache installed on the screen that uses a liquid substance between two transparent electrode panels. Interlaced monitors take two passes to create a complete screen image. kilobyte (KB)-A unit of display that represents a function, file, or program. load-To move information from a computer while the computer is running and have the operating system automatically recognize the change. It is refreshed. liquid crystal display (LCD)-A type of...
...-Memory cache installed on the screen that uses a liquid substance between two transparent electrode panels. Interlaced monitors take two passes to create a complete screen image. kilobyte (KB)-A unit of display that represents a function, file, or program. load-To move information from a computer while the computer is running and have the operating system automatically recognize the change. It is refreshed. liquid crystal display (LCD)-A type of...
User Guide
Page 307
... to a network 105 Connecting external AV input devices 77 Connecting external display devices 73 connecting to a power source 52 connection set up 138 conserving battery power 123 Contents CDs 102 DVDs 102 control buttons 59 critical applications 2 Ctrl keys 86 D desktop creating new icon 133 exploring 132 icons 133 major features 133 Device Manager 249 checking properties 250 disabling a device 249, 250 devices keyboard 67 mouse 67 dial-up connection 105 Dial-Up Networking Wizard 105 Disk Defragmenter 257 disk drive corrupted...
... to a network 105 Connecting external AV input devices 77 Connecting external display devices 73 connecting to a power source 52 connection set up 138 conserving battery power 123 Contents CDs 102 DVDs 102 control buttons 59 critical applications 2 Ctrl keys 86 D desktop creating new icon 133 exploring 132 icons 133 major features 133 Device Manager 249 checking properties 250 disabling a device 249, 250 devices keyboard 67 mouse 67 dial-up connection 105 Dial-Up Networking Wizard 105 Disk Defragmenter 257 disk drive corrupted...

User Guide
Page 308
... 254 external monitor not working 255 latch 56 screen is blank 253 display device connecting 73 display mode setting 74 display modes hot key 273 display output settings 76 display panel closing 81 opening 56 disposal information 27 disposing of used batteries 130 DMA (Direct Memory Access) 248 double-click 59 DVD-ROM or multi-function drive cannot access disc 258 drive tray will not open 258 inserting discs 100 problems 258 removing 102 troubleshooting 250 E environmental considerations 44 ergonomics 44 posture 44 error messages device driver conflict...
... 254 external monitor not working 255 latch 56 screen is blank 253 display device connecting 73 display mode setting 74 display modes hot key 273 display output settings 76 display panel closing 81 opening 56 disposal information 27 disposing of used batteries 130 DMA (Direct Memory Access) 248 double-click 59 DVD-ROM or multi-function drive cannot access disc 258 drive tray will not open 258 inserting discs 100 problems 258 removing 102 troubleshooting 250 E environmental considerations 44 ergonomics 44 posture 44 error messages device driver conflict...

User Guide
Page 310
... removing expansion slot cover 63 memory module inserting 63 removing 66 Memory Stick inserting 154 removing 154 microphone 148 built-in 148 Microsoft Internet Explorer 104 Microsoft Support Online Web site 247 modem connecting to a telephone line 172 determining COM port 136 port 104 problem solving 263 resetting port to default settings 136 upgrading 136 using 104 module memory 63 Wi-Fi Mini PC 140 monitor connecting 73, 76 not working 254 mouse installing 67 serial 67 N network 230 accessing 137 connecting...
... removing expansion slot cover 63 memory module inserting 63 removing 66 Memory Stick inserting 154 removing 154 microphone 148 built-in 148 Microsoft Internet Explorer 104 Microsoft Support Online Web site 247 modem connecting to a telephone line 172 determining COM port 136 port 104 problem solving 263 resetting port to default settings 136 upgrading 136 using 104 module memory 63 Wi-Fi Mini PC 140 monitor connecting 73, 76 not working 254 mouse installing 67 serial 67 N network 230 accessing 137 connecting...

User Guide
Page 313
... speakers using external 150 Stand By mode hot key 271 Standby low battery 122 Standby mode going into more quickly 112 starting again from 113 start button 134 starting a program 89 Run dialog box 91 Windows Explorer 90 Windows Start menu 89 starting up the computer from Shut down 108 from Standby 113 Startup menu problem solving 245 stored data protection 2 supervisor password, deleting 240 supervisor password, set up 238 S-video In port S-video In 78 S-video port cable...
... speakers using external 150 Stand By mode hot key 271 Standby low battery 122 Standby mode going into more quickly 112 starting again from 113 start button 134 starting a program 89 Run dialog box 91 Windows Explorer 90 Windows Start menu 89 starting up the computer from Shut down 108 from Standby 113 Startup menu problem solving 245 stored data protection 2 supervisor password, deleting 240 supervisor password, set up 238 S-video In port S-video In 78 S-video port cable...


