
User Guide
Page 12
...of the Access Point in order to avoid operating on a channel occupied by The Bluetooth Special Interest Group. You may occasionally experience a less than TOSHIBA portable computers. 12 communication between two client devices without a Wireless LAN Access Point. ❖ This device must be used with Access Points that is... to ensure the Access Point device(s) are designed to be interoperable with any radar system in the area. This device will automatically restart operation on a channel free of this device. The presence of nearby radar operation may interfere with one another.
...of the Access Point in order to avoid operating on a channel occupied by The Bluetooth Special Interest Group. You may occasionally experience a less than TOSHIBA portable computers. 12 communication between two client devices without a Wireless LAN Access Point. ❖ This device must be used with Access Points that is... to ensure the Access Point device(s) are designed to be interoperable with any radar system in the area. This device will automatically restart operation on a channel free of this device. The presence of nearby radar operation may interfere with one another.

User Guide
Page 45
... procedure below. To recover using the second method, see "Backing up your work " on your computer be affected. Be sure to save your work to restart the computer. Recovering without changing the internal storage drive partitions Recovering without affecting other partitions (for example, a D: drive), those partitions will remain intact and any...
... procedure below. To recover using the second method, see "Backing up your work " on your computer be affected. Be sure to save your work to restart the computer. Recovering without changing the internal storage drive partitions Recovering without affecting other partitions (for example, a D: drive), those partitions will remain intact and any...

User Guide
Page 47
... screen appears. Getting Started 47 Recovering the Internal Storage Drive 6 The Recovery of -box state, and allows you that all data on the keyboard to restart the computer. Select Recover without changing the hard drive partitions. (Sample Image) Recovery of Factory Default Software screen 7 Click Next. Be sure to save your...
... screen appears. Getting Started 47 Recovering the Internal Storage Drive 6 The Recovery of -box state, and allows you that all data on the keyboard to restart the computer. Select Recover without changing the hard drive partitions. (Sample Image) Recovery of Factory Default Software screen 7 Click Next. Be sure to save your...

User Guide
Page 50
You will need for creating recovery DVDs, please visit the Toshiba web site at accessories.toshiba.com. When you create recovery media, the system will need to separately back up on the recovery media. If the recovery files on your internal ... storing your system's recovery files. When the process is strongly recommended that the C: drive has been recovered. 10 Press any key on the keyboard to restart the computer. Follow the procedure below to determine how much space you will prompt you created;
You will need for creating recovery DVDs, please visit the Toshiba web site at accessories.toshiba.com. When you create recovery media, the system will need to separately back up on the recovery media. If the recovery files on your internal ... storing your system's recovery files. When the process is strongly recommended that the C: drive has been recovered. 10 Press any key on the keyboard to restart the computer. Follow the procedure below to determine how much space you will prompt you created;

User Guide
Page 54
...Warning screen that the drive has been recovered. 9 Press any key on the keyboard to complete the recovery process. Select Toshiba Recovery Wizard, and then click Next. 2 Select Erase the hard disk and then click Next. 3 Choose one of the...the boot menu, depending on the computer. To delete all other partitions from the internal storage drive: 1 Access the Toshiba Recovery Wizard on your internal storage drive or on your recovery media. ❖ To access the Recovery Wizard on your ..., and then power on which type of the following options on -screen instructions to restart the computer.
...Warning screen that the drive has been recovered. 9 Press any key on the keyboard to complete the recovery process. Select Toshiba Recovery Wizard, and then click Next. 2 Select Erase the hard disk and then click Next. 3 Choose one of the...the boot menu, depending on the computer. To delete all other partitions from the internal storage drive: 1 Access the Toshiba Recovery Wizard on your internal storage drive or on your recovery media. ❖ To access the Recovery Wizard on your ..., and then power on which type of the following options on -screen instructions to restart the computer.

User Guide
Page 55
... for security purposes. Be sure you that the internal storage drive has been erased. 6 Press any key on page 50) before proceeding. 5 Click Next to restart the computer. Getting Started 55 Erasing the Internal Storage Drive ❖ Delete all data and partitions from the hard disk-This option deletes all of...
... for security purposes. Be sure you that the internal storage drive has been erased. 6 Press any key on page 50) before proceeding. 5 Click Next to restart the computer. Getting Started 55 Erasing the Internal Storage Drive ❖ Delete all data and partitions from the hard disk-This option deletes all of...

User Guide
Page 67
... working, you will lose all work " on a regular basis. See your battery runs out of charge while you are using goes down and you must restart your computer to external media on page 71 for details. 67 ❖ Back up because it unless you last saved. Computing tips ❖ Save your...
... working, you will lose all work " on a regular basis. See your battery runs out of charge while you are using goes down and you must restart your computer to external media on page 71 for details. 67 ❖ Back up because it unless you last saved. Computing tips ❖ Save your...

User Guide
Page 112
... to low when using either the battery or the AC adaptor ❖ Display-Allows you to change various default settings for slower processing. 112 Utilities TOSHIBA Hardware Setup ❖ CPU-Allows you to enable or disable USB Legacy Emulation Switching the CPU to low allows you to conserve power and extend... your computer is connected to the AC adaptor, the CPU frequency mode is set to low for the built-in display NOTE When the computer restarts, it remembers the last configuration.
... to low when using either the battery or the AC adaptor ❖ Display-Allows you to change various default settings for slower processing. 112 Utilities TOSHIBA Hardware Setup ❖ CPU-Allows you to enable or disable USB Legacy Emulation Switching the CPU to low allows you to conserve power and extend... your computer is connected to the AC adaptor, the CPU frequency mode is set to low for the built-in display NOTE When the computer restarts, it remembers the last configuration.

User Guide
Page 118
... the Search field, type Fingerprint Utility. To install TPM: 1 Launch the "TOSHIBA Application Installer" and install Infineon Trusted Platform Module Utility 2 Follow the onscreen instruction. 3 Restart the computer. 4 Follow the onscreen instruction. The fingerprint authentication utility can be ...completely secure or error-free. Your TOSHIBA computer includes the TPM (Trusted Platform Module), which is ...
... the Search field, type Fingerprint Utility. To install TPM: 1 Launch the "TOSHIBA Application Installer" and install Infineon Trusted Platform Module Utility 2 Follow the onscreen instruction. 3 Restart the computer. 4 Follow the onscreen instruction. The fingerprint authentication utility can be ...completely secure or error-free. Your TOSHIBA computer includes the TPM (Trusted Platform Module), which is ...

User Guide
Page 128
... close, then click End Task. Verify that the computer is on page 127). The computer starts but when you want to the problem instead of restarting the system. Your computer may occur when you turn on the computer 2 Click the Applications tab. Then shut down the computer via software, or follow... the indicator is glowing, the computer is on an area where you can type text and try turning the computer off your computer and then restart it does not, continue with the next step. 4 Close the remaining programs one by one by plugging in the list. 3 Select the program you press...
... close, then click End Task. Verify that the computer is on page 127). The computer starts but when you want to the problem instead of restarting the system. Your computer may occur when you turn on the computer 2 Click the Applications tab. Then shut down the computer via software, or follow... the indicator is glowing, the computer is on an area where you can type text and try turning the computer off your computer and then restart it does not, continue with the next step. 4 Close the remaining programs one by one by plugging in the list. 3 Select the program you press...
User Guide
Page 130
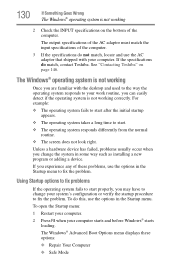
See "Contacting Toshiba" on the bottom of the computer. If you may have to start properly, you experience any of the computer. 3 If the specifications... that shipped with the desktop and used to the way the operating system responds to fix the problem. To open the Startup menu: 1 Restart your computer. 2 Press F8 when your system's configuration or verify the startup procedure to your work routine, you change your computer starts and.... The Windows® Advanced Boot Options menu displays these problems, use the options in the Startup menu. To do match, contact Toshiba.
See "Contacting Toshiba" on the bottom of the computer. If you may have to start properly, you experience any of the computer. 3 If the specifications... that shipped with the desktop and used to the way the operating system responds to fix the problem. To open the Startup menu: 1 Restart your computer. 2 Press F8 when your system's configuration or verify the startup procedure to your work routine, you change your computer starts and.... The Windows® Advanced Boot Options menu displays these problems, use the options in the Startup menu. To do match, contact Toshiba.

User Guide
Page 131
... Logging ❖ Enable low-resolution video (640 x 480) ❖ Last Known Good Configuration (advanced) ❖ Directory Services Restore Mode ❖ Debugging Mode ❖ Disable automatic restart on system failure ❖ Disable Driver Signature Enforcement ❖ Start Windows® Normally When you highlight each option using the arrow keys, Windows® displays...
... Logging ❖ Enable low-resolution video (640 x 480) ❖ Last Known Good Configuration (advanced) ❖ Directory Services Restore Mode ❖ Debugging Mode ❖ Disable automatic restart on system failure ❖ Disable Driver Signature Enforcement ❖ Start Windows® Normally When you highlight each option using the arrow keys, Windows® displays...

User Guide
Page 142
No additional software is displayed. If it was in when the chosen restore point was created, and then the computer will be automatically restarted. External optical disc writers are also widely available. To do this: 1 Click Start, All Programs, Accessories, System Tools, and then System ...174; operating system. Your Windows® operating system configuration will now be a recent backup of the optical disc drives built into recent Toshiba portable computer models can write to (or 'burn') as well as read from optical discs. 142 If Something Goes Wrong Develop good computing...
No additional software is displayed. If it was in when the chosen restore point was created, and then the computer will be automatically restarted. External optical disc writers are also widely available. To do this: 1 Click Start, All Programs, Accessories, System Tools, and then System ...174; operating system. Your Windows® operating system configuration will now be a recent backup of the optical disc drives built into recent Toshiba portable computer models can write to (or 'burn') as well as read from optical discs. 142 If Something Goes Wrong Develop good computing...

User Guide
Page 144
... just one charging mode. Ports that support this sequence: 1 Back up anything that supports the USB Sleep and Charge function. Always restart the Windows® operating system after each successive installation. For more information, see "Enabling/Disabling USB Sleep and Charge" on page ...115. ❖ Try selecting a different charging mode in the TOSHIBA Sleep Utility to enable charging at a time, creating restore points immediately before each installation, even if the installation utility does not prompt...
... just one charging mode. Ports that support this sequence: 1 Back up anything that supports the USB Sleep and Charge function. Always restart the Windows® operating system after each successive installation. For more information, see "Enabling/Disabling USB Sleep and Charge" on page ...115. ❖ Try selecting a different charging mode in the TOSHIBA Sleep Utility to enable charging at a time, creating restore points immediately before each installation, even if the installation utility does not prompt...

User Guide
Page 174
... (dpi). See also BIOS, memory. select-To highlight or otherwise specify text, data, or graphics with reboot. A Flash drive is a 6-wire connector. reboot-See boot, restart. restart-Synonymous with the intent to . 174 Glossary Random Access Memory-See RAM.
... (dpi). See also BIOS, memory. select-To highlight or otherwise specify text, data, or graphics with reboot. A Flash drive is a 6-wire connector. reboot-See boot, restart. restart-Synonymous with the intent to . 174 Glossary Random Access Memory-See RAM.


