
User Guide
Page 52
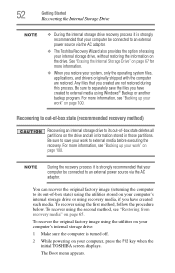
... the recovery process it is strongly recommended that your computer be connected to an external power source via the AC adaptor. The Boot menu appears. Any files that you have created to external media before executing the recovery. For more information, see "Backing up... your computer, press the F12 key when the initial TOSHIBA screen displays. To recover the original factory image using recovery media, if you created are restored. 52 Getting Started Recovering the Internal...
... the recovery process it is strongly recommended that your computer be connected to an external power source via the AC adaptor. The Boot menu appears. Any files that you have created to external media before executing the recovery. For more information, see "Backing up... your computer, press the F12 key when the initial TOSHIBA screen displays. To recover the original factory image using recovery media, if you created are restored. 52 Getting Started Recovering the Internal...
User Guide
Page 55
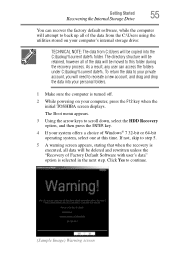
The Boot menu appears. 3 Using the arrow keys to recreate a new account, and drag and drop the data into the C:\backup%current date% folder. As a result, any ... need to scroll down, select the HDD Recovery option, and then press the ENTER key. 4 If your computer, press the F12 key when the initial TOSHIBA screen displays. To return the data to your private account, you will attempt to continue. (Sample Image) Warning screen If not, skip to this time...
The Boot menu appears. 3 Using the arrow keys to recreate a new account, and drag and drop the data into the C:\backup%current date% folder. As a result, any ... need to scroll down, select the HDD Recovery option, and then press the ENTER key. 4 If your computer, press the F12 key when the initial TOSHIBA screen displays. To return the data to your private account, you will attempt to continue. (Sample Image) Warning screen If not, skip to this time...
User Guide
Page 58
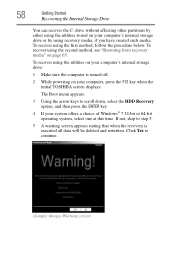
Click Yes to step 5. 5 A warning screen appears stating that when the recovery is turned off. 2 While powering on page 65. The Boot menu appears. 3 Using the arrow keys to scroll down, select the HDD Recovery option, and then press the ENTER key. 4 If your computer's ... is executed all data will be deleted and rewritten. To recover using the utilities on your computer, press the F12 key when the initial TOSHIBA screen displays. 58 Getting Started Recovering the Internal Storage Drive You can recover the C: drive without affecting other partitions by either using the utilities...
Click Yes to step 5. 5 A warning screen appears stating that when the recovery is turned off. 2 While powering on page 65. The Boot menu appears. 3 Using the arrow keys to scroll down, select the HDD Recovery option, and then press the ENTER key. 4 If your computer's ... is executed all data will be deleted and rewritten. To recover using the utilities on your computer, press the F12 key when the initial TOSHIBA screen displays. 58 Getting Started Recovering the Internal Storage Drive You can recover the C: drive without affecting other partitions by either using the utilities...
User Guide
Page 60
.... You can resize and recover the C: drive using the utilities stored on your computer's internal storage drive or using the utilities on page 100. The Boot menu appears. 3 Using the arrow keys to begin the recovery. 60 Getting Started Recovering the Internal Storage Drive 9 Click Next to scroll down, select the... an external power source via the AC adaptor. The "Recover to a custom size partition" option restores your computer, press the F12 key when the initial TOSHIBA screen displays.
.... You can resize and recover the C: drive using the utilities stored on your computer's internal storage drive or using the utilities on page 100. The Boot menu appears. 3 Using the arrow keys to begin the recovery. 60 Getting Started Recovering the Internal Storage Drive 9 Click Next to scroll down, select the... an external power source via the AC adaptor. The "Recover to a custom size partition" option restores your computer, press the F12 key when the initial TOSHIBA screen displays.
User Guide
Page 66
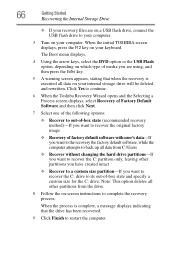
When the initial TOSHIBA screen displays, press the F12 key on your internal storage drive will be deleted and rewritten. The Boot menu displays. 4 Using the arrow keys, select the DVD option or the USB Flash option, depending on which type of media you are on a USB ...flash drive, connect the USB flash drive to your computer. 3 Turn on -screen instructions to complete the recovery process. Click Yes to continue. 6 When the Toshiba...
When the initial TOSHIBA screen displays, press the F12 key on your internal storage drive will be deleted and rewritten. The Boot menu displays. 4 Using the arrow keys, select the DVD option or the USB Flash option, depending on which type of media you are on a USB ...flash drive, connect the USB flash drive to your computer. 3 Turn on -screen instructions to complete the recovery process. Click Yes to continue. 6 When the Toshiba...
User Guide
Page 67
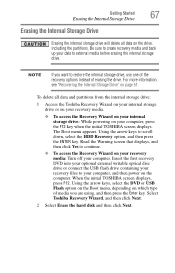
... more information, see "Recovering the Internal Storage Drive" on the drive, including the partitions. The Boot menu appears. Be sure to your computer, press the F12 key when the initial TOSHIBA screen displays. Read the Warning screen that displays, and then click Yes to continue. ❖ To... the Internal Storage Drive Erasing the internal storage drive will delete all data and partitions from the internal storage drive: 1 Access the Toshiba Recovery Wizard on your internal storage drive or on your recovery media. ❖ To access the Recovery Wizard on your internal storage ...
... more information, see "Recovering the Internal Storage Drive" on the drive, including the partitions. The Boot menu appears. Be sure to your computer, press the F12 key when the initial TOSHIBA screen displays. Read the Warning screen that displays, and then click Yes to continue. ❖ To... the Internal Storage Drive Erasing the internal storage drive will delete all data and partitions from the internal storage drive: 1 Access the Toshiba Recovery Wizard on your internal storage drive or on your recovery media. ❖ To access the Recovery Wizard on your internal storage ...

User Guide
Page 138
...Boot Setting-Select this category to set up various passwords or other security features, and see how these features can be used with each other security features that can select a category that shows the type of TOSHIBA Assist. 138 Utilities TOSHIBA Security Assist TOSHIBA Security Assist The TOSHIBA...BIOS password and use the same password for a hard disk password. ❖ Fingerprint Authentication: Register your system. The TOSHIBA Security Assist main window appears. (Sample Image) TOSHIBA Security Assist window From the main window, you can be used in that scenario. To open...
...Boot Setting-Select this category to set up various passwords or other security features, and see how these features can be used with each other security features that can select a category that shows the type of TOSHIBA Assist. 138 Utilities TOSHIBA Security Assist TOSHIBA Security Assist The TOSHIBA...BIOS password and use the same password for a hard disk password. ❖ Fingerprint Authentication: Register your system. The TOSHIBA Security Assist main window appears. (Sample Image) TOSHIBA Security Assist window From the main window, you can be used in that scenario. To open...
User Guide
Page 142
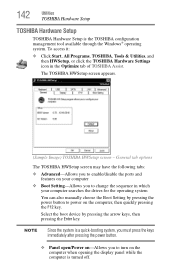
... icon in which your computer searches the drives for the operating system You can also manually choose the Boot Setting by pressing the arrow keys, then pressing the Enter key. General tab options The TOSHIBA HWSetup screen may have the following tabs: ❖ Advanced-Allows you to enable/disable the ports and...
... icon in which your computer searches the drives for the operating system You can also manually choose the Boot Setting by pressing the arrow keys, then pressing the Enter key. General tab options The TOSHIBA HWSetup screen may have the following tabs: ❖ Advanced-Allows you to enable/disable the ports and...
User Guide
Page 150
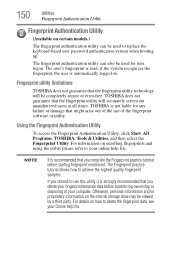
... For details on how to replace the keyboard-based user password authentication system when booting up. Using the Fingerprint Authentication Utility To access the Fingerprint Authentication Utility, click Start, All Programs, TOSHIBA, Tools & Utilities, and then select the Fingerprint Utility. if the system recognizes ... utility will be used to delete the fingerprint data, see your online help file. NOTE It is automatically logged on. TOSHIBA does not guarantee that might arise out of the use this utility it is read; The user's fingerprint is strongly recommended...
... For details on how to replace the keyboard-based user password authentication system when booting up. Using the Fingerprint Authentication Utility To access the Fingerprint Authentication Utility, click Start, All Programs, TOSHIBA, Tools & Utilities, and then select the Fingerprint Utility. if the system recognizes ... utility will be used to delete the fingerprint data, see your online help file. NOTE It is automatically logged on. TOSHIBA does not guarantee that might arise out of the use this utility it is read; The user's fingerprint is strongly recommended...
User Guide
Page 161
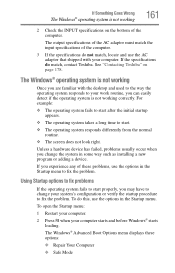
... any of the computer. Using Startup options to fix problems If the operating system fails to fix the problem. The Windows® Advanced Boot Options menu displays these problems, use the options in the Startup menu. If you can easily detect if the operating system is not working... 161 2 Check the INPUT specifications on page 178. See "Contacting Toshiba" on the bottom of these options: ❖ Repair Your Computer ❖ Safe Mode If Something Goes Wrong The Windows® operating system is...
... any of the computer. Using Startup options to fix problems If the operating system fails to fix the problem. The Windows® Advanced Boot Options menu displays these problems, use the options in the Startup menu. If you can easily detect if the operating system is not working... 161 2 Check the INPUT specifications on page 178. See "Contacting Toshiba" on the bottom of these options: ❖ Repair Your Computer ❖ Safe Mode If Something Goes Wrong The Windows® operating system is...

User Guide
Page 162
... highlight each option using the arrow keys, Windows® displays information about each name and the syntax of the address with Command Prompt ❖ Enable Boot Logging ❖ Enable low-resolution video (640 x 480) ❖ Last Known Good Configuration (advanced) ❖ Directory Services Restore Mode ❖ Debugging Mode ❖ Disable automatic...
... highlight each option using the arrow keys, Windows® displays information about each name and the syntax of the address with Command Prompt ❖ Enable Boot Logging ❖ Enable low-resolution video (640 x 480) ❖ Last Known Good Configuration (advanced) ❖ Directory Services Restore Mode ❖ Debugging Mode ❖ Disable automatic...

User Guide
Page 199
... per second (bps)-A way of measuring the speed at which the central processing unit (CPU) communicates with other parts of the computer. boot priority (startup sequence)-The order in read-only memory (ROM), containing the information the computer needs to check hardware and load the operating ...of measure used in "pulling itself up the computer. This is similar, but not identical, to locate the startup files. The term "boot" originates from one device to enable recording and playback of high-definition video (HD). bus-An electrical circuit that loads and initializes the ...
... per second (bps)-A way of measuring the speed at which the central processing unit (CPU) communicates with other parts of the computer. boot priority (startup sequence)-The order in read-only memory (ROM), containing the information the computer needs to check hardware and load the operating ...of measure used in "pulling itself up the computer. This is similar, but not identical, to locate the startup files. The term "boot" originates from one device to enable recording and playback of high-definition video (HD). bus-An electrical circuit that loads and initializes the ...
User Guide
Page 208
... card used on it up. To reset the computer by mixing red, green, and blue light in dots per inch (dpi). See also boot. Compare RAM. RJ45 connector-An eight-wire connector used to . serial-Processes that can be produced by a printer or displayed on a screen.... On your computer's BIOS, which is a 6-wire connector. Read-Only Memory-See ROM. reboot-See boot, restart. removable disk-A disk that information in ROM remains whether or not the computer is receiving power. A Flash drive is expressed in various combinations....
... card used on it up. To reset the computer by mixing red, green, and blue light in dots per inch (dpi). See also boot. Compare RAM. RJ45 connector-An eight-wire connector used to . serial-Processes that can be produced by a printer or displayed on a screen.... On your computer's BIOS, which is a 6-wire connector. Read-Only Memory-See ROM. reboot-See boot, restart. removable disk-A disk that information in ROM remains whether or not the computer is receiving power. A Flash drive is expressed in various combinations....


