User Guide
Page 28
... (optional 49 Installing a memory module 50 Removing a memory module 54 Checking total memory 56 Hard Drive Recovery Utilities 56 Creating Recovery CDs/DVDs 57 Hard Disk Drive Recovery using the recovery partition 58 Hard Disk Drive Recovery using the Recovery media 62 Installing drivers and applications 65 Using the TouchPad 65 Scrolling with the TouchPad 66...
... (optional 49 Installing a memory module 50 Removing a memory module 54 Checking total memory 56 Hard Drive Recovery Utilities 56 Creating Recovery CDs/DVDs 57 Hard Disk Drive Recovery using the recovery partition 58 Hard Disk Drive Recovery using the Recovery media 62 Installing drivers and applications 65 Using the TouchPad 65 Scrolling with the TouchPad 66...
User Guide
Page 56
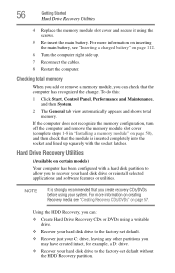
...default. ❖ Recover just your hard disk drive or reinstall selected applications and software features or utilities. For more information on creating Recovery media see "Inserting a charged battery" on page 50), and then check that the module is strongly recommended that the computer has recognized... the change. Using the HDD Recovery, you can check that you may have created intact, for example, a D: drive. ❖ Recover your hard disk drive to allow you ...
...default. ❖ Recover just your hard disk drive or reinstall selected applications and software features or utilities. For more information on creating Recovery media see "Inserting a charged battery" on page 50), and then check that the module is strongly recommended that the computer has recognized... the change. Using the HDD Recovery, you can check that you may have created intact, for example, a D: drive. ❖ Recover your hard disk drive to allow you ...
User Guide
Page 57
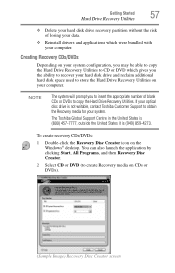
...blank CDs or DVDs to create Recovery media on the Windows® desktop. The Toshiba Global Support Centre in the United States is (800) 457-7777, outside the United States it is not writable, contact Toshiba Customer Support to store the Hard Drive Recovery Utilities on your computer. You can... also launch the application by clicking Start, All Programs, and then Recovery Disc Creator. 2 Select CD or DVD (to copy the Hard Drive...
...blank CDs or DVDs to create Recovery media on the Windows® desktop. The Toshiba Global Support Centre in the United States is (800) 457-7777, outside the United States it is not writable, contact Toshiba Customer Support to store the Hard Drive Recovery Utilities on your computer. You can... also launch the application by clicking Start, All Programs, and then Recovery Disc Creator. 2 Select CD or DVD (to copy the Hard Drive...

User Guide
Page 58
... a D: drive) intact, or changing the size of your C: drive and then recovering it. For more information on using the Recovery media you want to copy by clicking the check box next to the factory-set default, or recovering just your keyboard while powering .... To recover your hard disk drive using the Recovery media" on , the Toshiba Recovery Wizard screen displays. (Sample Image) Toshiba Recovery Wizard screen Hard Disk Drive Recovery using the recovery partition You have created with the preceding steps see "Hard Disk Drive Recovery using the utilities stored on your computer's HDD:...
... a D: drive) intact, or changing the size of your C: drive and then recovering it. For more information on using the Recovery media you want to copy by clicking the check box next to the factory-set default, or recovering just your keyboard while powering .... To recover your hard disk drive using the Recovery media" on , the Toshiba Recovery Wizard screen displays. (Sample Image) Toshiba Recovery Wizard screen Hard Disk Drive Recovery using the recovery partition You have created with the preceding steps see "Hard Disk Drive Recovery using the utilities stored on your computer's HDD:...
User Guide
Page 59
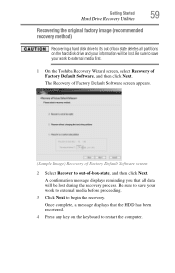
...) Recovering a hard disk drive to its out of box state deletes all data will be lost . The Recovery of Factory Default Software screen appears. (Sample Image) Recovery of Factory Default Software screen 2 Select Recover to out-of Factory Default Software, and then click Next. A confirmation message displays reminding you that the HDD... disk drive and your work to restart the computer. Once complete, a message displays that all partitions on the keyboard to external media first. 1 On the Toshiba Recovery Wizard screen, select Recovery of -box-state, and then click Next.
...) Recovering a hard disk drive to its out of box state deletes all data will be lost . The Recovery of Factory Default Software screen appears. (Sample Image) Recovery of Factory Default Software screen 2 Select Recover to out-of Factory Default Software, and then click Next. A confirmation message displays reminding you that the HDD... disk drive and your work to restart the computer. Once complete, a message displays that all partitions on the keyboard to external media first. 1 On the Toshiba Recovery Wizard screen, select Recovery of -box-state, and then click Next.
User Guide
Page 60
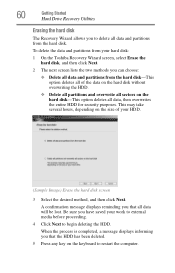
...you that all data will be lost. Be sure you can choose: ❖ Delete all data and partitions from your hard disk: 1 On the Toshiba Recovery Wizard screen, select Erase the hard disk, and then click Next. 2 The next screen lists the two methods you have saved your HDD. (...Sample Image) Erase the hard disk screen 3 Select the desired method, and then click Next. 60 Getting Started Hard Drive Recovery Utilities Erasing the hard disk The Recovery Wizard allows you to delete all data, then overwrites the entire HDD for security purposes. This may take several hours, depending on...
...you that all data will be lost. Be sure you can choose: ❖ Delete all data and partitions from your hard disk: 1 On the Toshiba Recovery Wizard screen, select Erase the hard disk, and then click Next. 2 The next screen lists the two methods you have saved your HDD. (...Sample Image) Erase the hard disk screen 3 Select the desired method, and then click Next. 60 Getting Started Hard Drive Recovery Utilities Erasing the hard disk The Recovery Wizard allows you to delete all data, then overwrites the entire HDD for security purposes. This may take several hours, depending on...
User Guide
Page 61
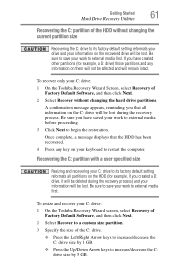
...intact. A confirmation message appears, reminding you created a D: drive, it will be deleted during the recovery process. Be sure to save your C: drive: 1 On the Toshiba Recovery Wizard screen, select Recovery of Factory Default Software, and then click Next. 2 Select Recover to a custom size partition. ...resize and recover your work to begin the restoration. Be sure you have saved your C: drive: 1 On the Toshiba Recovery Wizard Screen, select Recovery of the HDD without changing the hard drive partitions. If you have created other partitions (for example, if you ...
...intact. A confirmation message appears, reminding you created a D: drive, it will be deleted during the recovery process. Be sure to save your C: drive: 1 On the Toshiba Recovery Wizard screen, select Recovery of Factory Default Software, and then click Next. 2 Select Recover to a custom size partition. ...resize and recover your work to begin the restoration. Be sure you have saved your C: drive: 1 On the Toshiba Recovery Wizard Screen, select Recovery of the HDD without changing the hard drive partitions. If you have created other partitions (for example, if you ...

User Guide
Page 62
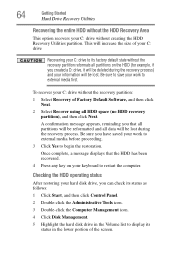
... displays, press F12. The boot menu appears. 3 Using the arrow keys, select the CD/DVD option and press Enter. (Sample Image) Toshiba HDD Recovery Utility screen Hard Disk Drive Recovery using the Recovery media If you need to recover your computer to its default factory state, you make your Hard Drive... Recovery Utilities. 62 Getting Started Hard Drive Recovery Utilities NOTE The size of the C: drive will display on the progress bar as you can rebuild the system using your selections. 4...
... displays, press F12. The boot menu appears. 3 Using the arrow keys, select the CD/DVD option and press Enter. (Sample Image) Toshiba HDD Recovery Utility screen Hard Disk Drive Recovery using the Recovery media If you need to recover your computer to its default factory state, you make your Hard Drive... Recovery Utilities. 62 Getting Started Hard Drive Recovery Utilities NOTE The size of the C: drive will display on the progress bar as you can rebuild the system using your selections. 4...

User Guide
Page 63
...to external media before proceeding. 3 Click Next to begin the restoration. Be sure to save your work to external media first. 1 Select Recovery of Factory Default Software, and then click Next. 2 Select Recover to out-of the HDD only Recovering the C: drive to its factory ... drive and your information on the recovered drive will remain intact. Once complete, a message displays that all data will be lost during the recovery process. A confirmation message displays, reminding you that the HDD has been recovered. 4 Press any information on the keyboard to restart the computer...
...to external media before proceeding. 3 Click Next to begin the restoration. Be sure to save your work to external media first. 1 Select Recovery of Factory Default Software, and then click Next. 2 Select Recover to out-of the HDD only Recovering the C: drive to its factory ... drive and your information on the recovered drive will remain intact. Once complete, a message displays that all data will be lost during the recovery process. A confirmation message displays, reminding you that the HDD has been recovered. 4 Press any information on the keyboard to restart the computer...
User Guide
Page 64
... partition. Checking the HDD operating status After restoring your hard disk drive, you have saved your C: drive without the recovery partition: 1 Select Recovery of the screen. Be sure you can check its status as follows: 1 Click Start, and then click Control Panel. 2 Double-click the Administrative Tools icon..., if you that all partitions will be reformatted and all data will increase the size of your C: drive Recovering your C: drive without the recovery partition reformats all partitions on your work to external media before proceeding. 3 Click Yes to restart the computer.
... partition. Checking the HDD operating status After restoring your hard disk drive, you have saved your C: drive without the recovery partition: 1 Select Recovery of the screen. Be sure you can check its status as follows: 1 Click Start, and then click Control Panel. 2 Double-click the Administrative Tools icon..., if you that all partitions will be reformatted and all data will increase the size of your C: drive Recovering your C: drive without the recovery partition reformats all partitions on your work to external media before proceeding. 3 Click Yes to restart the computer.
User Guide
Page 183
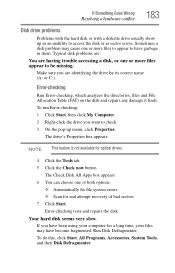
... drive usually show up as an inability to check. 3 On the pop-up menu, click Properties. NOTE This feature is not available for and attempt recovery of bad sectors 7 Click Start. The Check Disk All Apps box appears. 6 You can choose one or more files to appear to be missing. To...
... drive usually show up as an inability to check. 3 On the pop-up menu, click Properties. NOTE This feature is not available for and attempt recovery of bad sectors 7 Click Start. The Check Disk All Apps box appears. 6 You can choose one or more files to appear to be missing. To...
User Guide
Page 184
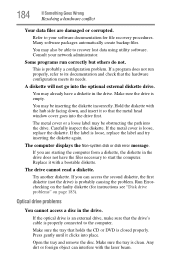
... already have the files necessary to your network administrator. Consult your software documentation for instructions see "Disk drive problems" on the faulty diskette (for file recovery procedures. Some programs run properly, refer to the computer. Hold the diskette with a bootable diskette. Optical drive problems You cannot access a disc in the drive...
... already have the files necessary to your network administrator. Consult your software documentation for instructions see "Disk drive problems" on the faulty diskette (for file recovery procedures. Some programs run properly, refer to the computer. Hold the diskette with a bootable diskette. Optical drive problems You cannot access a disc in the drive...
Maintenance Manual
Page 115
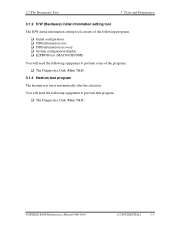
... the following programs. ‰ Initial configuration ‰ DMI information save ‰ DMI information recovery ‰ System configuration display ‰ E2PROM test (MAC/GUID/DMI) You will need the following equipment to perform this program. ‰ The Diagnostics Disk (Main T&D) PORTEGE R500 Maintenance Manual (960-634) [CONFIDENTIAL] 3-3 3.1 The Diagnostic Test 3 Tests and Diagnostics 3.1.2 H/W (Hardware...
... the following programs. ‰ Initial configuration ‰ DMI information save ‰ DMI information recovery ‰ System configuration display ‰ E2PROM test (MAC/GUID/DMI) You will need the following equipment to perform this program. ‰ The Diagnostics Disk (Main T&D) PORTEGE R500 Maintenance Manual (960-634) [CONFIDENTIAL] 3-3 3.1 The Diagnostic Test 3 Tests and Diagnostics 3.1.2 H/W (Hardware...
Maintenance Manual
Page 116
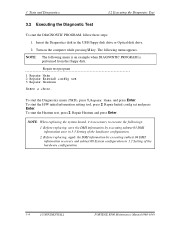
...2 Repair Initial config set and press Enter. Insert the Diagnostics disk in 3.3 Setting of the hardware configuration. 3-4 [CONFIDENTIAL] PORTEGE R500 Maintenance Manual (960-634) The following menu is an example when DIAGNOSTIC PROGRAM is necessary to execute the followings: 1. To ...Heatrun test, press 3, Repair Heatrun and press Enter. Before replacing, save the DMI information by executing subtest 04 DMI information recovery and subtest 08 System configuration in 3.3 Setting of the hardware configuration. 2. 3 Tests and Diagnostics 3.2 Executing the Diagnostic Test...
...2 Repair Initial config set and press Enter. Insert the Diagnostics disk in 3.3 Setting of the hardware configuration. 3-4 [CONFIDENTIAL] PORTEGE R500 Maintenance Manual (960-634) The following menu is an example when DIAGNOSTIC PROGRAM is necessary to execute the followings: 1. To ...Heatrun test, press 3, Repair Heatrun and press Enter. Before replacing, save the DMI information by executing subtest 04 DMI information recovery and subtest 08 System configuration in 3.3 Setting of the hardware configuration. 2. 3 Tests and Diagnostics 3.2 Executing the Diagnostic Test...
Maintenance Manual
Page 120
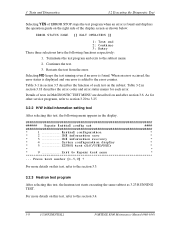
... information recovery * * 4 System configuration display * * 5 E2PROM test (MAC/GUID/DMI) * * * * 9 Exit to Repair test menu * ... Press test number [1-5,9] ? Selecting NO keeps the test running even if an error is found and displays the operation guide on the subtest. For more details on this test, refer to the section 3.4. 3-8 [CONFIDENTIAL] PORTEGE R500 Maintenance Manual...
... information recovery * * 4 System configuration display * * 5 E2PROM test (MAC/GUID/DMI) * * * * 9 Exit to Repair test menu * ... Press test number [1-5,9] ? Selecting NO keeps the test running even if an error is found and displays the operation guide on the subtest. For more details on this test, refer to the section 3.4. 3-8 [CONFIDENTIAL] PORTEGE R500 Maintenance Manual...
Maintenance Manual
Page 122
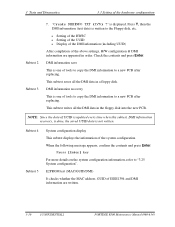
...GUID/DMI) It checks whether the MAC address, GUID of the above settings, H/W configuration & DMI information are written. 3-10 [CONFIDENTIAL] PORTEGE R500 Maintenance Manual (960-634) NOTE: Since the data of the system configuration. DMI information save This is written to a new PCB after ...4 Subtest 5 System configuration display This subtest displays the information of UUID is updated every time when this subtest, DMI information recovery, is done, the saved UUID data is displayed. 3 Tests and Diagnostics 3.3 Setting of tools to copy the DMI information to "3....
...GUID/DMI) It checks whether the MAC address, GUID of the above settings, H/W configuration & DMI information are written. 3-10 [CONFIDENTIAL] PORTEGE R500 Maintenance Manual (960-634) NOTE: Since the data of the system configuration. DMI information save This is written to a new PCB after ...4 Subtest 5 System configuration display This subtest displays the information of UUID is updated every time when this subtest, DMI information recovery, is done, the saved UUID data is displayed. 3 Tests and Diagnostics 3.3 Setting of tools to copy the DMI information to "3....

User Manual
Page 2
... damage xii PC Card overheating xii Mobile phones xii Instruction Manual for Safety and Comfort xii Chapter 1 Getting Started Equipment checklist 1-1 Getting Started 1-3 System Recovery Options 1-12 System Recovery 1-13 Chapter 2 The Grand Tour Front with the display closed 2-1 Left side 2-2 Right side 2-3 Back 2-5 Underside 2-6 Front with the display open 2-7 Indicators 2-10...
... damage xii PC Card overheating xii Mobile phones xii Instruction Manual for Safety and Comfort xii Chapter 1 Getting Started Equipment checklist 1-1 Getting Started 1-3 System Recovery Options 1-12 System Recovery 1-13 Chapter 2 The Grand Tour Front with the display closed 2-1 Left side 2-2 Right side 2-3 Back 2-5 Underside 2-6 Front with the display open 2-7 Indicators 2-10...
User Manual
Page 14
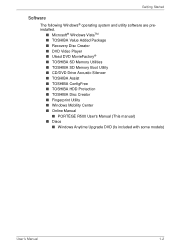
...; Recovery Disc Creator ■ DVD Video Player ■ Ulead DVD MovieFactory® ■ TOSHIBA SD Memory Utilities ■ TOSHIBA SD Memory Boot Utility ■ CD/DVD Drive Acoustic Silencer ■ TOSHIBA Assist ■ TOSHIBA ConfigFree ■ TOSHIBA HDD Protection ■ TOSHIBA Disc Creator ■ Fingerprint Utility ■ Windows Mobility Center ■ Online Manual ■ PORTÉGÉ R500...
...; Recovery Disc Creator ■ DVD Video Player ■ Ulead DVD MovieFactory® ■ TOSHIBA SD Memory Utilities ■ TOSHIBA SD Memory Boot Utility ■ CD/DVD Drive Acoustic Silencer ■ TOSHIBA Assist ■ TOSHIBA ConfigFree ■ TOSHIBA HDD Protection ■ TOSHIBA Disc Creator ■ Fingerprint Utility ■ Windows Mobility Center ■ Online Manual ■ PORTÉGÉ R500...
User Manual
Page 15
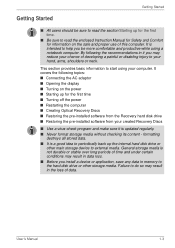
...Comfort for the first time ■ Turning off the power ■ Restarting the computer ■ Creating Optical Recovery Discs ■ Restoring the pre-installed software from the Recovery hard disk drive ■ Restoring the pre-installed software from your chance of data. General storage media is ...updated regularly. ■ Never format storage media without checking its content - User's Manual 1-3 Failure to do so may reduce your created Recovery Discs ■ Use a virus-check program and make sure it you be sure to read the section Starting up the internal hard disk ...
...Comfort for the first time ■ Turning off the power ■ Restarting the computer ■ Creating Optical Recovery Discs ■ Restoring the pre-installed software from the Recovery hard disk drive ■ Restoring the pre-installed software from your chance of data. General storage media is ...updated regularly. ■ Never format storage media without checking its content - User's Manual 1-3 Failure to do so may reduce your created Recovery Discs ■ Use a virus-check program and make sure it you be sure to read the section Starting up the internal hard disk ...
User Manual
Page 24
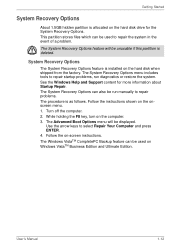
...on the hard disk drive for more information about Startup Repair. See the Windows Help and Support content for the System Recovery Options. Getting Started System Recovery Options About 1.5GB hidden partition is allocated on Windows VistaTM Business Edition and Ultimate Edition. Turn off the computer. ...disk when shipped from the factory. This partition stores files which can also be unusable if this partition is deleted. The System Recovery Options can be used to repair problems. The procedure is installed on -screen instructions. The Advanced Boot Options menu will be ...
...on the hard disk drive for more information about Startup Repair. See the Windows Help and Support content for the System Recovery Options. Getting Started System Recovery Options About 1.5GB hidden partition is allocated on Windows VistaTM Business Edition and Ultimate Edition. Turn off the computer. ...disk when shipped from the factory. This partition stores files which can also be unusable if this partition is deleted. The System Recovery Options can be used to repair problems. The procedure is installed on -screen instructions. The Advanced Boot Options menu will be ...


