
User Guide
Page 33
...user password 152 TOSHIBA PC Diagnostic Tool Utility 153 TOSHIBA HDD Protection Utility 154 Fn-esse 155 Starting Fn-esse 155 TOSHIBA SD™ Memory Card Format Utility .........156 TOSHIBA SD™ Memory Boot Utility 157 Booting from a bootable SD card 158 TOSHIBA Power Saver ... TOSHIBA Hardware Setup 162 TOSHIBA Zooming Utility 164 TOSHIBA Mobile Extension 165 TOSHIBA Button Support 166 CD/DVD Drive Acoustic Silencer 167 TOSHIBA Rotation Utility 168 Tablet and Pen Settings 169 Cross Menu Utility 171 Creating a New Menu 172 Toshiba Tablet Access Code Utility 173 TOSHIBA ...
...user password 152 TOSHIBA PC Diagnostic Tool Utility 153 TOSHIBA HDD Protection Utility 154 Fn-esse 155 Starting Fn-esse 155 TOSHIBA SD™ Memory Card Format Utility .........156 TOSHIBA SD™ Memory Boot Utility 157 Booting from a bootable SD card 158 TOSHIBA Power Saver ... TOSHIBA Hardware Setup 162 TOSHIBA Zooming Utility 164 TOSHIBA Mobile Extension 165 TOSHIBA Button Support 166 CD/DVD Drive Acoustic Silencer 167 TOSHIBA Rotation Utility 168 Tablet and Pen Settings 169 Cross Menu Utility 171 Creating a New Menu 172 Toshiba Tablet Access Code Utility 173 TOSHIBA ...

User Guide
Page 64
64 Getting Started Hard Drive Recovery Utilities NOTE The size of the C: drive will boot up to the Toshiba Recovery Wizard screen. 4 Please refer to "Hard Disk Drive Recovery options" on the computer. 2 When the initial screen displays, press F12. Hard Disk ...recover your computer to its default factory state, you make your selections. 4 Click Next to explain the available recovery options. (Sample Image) Toshiba HDD Recovery Utility screen The boot menu appears. 3 Using the arrow keys, select the CD/DVD option and press Enter. Once complete, a message displays that the HDD has ...
64 Getting Started Hard Drive Recovery Utilities NOTE The size of the C: drive will boot up to the Toshiba Recovery Wizard screen. 4 Please refer to "Hard Disk Drive Recovery options" on the computer. 2 When the initial screen displays, press F12. Hard Disk ...recover your computer to its default factory state, you make your selections. 4 Click Next to explain the available recovery options. (Sample Image) Toshiba HDD Recovery Utility screen The boot menu appears. 3 Using the arrow keys, select the CD/DVD option and press Enter. Once complete, a message displays that the HDD has ...

User Guide
Page 158
The system displays the Boot menu. 6 Use the arrow keys to select the SD/Floppy icon. 7 Press the Enter key. Booting from a bootable SD card To boot from a floppy disk. 6 Click Start. 158 Utilities TOSHIBA SD™ Memory Boot Utility 4 Select the drive where the SD card is located. 5 Select Read from a ...bootable SD card: 1 Create a bootable SD card (see "TOSHIBA SD™ Memory Boot Utility" on page 157 for instructions). 2 Verify that no floppy disk is installed in the optional external floppy disk drive. 3 Insert ...
The system displays the Boot menu. 6 Use the arrow keys to select the SD/Floppy icon. 7 Press the Enter key. Booting from a bootable SD card To boot from a floppy disk. 6 Click Start. 158 Utilities TOSHIBA SD™ Memory Boot Utility 4 Select the drive where the SD card is located. 5 Select Read from a ...bootable SD card: 1 Create a bootable SD card (see "TOSHIBA SD™ Memory Boot Utility" on page 157 for instructions). 2 Verify that no floppy disk is installed in the optional external floppy disk drive. 3 Insert ...
User Guide
Page 182
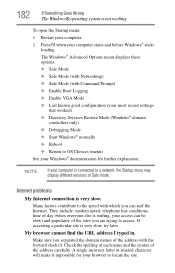
... Wrong The Windows® operating system is very slow, try later. The Windows® Advanced Options menu displays these options: ❖ Safe Mode ❖ Safe Mode (with Networking) ❖ Safe Mode (with Command Prompt) ❖ Enable Boot Logging ❖ Enable VGA Mode ❖ Last known good configuration (your most recent settings that...
... Wrong The Windows® operating system is very slow, try later. The Windows® Advanced Options menu displays these options: ❖ Safe Mode ❖ Safe Mode (with Networking) ❖ Safe Mode (with Command Prompt) ❖ Enable Boot Logging ❖ Enable VGA Mode ❖ Last known good configuration (your most recent settings that...


