Toshiba IK-WR12A Support and Manuals
Get Help and Manuals for this Toshiba item

View All Support Options Below
Free Toshiba IK-WR12A manuals!
Problems with Toshiba IK-WR12A?
Ask a Question
Free Toshiba IK-WR12A manuals!
Problems with Toshiba IK-WR12A?
Ask a Question
Popular Toshiba IK-WR12A Manual Pages
Quick Start Guide - Page 1
... peripheral devices, refer to the following Website: n http://www.toshibasecurity.com If the URL changes, refer to the user's manual (PDF file) contained in the CD-ROM for settings, operations and other information. NETWORK CAMERA
Model: IK-WR12A
Quick Start Guide and Important Safeguards
This guide describes the hardware installation. The application Adobe Reader is needed to view PDF files.
Quick Start Guide - Page 3

...® Corporation in a convenient place for purchasing the IK-WR12A Network Camera. Windows® XP: Microsoft® Windows® XP operating system -- Once you start using the camera, read this quick start guide, keep it in the United States and other countries. The design, specifications, software, and quick start guide carefully to change without prior notice. l Microsoft...
Quick Start Guide - Page 4
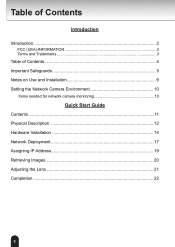
...)-INFORMATION 2 Terms and Trademarks 3 Table of Contents 4 Important Safeguards 5 Notes on Use and Installation 9 Setting the Network Camera Environment 10 Items needed for network camera monitoring 10
Quick Start Guide Contents 11 Physical Description 12 Hardware Installation 14 Network Deployment 17 Assigning IP Address 19 Retrieving Images 20 Adjusting the Lens 21 Completion 22
4
Quick Start Guide - Page 5
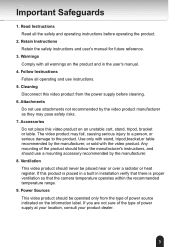
... all warnings on the product and in installation verify that there is placed in a built in the user's manual.
4. Cleaning Disconnect this video product from the type of power supply at your location, consult your product dealer.
5 Ventilation This video product should use instructions.
5. Important Safeguards
1. Warnings Comply with the video product. Accessories...
Quick Start Guide - Page 7
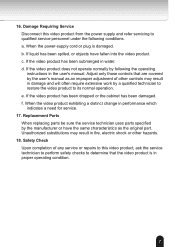
...repairs to this video product from the power supply and refer servicing to qualified service personnel under the following the operating instructions in fire, electric shock or other hazards.
18. Safety Check Upon completion of other controls may result in the user's manual... product. f. Replacement Parts When replacing parts be sure the service technician uses parts specified by following...
Quick Start Guide - Page 9
... Installation
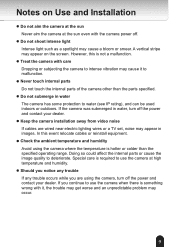
l Do not aim the camera at the sun Never aim the camera at high temperature and humidity.
If the camera was submerged in water, turn off the power and contact your dealer.
If you are wired near electric lighting wires or a TV set, noise may cause it , the trouble may get worse and an unpredictable problem...
Quick Start Guide - Page 10
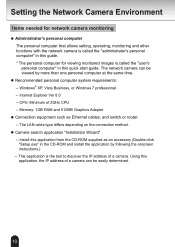
... tool to discover the IP address of a camera. CPU: Minimum of a camera can be easily determined.
10 Memory: 1GB RAM and 512MB Graphics Adapter
l Connection equipment such as an accessory (Double-click "Setup.exe" in this quick start guide. The network camera can be viewed by following the onscreen instructions.) -- Using this application, the IP address of 2GHz CPU...
Quick Start Guide - Page 11
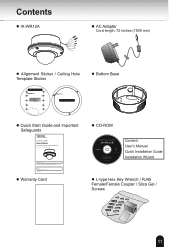
...-ROM
IK-WR12A
Content: User's Manual Quick Installation Guide Installation Wizard
l L-type Hex Key Wrench / RJ45 Female/Female Coupler / Slica Gel / Screws
11 N.C. AACC2244VV
l Alignment Sticker / Ceiling Hole Template Sticker
l Bottom Base
Drill hole Ceiling Hole Template Sticker
l Quick Start Guide and Important Safeguards
NETWORK CAMERA Model: IK-WR12A Quick Start Guide and Important...
Quick Start Guide - Page 12
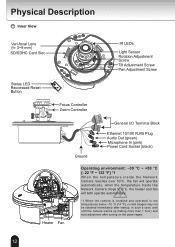
... Adjustment Screw Pan Adjustment Screw
Status LED Reccessed Reset Button
Focus Controller Zoom Controller
N.C. when the temparature inside the Network Camera reaches over 50°C, the fan will both operate automatically.
*1 When the camera is installed and operated in low temperatures below -10 °C {14 °F}, normal images may not be obtained immediately after...
Quick Start Guide - Page 16
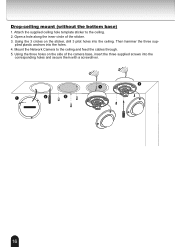
... holes into the
corresponding holes and secure them with a screwdriver.
5 4
1
2
3
Drill hole
Ceiling Hole Template Sticker
16 plied plastic anchors into the holes. 4. Mount the Network Camera to the ceiling. 2. Attach the supplied ceiling hole template sticker to the ceiling and feed the cables through. 5.
Drop-ceiling mount (without the bottom base)
1.
Quick Start Guide - Page 17

...N.C. N . C . : No Connector
AC24V AC24V
AC24V: Power in 24V AC
AC24V: Power in to the Network Camera before plugging in 24V AC
G N D : Ground
GND DI
D I /O terminal block. NN.CN.C. ...UL Listed Class2 power supply.
AC.
Use the supplied RJ45 female/female coupler to connect the Network Camera to PC. If you have external devices such as sensors and alarms, make the connection from...
Quick Start Guide - Page 18
... to a PoE switch via a single Ethernet cable. NA.CC.24V
AC24V
POWER
COLLISION
1
2
3
4
5
LINK RECEIVE PARTITION
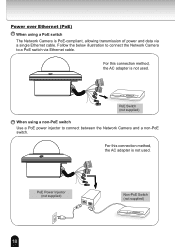
PoE Switch (not supplied)
When using a PoE switch
The Network Camera is not used . For this connection method, the AC adapter is PoE-compliant, allowing transmission of power and data via Ethernet cable. Follow the below...
Quick Start Guide - Page 19
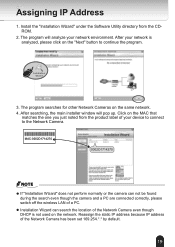
...pop up. Click on the "Next" button to the Network Camera.
After your network is not used on the same network.
4.
Reassign the static IP address because IP address of your network environment. Install the "Installation Wizard" under the Software Utility directory from the product label of the Network Camera has been set 169.254.*.* by default.
19 The program searches for other...
Quick Start Guide - Page 20
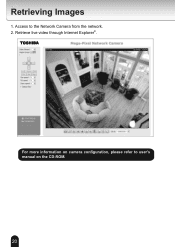
Access to user's manual on the CD-ROM.
20 Retrieving Images
1. Retrieve live video through Internet Explorer®.
2010/09/01 16:34:42
For more information on camera configuration, please refer to the Network Camera from the network. 2.
Quick Start Guide - Page 24

Surveillance & IP Video Products 9740 Irvine Boulevard, Irvine, CA 92618-1697 Phone Number: (877) 855-1349
625012200G TOSHIBA AMERICA INFORMATION SYSTEMS, INC.
Toshiba IK-WR12A Reviews
We have not received any reviews for Toshiba yet.