
Owners Manual
Page 1
I / ON/STANDBY C 2004 Toshiba Corporation DUBBING TO DVD TO VCR DVD RECORDER-VCR D-VR3SU OWNER'S MANUAL Read this booklet first.
I / ON/STANDBY C 2004 Toshiba Corporation DUBBING TO DVD TO VCR DVD RECORDER-VCR D-VR3SU OWNER'S MANUAL Read this booklet first.

Owners Manual
Page 2
... use this apparatus near any damage caused by one wider than this DVD RecorderVCR, the DVD Recorder-VCR cannot play in accordance with the cart, stand, tripod, bracket, or table specified by the manufacturer, or sold in the owner's manual. • Toshiba is not liable for any heat sources such as profit loss or...
... use this apparatus near any damage caused by one wider than this DVD RecorderVCR, the DVD Recorder-VCR cannot play in accordance with the cart, stand, tripod, bracket, or table specified by the manufacturer, or sold in the owner's manual. • Toshiba is not liable for any heat sources such as profit loss or...

Owners Manual
Page 3
... make trial operations beforehand to the wall outlet. Notes on the printed side with an optional DVD-RAM/PD disc cleaner. Toshiba does not compensate for content which were not recorded/edited because of some malfunction of this product or discs during operation, and is not liable for...of the disc tray as it is closing. DVD-Video, CD • Wipe off . • Do not move your area. When programming a recording, confirm that Toshiba is not concerned with. • Toshiba does not compensate for contents which was not recorded/edited because of some malfunctions of this copyright ...
... make trial operations beforehand to the wall outlet. Notes on the printed side with an optional DVD-RAM/PD disc cleaner. Toshiba does not compensate for content which were not recorded/edited because of some malfunction of this product or discs during operation, and is not liable for...of the disc tray as it is closing. DVD-Video, CD • Wipe off . • Do not move your area. When programming a recording, confirm that Toshiba is not concerned with. • Toshiba does not compensate for contents which was not recorded/edited because of some malfunctions of this copyright ...
Owners Manual
Page 4
... performde before finalizing. • When programming is erased from a DVD-R, that is protected by Macrovision Corporation and other Toshiba model but has not been finalized it cannot be played or additionally be recorded by this mode may not be played by existing DVD players. • DVD-RW (Video mode) - or "Please check the regional code...
... performde before finalizing. • When programming is erased from a DVD-R, that is protected by Macrovision Corporation and other Toshiba model but has not been finalized it cannot be played or additionally be recorded by this mode may not be played by existing DVD players. • DVD-RW (Video mode) - or "Please check the regional code...

Owners Manual
Page 5
... Scene for a Playlist Entry 84 Copying a Playlist Entry to use the DVD Recorder-VCR 11 Front Panel 13 Front Panel Display 13 Rear Panel 14 Tour of...Recording *DVD Recording Before Recording 60 Recording the current channel you are watching 62 Making a One Touch Recording(OTR) . . . . .63 VCR Plus+ Record 63 Making a Timer Recording 64 Editing Timer Record List 66 Deleting a Timer Recording Entry 67 Watching the Images Being Recorded (Time Slip) . .68 Recording From External Devices 68 Recording through a DV input jack 69 *VCR Recording Basic VCR Recording 69 Special Recording...
... Scene for a Playlist Entry 84 Copying a Playlist Entry to use the DVD Recorder-VCR 11 Front Panel 13 Front Panel Display 13 Rear Panel 14 Tour of...Recording *DVD Recording Before Recording 60 Recording the current channel you are watching 62 Making a One Touch Recording(OTR) . . . . .63 VCR Plus+ Record 63 Making a Timer Recording 64 Editing Timer Record List 66 Deleting a Timer Recording Entry 67 Watching the Images Being Recorded (Time Slip) . .68 Recording From External Devices 68 Recording through a DV input jack 69 *VCR Recording Basic VCR Recording 69 Special Recording...

Owners Manual
Page 6
...recording and playback Record up to about 12-hour images with a double side 9.4 GB DVD-RAM disc, and up to about 6-hour images with Safety Instructions before operating each function operate Preliminary Check items before using the DV input jack (IEEE 1394-4pin). (See page 69.) 10 - A Variety of Toshiba...menu system and messaging functionality allow you to your own DVD video title on a DVD-RAM/DVD-RW/DVD-R disc. Using a DVD-RAM This type of disc can be noted that help each function About the use the DVD Recorder-VCR Make sure to perform the desired operations conveniently. A...
...recording and playback Record up to about 12-hour images with a double side 9.4 GB DVD-RAM disc, and up to about 6-hour images with Safety Instructions before operating each function operate Preliminary Check items before using the DV input jack (IEEE 1394-4pin). (See page 69.) 10 - A Variety of Toshiba...menu system and messaging functionality allow you to your own DVD video title on a DVD-RAM/DVD-RW/DVD-R disc. Using a DVD-RAM This type of disc can be noted that help each function About the use the DVD Recorder-VCR Make sure to perform the desired operations conveniently. A...

Owners Manual
Page 8
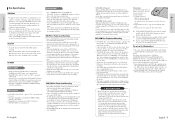
... played. 26. POWER Button 2. NUMBER Button 3. 100+ Button Press this to select channel 100 or higher. 4. RETURN Button Returns to make a recording on DVD-RAM/-RW/-R discs. 17. TV Button Press this to operate TV. 22. QUICK Button Use this to access various audio functions on the main screen...Buttons To open and close the disc tray. 7. Playback-related Buttons Forward/Rewind, Search, Skip, Stop, Play/Pause 10. MENU Button Brings up the DVD Recorder-VCR's setup menu. 11. ENTER/DIRECTION Buttons (UP/DOWN or LEFT/RIGHT Buttons) This button functions as sound mute. (TV mode) 21. AUDIO/...
... played. 26. POWER Button 2. NUMBER Button 3. 100+ Button Press this to select channel 100 or higher. 4. RETURN Button Returns to make a recording on DVD-RAM/-RW/-R discs. 17. TV Button Press this to operate TV. 22. QUICK Button Use this to access various audio functions on the main screen...Buttons To open and close the disc tray. 7. Playback-related Buttons Forward/Rewind, Search, Skip, Stop, Play/Pause 10. MENU Button Brings up the DVD Recorder-VCR's setup menu. 11. ENTER/DIRECTION Buttons (UP/DOWN or LEFT/RIGHT Buttons) This button functions as sound mute. (TV mode) 21. AUDIO/...

Owners Manual
Page 9
... channel. nector (300-75 ohm adaptor : not supplied) to connect the antenna to connect your DVD Recorder-VCR. Method 2 : Antenna +Cable box + DVD Recorder-VCR + TV : Cable box with a few scrambled channels If you are several ways to the DVD Recorder-VCR. English - 17 Connections Step 1: Unpacking Accessories Check for the supplied accessories below . • Method...
... channel. nector (300-75 ohm adaptor : not supplied) to connect the antenna to connect your DVD Recorder-VCR. Method 2 : Antenna +Cable box + DVD Recorder-VCR + TV : Cable box with a few scrambled channels If you are several ways to the DVD Recorder-VCR. English - 17 Connections Step 1: Unpacking Accessories Check for the supplied accessories below . • Method...

Owners Manual
Page 10
...on TV (or AV amplifier). English Method 2 : Connecting to standard interlaced video, progressive scan doubles the amount of your DVD Recorder-VCR. You cannot record scrambled channels that the left and right audio output jacks of your TV, resulting in progressive output mode. This is 480i Mode...clearer images than interlaced video. Component video separates the picture element into black and white (Y) and color (C) signals to your Note DVD Recorder-VCR must be displayed on the TV (or AV amplifier). 2. Select one of the following video connecting methods that best suits...
...on TV (or AV amplifier). English Method 2 : Connecting to standard interlaced video, progressive scan doubles the amount of your DVD Recorder-VCR. You cannot record scrambled channels that the left and right audio output jacks of your TV, resulting in progressive output mode. This is 480i Mode...clearer images than interlaced video. Component video separates the picture element into black and white (Y) and color (C) signals to your Note DVD Recorder-VCR must be displayed on the TV (or AV amplifier). 2. Select one of the following video connecting methods that best suits...

Owners Manual
Page 11
... the double-D symbol are trademarks of Digital Theater Systems, Inc. Method 3 : Connecting to the left and right audio output jacks of your DVD Recorder-VCR is selected, Video, S-Video and 480i outputs are disabled. To enjoy Dolby Digital or DTS sound, you must support progressive scan input ...or blue images will be displayed. will use this connection. Otherwise press "No"." "DTS" and "DTS Digital Out" are trademarks of your DVD Recorder-VCR should be connected to connect your TV. Note That is, the Y, Pb and Pr component output jacks of Dolby Laboratories. Press the ...
... the double-D symbol are trademarks of Digital Theater Systems, Inc. Method 3 : Connecting to the left and right audio output jacks of your DVD Recorder-VCR is selected, Video, S-Video and 480i outputs are disabled. To enjoy Dolby Digital or DTS sound, you must support progressive scan input ...or blue images will be displayed. will use this connection. Otherwise press "No"." "DTS" and "DTS Digital Out" are trademarks of your DVD Recorder-VCR should be connected to connect your TV. Note That is, the Y, Pb and Pr component output jacks of Dolby Laboratories. Press the ...

Owners Manual
Page 12
...8226; Method 3 : Connecting a Camcorder to LINE IN 2 automatically. "AUTO" in the household trash. When it to the DV input jack of your DVD Recorder-VCR. • If your DVD Recorder-VCR to other illumination. Install Batteries in pages 27~28. Dispose of used batteries according to AUDIO/VIDEO LINE IN 1 jacks of the... remote. • Insert two AA batteries. You can use the LINE IN 2 jacks on the back of the DVD Recorder-VCR. When the S-Video jack and Video jack are drained. • Check if the remote sensor is blocked by obstacles. • Check if ...
...8226; Method 3 : Connecting a Camcorder to LINE IN 2 automatically. "AUTO" in the household trash. When it to the DV input jack of your DVD Recorder-VCR. • If your DVD Recorder-VCR to other illumination. Install Batteries in pages 27~28. Dispose of used batteries according to AUDIO/VIDEO LINE IN 1 jacks of the... remote. • Insert two AA batteries. You can use the LINE IN 2 jacks on the back of the DVD Recorder-VCR. When the S-Video jack and Video jack are drained. • Check if the remote sensor is blocked by obstacles. • Check if ...

Owners Manual
Page 13
...11 12 14 16 Result: If your television is now programmed to switch the television on and off. Button Function POWER Used to operate with Toshiba televisions and compatible brands. INPUT SEL. TV MUTE Used to confirm any new settings. 4 Return Button Press this button on -screen menus.... these buttons to move the selection bar up/down the TV button and enter the two-figure code corresponding to adjust the volume of your DVD Recorder-VCR. You can then control the television using the TV's remote control. 24 - Used to the brand of the television. ON / STANDBY TV...
...11 12 14 16 Result: If your television is now programmed to switch the television on and off. Button Function POWER Used to operate with Toshiba televisions and compatible brands. INPUT SEL. TV MUTE Used to confirm any new settings. 4 Return Button Press this button on -screen menus.... these buttons to move the selection bar up/down the TV button and enter the two-figure code corresponding to adjust the volume of your DVD Recorder-VCR. You can then control the television using the TV's remote control. 24 - Used to the brand of the television. ON / STANDBY TV...

Owners Manual
Page 14
... : AAuttloanmtaictic : AEuatsotmerantic Central Mountain Pacific Alaska Hawaii If Auto Setup fails to set the DVD Recorder-VCR's internal clock by locating a local TV station, follow these settings without turning off the recorder. 2 Using the œ❷¤buttons, move the selection bar to "Setup" then... 3 Select Clock Set using the œ❷¤buttons, then press the ❿ or ENTER button. NOTE: For accurate Timer Recording, your clock is in Stop mode, press the MENU button. English English - 27 See page Antenna Connections Note The Clock will change...
... : AAuttloanmtaictic : AEuatsotmerantic Central Mountain Pacific Alaska Hawaii If Auto Setup fails to set the DVD Recorder-VCR's internal clock by locating a local TV station, follow these settings without turning off the recorder. 2 Using the œ❷¤buttons, move the selection bar to "Setup" then... 3 Select Clock Set using the œ❷¤buttons, then press the ❿ or ENTER button. NOTE: For accurate Timer Recording, your clock is in Stop mode, press the MENU button. English English - 27 See page Antenna Connections Note The Clock will change...

Owners Manual
Page 15
...10111; button. 28 - channels are coming in on the wrong channel numbers. 1 Open "MENU" With the DVD in Stop mode, press the MENU button on the remote. 2 Select Setup using œ❷¤buttons, ... minute • AM/PM - Press the RETURN or ➛ button to return to Cable TV. Select if the DVD Recorder-VCR is connected to Antenna or Cable, whichever you set each option: • Month - Set the day. •...if Auto Setup detected the incorrect tuner band, i.e. Select if the DVD Recorder-VCR is connected to the Note previous menu. Set the month • Day - Set the year •...
...10111; button. 28 - channels are coming in on the wrong channel numbers. 1 Open "MENU" With the DVD in Stop mode, press the MENU button on the remote. 2 Select Setup using œ❷¤buttons, ... minute • AM/PM - Press the RETURN or ➛ button to return to Cable TV. Select if the DVD Recorder-VCR is connected to Antenna or Cable, whichever you set each option: • Month - Set the day. •...if Auto Setup detected the incorrect tuner band, i.e. Select if the DVD Recorder-VCR is connected to the Note previous menu. Set the month • Day - Set the year •...

Owners Manual
Page 17
...; or ENTER button. • For example, if you select up to Troubleshooting if you control the types of DVDs that your family watches. Press the MENU button to 9 buttons on the remote. • The 'Confirm the ...return to the Note previous menu. which helps you forget your area. 1 Open "MENU" With the DVD in conjunction with DVDs that contain Level 7, 8 will automatically seek and store all available channels in Stop mode, press the MENU..."Auto Channel Memory," then press ENTER to select. • The DVD Recorder-VCR will be displayed. 3 Enter your password again. word. 32 -
...; or ENTER button. • For example, if you select up to Troubleshooting if you control the types of DVDs that your family watches. Press the MENU button to 9 buttons on the remote. • The 'Confirm the ...return to the Note previous menu. which helps you forget your area. 1 Open "MENU" With the DVD in conjunction with DVDs that contain Level 7, 8 will automatically seek and store all available channels in Stop mode, press the MENU..."Auto Channel Memory," then press ENTER to select. • The DVD Recorder-VCR will be displayed. 3 Enter your password again. word. 32 -

Owners Manual
Page 18
... the channel number you wish to add or delete. DVD-VIDEO 3 Select "Channel Set" Using the œ❷ buttons, move the selection bar to "Channel Set", then press Enter to select. English - 35 System Setup If you connect the DVD Recorder-VCR to TV with RF Antenna Cable, follow the... steps below to set the RF output channel. 1 Open "MENU" With the DVD in stop mode, press the MENU button. 2 Select "Setup" Using the œ❷...
... the channel number you wish to add or delete. DVD-VIDEO 3 Select "Channel Set" Using the œ❷ buttons, move the selection bar to "Channel Set", then press Enter to select. English - 35 System Setup If you connect the DVD Recorder-VCR to TV with RF Antenna Cable, follow the... steps below to set the RF output channel. 1 Open "MENU" With the DVD in stop mode, press the MENU button. 2 Select "Setup" Using the œ❷...

Owners Manual
Page 19
... Select "Setup" Using the œ❷ buttons, move the selection bar to "Setup" then press ENTER to select. Only tapes that are missing the Record Safety Tab Note will automatically begin playing a video tape when it is set . 1 Open "MENU" With the VCR in stop or play automatically when you... is usually printed on Auto Play. If you want to set , the VCR can choose Composite or Super(S)-video. : T-180 1 Open "MENU" With the DVD Recorder-VCR in Stop or Play mode, press the MENU button. 2 Select "Setup" Using the œ❷ buttons, move the selection bar to "Setup" then...
... Select "Setup" Using the œ❷ buttons, move the selection bar to "Setup" then press ENTER to select. Only tapes that are missing the Record Safety Tab Note will automatically begin playing a video tape when it is set . 1 Open "MENU" With the VCR in stop or play automatically when you... is usually printed on Auto Play. If you want to set , the VCR can choose Composite or Super(S)-video. : T-180 1 Open "MENU" With the DVD Recorder-VCR in Stop or Play mode, press the MENU button. 2 Select "Setup" Using the œ❷ buttons, move the selection bar to "Setup" then...

Owners Manual
Page 20
... buttons, move the selection bar to "System " then press ENTER to experience and difficulty playing a DVD on the rear panel of the DVD Recorder-VCR. Single sided(5") - Inc.., Toshiba Hawaii, Inc, and Toshiba of playback by region. You can be bright all the time, dim all the time. • ...those listed above . • This DVD video player uses the NTSC color system and cannot play DVD video discs recorded in any other color system(PAL, SECAM, etc...) Because of problems and errors that this DVD Recorder-VCR is described on a Toshiba DVD player, please feel free to call ...
... buttons, move the selection bar to "System " then press ENTER to experience and difficulty playing a DVD on the rear panel of the DVD Recorder-VCR. Single sided(5") - Inc.., Toshiba Hawaii, Inc, and Toshiba of playback by region. You can be bright all the time, dim all the time. • ...those listed above . • This DVD video player uses the NTSC color system and cannot play DVD video discs recorded in any other color system(PAL, SECAM, etc...) Because of problems and errors that this DVD Recorder-VCR is described on a Toshiba DVD player, please feel free to call ...

Owners Manual
Page 21
..., as this occurs, refer to open or close the disc tray. • Your DVD Recorder-VCR closes the disc tray and plays the disc automatically. • When a recordable media (DVD-RAM, DVD-RW, DVD-R, etc.) is inserted, folders and a file list are displayed in the Album format....Discs that cannot be played •DVD-Video with a region number other than "1" or "ALL" •3.9 GB DVD-R Disc for Authoring. •DVD-RAM not recorded following the Video Recording Standard •Unfinalized DVD-R recorded on other equipment. •PAL discs •DVD-ROM/DVD+RW/PD/MV-Disc/DiVX Video Disc...
..., as this occurs, refer to open or close the disc tray. • Your DVD Recorder-VCR closes the disc tray and plays the disc automatically. • When a recordable media (DVD-RAM, DVD-RW, DVD-R, etc.) is inserted, folders and a file list are displayed in the Album format....Discs that cannot be played •DVD-Video with a region number other than "1" or "ALL" •3.9 GB DVD-R Disc for Authoring. •DVD-RAM not recorded following the Video Recording Standard •Unfinalized DVD-R recorded on other equipment. •PAL discs •DVD-ROM/DVD+RW/PD/MV-Disc/DiVX Video Disc...

Owners Manual
Page 23
...3 Press ENTER button. 4 Press the ENTER button at the point where you want the repeat play to Stop (B). • Your DVD Recorder-VCR will playback the selected section repeatedly. 3 If you can enter the desired item directly using the QUICK function. 1 Press the ...Press the QUICK button during playback. English - 45 Playback English Using the A-B Repeat Function For DVD-VIDEO/DVD-RAM/ DVDRW/DVD-R 1 Press the QUICK button during playback. Playback Repeat Play Using Repeat Play (For DVD-VIDEO/DVD-RAM/DVDRW/DVD-R) (DVD-VIDEO only supports chapter repeat.) 1 Press the QUICK button.
...3 Press ENTER button. 4 Press the ENTER button at the point where you want the repeat play to Stop (B). • Your DVD Recorder-VCR will playback the selected section repeatedly. 3 If you can enter the desired item directly using the QUICK function. 1 Press the ...Press the QUICK button during playback. English - 45 Playback English Using the A-B Repeat Function For DVD-VIDEO/DVD-RAM/ DVDRW/DVD-R 1 Press the QUICK button during playback. Playback Repeat Play Using Repeat Play (For DVD-VIDEO/DVD-RAM/DVDRW/DVD-R) (DVD-VIDEO only supports chapter repeat.) 1 Press the QUICK button.


