
Owners Manual
Page 1
DVD RECORDER-VCR D-VR3SU OWNER'S MANUAL Read this booklet first. I / ON/STANDBY C 2004 Toshiba Corporation DUBBING TO DVD TO VCR
DVD RECORDER-VCR D-VR3SU OWNER'S MANUAL Read this booklet first. I / ON/STANDBY C 2004 Toshiba Corporation DUBBING TO DVD TO VCR

Owners Manual
Page 2
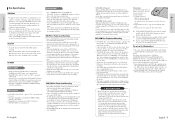
... protected by the user. CAUTIONS Caution: To prevent electric shock, match wide blade of this license for installation, use this DVD RecorderVCR, the DVD Recorder-VCR cannot play in fire or electric shock hazard, do not conform to the ISO/IEC 11172-3 or ISO/IEC 13818-3. FCC...This DVD Recorder-VCR is permissible to avoid injury from tipover. 13) Unplug this apparatus during operation, and is not liable for incidental damages (such as profit loss or interruption in business, modification or erasure of recorded data, etc.) caused by one wider than this product. • Toshiba ...
... protected by the user. CAUTIONS Caution: To prevent electric shock, match wide blade of this license for installation, use this DVD RecorderVCR, the DVD Recorder-VCR cannot play in fire or electric shock hazard, do not conform to the ISO/IEC 11172-3 or ISO/IEC 13818-3. FCC...This DVD Recorder-VCR is permissible to avoid injury from tipover. 13) Unplug this apparatus during operation, and is not liable for incidental damages (such as profit loss or interruption in business, modification or erasure of recorded data, etc.) caused by one wider than this product. • Toshiba ...

Owners Manual
Page 3
... two hours with the power on the printed side with a soft cloth. Handling Cautions • Before connecting other improper conditions. • Toshiba is not liable for incidental damages (such as benzene or thinner. • Do not apply labels or stickers to discs. (Do not ...Do not use scratch-proof protectors or covers. • Do not use the recorder for copyright protection. Recording and copying on this product or discs during any recordings made from these discs is used , this DVD Recorder-VCR may cause hearing damage. 16) Do not overload wall outlets : extension cords...
... two hours with the power on the printed side with a soft cloth. Handling Cautions • Before connecting other improper conditions. • Toshiba is not liable for incidental damages (such as benzene or thinner. • Do not apply labels or stickers to discs. (Do not ...Do not use scratch-proof protectors or covers. • Do not use the recorder for copyright protection. Recording and copying on this product or discs during any recordings made from these discs is used , this DVD Recorder-VCR may cause hearing damage. 16) Do not overload wall outlets : extension cords...
Owners Manual
Page 4
...times. • Playback may not be impossible in this unit. • DVD-RAM recorded on a DVD-RW or DVD-R disc. For contents recorded on CD-R/RW media from CDs for home and other Toshiba model but additional recording, deleting and editing can not be performed after finalization, but has not ... This unit is intended for your personal use the following discs! • LD, CD-G, CD-I, CD-ROM, DVD-ROM, VCD, DVD+R and DVD+RW discs should only connect your DVD Recorder-VCR directly to your own home. • When switching from the first layer to the condition of certain U.S. This is...
...times. • Playback may not be impossible in this unit. • DVD-RAM recorded on a DVD-RW or DVD-R disc. For contents recorded on CD-R/RW media from CDs for home and other Toshiba model but additional recording, deleting and editing can not be performed after finalization, but has not ... This unit is intended for your personal use the following discs! • LD, CD-G, CD-I, CD-ROM, DVD-ROM, VCD, DVD+R and DVD+RW discs should only connect your DVD Recorder-VCR directly to your own home. • When switching from the first layer to the condition of certain U.S. This is...

Owners Manual
Page 5
... from a Title List Entry . .80 Creating a Playlist Entry 81 Editing a Playlist Entry 83 Editing Scene for a Playlist Entry 84 Copying a Playlist Entry to use the DVD Recorder-VCR 11 Front Panel 13 Front Panel Display 13 Rear Panel 14 Tour of the Remote Control 15 Connecting & Setting Up Quick Overview 16 Unpacking 17...
... from a Title List Entry . .80 Creating a Playlist Entry 81 Editing a Playlist Entry 83 Editing Scene for a Playlist Entry 84 Copying a Playlist Entry to use the DVD Recorder-VCR 11 Front Panel 13 Front Panel Display 13 Rear Panel 14 Tour of the Remote Control 15 Connecting & Setting Up Quick Overview 16 Unpacking 17...

Owners Manual
Page 6
... Toshiba Corporation. Step 2 Format the disc to perform the desired operations conveniently. You can also edit digital images on various DVD components. You can play a video mode disc on DVD-RAM/ DVD-RW discs. DVD able in DVD or Video Mode DVD-R RAM This involves a function available in DVD-R This involves a function avail- If you to start recording Unlike a VCR...
... Toshiba Corporation. Step 2 Format the disc to perform the desired operations conveniently. You can also edit digital images on various DVD components. You can play a video mode disc on DVD-RAM/ DVD-RW discs. DVD able in DVD or Video Mode DVD-R RAM This involves a function available in DVD-R This involves a function avail- If you to start recording Unlike a VCR...

Owners Manual
Page 8
... is being played. 26. VCR TV VOL CH / TRK F / ADV / SKIP VCR Plus+ MARKER RETURN CLEAR DISPLAY TV / VCR SUBTITLE REC SPEED REC DVD VCR REC PAUSE PIP COPY TIME SLIP 1. OPEN/CLOSE Buttons To open and close the disc tray. 7. MENU Button Brings up the DVD Recorder-VCR's setup menu. 11. REC... Button Use to VCR. TV POWER Button 20. INPUT Button Select line input signal in external input mode(Tuner or Line input) 23. DIGITAL...
... is being played. 26. VCR TV VOL CH / TRK F / ADV / SKIP VCR Plus+ MARKER RETURN CLEAR DISPLAY TV / VCR SUBTITLE REC SPEED REC DVD VCR REC PAUSE PIP COPY TIME SLIP 1. OPEN/CLOSE Buttons To open and close the disc tray. 7. MENU Button Brings up the DVD Recorder-VCR's setup menu. 11. REC... Button Use to VCR. TV POWER Button 20. INPUT Button Select line input signal in external input mode(Tuner or Line input) 23. DIGITAL...

Owners Manual
Page 9
...'s Manual • Dispose of cable entry as practical. Step 1: Unpacking Accessories Check for the supplied accessories below . • Method 1 : Antenna + DVD Recorder-VCR + TV : No Cable box • Method 2 : Antenna +Cable box + DVD Recorder-VCR + TV : Cable box with a few scrambled channels If you enough information to start using an off-air antenna that the cable...
...'s Manual • Dispose of cable entry as practical. Step 1: Unpacking Accessories Check for the supplied accessories below . • Method 1 : Antenna + DVD Recorder-VCR + TV : No Cable box • Method 2 : Antenna +Cable box + DVD Recorder-VCR + TV : Cable box with a few scrambled channels If you enough information to start using an off-air antenna that the cable...

Owners Manual
Page 10
...the disc has stopped completely before changing the mode. Make sure that not all high definition television sets are available only if your DVD Recorder-VCR. Component video separates the picture element into black and white (Y) and color (C) signals to your TV. Select one of the ... in 480i mode • Method 4 : Connecting to the exact corresponding component input jacks on the cable box. Connections Method 3 : Antenna + DVD Recorder-VCR + Cable box +TV : Cable box with this product and may cause artifacts to present most clear and clean images. If anything is not displayed...
...the disc has stopped completely before changing the mode. Make sure that not all high definition television sets are available only if your DVD Recorder-VCR. Component video separates the picture element into black and white (Y) and color (C) signals to your TV. Select one of the ... in 480i mode • Method 4 : Connecting to the exact corresponding component input jacks on the cable box. Connections Method 3 : Antenna + DVD Recorder-VCR + Cable box +TV : Cable box with this product and may cause artifacts to present most clear and clean images. If anything is not displayed...

Owners Manual
Page 11
...Dolby Laboratories. Make sure that the left and right audio input jacks of Digital Theater Systems, Inc. If "480P" is displayed on your DVD Recorder-VCR are disabled. Method 1 : Connecting to an AV amplifier with analog input jacks If your TV, respectively.(page 21) 20 - Make sure... the digital input jack If your AV amplifier only has a Dolby Digital or DTS decoder and a digital input jack, use your DVD Recorder-VCR. Method 2 : Connecting to connect your TV's speakers. English English - 21 Connect Component video cables(not supplied) between the COMPONENT VIDEO OUT...
...Dolby Laboratories. Make sure that the left and right audio input jacks of Digital Theater Systems, Inc. If "480P" is displayed on your DVD Recorder-VCR are disabled. Method 1 : Connecting to an AV amplifier with analog input jacks If your TV, respectively.(page 21) 20 - Make sure... the digital input jack If your AV amplifier only has a Dolby Digital or DTS decoder and a digital input jack, use your DVD Recorder-VCR. Method 2 : Connecting to connect your TV's speakers. English English - 21 Connect Component video cables(not supplied) between the COMPONENT VIDEO OUT...

Owners Manual
Page 12
... Control • Open the battery cover on the front Note panel of the DVD Recorder-VCR. From such equipment, recording is not possible. • Depending on the front panel of the DVD Recorder-VCR. You can record a copy free contest from connected equipment. English • Some models of the... switched to the LINE IN 2 jacks You can also use the LINE IN 2 jacks on the models of your DVD Recorder-VCR. • If your DVD Recorder-VCR to other illumination. Line Selection will have priority. In that the polarities (+ and -) are both connected, the S-Video...
... Control • Open the battery cover on the front Note panel of the DVD Recorder-VCR. From such equipment, recording is not possible. • Depending on the front panel of the DVD Recorder-VCR. You can record a copy free contest from connected equipment. English • Some models of the... switched to the LINE IN 2 jacks You can also use the LINE IN 2 jacks on the models of your DVD Recorder-VCR. • If your DVD Recorder-VCR to other illumination. Line Selection will have priority. In that the polarities (+ and -) are both connected, the S-Video...

Owners Manual
Page 13
.... English - 25 System Setup Connections Setting the Remote Control Your DVD Recorder-VCR remote control will work on -screen menus. ON / STANDBY TV ON / STANDBTY 100 + DVD OPEN/CLOSE TV MUTE AUDIO SELECT INPUT SEL. INPUT SEL. CH ( or ) Used to operate with Toshiba televisions and compatible brands. English System Setup On-Screen Menu Navigation...
.... English - 25 System Setup Connections Setting the Remote Control Your DVD Recorder-VCR remote control will work on -screen menus. ON / STANDBY TV ON / STANDBTY 100 + DVD OPEN/CLOSE TV MUTE AUDIO SELECT INPUT SEL. INPUT SEL. CH ( or ) Used to operate with Toshiba televisions and compatible brands. English System Setup On-Screen Menu Navigation...

Owners Manual
Page 14
... : AAuutotommaatitcic : AAuttloanmtaictic : AEuatsotmerantic Central Mountain Pacific Alaska Hawaii If Auto Setup fails to set the DVD Recorder-VCR's internal clock by locating a local TV station, follow these settings without turning off the recorder. 2 Using the œ❷¤buttons, move the selection bar to "Setup" then press ENTER... ENTER button. • The Clock Set will be automatically set correctly. 1 Open "MENU" Press the MENU button while the DVD or VCR is set the date and time manually. No Disc You must be set when you can adjust these steps to set to the...
... : AAuutotommaatitcic : AAuttloanmtaictic : AEuatsotmerantic Central Mountain Pacific Alaska Hawaii If Auto Setup fails to set the DVD Recorder-VCR's internal clock by locating a local TV station, follow these settings without turning off the recorder. 2 Using the œ❷¤buttons, move the selection bar to "Setup" then press ENTER... ENTER button. • The Clock Set will be automatically set correctly. 1 Open "MENU" Press the MENU button while the DVD or VCR is set the date and time manually. No Disc You must be set when you can adjust these steps to set to the...

Owners Manual
Page 15
...- Channel Set 4 Select "Antenna/Cable TV" Move the selection arrow to "Antenna/Cable TV" then press right button to Cable TV. Select if the DVD Recorder-VCR is connected to an indoor or outdoor VHF/UHF Antenna. • Cable TV - If you watch a movie. 1 With the unit in Stop press the..., move the selection bar to "Setup" then press ENTER to select. Select if the DVD Recorder-VCR is connected to select from the following options, then use the œ❷ buttons to set the DVD RecorderVCR's tuner band to Antenna or Cable, whichever you to manually set each of the following...
...- Channel Set 4 Select "Antenna/Cable TV" Move the selection arrow to "Antenna/Cable TV" then press right button to Cable TV. Select if the DVD Recorder-VCR is connected to an indoor or outdoor VHF/UHF Antenna. • Cable TV - If you watch a movie. 1 With the unit in Stop press the..., move the selection bar to "Setup" then press ENTER to select. Select if the DVD Recorder-VCR is connected to select from the following options, then use the œ❷ buttons to set the DVD RecorderVCR's tuner band to Antenna or Cable, whichever you to manually set each of the following...

Owners Manual
Page 17
...up to 8 rating levels on a disc. 1 With the unit in the selected Tuner Band. Enter your area. 1 Open "MENU" With the DVD in conjunction with DVDs that have been assigned a rating - Refer to 9 buttons on the remote. English About the Change Password; 1 Select Change Password using ❿ ... the menu. 4 Run "Auto channel memory" Move the selection arrow to "Auto Channel Memory," then press ENTER to select. • The DVD Recorder-VCR will automatically seek and store all available channels in Stop mode, press the MENU button on the remote. • The 'Confirm the password.' word...
...up to 8 rating levels on a disc. 1 With the unit in the selected Tuner Band. Enter your area. 1 Open "MENU" With the DVD in conjunction with DVDs that have been assigned a rating - Refer to 9 buttons on the remote. English About the Change Password; 1 Select Change Password using ❿ ... the menu. 4 Run "Auto channel memory" Move the selection arrow to "Auto Channel Memory," then press ENTER to select. • The DVD Recorder-VCR will automatically seek and store all available channels in Stop mode, press the MENU button on the remote. • The 'Confirm the password.' word...

Owners Manual
Page 18
... channel of the player. Use the number buttons to move the selection bar to "Setup" then press ENTER to select Delete. If you connect the DVD Recorder-VCR to TV with RF Antenna Cable, follow the steps below to set the RF output channel. 1 Open "MENU" With the... the channel number you want to select. Press ENTER to select. RF Output Channel When you use VCR Plus+ codes for timer recording. Set these guide channels so you wish to the next memorized channel. DVD-VIDEO 6 Add/Delete Channel. Then press ENTER to add and delete a channel you can use the navigation...
... channel of the player. Use the number buttons to move the selection bar to "Setup" then press ENTER to select Delete. If you connect the DVD Recorder-VCR to TV with RF Antenna Cable, follow the steps below to set the RF output channel. 1 Open "MENU" With the... the channel number you want to select. Press ENTER to select. RF Output Channel When you use VCR Plus+ codes for timer recording. Set these guide channels so you wish to the next memorized channel. DVD-VIDEO 6 Add/Delete Channel. Then press ENTER to add and delete a channel you can use the navigation...

Owners Manual
Page 19
...the tape when you press the INFO. Video Input : :n T-120 T-160 If you want to set , the VCR can choose Composite or Super(S)-video. : T-180 1 Open "MENU" With the DVD Recorder-VCR in Stop or Play mode, press the MENU button. 2 Select "Setup" Using the œ❷ buttons, ...move the selection bar to "Setup" then press ENTER to select. : :n On : Off English - 37 System Setup VCR Setting 4 Select "Guide Channel Setup" Move the...
...the tape when you press the INFO. Video Input : :n T-120 T-160 If you want to set , the VCR can choose Composite or Super(S)-video. : T-180 1 Open "MENU" With the DVD Recorder-VCR in Stop or Play mode, press the MENU button. 2 Select "Setup" Using the œ❷ buttons, ...move the selection bar to "Setup" then press ENTER to select. : :n On : Off English - 37 System Setup VCR Setting 4 Select "Guide Channel Setup" Move the...

Owners Manual
Page 20
... 6 (EP: Extended) • You cannot play discs other color system(PAL, SECAM, etc...) Because of problems and errors that this DVD Recorder-VCR is described on a Toshiba DVD player, please feel free to call our contact listed in U.S.A, Canada, Korea, Japan,etc. • Before Playing 39 • Playing ... - These regional codes must match in any other than those listed above . • This DVD video player uses the NTSC color system and cannot play . Inc.., Toshiba Hawaii, Inc, and Toshiba of the DVD Recorder-VCR. cannot guarantee that can occur during power off . • Bright -
... 6 (EP: Extended) • You cannot play discs other color system(PAL, SECAM, etc...) Because of problems and errors that this DVD Recorder-VCR is described on a Toshiba DVD player, please feel free to call our contact listed in U.S.A, Canada, Korea, Japan,etc. • Before Playing 39 • Playing ... - These regional codes must match in any other than those listed above . • This DVD video player uses the NTSC color system and cannot play . Inc.., Toshiba Hawaii, Inc, and Toshiba of the DVD Recorder-VCR. cannot guarantee that can occur during power off . • Bright -

Owners Manual
Page 21
... this if necessary Do not allow the disc to open or close the disc tray. • Your DVD Recorder-VCR closes the disc tray and plays the disc automatically. • When a recordable media (DVD-RAM, DVD-RW, DVD-R, etc.) is used, Auto Playback cannot be activated without pressing the Play button. Information about the discs is written...
... this if necessary Do not allow the disc to open or close the disc tray. • Your DVD Recorder-VCR closes the disc tray and plays the disc automatically. • When a recordable media (DVD-RAM, DVD-RW, DVD-R, etc.) is used, Auto Playback cannot be activated without pressing the Play button. Information about the discs is written...

Owners Manual
Page 23
.... Moving to a Scene Directly You can select Track, Folder or Disc. 4 Press ENTER button. Repeat play to Stop (B). • Your DVD Recorder-VCR will playback the selected section repeatedly. 3 If you want to select a title or chapter, select it using the ➛❿ buttons. Playback... Repeat Play Using Repeat Play (For DVD-VIDEO/DVD-RAM/DVDRW/DVD-R) (DVD-VIDEO only supports chapter repeat.) 1 Press the QUICK button. Using Repeat Play (For Audio CD/MP3) 1 Press the QUICK button ...
.... Moving to a Scene Directly You can select Track, Folder or Disc. 4 Press ENTER button. Repeat play to Stop (B). • Your DVD Recorder-VCR will playback the selected section repeatedly. 3 If you want to select a title or chapter, select it using the ➛❿ buttons. Playback... Repeat Play Using Repeat Play (For DVD-VIDEO/DVD-RAM/DVDRW/DVD-R) (DVD-VIDEO only supports chapter repeat.) 1 Press the QUICK button. Using Repeat Play (For Audio CD/MP3) 1 Press the QUICK button ...


