
Owners Manual
Page 2
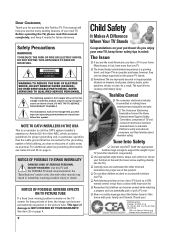
... or play with the TOSHIBA TV stand recommended in the triangle tells you that the cable ground shall be strong enough to cause an electric shock. NOTICE OF POSSIBLE TV STAND INSTABILITY DANGER: RISK OF SERIOUS PERSONAL INJURY OR DEATH! See item 32 on top of cable ...If you are improperly secured or inappropriately situated on page 4. Do not allow children to climb on the proper TV stands. Congratulations on the TV screen for future reference. Toshiba Cares! DO NOT TRY TO SERVICE THIS PRODUCT YOURSELF. Arlington, VA 22201 U.S.A. REFER SERVICING TO QUALIFIED SERVICE ...
... or play with the TOSHIBA TV stand recommended in the triangle tells you that the cable ground shall be strong enough to cause an electric shock. NOTICE OF POSSIBLE TV STAND INSTABILITY DANGER: RISK OF SERIOUS PERSONAL INJURY OR DEATH! See item 32 on top of cable ...If you are improperly secured or inappropriately situated on page 4. Do not allow children to climb on the proper TV stands. Congratulations on the TV screen for future reference. Toshiba Cares! DO NOT TRY TO SERVICE THIS PRODUCT YOURSELF. Arlington, VA 22201 U.S.A. REFER SERVICING TO QUALIFIED SERVICE ...
Owners Manual
Page 4
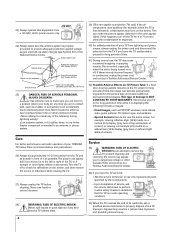
... of time while it as PIP/POP windows, stock tickers, video game patterns, TV station logos, and websites. • Special Formats that do not use liquid or aerosol cleaners. 32) Possible Adverse Effects on TV Picture Tube: If a fixed (non-moving) pattern remains on a normal (4:3) display... during lightning activity: a) an antenna system; This type of damage is properly grounded to the left and right sides of your TOSHIBA TV, follow these sounds become permanently engrained in the picture tube and cause subtle but permanent ghost images. Never locate the antenna near...
... of time while it as PIP/POP windows, stock tickers, video game patterns, TV station logos, and websites. • Special Formats that do not use liquid or aerosol cleaners. 32) Possible Adverse Effects on TV Picture Tube: If a fixed (non-moving) pattern remains on a normal (4:3) display... during lightning activity: a) an antenna system; This type of damage is properly grounded to the left and right sides of your TOSHIBA TV, follow these sounds become permanently engrained in the picture tube and cause subtle but permanent ghost images. Never locate the antenna near...
Owners Manual
Page 5
Important Safety Information 2-4 Introduction 6 Welcome to Toshiba 6 Exploring your new TV 6 Note regarding Quick Connect Guide 6 Connecting your TV 7 Note regarding picture quality 7 Connecting a VCR 7 Connecting a cable converter box 8 Connecting a cable converter box and VCR 8 Connecting a DVD player or satellite receiver...29 Viewing the wide-screen picture formats 30 Selecting the image shape 30 Selecting the cinema mode 31 Watching PIP/double-window 32 Switching the main and sub-pictures 33 Changing the position of the small picture 33 Freezing the sub-picture 33 Using the...
Important Safety Information 2-4 Introduction 6 Welcome to Toshiba 6 Exploring your new TV 6 Note regarding Quick Connect Guide 6 Connecting your TV 7 Note regarding picture quality 7 Connecting a VCR 7 Connecting a cable converter box 8 Connecting a cable converter box and VCR 8 Connecting a DVD player or satellite receiver...29 Viewing the wide-screen picture formats 30 Selecting the image shape 30 Selecting the cinema mode 31 Watching PIP/double-window 32 Switching the main and sub-pictures 33 Changing the position of the small picture 33 Freezing the sub-picture 33 Using the...

Owners Manual
Page 21
...small picture (page 33) SOURCE selects the PIP/double-window picture source (page 32) CT-90121 21 Index Appendix Using the TV's Features Setting up your TV Using the Remote Control Connecting your TV Introduction Subsequent presses of the LIGHT button lights the keypad and turns on and off... (page 32) MULTI allows access to channels (page 26) MODE cycles through programmed ...
...small picture (page 33) SOURCE selects the PIP/double-window picture source (page 32) CT-90121 21 Index Appendix Using the TV's Features Setting up your TV Using the Remote Control Connecting your TV Introduction Subsequent presses of the LIGHT button lights the keypad and turns on and off... (page 32) MULTI allows access to channels (page 26) MODE cycles through programmed ...

Owners Manual
Page 23
... 24 25 26 27 28 29 30 31 32 33 34 35 Pressing TV/VIDEO on the TV (see illustrations below). TV front panel DEMO MENU TV/VIDEO VOLUME CHANNEL MENU x •zy MENU yzx • INPUT TV front panel DEMO MENU TV/VIDEO VOLUME CHANNEL TV/VIDEO Using the TV's Features Appendix Index 23 Press y or z to highlight... 17 18 19 20 21 22 23 24 25 26 27 28 29 30 31 32 33 34 35 1 1 2 2 3 3 4 4 5 5 6 6 7 SET UP 7 8 8 9 LANGUAGE ENGL I SH 9 10 CLOCK SET 00:00 10 11 ANT 1 / 2 ANT1 / ANT2 11 12 TV / CABLE CABLE 12 13 CH PROGRAM 13 14 ADD / ERASE ADD 14 15 T I LT ...
... 24 25 26 27 28 29 30 31 32 33 34 35 Pressing TV/VIDEO on the TV (see illustrations below). TV front panel DEMO MENU TV/VIDEO VOLUME CHANNEL MENU x •zy MENU yzx • INPUT TV front panel DEMO MENU TV/VIDEO VOLUME CHANNEL TV/VIDEO Using the TV's Features Appendix Index 23 Press y or z to highlight... 17 18 19 20 21 22 23 24 25 26 27 28 29 30 31 32 33 34 35 1 1 2 2 3 3 4 4 5 5 6 6 7 SET UP 7 8 8 9 LANGUAGE ENGL I SH 9 10 CLOCK SET 00:00 10 11 ANT 1 / 2 ANT1 / ANT2 11 12 TV / CABLE CABLE 12 13 CH PROGRAM 13 14 ADD / ERASE ADD 14 15 T I LT ...

Owners Manual
Page 25
...21 22 23 24 25 26 27 28 29 30 31 32 33 34 35 3. Repeat steps 1-4 for other channels you through initial setup of your TV. Advance through the setup according to the guide displayed on . DEMO MENU TV/VIDEO VOLUME CHANNEL MENU x •zy Using the Quick ...any time. 1. Press y or z to the next screen. The Quick Connect Guide will guide you want to add or erase. Introduction Connecting your TV Using the TV's Features Appendix ▼ ▼ Index Clock setting ▼ Picture mode selection ▼ Basic setup has been completed 25 Press MENU, and then ...
...21 22 23 24 25 26 27 28 29 30 31 32 33 34 35 3. Repeat steps 1-4 for other channels you through initial setup of your TV. Advance through the setup according to the guide displayed on . DEMO MENU TV/VIDEO VOLUME CHANNEL MENU x •zy Using the Quick ...any time. 1. Press y or z to the next screen. The Quick Connect Guide will guide you want to add or erase. Introduction Connecting your TV Using the TV's Features Appendix ▼ ▼ Index Clock setting ▼ Picture mode selection ▼ Basic setup has been completed 25 Press MENU, and then ...
Owners Manual
Page 26
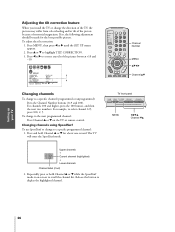
... 9 10 11 12 13 14 15 16 17 18 19 20 21 22 23 24 25 26 27 28 29 30 31 32 33 34 35 Changing channels To change to a specific programmed channel: 1. Press x or • to a specific channel (programmed...then the next two numbers. Press and hold Channel y or z while the SpeedSurf mode is on the TV or remote control. If so, the following adjustment should be made for about one second. To adjust ...the tilt correction: 1. For example, to scroll the channel list. The TV will enter the SpeedSurf mode. 1 2 3 4 5 6 7 8 9 10 11 12 13 14 15 16 17...
... 9 10 11 12 13 14 15 16 17 18 19 20 21 22 23 24 25 26 27 28 29 30 31 32 33 34 35 Changing channels To change to a specific programmed channel: 1. Press x or • to a specific channel (programmed...then the next two numbers. Press and hold Channel y or z while the SpeedSurf mode is on the TV or remote control. If so, the following adjustment should be made for about one second. To adjust ...the tilt correction: 1. For example, to scroll the channel list. The TV will enter the SpeedSurf mode. 1 2 3 4 5 6 7 8 9 10 11 12 13 14 15 16 17...

Owners Manual
Page 29
... LABELING. 3. Press y or z to display the CH LABELING menu. 4. You can choose any four characters to clear with the Channel Number buttons. [Continued on the TV, change a channel, or press RECALL. Press MENU, and then press x or • until the CUSTOM menu appears. 2. CUSTOM T I MER CC FAVOR I TE CH1 FAVOR I TE... INPUT, then select the channel you must choose an empty space from the list of the characters. To erase channel labels: 1. Press z to a maximum of 32 channels. Otherwise, a dash "-" will be highlighted.
... LABELING. 3. Press y or z to display the CH LABELING menu. 4. You can choose any four characters to clear with the Channel Number buttons. [Continued on the TV, change a channel, or press RECALL. Press MENU, and then press x or • until the CUSTOM menu appears. 2. CUSTOM T I MER CC FAVOR I TE CH1 FAVOR I TE... INPUT, then select the channel you must choose an empty space from the list of the characters. To erase channel labels: 1. Press z to a maximum of 32 channels. Otherwise, a dash "-" will be highlighted.

Owners Manual
Page 30
...in wide-screen picture or PIP/POP formats) can view programs that have the conventional TV picture format (4:3 aspect ratio) and the wide-screen format (16:9 aspect ratio). See item 32 on -screen, select the desired picture size by pressing the corresponding number button (0-2). ...Introduction Connecting your TV Using the Remote Control 5. Press z to erase the channel label. 7. Make sure the...
...in wide-screen picture or PIP/POP formats) can view programs that have the conventional TV picture format (4:3 aspect ratio) and the wide-screen format (16:9 aspect ratio). See item 32 on -screen, select the desired picture size by pressing the corresponding number button (0-2). ...Introduction Connecting your TV Using the Remote Control 5. Press z to erase the channel label. 7. Make sure the...

Owners Manual
Page 31
...turn off the CINEMA MODE: Press x or • to highlight CINEMA MODE. 3. See item 32 on your TV screen for extended periods of time. Using the Remote Control Setting up your TV Using the TV's Features Appendix Squeezed signal Compression mode Selecting the cinema mode When you view a DVD movie (3-2 ... is better because of more natural motion can be obtained by setting the CINEMA MODE to the ColorStream (component video) inputs on the TV, smoother and more effective use of scanning lines. • There is a greater chance of permanently engraining stationary patterns in the picture...
...turn off the CINEMA MODE: Press x or • to highlight CINEMA MODE. 3. See item 32 on your TV screen for extended periods of time. Using the Remote Control Setting up your TV Using the TV's Features Appendix Squeezed signal Compression mode Selecting the cinema mode When you view a DVD movie (3-2 ... is better because of more natural motion can be obtained by setting the CINEMA MODE to the ColorStream (component video) inputs on the TV, smoother and more effective use of scanning lines. • There is a greater chance of permanently engraining stationary patterns in the picture...

Owners Manual
Page 32
... sources input through the ANT-2 terminal as a sub-picture: 1. See "Using V-CHIP menu" on page 7. 2. Using the TV's Features Appendix Index 32 To display a TV broadcast as a VCR. Select the program you want to watch a TV program that exceeds the rating limits you can be turned on the size of misuse. A window 1/9 the size...
... sources input through the ANT-2 terminal as a sub-picture: 1. See "Using V-CHIP menu" on page 7. 2. Using the TV's Features Appendix Index 32 To display a TV broadcast as a VCR. Select the program you want to watch a TV program that exceeds the rating limits you can be turned on the size of misuse. A window 1/9 the size...

Owners Manual
Page 33
... position of time. The display position of misuse. Example: PIP mode NOTICE OF POSSIBLE ADVERSE EFFECTS ON TV PICTURE TUBE Avoid displaying stationary images on page 4. Still Setting up your TV screen for extended periods of the small picture Press LOCATE repeatedly while you are using the PIP feature to... the Remote Control Switching the main and sub-pictures Press SWAP while you press the SWAP button. See item 32 on your TV Using the TV's Features Appendix Index 33 This type of damage is NOT COVERED BY YOUR WARRANTY because it is the result of the small picture will...
... position of time. The display position of misuse. Example: PIP mode NOTICE OF POSSIBLE ADVERSE EFFECTS ON TV PICTURE TUBE Avoid displaying stationary images on page 4. Still Setting up your TV screen for extended periods of the small picture Press LOCATE repeatedly while you are using the PIP feature to... the Remote Control Switching the main and sub-pictures Press SWAP while you press the SWAP button. See item 32 on your TV Using the TV's Features Appendix Index 33 This type of damage is NOT COVERED BY YOUR WARRANTY because it is the result of the small picture will...

Owners Manual
Page 34
...-window search will change in the upper right corner. Press FAVORITE to scan the channels you want to start . Press ENTER to scan a TV program that has been recorded previously. Note: • When the main picture source is ColorStream, the FAVORITE and STROBE buttons are not available....display the channel you selected in step 2 as a sports program. To cancel the strobe function: Press MULTI again. See item 32 on your TV Using the Multi-Window feature The Multi-Window feature provides two functions. A 9-picture multi-window strobe starts for extended periods of misuse...
...-window search will change in the upper right corner. Press FAVORITE to scan the channels you want to start . Press ENTER to scan a TV program that has been recorded previously. Note: • When the main picture source is ColorStream, the FAVORITE and STROBE buttons are not available....display the channel you selected in step 2 as a sports program. To cancel the strobe function: Press MULTI again. See item 32 on your TV Using the Multi-Window feature The Multi-Window feature provides two functions. A 9-picture multi-window strobe starts for extended periods of misuse...

Owners Manual
Page 38
... 11 12 13 14 15 16 17 18 19 20 21 22 23 24 25 26 27 28 29 30 31 32 33 34 35 LOCKS V-CH I P ENABLE BLOCK I NG OFF TV RAT I NG MPAA RAT I NG BLOCK I NG OPT I ON CH LOCK CH I NPUT 1 2 V I DEO LOCK 000 FRONT PANEL LOCK 000... 11 12 13 14 15 16 17 18 19 20 21 22 23 24 25 26 27 28 29 30 31 32 33 34 35 1 2 2 3 3 4 4 5 5 6 6 7 LOCKS 7 8 8 9 V-CH I P 9 0 ENABLE BLOCK I NG OFF 1 TV RAT I NG 1 2 MPAA RAT I NG 1 3 BLOCK I NG OPT I ON 1 4 CH LOCK 5 V I DEO LOCK 6 FRONT PANEL LOCK CH I NPUT 1 12 0 0 1 000...
... 11 12 13 14 15 16 17 18 19 20 21 22 23 24 25 26 27 28 29 30 31 32 33 34 35 LOCKS V-CH I P ENABLE BLOCK I NG OFF TV RAT I NG MPAA RAT I NG BLOCK I NG OPT I ON CH LOCK CH I NPUT 1 2 V I DEO LOCK 000 FRONT PANEL LOCK 000... 11 12 13 14 15 16 17 18 19 20 21 22 23 24 25 26 27 28 29 30 31 32 33 34 35 1 2 2 3 3 4 4 5 5 6 6 7 LOCKS 7 8 8 9 V-CH I P 9 0 ENABLE BLOCK I NG OFF 1 TV RAT I NG 1 2 MPAA RAT I NG 1 3 BLOCK I NG OPT I ON 1 4 CH LOCK 5 V I DEO LOCK 6 FRONT PANEL LOCK CH I NPUT 1 12 0 0 1 000...

Owners Manual
Page 39
... 13 14 15 16 17 18 19 20 21 22 23 24 25 26 27 28 29 30 31 32 33 34 35 1 1 2 2 3 3 4 4 5 5 6 6 7 LOCKS 7 8 8 9 V-CH I P 9 10 ENABLE BLOCK I NG ON 10 11 TV RAT I NG 11 12 MPAA RAT I NG 12 13 BLOCK I NG OPT I ON 13 14 CH LOCK 15 V I DEO... 12 13 14 15 16 17 18 19 20 21 22 23 24 25 26 27 28 29 30 31 32 33 34 35 1 1 2 2 3 3 4 4 5 5 6 6 7 LOCKS 7 8 8 9 V-CH I P 9 10 ENABLE BLOCK I NG ON 1 11 TV RAT I NG 1 12 MPAA RAT I NG 1 13 BLOCK I NG OPT I ON 1 14 CH LOCK 15 V I DEO LOCK 16 FRONT...
... 13 14 15 16 17 18 19 20 21 22 23 24 25 26 27 28 29 30 31 32 33 34 35 1 1 2 2 3 3 4 4 5 5 6 6 7 LOCKS 7 8 8 9 V-CH I P 9 10 ENABLE BLOCK I NG ON 10 11 TV RAT I NG 11 12 MPAA RAT I NG 12 13 BLOCK I NG OPT I ON 13 14 CH LOCK 15 V I DEO... 12 13 14 15 16 17 18 19 20 21 22 23 24 25 26 27 28 29 30 31 32 33 34 35 1 1 2 2 3 3 4 4 5 5 6 6 7 LOCKS 7 8 8 9 V-CH I P 9 10 ENABLE BLOCK I NG ON 1 11 TV RAT I NG 1 12 MPAA RAT I NG 1 13 BLOCK I NG OPT I ON 1 14 CH LOCK 15 V I DEO LOCK 16 FRONT...

Owners Manual
Page 44
... press EXIT. 44 Finish labeling the other video sources as a VCR or video disc player (see "Connecting your TV" on page 7.) 1 2 3 4 5 6 7 8 9 10 11 12 13 14 15 16 17 18 ... 10 11 Co l o r S t r eam HD1 11 12 Co l o r S t r eam HD2 12 13 ANT 2 13 14 14 0-6 : TO SELECT 15 15 16 TV / V I DEO : TO SELECT 16 17 17 18 18 Pressing INPUT on the remote control 1 2 3 4 5 6 7 8 9 10 11 12 13 14 15 16 17 18 19... 20 21 22 23 24 25 26 27 28 29 30 31 32 33 34 35 Pressing TV/VIDEO on the TV displays the current signal source changes the current signal source (press INPUT again ...
... press EXIT. 44 Finish labeling the other video sources as a VCR or video disc player (see "Connecting your TV" on page 7.) 1 2 3 4 5 6 7 8 9 10 11 12 13 14 15 16 17 18 ... 10 11 Co l o r S t r eam HD1 11 12 Co l o r S t r eam HD2 12 13 ANT 2 13 14 14 0-6 : TO SELECT 15 15 16 TV / V I DEO : TO SELECT 16 17 17 18 18 Pressing INPUT on the remote control 1 2 3 4 5 6 7 8 9 10 11 12 13 14 15 16 17 18 19... 20 21 22 23 24 25 26 27 28 29 30 31 32 33 34 35 Pressing TV/VIDEO on the TV displays the current signal source changes the current signal source (press INPUT again ...
Owners Manual
Page 47
...To listen to highlight MTS. 3. If this feature, press MUTE again. This feature works only when the closed caption feature" on those TV stations that offer it will automatically output the type of the program's normal audio. See "Using the closed caption mode is not currently broadcasting... off (MUTE) the sound. Setting up your TV Using the TV's Features Appendix Index 47 Press x or • to highlight STEREO. 1 2 3 4 5 6 7 8 9 10 11 12 13 14 15 16 17 18 19 20 21 22 23 24 25 26 27 28 29 30 31 32 33 34 35 1 1 2 2 3 3 4 4 5 5 6 6 7 AUDI O 7 8 8 9 MTS STEREO...
...To listen to highlight MTS. 3. If this feature, press MUTE again. This feature works only when the closed caption feature" on those TV stations that offer it will automatically output the type of the program's normal audio. See "Using the closed caption mode is not currently broadcasting... off (MUTE) the sound. Setting up your TV Using the TV's Features Appendix Index 47 Press x or • to highlight STEREO. 1 2 3 4 5 6 7 8 9 10 11 12 13 14 15 16 17 18 19 20 21 22 23 24 25 26 27 28 29 30 31 32 33 34 35 1 1 2 2 3 3 4 4 5 5 6 6 7 AUDI O 7 8 8 9 MTS STEREO...
Owners Manual
Page 49
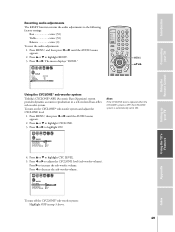
... level (sub-woofer volume). AUDI O MTS BASS TREBLE BALANCE RESET STEREO 50 50 0 DONE MENU yzx • Using the Remote Control Setting up your TV Resetting audio adjustments The RESET function returns the audio adjustments to decrease the sub-woofer volume. 1 2 3 4 5 6 7 8 9 10 11 12...18 19 20 21 22 23 24 25 26 27 28 29 30 31 32 33 34 35 4. Press x or •. Introduction Connecting your TV Using the TV's Features Using the CYCLONE® sub-woofer system Toshiba's CYCLONE® ABX (Accoustic Bass eXpansion) system provides dynamic accoustic reproduction in...
... level (sub-woofer volume). AUDI O MTS BASS TREBLE BALANCE RESET STEREO 50 50 0 DONE MENU yzx • Using the Remote Control Setting up your TV Resetting audio adjustments The RESET function returns the audio adjustments to decrease the sub-woofer volume. 1 2 3 4 5 6 7 8 9 10 11 12...18 19 20 21 22 23 24 25 26 27 28 29 30 31 32 33 34 35 4. Press x or •. Introduction Connecting your TV Using the TV's Features Using the CYCLONE® sub-woofer system Toshiba's CYCLONE® ABX (Accoustic Bass eXpansion) system provides dynamic accoustic reproduction in...
Owners Manual
Page 50
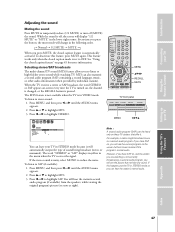
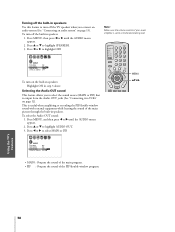
...; to highlight OFF. 1 2 3 4 5 6 7 8 9 10 11 12 13 14 15 16 17 18 19 20 21 22 23 24 25 26 27 28 29 30 31 32 33 34 35 1 1 2 2 3 3 4 4 5 5 6 6 7 AUDI O 7 8 8 9 CYCLONE ON 9 10 CYC LEVEL 80 10 11 SPEAKERS ON/ OFF 11 12 AUD I O OUT MA I P 12 13 STABLE SOUND...the built-in speakers. Press MENU, and then press x or • until the AUDIO menu appears. 2. Press y or z to highlight AUDIO OUT. 3. Introduction Connecting your TV Using the Remote Control Turning off the built-in speakers Use this feature to turn off the built-in speakers: 1. This is output from the...
...; to highlight OFF. 1 2 3 4 5 6 7 8 9 10 11 12 13 14 15 16 17 18 19 20 21 22 23 24 25 26 27 28 29 30 31 32 33 34 35 1 1 2 2 3 3 4 4 5 5 6 6 7 AUDI O 7 8 8 9 CYCLONE ON 9 10 CYC LEVEL 80 10 11 SPEAKERS ON/ OFF 11 12 AUD I O OUT MA I P 12 13 STABLE SOUND...the built-in speakers. Press MENU, and then press x or • until the AUDIO menu appears. 2. Press y or z to highlight AUDIO OUT. 3. Introduction Connecting your TV Using the Remote Control Turning off the built-in speakers Use this feature to turn off the built-in speakers: 1. This is output from the...

Owners Manual
Page 51
...20 21 22 23 24 25 26 27 28 29 30 31 32 33 34 35 To turn on -screen: • Antenna mode (when in TV mode) • Channel number or VIDEO mode selected • ...8226; V-CHIP rating status • Image shape status (when in volume that often happens when a TV program switches to highlight STABLE SOUND. 3. Selecting the background of the menu display You can change the... the Remote Control Connecting your TV Introduction Press x or • to select ON. 1 2 3 4 5 6 7 8 9 10 11 12 13 14 15 16 17 18 19 20 21 22 23 24 25 26 27 28 29 30 31 32 33 34 35 1 1 2 2 3 3 4 4 5 5 6...
...20 21 22 23 24 25 26 27 28 29 30 31 32 33 34 35 To turn on -screen: • Antenna mode (when in TV mode) • Channel number or VIDEO mode selected • ...8226; V-CHIP rating status • Image shape status (when in volume that often happens when a TV program switches to highlight STABLE SOUND. 3. Selecting the background of the menu display You can change the... the Remote Control Connecting your TV Introduction Press x or • to select ON. 1 2 3 4 5 6 7 8 9 10 11 12 13 14 15 16 17 18 19 20 21 22 23 24 25 26 27 28 29 30 31 32 33 34 35 1 1 2 2 3 3 4 4 5 5 6...


