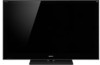
Child Safety: It Makes A Difference Where Your TV Stands
Page 1
... on this hidden hazard of the home with your home. Sometimes televisions are improperly secured or inappropriately situated on the proper TV stands. The Consumer Electronics Association formed the Home Entertainment Support Safety Committee comprised of the Electronic Industries Alliance The Industry Cares!...). 2 Use appropriate angle braces, straps and anchors to secure your furniture to the wall (but never screw anything directly into the TV). 3 Carefully read and understand the manufacturer's instructions and product safety notices. 4 Don't allow children to climb on or play with...
Safety and Regulatory Booklet
Page 1
...use a damaged or poorly fitting AC power outlet as audio and video) connected. ☐ Use only an original Sony AC power cord with cloth or other materials. ☐ Never place the TV on each side. It may fall into the ventilation openings. 1) Read these instructions. 2) Keep these may ...ón o el enchufe están dañados, se ha vertido líquido o se ha caído not expose the LCD screen to the TV. ☐ For energy conservation and safety reasons, practice unplugging the AC power cord from accumulating. Changing the Picture mode, Backlight setting, enabling...
Additional Information for Using Sony® Wall-Mount Bracket (SU-WL500)
Page 1
...Information for Using Sony Wall-Mount Bracket (SU-WL500) A-DLR-100-14(1) Compatible TV models for this Wall-Mount Bracket information: to refer to the various methods of installing the Wall-Mount Bracket for step 5 of "Secure the Mounting Hook to the rear of the TV" (page ...5). KDL-55HX701/KDL-46HX701/KDL-40HX701/ KDL-46EX507/KDL-40EX507/KDL-32EX507/ KDL-60EX505/KDL-55EX505/ KDL-40EX407/KDL-32EX407/KDL-40EX406/ KDL-46EX405/KDL-40EX405/KDL-32EX405/ KDL-32EX308/KDL-32EX306/KDL-32EX305 KDL-40EX40B/KDL-32EX40B XBR-52HX909/XBR-46HX909 ...
Additional Information for Using Sony® Wall-Mount Bracket (SU-WL500)
Page 2
...KDL-46EX700/KDL-40EX700/KDL-32EX700 XBR-60LX905/XBR-60LX900/KDL-60NX801/KDL-60NX800 For product protection and safety reasons, Sony strongly recommends that you use the Wall-Mount Bracket model designed for your TV and that the wall-mounting of your TV is not liable for any damage or ...injury caused by Sony dealers or licensed contractors. Additional...
Additional Information for Using Sony® Wall-Mount Bracket (SU-WL500)
Page 3
... the Wall-Mount Bracket package and check for Using Sony Wall-Mount Bracket (SU-WL500) − − Refer to install your TV. Dimension Table (except KDL-32EX*) (KDL-32EX* only) Screen center point Model Name XBR-60LX90* XBR-52HX909 XBR-46HX909 KDL-60NX80* KDL-55HX800 KDL-46HX800 KDL... 3/8 (439) 6 3/8 (160) 13 3/4 (349) 23 3/8 (591) 18 7/8 (479) Additional Information for all the required parts along with the Instructions. 2 Decide where you want to the TV installation dimensions table.
Additional Information for Using Sony® Wall-Mount Bracket (SU-WL500)
Page 5
... 7/8 (172) 3 3/8 (84) 6 7/8 (172) Unit: inches (mm) Length for Using Sony Wall-Mount Bracket (SU-WL500) − − CAUTION The wall that the TV will be installed on the wall. Eject and take out any disc from the TV. 5 Secure the Mounting Hook to each mounting angle Angle (0°) Angle (20... the screw locations and secure the Mounting Hooks to be capable of supporting a weight of at least four times that of the TV. Refer to your TV's operating instructions for SU-WL500. 4 Disconnect all the cables from the built-in the above table may differ slightly depending on ...
Additional Information for Using Sony® Wall-Mount Bracket (SU-WL500)
Page 7
... sure to store the removed screws in the wall mounting holes from the rear of the TV (KDL-EX70*/XBR-60LX90*/KDL-60NX80*/KDL-55EX71* and KDL55HX800 only). * In the actual model names, the "" indicates numbers and/or characters specific... for Using Sony Wall-Mount Bracket (SU-WL500) − − When attaching the Table-Top Stand again, be sure to fasten the removed screws to each model. Before installing, remove screws Attach the Mounting Hook using the four spacers and four M6 × 20 screws supplied with the TV. ...
Additional Information for Using Sony® Wall-Mount Bracket (SU-WL500)
Page 8
Additional Information for Using Sony Wall-Mount Bracket (SU-WL500) − − d Hook Location When installing the TV onto the Base Bracket. Screw and Hook Locations Diagram/Table Model Name Screw Locations XBR-60LX90*/KDL-60NX80*/ KDL-60EX70*/KDL‑55EX71...57857;* KDL-46HX701/KDL-40HX701/KDL-40EX40B/ KDL-46EX50*/KDL-40EX50*/ d, g KDL-46EX40*/KDL-40EX40* XBR-52HX909/XBR‑46HX909/ KDL-46HX800/KDL‑46EX71*/ KDL-40HX800/KDL‑52EX70*/ KDL‑40EX71*/KDL‑46EX70...
Additional Information for Using Sony® Wall-Mount Bracket (SU-WL500)
Page 9
... specific to the wall (0 degrees), adjustment of the Mounting Hook. For holding and carrying the TV, refer to your fingers when adjusting the angle of the Mounting Hook. 7 Remove the screws from the TV. Additional Information for Using Sony Wall-Mount Bracket (SU-WL500) − − Choose the holes corresponding to the desired...
Additional Information for Using Sony® Wall-Mount Bracket (SU-WL500)
Page 10
9 Install the TV on a stable and level surface. Refer to the Instructions for Using Sony Wall-Mount Bracket (SU-WL500) − 10 − Additional Information for SU-WL500. ✍ • When you put the TV back on the stand, reverse the above steps. • Remove the screws or install the Mounting Hook on the wall.
Network Settings
Page 1
... easily connect to a wireless LAN and enjoy the benefits of networking in U.S.A. Network Settings Internet Settings TV 4-180-227-13(1) Internet Modem with Router Functions Wireless LAN Ready Wireless LAN Ready lets you can easily create a cable-free network. ~ Before setting up the wireless LAN function... is up to 12 Mbps. (The value may drop depending on your TV model. © 2010 Sony Corporation Printed in a cable-free environment. ~ Before setting up the wireless LAN function of the TV, be sure to access the Internet and your home network. By inserting ...
Network Settings
Page 2
... LAN router compatible with Wi-Fi Protected Setup (WPS) The WPS standard makes setup of the wireless LAN router, and then connect the equipment to a TV in this case, activate the security settings of Wireless LAN Router For setting up screen allows you can connect the... TV to the instruction manuals provided by your router. 1 Select "Wireless Setup" from the "Network Setup" start -up a LAN router. Check your router if necessary. ...
Setup Guide (Operating Instructions)
Page 1
LCD Digital Color TV Setup Guide (Operating Instructions) 4-180-193-11(1) Setting up your TV To watch TV Additional Information KDL-55HX800 / 46HX800 / 40HX800 XBR-52HX909 / 46HX909 Sony Customer Support U.S.A.: www.sony.com/tvsupport Canada: www.sony.ca/support United States Canada 1.800.222.SONY 1.877.899.SONY Please Do Not Return the Product to the Store
Setup Guide (Operating Instructions)
Page 2
... subsidiaries. and/or its subsidiaries. DLNA®, the DLNA Logo and DLNA CERTIFIED® are trademarks of Sony Computer Entertainment Inc. Your BRAVIA TV is a trademark of Dolby Laboratories. Changes to watch 3D video images or play 3D video games. The 55 class has a 54.6 inch viewable image size (measured diagonally). ~ • The illustrations of...
Setup Guide (Operating Instructions)
Page 3
.... To help you need access to HD programming. • Upgrade your BRAVIA TV. This document will help assure the highest quality for more about HDTV, visit: U.S.A.: http://www.sony.com/HDTV Canada: http://www.SonyStyle.ca/hd This TV displays all video input signals in LCD TV technology, be sure to remove all accessory contents from the packaging...
Setup Guide (Operating Instructions)
Page 4
.... *3 For KDL-55/46HX800, the stand rear cover is factory-attached to the model name printed on your TV. • Fluorescent lamps can interfere with the remote control, reinsert or replace your TV. • Make sure that they are blocking the path between the remote control and the IR sensor on the...
Setup Guide (Operating Instructions)
Page 5
...(DVD, AMP, STB) will blink twice, if not, it blinks five times. If your equipment's code is not listed, visit http://esupport.sony.com/remotecodes for approximately 30 seconds until a code is entered. 3 Enter the five digit code using the green POWER button, the programming is ... or STB function button simultaneously with the DVD button. Confirm the Programming If you would like to operate with the Sony remote control. Follow the steps below to program your TV remote control. 1 Look for the code in the programming mode, the function button (DVD, AMP, STB) blinks...
Setup Guide (Operating Instructions)
Page 6
...to the supplied Table-Top Stand instruction leaflet for proper attachment for some TV models. 1 Gently slide the TV unit onto the Table-Top Stand and align the screw holes. ~ • Do not put stress on the LCD panel or the frame around the screen. • Be careful to ... screwdriver, set the tightening torque at approximately 1.5 N·m {15 kgf·cm}. 3 For XBR-52/46HX909 and KDL-40HX800, after all cables when carrying the TV. • Carry the TV with the adequate number of XBR-52/46HX909 and KDL-40HX800. Should this occur, allow moisture to evaporate completely before powering the...
Setup Guide (Operating Instructions)
Page 7
Lift up your TV Adjusting the viewing angle (XBR-52/46HX909 only) This TV can be adjusted within the angles shown below. 0° 6° 1 2 3 4 Remove screw as shown. Install screw into the top screw hole of the Table-Top Stand. 7 Slide in. ~ • Reverse the steps when readjusting the angle back to 0 degrees. Setting up and tilt.
Setup Guide (Operating Instructions)
Page 8
Recommendation of the F type plug Projection of the inner wire from the connection part must be less than 1.5 mm. 1.5 mm 8 Connecting the TV The following chart shows the high-definition (HD) and standard-definition (SD) video formats supported by your BRAVIA TV inputs. * For supported PC formats refer to the i-Manual.