
Operating Instructions
Page 4
... 8 Remote Control 9 Connections and Preparations Unpacking 10 Step 1: Installing the Projector ......... 11 Before Setting Up the Projector 11 Positioning the Projector and a screen 13 Step 2: Adjusting the Picture Position 17 Step 3: Connecting the Projector ..... 22 Connecting to a VCR 22 Connecting to a Computer ......... 25... the BRAVIA Sync Compatible Equipment with the Remote Control of the Projector ......30 Selecting the Wide Screen Mode .....32 Selecting the Picture Viewing Mode 34 Adjusting the Picture Quality ...........35 Selecting to Directly Adjust the Desired Menu Item 35...
... 8 Remote Control 9 Connections and Preparations Unpacking 10 Step 1: Installing the Projector ......... 11 Before Setting Up the Projector 11 Positioning the Projector and a screen 13 Step 2: Adjusting the Picture Position 17 Step 3: Connecting the Projector ..... 22 Connecting to a VCR 22 Connecting to a Computer ......... 25... the BRAVIA Sync Compatible Equipment with the Remote Control of the Projector ......30 Selecting the Wide Screen Mode .....32 Selecting the Picture Viewing Mode 34 Adjusting the Picture Quality ...........35 Selecting to Directly Adjust the Desired Menu Item 35...

Operating Instructions
Page 6
... voltage of your local power supply. • Should any liquid or solid object fall into the lens while the lamp is hot. Caution The projector is equipped with the voltage of your unit is identical with ventilation holes (intake) and ventilation holes (exhaust). Do not block or place anything ...near these holes, or internal heat build-up may occur, causing picture degradation or damage to ship your hand or objects near the unit and easily accessible. • The unit is not disconnected to the AC power...
... voltage of your local power supply. • Should any liquid or solid object fall into the lens while the lamp is hot. Caution The projector is equipped with the voltage of your unit is identical with ventilation holes (intake) and ventilation holes (exhaust). Do not block or place anything ...near these holes, or internal heat build-up may occur, causing picture degradation or damage to ship your hand or objects near the unit and easily accessible. • The unit is not disconnected to the AC power...

Operating Instructions
Page 9
button (1 page 45) Infrared transmitter ?/1 (On/standby) switch (1 page 18) INPUT button (1 page 28) RESET button (1 page 39) M/m/ Remote Control LIGHT button Illuminates the buttons on the remote control. PICTURE MODE buttons (1 page 34) Buttons to operate BRAVIA Sync compatible equipment (1 page 30) LENS button (1 page 18) BLACK LEVEL button (1 page 35) GAMMA CORRECTION button (1 page 35) COLOR SPACE button (1 page 35) WIDE MODE button (1 page 32) SHARPNESS +/-
button (1 page 45) Infrared transmitter ?/1 (On/standby) switch (1 page 18) INPUT button (1 page 28) RESET button (1 page 39) M/m/ Remote Control LIGHT button Illuminates the buttons on the remote control. PICTURE MODE buttons (1 page 34) Buttons to operate BRAVIA Sync compatible equipment (1 page 30) LENS button (1 page 18) BLACK LEVEL button (1 page 35) GAMMA CORRECTION button (1 page 35) COLOR SPACE button (1 page 35) WIDE MODE button (1 page 32) SHARPNESS +/-

Operating Instructions
Page 10
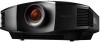
CAUTION Danger of the battery, you must obey the law in the relative area or country. When you have purchased the projector, the lens cap is incorrectly replaced. Unpacking Check the carton to make sure it . • Do not place the remote in a location near a heat source, a ... onto the lens. Push and slide to open. Remove this lens cap when you want to project the picture, etc. Do not drop or step on it, or spill liquid of explosion, use the projector. • Operating Instructions (this manual) Inserting the batteries into the remote control Insert the batteries E side first...
CAUTION Danger of the battery, you must obey the law in the relative area or country. When you have purchased the projector, the lens cap is incorrectly replaced. Unpacking Check the carton to make sure it . • Do not place the remote in a location near a heat source, a ... onto the lens. Push and slide to open. Remove this lens cap when you want to project the picture, etc. Do not drop or step on it, or spill liquid of explosion, use the projector. • Operating Instructions (this manual) Inserting the batteries into the remote control Insert the batteries E side first...

Operating Instructions
Page 11
...7/8 inches) 11 Connections and Preparations Step 1: Installing the Projector The projector displays pictures output from walls To maintain the performance and reliability of the projector, allow at least 30 cm (11 7/8 inches) between the projector and walls. Near a heat or smoke sensor Unsuitable installation...11 7/8 inches) around the unit. Locations subject to have broader options for placing the projector and viewing pictures easily. Before Setting Up the Projector Installing the projector in a location away from a VCR or other device. Very dusty and extremely smoky ...
...7/8 inches) 11 Connections and Preparations Step 1: Installing the Projector The projector displays pictures output from walls To maintain the performance and reliability of the projector, allow at least 30 cm (11 7/8 inches) between the projector and walls. Near a heat or smoke sensor Unsuitable installation...11 7/8 inches) around the unit. Locations subject to have broader options for placing the projector and viewing pictures easily. Before Setting Up the Projector Installing the projector in a location away from a VCR or other device. Very dusty and extremely smoky ...

Operating Instructions
Page 13
... in the table on the lens shift feature, see "Step 2: Adjusting the Picture Position." (1 page 17) 13 y: Vertical distance between the center of the screen and the center of the projector's lens. x: Horizontal distance between the center of the screen and the center ... (x = 0, y = 0) ** Example of installation position using lens shift (x, y) L: Distance between the screen and the front end of the projector and screen. Use the values L, x and y in the illustration. You can obtain a good quality picture if you use the lens shift features. 1 Determine the installation position of the...
... in the table on the lens shift feature, see "Step 2: Adjusting the Picture Position." (1 page 17) 13 y: Vertical distance between the center of the screen and the center of the projector's lens. x: Horizontal distance between the center of the screen and the center ... (x = 0, y = 0) ** Example of installation position using lens shift (x, y) L: Distance between the screen and the front end of the projector and screen. Use the values L, x and y in the illustration. You can obtain a good quality picture if you use the lens shift features. 1 Determine the installation position of the...

Operating Instructions
Page 16
This is parallel to the screen. 2 Position the projector so that it fits the screen. (1 page 17) Note When using a screen with an uneven surface, stripes pattern may rarely appear on the screen depending on the distance between the screen and the projector or the zooming magnifications. Top view Screen 3 Project an image on the screen and adjust the picture so that the lens is not a malfunction of the projector. 16
This is parallel to the screen. 2 Position the projector so that it fits the screen. (1 page 17) Note When using a screen with an uneven surface, stripes pattern may rarely appear on the screen depending on the distance between the screen and the projector or the zooming magnifications. Top view Screen 3 Project an image on the screen and adjust the picture so that the lens is not a malfunction of the projector. 16

Operating Instructions
Page 17
Connections and Preparations Step 2: Adjusting the Picture Position Project an image on the screen and then adjust the picture position. 1 ON/STANDBY indicator 4 Lens shift dials Remote control detector 5, 6 Zoom lever, Focus ring 2 ?/1 (On/ standby) switch 3 LENS button Tip The ?/1 (ON/STANDBY), INPUT, MENU, and M/m/
Connections and Preparations Step 2: Adjusting the Picture Position Project an image on the screen and then adjust the picture position. 1 ON/STANDBY indicator 4 Lens shift dials Remote control detector 5, 6 Zoom lever, Focus ring 2 ?/1 (On/ standby) switch 3 LENS button Tip The ?/1 (ON/STANDBY), INPUT, MENU, and M/m/

Operating Instructions
Page 18
Tip The test signal is displayed for a while (tens of seconds) and then lights in green. 2 Press the ?/1 (ON/STANDBY) switch to turn on the projector. Press the button to clear the test signal display before that. 4 Move both lens shift dials to display the test signal. Flashes in green for 1 ... ON/STANDBY indicator flashes, "Starting..." The ON/STANDBY indicator flashes in green, and then lights in green. appears on the remote control to adjust the picture position. Press the LENS button on the screen. 3 Display a test signal for performing adjustments.
Tip The test signal is displayed for a while (tens of seconds) and then lights in green. 2 Press the ?/1 (ON/STANDBY) switch to turn on the projector. Press the button to clear the test signal display before that. 4 Move both lens shift dials to display the test signal. Flashes in green for 1 ... ON/STANDBY indicator flashes, "Starting..." The ON/STANDBY indicator flashes in green, and then lights in green. appears on the remote control to adjust the picture position. Press the LENS button on the screen. 3 Display a test signal for performing adjustments.

Operating Instructions
Page 19
...the screen moves right or left . Side view 65% 1 screen height 65% : Picture position when moving the picture upward at maximum : Picture position when moving the picture to the right at maximum 19 The picture projected on the screen moves up or down . To adjust the horizontal position Turn ...from the center of the lens. 25% 1 screen width 25% Top view Connections and Preparations : Picture position when moving the picture to the left at maximum : Picture position when moving the picture downward at maximum To adjust the vertical position Turn the lens shift dial up or down by a...
...the screen moves right or left . Side view 65% 1 screen height 65% : Picture position when moving the picture upward at maximum : Picture position when moving the picture to the right at maximum 19 The picture projected on the screen moves up or down . To adjust the horizontal position Turn ...from the center of the lens. 25% 1 screen width 25% Top view Connections and Preparations : Picture position when moving the picture to the left at maximum : Picture position when moving the picture downward at maximum To adjust the vertical position Turn the lens shift dial up or down by a...

Operating Instructions
Page 20
...; When you use both the horizontal and vertical lens shift features at the same time, the distance the picture projected on the screen moves differ depending on the screen can be adjusted only within the octagon area illustrated below. Focus ring 20 Zoom lever 6 ...Adjust the focus using the zoom lever. Notes • The range to move the picture projected on how much the lens shift is adjusted. For details, see "Positioning the Projector and a screen" (1 page 13) as well. In this connection, see the table on page 15 or 16. 5 Adjust...
...; When you use both the horizontal and vertical lens shift features at the same time, the distance the picture projected on the screen moves differ depending on the screen can be adjusted only within the octagon area illustrated below. Focus ring 20 Zoom lever 6 ...Adjust the focus using the zoom lever. Notes • The range to move the picture projected on how much the lens shift is adjusted. For details, see "Positioning the Projector and a screen" (1 page 13) as well. In this connection, see the table on page 15 or 16. 5 Adjust...

Operating Instructions
Page 22
... with HDMI output connectors You can operate the projector synchronizing with the Control for each connection. • Insert the cable plugs properly; Right side of the connected equipment. poor connection at the plugs may cause a malfunction or poor picture quality. When pulling out a cable, be ...sure to pull it out from the plug, not the cable itself. • Refer to the operating instructions of the projector AV amplifier Speakers Equipment with HDMI output to use a ...
... with HDMI output connectors You can operate the projector synchronizing with the Control for each connection. • Insert the cable plugs properly; Right side of the connected equipment. poor connection at the plugs may cause a malfunction or poor picture quality. When pulling out a cable, be ...sure to pull it out from the plug, not the cable itself. • Refer to the operating instructions of the projector AV amplifier Speakers Equipment with HDMI output to use a ...

Operating Instructions
Page 23
... output connectors : Video signal flow Component video cable (not supplied) 23 To connect to equipment with component video output connectors Right side of the projector AV amplifier Speakers Equipment with an HDMI cable is not clear, check the settings of the cable is set at the same position. •... If the picture from equipment connected to the projector, make sure the V mark on the upper part of the HDMI input of the projector and the v mark on the connector of the connected equipment.
... output connectors : Video signal flow Component video cable (not supplied) 23 To connect to equipment with component video output connectors Right side of the projector AV amplifier Speakers Equipment with an HDMI cable is not clear, check the settings of the cable is set at the same position. •... If the picture from equipment connected to the projector, make sure the V mark on the upper part of the HDMI input of the projector and the v mark on the connector of the connected equipment.

Operating Instructions
Page 24
If the equipment to be connected has no S video connector, connect the cable to enjoy better picture quality. Right side of the projector Speakers AV amplifier Video equipment to S video or video output : Video signal flow S video or video cable (not supplied) Tip If you do not know ...
If the equipment to be connected has no S video connector, connect the cable to enjoy better picture quality. Right side of the projector Speakers AV amplifier Video equipment to S video or video output : Video signal flow S video or video cable (not supplied) Tip If you do not know ...

Operating Instructions
Page 25
... such as a notebook type, to output the signal to both computer's display and this equipment, the picture of the connected equipment. 25 For settings of the computer, consult with the manufacturer of the projector Computer to monitor output HD-Dsub15 pin cable (not supplied) or HDMI cable (not supplied) : Video.... in the Setup menu to "Auto" or "Computer." Connections and Preparations Connecting to a Computer Right side of the computer. • If the picture from equipment connected to the projector with your computer to output the signal to only the external monitor.
... such as a notebook type, to output the signal to both computer's display and this equipment, the picture of the connected equipment. 25 For settings of the computer, consult with the manufacturer of the projector Computer to monitor output HD-Dsub15 pin cable (not supplied) or HDMI cable (not supplied) : Video.... in the Setup menu to "Auto" or "Computer." Connections and Preparations Connecting to a Computer Right side of the computer. • If the picture from equipment connected to the projector with your computer to output the signal to only the external monitor.

Operating Instructions
Page 28
... or press M/m/ (enter) to select the equipment from which to project. Projecting This section describes how to operate the projector to view the picture from Video equipment connected to the VIDEO INPUT connector Video equipment connected to the S VIDEO INPUT connector RGB/component equipment connected...operation of the equipment connected to HDMI 1 or HDMI 2 input of the picture to suit your taste. To view the picture from the equipment connected to adjust the quality of the projector. (Only when the connected equipment supports Control for HDMI compatible.) 28 It also...
... or press M/m/ (enter) to select the equipment from which to project. Projecting This section describes how to operate the projector to view the picture from Video equipment connected to the VIDEO INPUT connector Video equipment connected to the S VIDEO INPUT connector RGB/component equipment connected...operation of the equipment connected to HDMI 1 or HDMI 2 input of the picture to suit your taste. To view the picture from the equipment connected to adjust the quality of the projector. (Only when the connected equipment supports Control for HDMI compatible.) 28 It also...

Operating Instructions
Page 29
...720 signals) Turning Off the Power 1 Press the ?/1 (ON/STANDBY) switch. Note Never disconnect the power cord while the indicator is turned off the projector by holding the ?/1 (ON/STANDBY) switch for about 1 second, instead of the equipment connected with the ?/1 (ON/STANDBY) switch. appears on ... Full (0-255) When a signal other than those of HDMI standard is input, the following to suit the HDMI standard and display in the Picture menu of the projector. (1 page 44) * When a computer signal is input, the color gradation of the connected equipment to remaining red. A message "POWER...
...720 signals) Turning Off the Power 1 Press the ?/1 (ON/STANDBY) switch. Note Never disconnect the power cord while the indicator is turned off the projector by holding the ?/1 (ON/STANDBY) switch for about 1 second, instead of the equipment connected with the ?/1 (ON/STANDBY) switch. appears on ... Full (0-255) When a signal other than those of HDMI standard is input, the following to suit the HDMI standard and display in the Picture menu of the projector. (1 page 44) * When a computer signal is input, the color gradation of the connected equipment to remaining red. A message "POWER...

Operating Instructions
Page 30
... INPUT connectors of the connected equipment currently being viewed is currently being viewed Press SYNC MENU while viewing pictures. You can make basic operations such as playback or stop for HDMI setting of the projector, you can be set. (1 page 52) Making operations such as playback or stop Press ., m,... N, >, M, X, x while viewing pictures. To operate the BRAVIA Sync compatible equipment, the Control for the connected ...
... INPUT connectors of the connected equipment currently being viewed is currently being viewed Press SYNC MENU while viewing pictures. You can make basic operations such as playback or stop for HDMI setting of the projector, you can be set. (1 page 52) Making operations such as playback or stop Press ., m,... N, >, M, X, x while viewing pictures. To operate the BRAVIA Sync compatible equipment, the Control for the connected ...

Operating Instructions
Page 31
Operate through the menu or select a menu item with M/m/ . Projecting Using the OPTIONS button to operate with M/m/ Device Control screen is displayed. The screen of the selected menu item is displayed. 2 Select the desired menu item to operate 1 Press OPTIONS while viewing pictures from the connected BRAVIA Sync compatible equipment.
Operate through the menu or select a menu item with M/m/ . Projecting Using the OPTIONS button to operate with M/m/ Device Control screen is displayed. The screen of the selected menu item is displayed. 2 Select the desired menu item to operate 1 Press OPTIONS while viewing pictures from the connected BRAVIA Sync compatible equipment.

Operating Instructions
Page 32
... Mode You can select the "Wide Mode" setting. Each time you press the button, you can enjoy various wide screen modes according to a 4:3 picture. You can also select it using the menu. (1 page 48) WIDE MODE button Original image Squeezed 32 When the Wide Mode is operated Wide Zoom... (When a video signal is input) A 4:3 aspect ratio picture is enlarged horizontally to fill the screen vertically. Tip Squeezed: An original 16:9 aspect ratio picture is displayed in the center of the screen are slightly cut off. The upper and lower portions of...
... Mode You can select the "Wide Mode" setting. Each time you press the button, you can enjoy various wide screen modes according to a 4:3 picture. You can also select it using the menu. (1 page 48) WIDE MODE button Original image Squeezed 32 When the Wide Mode is operated Wide Zoom... (When a video signal is input) A 4:3 aspect ratio picture is enlarged horizontally to fill the screen vertically. Tip Squeezed: An original 16:9 aspect ratio picture is displayed in the center of the screen are slightly cut off. The upper and lower portions of...

