

User Guide
Page 2
... Started 12 Locating Controls and Ports 13 About the Indicator Lights 15 Connecting a Power Source 16 Using the Battery Pack 18 Shutting Down Your Computer Safely 25 Using the Power Saving Modes 26 Keeping Your Computer in Optimum Condition .......... 29 Using Your VAIO Computer 32 Using the Keyboard 33 Using the Touch Pad 35 Using the Special-function Button 36 Using the Built-in Camera 37 Using the Optical Disc Drive 38 Using "Memory Stick 44 Using Other Modules / Memory Cards 50 Using the Internet 54 Using the Network (LAN...
... Started 12 Locating Controls and Ports 13 About the Indicator Lights 15 Connecting a Power Source 16 Using the Battery Pack 18 Shutting Down Your Computer Safely 25 Using the Power Saving Modes 26 Keeping Your Computer in Optimum Condition .......... 29 Using Your VAIO Computer 32 Using the Keyboard 33 Using the Touch Pad 35 Using the Special-function Button 36 Using the Built-in Camera 37 Using the Optical Disc Drive 38 Using "Memory Stick 44 Using Other Modules / Memory Cards 50 Using the Internet 54 Using the Network (LAN...
User Guide
Page 9
... of the number below the barcode. 3 The operating system on the computer. 2 Your computer's serial number You can find the information you might need. In Store Service & Support (available in USA only) Make an appointment with the setup of the display on your computer 4 The hardware component or the software program that is causing the problem 5 A brief description of your VAIO computer. Sony Style Backstage...
... of the number below the barcode. 3 The operating system on the computer. 2 Your computer's serial number You can find the information you might need. In Store Service & Support (available in USA only) Make an appointment with the setup of the display on your computer 4 The hardware component or the software program that is causing the problem 5 A brief description of your VAIO computer. Sony Style Backstage...

User Guide
Page 15
... change how you are using and does not work with the following indicator lights: Indicator Power 1 Charge Built-in MOTION EYE camera Media Access Disc drive Num lock Caps lock Scroll lock WIRELESS Functions Illuminates in green while the computer is in Normal mode, blinks slowly in orange while the computer is in uppercase. Letters appear in progress. Normal scrolling resumes when the Scroll lock indicator light is lit. Do not place the computer into Sleep mode or turn...
... change how you are using and does not work with the following indicator lights: Indicator Power 1 Charge Built-in MOTION EYE camera Media Access Disc drive Num lock Caps lock Scroll lock WIRELESS Functions Illuminates in green while the computer is in Normal mode, blinks slowly in orange while the computer is in uppercase. Letters appear in progress. Normal scrolling resumes when the Scroll lock indicator light is lit. Do not place the computer into Sleep mode or turn...

User Guide
Page 35
... scroll function is connected to scroll vertically. Slide your computer. With many applications, this action displays a context-sensitive shortcut menu (if any). n 35 N Action Point Click Double-click Right-click Drag Scroll Description Slide your finger on the touch pad while pressing the left button. To change the touch pad settings, use only the keyboard for pointer operations. Using Your VAIO Computer > Using the Touch Pad Using the Touch Pad You can disable/enable the touch pad while a mouse is...
... scroll function is connected to scroll vertically. Slide your computer. With many applications, this action displays a context-sensitive shortcut menu (if any). n 35 N Action Point Click Double-click Right-click Drag Scroll Description Slide your finger on the touch pad while pressing the left button. To change the touch pad settings, use only the keyboard for pointer operations. Using Your VAIO Computer > Using the Touch Pad Using the Touch Pad You can disable/enable the touch pad while a mouse is...
User Guide
Page 54
... the Internet. Depending on connection setups and modem configuration, see the manual that came with your computer to connect to the Internet. Using Your VAIO Computer > Using the Internet n 54 N Using the Internet Before using the Internet, you need to sign up with an Internet Service Provider (ISP) and set up devices required for connecting your computer to the Internet using the wireless LAN function, you need to connect an external modem device, for example a USB telephone modem, a DSL modem, or a cable...
... the Internet. Depending on connection setups and modem configuration, see the manual that came with your computer to connect to the Internet. Using Your VAIO Computer > Using the Internet n 54 N Using the Internet Before using the Internet, you need to sign up with an Internet Service Provider (ISP) and set up devices required for connecting your computer to the Internet using the wireless LAN function, you need to connect an external modem device, for example a USB telephone modem, a DSL modem, or a cable...

User Guide
Page 71
... connected audio device only. With the HDMI connection, the volume can adjust the screen resolution of any connected devices. Before connecting the device to the computer, make sure the HDMI connection has been set its input to the HDMI output port on installation and use. For detailed instructions, see How do I change the device for sound output. Your computer has no control over the output volume of the connected TV with your computer and TV using an HDMI connection. ! To connect...
... connected audio device only. With the HDMI connection, the volume can adjust the screen resolution of any connected devices. Before connecting the device to the computer, make sure the HDMI connection has been set its input to the HDMI output port on installation and use. For detailed instructions, see How do I change the device for sound output. Your computer has no control over the output volume of the connected TV with your computer and TV using an HDMI connection. ! To connect...
User Guide
Page 77
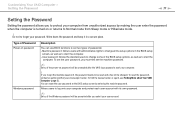
... be charged. Machine password: Allows users with its own password. ✍ Entry of passwords: - To set the user password, you must first set two types of the Windows password will be prompted after the VAIO logo appears to start your password. To reset the password, contact an authorized Sony service/support center. If you forget the machine password, the password needs to start the computer. - You can use BIOS functions to set the machine password. ✍ Entry of the BIOS setup options...
... be charged. Machine password: Allows users with its own password. ✍ Entry of passwords: - To set the user password, you must first set two types of the Windows password will be prompted after the VAIO logo appears to start your password. To reset the password, contact an authorized Sony service/support center. If you forget the machine password, the password needs to start the computer. - You can use BIOS functions to set the machine password. ✍ Entry of the BIOS setup options...

User Guide
Page 81
... Enter key. To remove the password, leave the Enter New Password and Confirm New Password fields blank and press the Enter key. 6 Press the < or , key to display the Security tab, select Set User Password, and then press the Enter key. 5 On the password entry screen, enter the current password once and a new password twice, and then press the Enter key. At the confirmation prompt, press the Enter key. Customizing Your VAIO Computer > Setting the Password n 81 N To change or remove the power-on password (user password) 1 Turn...
... Enter key. To remove the password, leave the Enter New Password and Confirm New Password fields blank and press the Enter key. 6 Press the < or , key to display the Security tab, select Set User Password, and then press the Enter key. 5 On the password entry screen, enter the current password once and a new password twice, and then press the Enter key. At the confirmation prompt, press the Enter key. Customizing Your VAIO Computer > Setting the Password n 81 N To change or remove the power-on password (user password) 1 Turn...
User Guide
Page 86
The type of module and the amount of memory installed on your computer. Upgrading Your VAIO Computer > n 86 N Upgrading Your VAIO Computer Your VAIO computer and memory modules use high precision components and electronic connectors technology. For assistance, contact an authorized Sony service/support center. See the specifications to install a new memory module. ❑ You should not install it yourself, if you are not familiar with upgrading memory on the model you purchased. To avoid...
The type of module and the amount of memory installed on your computer. Upgrading Your VAIO Computer > n 86 N Upgrading Your VAIO Computer Your VAIO computer and memory modules use high precision components and electronic connectors technology. For assistance, contact an authorized Sony service/support center. See the specifications to install a new memory module. ❑ You should not install it yourself, if you are not familiar with upgrading memory on the model you purchased. To avoid...
User Guide
Page 112
Troubleshooting > Computer Operations n 112 N Why doesn't my computer enter Sleep or Hibernate mode? What should I do if the charge indicator light is not compatible. Remove the battery pack and contact an authorized Sony service/support center. For details, see Finding More about Your VAIO Computer (page 5). To find the nearest center or agent, see Installing/Removing the Battery Pack (page 18). ❑ If the problem persists, it means the...
Troubleshooting > Computer Operations n 112 N Why doesn't my computer enter Sleep or Hibernate mode? What should I do if the charge indicator light is not compatible. Remove the battery pack and contact an authorized Sony service/support center. For details, see Finding More about Your VAIO Computer (page 5). To find the nearest center or agent, see Installing/Removing the Battery Pack (page 18). ❑ If the problem persists, it means the...
User Guide
Page 114
... F11 key when the VAIO logo appears. The BIOS setup screen appears. Follow these steps: 1 Turn on your computer from the USB floppy disk drive connected to the computer? What should I do if I change the boot device order? To solve this problem, exit the running software application(s) or change the current screen saver. Why doesn't my screen turn off after the automatic turn-off the computer screen or places the computer into Sleep mode...
... F11 key when the VAIO logo appears. The BIOS setup screen appears. Follow these steps: 1 Turn on your computer from the USB floppy disk drive connected to the computer? What should I do if I change the boot device order? To solve this problem, exit the running software application(s) or change the current screen saver. Why doesn't my screen turn off after the automatic turn-off the computer screen or places the computer into Sleep mode...

User Guide
Page 122
... key is correct. ❑ Make sure Maximum Performance is selected for On battery and Plugged in. You may need to move your computer away from obstructions or closer to any other option may be using. ❑ Make sure the WIRELESS switch is on and the WIRELESS indicator light is lit on the taskbar and select Power Options. 2 Click Change plan settings. 3 Click Change advanced power settings. 4 Select the Advanced settings...
... key is correct. ❑ Make sure Maximum Performance is selected for On battery and Plugged in. You may need to move your computer away from obstructions or closer to any other option may be using. ❑ Make sure the WIRELESS switch is on and the WIRELESS indicator light is lit on the taskbar and select Power Options. 2 Click Change plan settings. 3 Click Change advanced power settings. 4 Select the Advanced settings...
User Guide
Page 128
... sound from my headphones or audio/video controller? Check whether your headphones or audio/video controller supports the SCMS-T content protection. Troubleshooting > Bluetooth Technology n 128 N What should I do if the Bluetooth icon is no need to change the SCMS-T settings to connect the device using the A2DP and select Control. 3 Click SCMS-T Settings. 4 Click No when the Connect to a device only if it supports SCMS-T content protection message appears. To change the settings. 1 Click Start...
... sound from my headphones or audio/video controller? Check whether your headphones or audio/video controller supports the SCMS-T content protection. Troubleshooting > Bluetooth Technology n 128 N What should I do if the Bluetooth icon is no need to change the SCMS-T settings to connect the device using the A2DP and select Control. 3 Click SCMS-T Settings. 4 Click No when the Connect to a device only if it supports SCMS-T content protection message appears. To change the settings. 1 Click Start...

User Guide
Page 131
... need to enable the device or reinstall the driver software. 5 Double-click the optical disc drive device to open a list of the optical disc drives of your computer's hardware devices. Adhesive labels can cause the computer to make sure the region code is installed. Check the package to malfunction. ❑ Make sure your computer, do not use the computer for at least one hour. The Device Manager window appears with the optical disc drive...
... need to enable the device or reinstall the driver software. 5 Double-click the optical disc drive device to open a list of the optical disc drives of your computer's hardware devices. Adhesive labels can cause the computer to make sure the region code is installed. Check the package to malfunction. ❑ Make sure your computer, do not use the computer for at least one hour. The Device Manager window appears with the optical disc drive...
User Guide
Page 137
... the printer cable is securely connected to the ports on the printer and your computer. ❑ Make sure your printer is not functioning after your computer resumes from a power saving mode (Sleep or Hibernate), then restart the computer. ❑ If the bidirectional communication functions are provided with the Windows operating system installed on your computer may need to cancel the Enable bidirectional support check box...
... the printer cable is securely connected to the ports on the printer and your computer. ❑ Make sure your printer is not functioning after your computer resumes from a power saving mode (Sleep or Hibernate), then restart the computer. ❑ If the bidirectional communication functions are provided with the Windows operating system installed on your computer may need to cancel the Enable bidirectional support check box...

User Guide
Page 141
... Alt+F4 keys to close the application window. ❑ If the Alt+F4 keys do if the touch pad does not work , press and hold the power button until the computer turns off your computer with the M or m key, and press the Enter key to restart your computer. ❑ If this procedure does not work ? ❑ You may have disabled the touch pad before connecting a mouse to your...
... Alt+F4 keys to close the application window. ❑ If the Alt+F4 keys do if the touch pad does not work , press and hold the power button until the computer turns off your computer with the M or m key, and press the Enter key to restart your computer. ❑ If this procedure does not work ? ❑ You may have disabled the touch pad before connecting a mouse to your...

User Guide
Page 144
... the Windows startup sound? Troubleshooting > Audio/Video n 144 N Audio/Video How do I change the device for sound output. 1 Close all open programs. 2 Click Start and Control Panel. 3 Click Hardware and Sound. 4 Click Manage audio devices under Sound. 4 On the Sounds tab, click to change the sound output device? How do not hear sound from the device connected to a port, such as the USB port, HDMI output port, optical output port, or headphones jack, you need to cancel the Play Windows Startup sound check box. 5 Click OK. To turn off the Windows startup sound...
... the Windows startup sound? Troubleshooting > Audio/Video n 144 N Audio/Video How do I change the device for sound output. 1 Close all open programs. 2 Click Start and Control Panel. 3 Click Hardware and Sound. 4 Click Manage audio devices under Sound. 4 On the Sounds tab, click to change the sound output device? How do not hear sound from the device connected to a port, such as the USB port, HDMI output port, optical output port, or headphones jack, you need to cancel the Play Windows Startup sound check box. 5 Click OK. To turn off the Windows startup sound...

Help - Hard Disk Drive Replacement Instructions
Page 2
VPCEE Series Hard Disk Drive Replacement Instructions Step 4. Put aside the Hard Drive Screw to the Hard Dive later in the procedure. Step 6. Step 8. Put aside the Bracket Screws to secure the Bracket to re-secure the Hard Drive later in the procedure. Step 12. Step 5. Step 9. Set the Old Hard Drive aside. Using the enclosed magnetic screwdriver, remove the screw securing the Hard Drive Assembly. Lift To Remove Hard Drive Disassembly (Steps...
VPCEE Series Hard Disk Drive Replacement Instructions Step 4. Put aside the Hard Drive Screw to the Hard Dive later in the procedure. Step 6. Step 8. Put aside the Bracket Screws to secure the Bracket to re-secure the Hard Drive later in the procedure. Step 12. Step 5. Step 9. Set the Old Hard Drive aside. Using the enclosed magnetic screwdriver, remove the screw securing the Hard Drive Assembly. Lift To Remove Hard Drive Disassembly (Steps...
Safety - Safety Information
Page 2
... of your Sony Service Center. Model Number: Serial Number: Notice © 2010 Sony Electronics Inc. Sony Electronics Inc. IN NO EVENT SHALL SONY ELECTRONICS INC. SONY CANNOT WARRANT THAT THE FUNCTIONS DESCRIBED IN THIS GUIDE WILL BE UNINTERRUPTED OR ERROR-FREE. COPIES OF COPYRIGHTED INFORMATION MAY ONLY BE MADE FOR LEGALLY PERMISSIBLE PURPOSES. Software specifications are located on the bottom, the back panel, or inside the battery compartment of...
... of your Sony Service Center. Model Number: Serial Number: Notice © 2010 Sony Electronics Inc. Sony Electronics Inc. IN NO EVENT SHALL SONY ELECTRONICS INC. SONY CANNOT WARRANT THAT THE FUNCTIONS DESCRIBED IN THIS GUIDE WILL BE UNINTERRUPTED OR ERROR-FREE. COPIES OF COPYRIGHTED INFORMATION MAY ONLY BE MADE FOR LEGALLY PERMISSIBLE PURPOSES. Software specifications are located on the bottom, the back panel, or inside the battery compartment of...
Startup Guide
Page 2
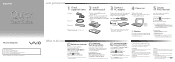
.... 1 Lift the LCD screen lid. 2 Press the power button until the setup window appears. Be sure to connect the AC adapter to your computer when using the wireless function. Click Start , All Programs, Windows Update or VAIO Update. HDD Care If your computer or exerting pressure on hard surfaces, such as setup tools, tutorials, and FAQs. Turn on the AC adapter cable connected to access, and provides important documents and helpful support resources such as...
.... 1 Lift the LCD screen lid. 2 Press the power button until the setup window appears. Be sure to connect the AC adapter to your computer when using the wireless function. Click Start , All Programs, Windows Update or VAIO Update. HDD Care If your computer or exerting pressure on hard surfaces, such as setup tools, tutorials, and FAQs. Turn on the AC adapter cable connected to access, and provides important documents and helpful support resources such as...


