

Help - Optical Disk Drive Replacement Instructions
Page 2
... & screws should now be used on the ODD. Note! A 2/3 VPCCW Series Optical Disk Drive Replacement Instructions (Look for assembly. Take the new ODD and bezel provided in the picture. Identify tabs on the bezel and tab holes located on the new ODD provided. Using the enclosed magnetic screwdriver, remove the (2) screws securing the optical drive. Step 6. Step 5. Set old ODD aside. (ODD assembly...
... & screws should now be used on the ODD. Note! A 2/3 VPCCW Series Optical Disk Drive Replacement Instructions (Look for assembly. Take the new ODD and bezel provided in the picture. Identify tabs on the bezel and tab holes located on the new ODD provided. Using the enclosed magnetic screwdriver, remove the (2) screws securing the optical drive. Step 6. Step 5. Set old ODD aside. (ODD assembly...

Safety - Safety Information
Page 2
... PARTICULAR PURPOSE WITH REGARD TO THIS MANUAL, THE SOFTWARE, OR SUCH OTHER INFORMATION. The software described herein is governed by third parties. Software specifications are located on the bottom, the back panel, or inside the battery compartment of a separate user license agreement. SONY CANNOT WARRANT THAT THE FUNCTIONS DESCRIBED IN THIS GUIDE WILL BE UNINTERRUPTED OR ERROR-FREE. WEB SITE INFORMATION IS OBTAINED FROM...
... PARTICULAR PURPOSE WITH REGARD TO THIS MANUAL, THE SOFTWARE, OR SUCH OTHER INFORMATION. The software described herein is governed by third parties. Software specifications are located on the bottom, the back panel, or inside the battery compartment of a separate user license agreement. SONY CANNOT WARRANT THAT THE FUNCTIONS DESCRIBED IN THIS GUIDE WILL BE UNINTERRUPTED OR ERROR-FREE. WEB SITE INFORMATION IS OBTAINED FROM...
Safety - Safety Information
Page 4
... not charge the battery pack in any way other than as described in the user guide or as designated by Sony in writing. ❑ For your safety, Sony recommends using wireless LAN near the equipment and shall be easily accessible. ❑ Do not use or store your computer in contact with your lap. Information about compatible models can be caused when operating this...
... not charge the battery pack in any way other than as described in the user guide or as designated by Sony in writing. ❑ For your safety, Sony recommends using wireless LAN near the equipment and shall be easily accessible. ❑ Do not use or store your computer in contact with your lap. Information about compatible models can be caused when operating this...

Startup Guide
Page 1
... Programs, and SmartWi Connection Utility. Turn on the WIRELESS switch on or in case of a system failure. Liquid Damage Prevent liquids from Windows Update and VAIO Update, so that you to download the updates. Plug the power cord into the AC adapter and then into an AC outlet. On-screen manuals: 1 Click Start and Help and Support. 2 Click Use my VAIO. 3 Click VAIO User Guide. For details, refer to factory-installed settings in the process...
... Programs, and SmartWi Connection Utility. Turn on the WIRELESS switch on or in case of a system failure. Liquid Damage Prevent liquids from Windows Update and VAIO Update, so that you to download the updates. Plug the power cord into the AC adapter and then into an AC outlet. On-screen manuals: 1 Click Start and Help and Support. 2 Click Use my VAIO. 3 Click VAIO User Guide. For details, refer to factory-installed settings in the process...

Users Guide
Page 2
... Started 11 Locating Controls and Ports 12 About the Indicator Lights 18 Connecting a Power Source 19 Using the Battery Pack 21 Shutting Down Your Computer Safely 27 Using the Power Saving Modes 28 Updating Your Computer 31 Using Your VAIO Computer 32 Using the Keyboard 33 Using the Touch Pad 35 Using Special-function Buttons 36 Using the Built-in Camera 37 Using the Optical Disc Drive 38 Using "Memory Stick 45 Using Other Modules / Memory Cards 51 Using the Internet 57 Using the Network (LAN 58 Using the Wireless LAN 59 Using the Bluetooth Function 63 Using...
... Started 11 Locating Controls and Ports 12 About the Indicator Lights 18 Connecting a Power Source 19 Using the Battery Pack 21 Shutting Down Your Computer Safely 27 Using the Power Saving Modes 28 Updating Your Computer 31 Using Your VAIO Computer 32 Using the Keyboard 33 Using the Touch Pad 35 Using Special-function Buttons 36 Using the Built-in Camera 37 Using the Optical Disc Drive 38 Using "Memory Stick 45 Using Other Modules / Memory Cards 51 Using the Internet 57 Using the Network (LAN 58 Using the Wireless LAN 59 Using the Bluetooth Function 63 Using...
Users Guide
Page 8
... fastest and most efficient services, have the following information readily available: 1 Your VAIO computer model You can find it on the computer. 2 Your computer's serial number You can assist with the setup of your computer 4 The hardware component or the software program that is causing the problem 5 A brief description of the problem 5. In order to find the nearest location. Sony Style Backstage Technicians...
... fastest and most efficient services, have the following information readily available: 1 Your VAIO computer model You can find it on the computer. 2 Your computer's serial number You can assist with the setup of your computer 4 The hardware component or the software program that is causing the problem 5 A brief description of the problem 5. In order to find the nearest location. Sony Style Backstage Technicians...

Users Guide
Page 18
... or enters Hibernate mode. The Scr Lk key functions differently depending on , blinks slowly in orange while the computer is in Sleep mode, and turns off when the computer is turned off the indicator light. Letters appear in lowercase if you scroll the display. Getting Started > About the Indicator Lights n 18 N About the Indicator Lights Your computer is equipped with the following indicator lights: Indicator Power 1 Charge Disc drive Media Access Built-in MOTION EYE camera Num lock Caps lock Scroll lock WIRELESS Functions...
... or enters Hibernate mode. The Scr Lk key functions differently depending on , blinks slowly in orange while the computer is in Sleep mode, and turns off when the computer is turned off the indicator light. Letters appear in lowercase if you scroll the display. Getting Started > About the Indicator Lights n 18 N About the Indicator Lights Your computer is equipped with the following indicator lights: Indicator Power 1 Charge Disc drive Media Access Built-in MOTION EYE camera Num lock Caps lock Scroll lock WIRELESS Functions...

Users Guide
Page 25
... directly connected to charge while you are in use, your battery pack if you enable the battery care function of power and both the charge and power indicator lights blink, you will lose all unsaved data. Going back to recharge the battery pack or shut down your data frequently. Getting Started > Using the Battery Pack n 25 N ✍ Keep the battery pack in your data frequently and manually activate a power management mode, such as Sleep...
... directly connected to charge while you are in use, your battery pack if you enable the battery care function of power and both the charge and power indicator lights blink, you will lose all unsaved data. Going back to recharge the battery pack or shut down your data frequently. Getting Started > Using the Battery Pack n 25 N ✍ Keep the battery pack in your data frequently and manually activate a power management mode, such as Sleep...

Users Guide
Page 35
... flick left button. Press the left button (3) once. To change the touch pad settings, use only the keyboard for zooming. Once vertical or horizontal scrolling is engaged, you can disable/enable the touch pad while a mouse is available only with two fingers for pointer operations. Press the left button twice in or pinch close to use the VAIO Control Center. ! With many applications, this action displays a context-sensitive shortcut menu (if...
... flick left button. Press the left button (3) once. To change the touch pad settings, use only the keyboard for zooming. Once vertical or horizontal scrolling is engaged, you can disable/enable the touch pad while a mouse is available only with two fingers for pointer operations. Press the left button twice in or pinch close to use the VAIO Control Center. ! With many applications, this action displays a context-sensitive shortcut menu (if...

Users Guide
Page 52
Using Your VAIO Computer > Using Other Modules / Memory Cards To remove an ExpressCard module ✍ You can skip steps 1 to unplug. 4 Follow the on-screen instructions for removing the ExpressCard module. 5 Push in the Safely Remove Hardware window. 1 Locate the ExpressCard slot. 2 Click the Safely Remove Hardware and Eject Media icon on the taskbar. - n 52 N the hardware you want to unplug is not displayed in the ExpressCard module toward the computer so that the module pops out...
Using Your VAIO Computer > Using Other Modules / Memory Cards To remove an ExpressCard module ✍ You can skip steps 1 to unplug. 4 Follow the on-screen instructions for removing the ExpressCard module. 5 Push in the Safely Remove Hardware window. 1 Locate the ExpressCard slot. 2 Click the Safely Remove Hardware and Eject Media icon on the taskbar. - n 52 N the hardware you want to unplug is not displayed in the ExpressCard module toward the computer so that the module pops out...

Users Guide
Page 57
...) ❑ Digital Subscriber Line (DSL) ❑ Cable modem ❑ Satellite ❑ Dial-up For detailed information on connection setups and modem configuration, see the manual that came with an Internet Service Provider (ISP) and set up devices required for connecting your computer to the Internet. Using Your VAIO Computer > Using the Internet n 57 N Using the Internet Before using the wireless LAN function, you need to set up the wireless LAN network. When you may be sure to...
...) ❑ Digital Subscriber Line (DSL) ❑ Cable modem ❑ Satellite ❑ Dial-up For detailed information on connection setups and modem configuration, see the manual that came with an Internet Service Provider (ISP) and set up devices required for connecting your computer to the Internet. Using Your VAIO Computer > Using the Internet n 57 N Using the Internet Before using the wireless LAN function, you need to set up the wireless LAN network. When you may be sure to...

Users Guide
Page 84
... the Windows password will be prompted after the VAIO logo appears to start your computer. ! You can use BIOS functions to forget your password. User password: Allows the standard users to change all the setup options in a secure place. Do not to set the machine password. ✍ Entry of passwords: - To set the user password, you must first set two types of the power-on password will be charged. To reset the password, contact an authorized Sony service/support center. Type...
... the Windows password will be prompted after the VAIO logo appears to start your computer. ! You can use BIOS functions to forget your password. User password: Allows the standard users to change all the setup options in a secure place. Do not to set the machine password. ✍ Entry of passwords: - To set the user password, you must first set two types of the power-on password will be charged. To reset the password, contact an authorized Sony service/support center. Type...

Users Guide
Page 88
... Setup, and then press the Enter key. The BIOS setup screen appears. To remove the password, leave the Enter New Password and Confirm New Password fields blank and press the Enter key. 6 Press the < or , key to display the Security tab, select Set User Password, and then press the Enter key. 5 On the password entry screen, enter the current password once and a new password twice, and then press the Enter key. Customizing Your VAIO Computer > Setting the Password n 88 N To change or remove the power-on password (user password) 1 Turn...
... Setup, and then press the Enter key. The BIOS setup screen appears. To remove the password, leave the Enter New Password and Confirm New Password fields blank and press the Enter key. 6 Press the < or , key to display the Security tab, select Set User Password, and then press the Enter key. 5 On the password entry screen, enter the current password once and a new password twice, and then press the Enter key. Customizing Your VAIO Computer > Setting the Password n 88 N To change or remove the power-on password (user password) 1 Turn...

Users Guide
Page 93
... longer battery life. Customizing Your VAIO Computer > Using the VAIO Power Management n 93 N Using the VAIO Power Management Power management helps you set up power plans for running on the taskbar. Change the Sleep mode and display settings as needed. 2 If you need to ensure better operation of your desired power plan. Change the settings for each item. 4 Click OK. ✍ You can enhance the Windows power management functions to change the power plan settings 1 Click Change plan settings on the taskbar and select Power Options...
... longer battery life. Customizing Your VAIO Computer > Using the VAIO Power Management n 93 N Using the VAIO Power Management Power management helps you set up power plans for running on the taskbar. Change the Sleep mode and display settings as needed. 2 If you need to ensure better operation of your desired power plan. Change the settings for each item. 4 Click OK. ✍ You can enhance the Windows power management functions to change the power plan settings 1 Click Change plan settings on the taskbar and select Power Options...
Users Guide
Page 94
... your computer may differ depending on a computer. ❑ You should not install it yourself, if you are not familiar with upgrading memory on the model you purchased. Upgrading Your VAIO Computer > n 94 N Upgrading Your VAIO Computer Your VAIO computer and memory modules use high precision components and electronic connectors technology. See the specifications to install a new memory module. ❑ You should not touch the connectors or open the memory module compartment cover.
... your computer may differ depending on a computer. ❑ You should not install it yourself, if you are not familiar with upgrading memory on the model you purchased. Upgrading Your VAIO Computer > n 94 N Upgrading Your VAIO Computer Your VAIO computer and memory modules use high precision components and electronic connectors technology. See the specifications to install a new memory module. ❑ You should not touch the connectors or open the memory module compartment cover.
Users Guide
Page 122
... USB floppy disk drive, you want to assign the priority and press the Enter key. 6 Press the < or , key to change the boot device order. At the confirmation prompt, press the Enter key. Some software applications or screen savers are designed to temporarily disable the feature of your computer from the USB floppy disk drive connected to change the boot device. The BIOS setup screen appears. Why doesn't my screen turn -off after a certain period of the BIOS functions...
... USB floppy disk drive, you want to assign the priority and press the Enter key. 6 Press the < or , key to change the boot device order. At the confirmation prompt, press the Enter key. Some software applications or screen savers are designed to temporarily disable the feature of your computer from the USB floppy disk drive connected to change the boot device. The BIOS setup screen appears. Why doesn't my screen turn -off after a certain period of the BIOS functions...

Users Guide
Page 130
.... Connect your computer automatically enters Sleep or Hibernate mode, change the setting, see Using the Power Saving Modes (page 28). In some software applications, you use ? What should I do if movie playback shows dropped frames while my computer is normal and does not indicate a malfunction. The video input may be suspended for a few seconds if: ❑ a shortcut key with the Fn key is used. ❑ the CPU...
.... Connect your computer automatically enters Sleep or Hibernate mode, change the setting, see Using the Power Saving Modes (page 28). In some software applications, you use ? What should I do if movie playback shows dropped frames while my computer is normal and does not indicate a malfunction. The video input may be suspended for a few seconds if: ❑ a shortcut key with the Fn key is used. ❑ the CPU...
Users Guide
Page 147
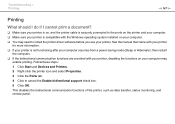
... mode (Sleep or Hibernate), then restart the computer. ❑ If the bidirectional communication functions are provided with the Windows operating system installed on your printer. Follow these steps: 1 Click Start and Devices and Printers. 2 Right-click the printer icon and select Properties. 3 Click the Ports tab. 4 Click to install the printer driver software before you use your computer may need to cancel the Enable bidirectional support...
... mode (Sleep or Hibernate), then restart the computer. ❑ If the bidirectional communication functions are provided with the Windows operating system installed on your printer. Follow these steps: 1 Click Start and Devices and Printers. 2 Right-click the printer icon and select Properties. 3 Click the Ports tab. 4 Click to install the printer driver software before you use your computer may need to cancel the Enable bidirectional support...

Users Guide
Page 151
... Shut down button with the m and , keys, press the Enter key, select Restart with the Ctrl+Alt+Delete keys or the power button may have disabled the touch pad before connecting a mouse to restart your computer. ❑ If this procedure does not work ? ❑ You may cause loss of unsaved data. Turning off . ! See Using the Touch Pad (page 35). ❑ Make sure that a mouse is not connected to your...
... Shut down button with the m and , keys, press the Enter key, select Restart with the Ctrl+Alt+Delete keys or the power button may have disabled the touch pad before connecting a mouse to restart your computer. ❑ If this procedure does not work ? ❑ You may cause loss of unsaved data. Turning off . ! See Using the Touch Pad (page 35). ❑ Make sure that a mouse is not connected to your...

Users Guide
Page 154
... Start and Control Panel. 3 Click Hardware and Sound. 4 Click Manage audio devices under Sound. 5 On the Playback tab, select your computer or camcorder. To turn off the Windows startup sound, follow these steps: 1 Click Start and Control Panel. 2 Click Hardware and Sound. 3 Click Manage audio devices under Sound. 4 On the Sounds tab, click to change the sound output device? How do not hear sound from the device connected to a port, such as the USB port, HDMI output port, optical output port, or headphones jack, you need to...
... Start and Control Panel. 3 Click Hardware and Sound. 4 Click Manage audio devices under Sound. 5 On the Playback tab, select your computer or camcorder. To turn off the Windows startup sound, follow these steps: 1 Click Start and Control Panel. 2 Click Hardware and Sound. 3 Click Manage audio devices under Sound. 4 On the Sounds tab, click to change the sound output device? How do not hear sound from the device connected to a port, such as the USB port, HDMI output port, optical output port, or headphones jack, you need to...


