
User Guide
Page 3
... i.LINK Device ...110 Connecting to a Network (LAN) ...112 Customizing Your VAIO Computer ...114 Setting the Password ...115 Setting Up Your Computer with VAIO Control Center 120 Using the Power Saving Mode...121 Upgrading Your VAIO Computer...124 Adding and Removing Memory...125 Adding the Hard Disk Drive...132 Precautions ...138 Handling the LCD Screen ...139 Using the Power...
... i.LINK Device ...110 Connecting to a Network (LAN) ...112 Customizing Your VAIO Computer ...114 Setting the Password ...115 Setting Up Your Computer with VAIO Control Center 120 Using the Power Saving Mode...121 Upgrading Your VAIO Computer...124 Adding and Removing Memory...125 Adding the Hard Disk Drive...132 Precautions ...138 Handling the LCD Screen ...139 Using the Power...

User Guide
Page 7
...on -screen guide: 1 Click Start and Help and Support. 2 Click Use My VAIO. 3 Click Media Center User Guide. Provides information about restoring individual software programs, hardware drivers, and drive partition(s) or your model supports the functions. ❑ Media Center User Guide (Selected .... See the online specifications to find out whether your entire hard disk drive to the original factory settings. To access this on -screen guide: 1 Click Start and Help and Support. 2 Click Use My VAIO. 3 Click VAIO Recovery Center User Guide. ❑ SmartWi™ Connection Utility...
...on -screen guide: 1 Click Start and Help and Support. 2 Click Use My VAIO. 3 Click Media Center User Guide. Provides information about restoring individual software programs, hardware drivers, and drive partition(s) or your model supports the functions. ❑ Media Center User Guide (Selected .... See the online specifications to find out whether your entire hard disk drive to the original factory settings. To access this on -screen guide: 1 Click Start and Help and Support. 2 Click Use My VAIO. 3 Click VAIO Recovery Center User Guide. ❑ SmartWi™ Connection Utility...

User Guide
Page 11
... get started using your system. Upon completion, connect one device (for the first time, do not connect any other hardware that did not originally come with only the supplied accessories connected and set up your VAIO computer. ! Before starting your computer for example, a printer, an external hard disk drive, a scanner, and so on) at a time, following...
... get started using your system. Upon completion, connect one device (for the first time, do not connect any other hardware that did not originally come with only the supplied accessories connected and set up your VAIO computer. ! Before starting your computer for example, a printer, an external hard disk drive, a scanner, and so on) at a time, following...

User Guide
Page 12
The appearance of your computer may also vary in specifications. Front A Built-in speakers (stereo) B Built-in microphone (monaural) C Built-in MOTION EYE camera indicator (page 17) D Built-in MOTION ... Locating Controls and Ports Take a moment to variations in some countries or areas. G SONY logo lamp (page 120) H LCD screen (page 139) I HDMI SELECT indicator* (page 17) J WIRELESS indicator (page 17) K DISPLAY OFF indicator (page 17) L Hard disk drive/Optical disc drive indicator (page 17) * On selected models only. It may be different from...
The appearance of your computer may also vary in specifications. Front A Built-in speakers (stereo) B Built-in microphone (monaural) C Built-in MOTION EYE camera indicator (page 17) D Built-in MOTION ... Locating Controls and Ports Take a moment to variations in some countries or areas. G SONY logo lamp (page 120) H LCD screen (page 139) I HDMI SELECT indicator* (page 17) J WIRELESS indicator (page 17) K DISPLAY OFF indicator (page 17) L Hard disk drive/Optical disc drive indicator (page 17) * On selected models only. It may be different from...

User Guide
Page 14
The area around the air exhaust vent (1) becomes hot while your computer is on. Be sure to wait until the computer cools down before you touch it. n 14 N Getting Started A Air exhaust vent (page 142) B HARD DISK DRIVE ACCESS BAY cover (page 133) C Memory module compartment cover (page 127) D AC In port (page 23) E CABLE...
The area around the air exhaust vent (1) becomes hot while your computer is on. Be sure to wait until the computer cools down before you touch it. n 14 N Getting Started A Air exhaust vent (page 142) B HARD DISK DRIVE ACCESS BAY cover (page 133) C Memory module compartment cover (page 127) D AC In port (page 23) E CABLE...

User Guide
Page 17
...a memory card. (Do not place the computer into Sleep mode or turn it off when this indicator is lit.) When the indicator is unlit, the memory card is not in green while the HDMI input is selected. Illuminates when the drive is in use . Illuminates in use .... Illuminates in MOTION EYE camera Media Access HDMI SELECT* DISPLAY OFF Hard disk drive/Optical disc drive WIRELESS * On selected models only. n 17 N Getting Started About the Indicator Lights Your computer is equipped with the following indicator lights: Indicator Power 1 Built-in orange when the LCD...
...a memory card. (Do not place the computer into Sleep mode or turn it off when this indicator is lit.) When the indicator is unlit, the memory card is not in green while the HDMI input is selected. Illuminates when the drive is in use . Illuminates in use .... Illuminates in MOTION EYE camera Media Access HDMI SELECT* DISPLAY OFF Hard disk drive/Optical disc drive WIRELESS * On selected models only. n 17 N Getting Started About the Indicator Lights Your computer is equipped with the following indicator lights: Indicator Power 1 Built-in orange when the LCD...

User Guide
Page 48
... it completely slides out. 1 Check that the Hard disk/Optical disc drive indicator light (1) is in Sleep mode. Be sure not to malfunction. If pressing either button does not slide the disc out of the drive, restart your computer is turned off. Do not remove the optical ... button on the wireless keyboard. To do so, click Start and Computer, right-click the optical disc drive icon, and select Eject. The drive eject button is disabled when your computer and repeat the procedure. n 48 N Using Your VAIO Computer To remove a disc ! The optical disc slides out. ✍ Alternatively, you...
... it completely slides out. 1 Check that the Hard disk/Optical disc drive indicator light (1) is in Sleep mode. Be sure not to malfunction. If pressing either button does not slide the disc out of the drive, restart your computer is turned off. Do not remove the optical ... button on the wireless keyboard. To do so, click Start and Computer, right-click the optical disc drive icon, and select Eject. The drive eject button is disabled when your computer and repeat the procedure. n 48 N Using Your VAIO Computer To remove a disc ! The optical disc slides out. ✍ Alternatively, you...

User Guide
Page 75
See the online specifications to the computer. You cannot record the HDMI input, such as a hard disk drive recorder, to find out if your computer is equipped with the HDMI INPUT port. ! n 75 N Using Your VAIO Computer Using the HDMI Input Function Your computer may be equipped with an HDMI INPUT port that enables you can receive the...
See the online specifications to the computer. You cannot record the HDMI input, such as a hard disk drive recorder, to find out if your computer is equipped with the HDMI INPUT port. ! n 75 N Using Your VAIO Computer Using the HDMI Input Function Your computer may be equipped with an HDMI INPUT port that enables you can receive the...
User Guide
Page 121
Using Normal Mode This is the normal state of the computer when it is lit in use. n 121 N Customizing Your VAIO Computer Using the Power Saving Mode In addition to turn off specific devices, your computer has a distinct power saving mode called Sleep mode. The green power indicator light is in this mode. To save power while not working, you to the normal operating mode, which allows you can turn off a specific device such as the LCD screen or the hard disk drive.
Using Normal Mode This is the normal state of the computer when it is lit in use. n 121 N Customizing Your VAIO Computer Using the Power Saving Mode In addition to turn off specific devices, your computer has a distinct power saving mode called Sleep mode. The green power indicator light is in this mode. To save power while not working, you to the normal operating mode, which allows you can turn off a specific device such as the LCD screen or the hard disk drive.

User Guide
Page 122
n 122 N Customizing Your VAIO Computer Using Sleep Mode Sleep mode turns off the LCD screen and places the hard disk drive and the CPU into Sleep mode. Make sure that the batteries of time. You will turn off your computer if you press and hold the power button for a long period of your wireless keyboard and...
n 122 N Customizing Your VAIO Computer Using Sleep Mode Sleep mode turns off the LCD screen and places the hard disk drive and the CPU into Sleep mode. Make sure that the batteries of time. You will turn off your computer if you press and hold the power button for a long period of your wireless keyboard and...
User Guide
Page 124
For assistance, contact an authorized Sony Service Center. n 124 N Upgrading Your VAIO Computer Upgrading Your VAIO Computer Your VAIO computer and memory modules use high precision components and electronic connectors technology. To avoid invalidation of memory installed on a computer. ❑ You should not touch the ...yourself, if you are not familiar with upgrading memory on your model, see Sony Support Information (page 193). ❑ Adding and Removing Memory (page 125) ❑ Adding the Hard Disk Drive (page 132) To find the nearest center or agent, see the online...
For assistance, contact an authorized Sony Service Center. n 124 N Upgrading Your VAIO Computer Upgrading Your VAIO Computer Your VAIO computer and memory modules use high precision components and electronic connectors technology. To avoid invalidation of memory installed on a computer. ❑ You should not touch the ...yourself, if you are not familiar with upgrading memory on your model, see Sony Support Information (page 193). ❑ Adding and Removing Memory (page 125) ❑ Adding the Hard Disk Drive (page 132) To find the nearest center or agent, see the online...

User Guide
Page 132
.... To find the nearest center or agent, see Sony Support Information (page 193). Make sure you need assistance to the computer and the peripheral devices as well as the hard disk. Review the manufacturer's information provided with VAIO computers. n 132 N Upgrading Your VAIO Computer Adding the Hard Disk Drive Your computer is plugged to its power source may cause damage...
.... To find the nearest center or agent, see Sony Support Information (page 193). Make sure you need assistance to the computer and the peripheral devices as well as the hard disk. Review the manufacturer's information provided with VAIO computers. n 132 N Upgrading Your VAIO Computer Adding the Hard Disk Drive Your computer is plugged to its power source may cause damage...

User Guide
Page 133
See Removing and Replacing the Covers (page 18) for the procedure. 3 Disconnect the power cord and the rest of the peripheral devices. 4 Wait about an hour until the computer cools down the computer, turn off all peripheral devices, and disconnect peripheral devices from the accessible ports and jacks. 2 Remove the back panel cover from the computer. n 133 N Upgrading Your VAIO Computer Installing an Additional Hard Disk Drive To install an additional hard disk drive 1 Shut down . 5 Unscrew the four screws (1) and remove the HARD DISK DRIVE ACCESS BAY cover (2).
See Removing and Replacing the Covers (page 18) for the procedure. 3 Disconnect the power cord and the rest of the peripheral devices. 4 Wait about an hour until the computer cools down the computer, turn off all peripheral devices, and disconnect peripheral devices from the accessible ports and jacks. 2 Remove the back panel cover from the computer. n 133 N Upgrading Your VAIO Computer Installing an Additional Hard Disk Drive To install an additional hard disk drive 1 Shut down . 5 Unscrew the four screws (1) and remove the HARD DISK DRIVE ACCESS BAY cover (2).

User Guide
Page 134
n 134 N Upgrading Your VAIO Computer 7 Pull out the drive holder (4) from the HARD DISK DRIVE ACCESS BAY and set it aside. 6 Unscrew the two screws (3) securing the drive holder.
n 134 N Upgrading Your VAIO Computer 7 Pull out the drive holder (4) from the HARD DISK DRIVE ACCESS BAY and set it aside. 6 Unscrew the two screws (3) securing the drive holder.

User Guide
Page 135
Do not overtighten these screws when securing the drive to the drive holder. 10 Slide the drive holder into the drive bay until it clicks into the drive holder and align the holes on each side of the drive holder. 9 Secure the drive to the drive holder with screws, through the holes on each side of the drive holder. ! A new hard disk drive comes with the necessary screws. n 135 N Upgrading Your VAIO Computer 8 Place a new drive into place and secure it with the screws.
Do not overtighten these screws when securing the drive to the drive holder. 10 Slide the drive holder into the drive bay until it clicks into the drive holder and align the holes on each side of the drive holder. 9 Secure the drive to the drive holder with screws, through the holes on each side of the drive holder. ! A new hard disk drive comes with the necessary screws. n 135 N Upgrading Your VAIO Computer 8 Place a new drive into place and secure it with the screws.

User Guide
Page 137
n 137 N Upgrading Your VAIO Computer Identifying the Additional Hard Disk Space When you initialize the new hard disk, it . The Windows Vista operating system recognizes the new hard disk drive and applies the NTFS format to complete the process. The Computer Management window appears. 3 Under the file directory on the right, click Disk Management under Storage. 4 Right-click...
n 137 N Upgrading Your VAIO Computer Identifying the Additional Hard Disk Space When you initialize the new hard disk, it . The Windows Vista operating system recognizes the new hard disk drive and applies the NTFS format to complete the process. The Computer Management window appears. 3 Under the file directory on the right, click Disk Management under Storage. 4 Right-click...

User Guide
Page 150
...and reads or writes data in temperature. ✍ If the hard disk drive is on. ❑ Do not turn off the power or restart your computer while reading or writing data to the hard disk drive. ❑ Do not use your computer in a place subject to mechanical vibration, shock or dust, ...you should be careful when handling your computer. Although the hard disk drive has the internal safety device to prevent...
...and reads or writes data in temperature. ✍ If the hard disk drive is on. ❑ Do not turn off the power or restart your computer while reading or writing data to the hard disk drive. ❑ Do not use your computer in a place subject to mechanical vibration, shock or dust, ...you should be careful when handling your computer. Although the hard disk drive has the internal safety device to prevent...

User Guide
Page 185
... turned off, the i.LINK cable may vary, depending on your computer or camcorder. Before connecting compatible i.LINK PC peripherals to designate that the i.LINK device is a trademark of Sony Corporation used only to your compatible i.LINK device for more information ...on operating conditions and proper connection. If a message appears stating that a product contains an IEEE 1394 connection. Not all products with an i.LINK connection can communicate with your system, such as a CD-RW or hard disk drive...
... turned off, the i.LINK cable may vary, depending on your computer or camcorder. Before connecting compatible i.LINK PC peripherals to designate that the i.LINK device is a trademark of Sony Corporation used only to your compatible i.LINK device for more information ...on operating conditions and proper connection. If a message appears stating that a product contains an IEEE 1394 connection. Not all products with an i.LINK connection can communicate with your system, such as a CD-RW or hard disk drive...
User Guide
Page 190
... n 190 N Troubleshooting Memory Stick What should I do if I cannot use Memory Stick formatted on a VAIO computer on it. Formatting Memory Stick erases all data, including music data previously saved on other sources. Why can...can view video clips that you want to save music files onto my Memory Stick? Sony is off. Make sure the erasure prevention switch is not responsible for music files that... logo. ! Can I write data to Memory Stick? You may need to reformat your hard disk drive to keep. 1 Copy the data from the copyright holders. Before you reformat Memory Stick,...
... n 190 N Troubleshooting Memory Stick What should I do if I cannot use Memory Stick formatted on a VAIO computer on it. Formatting Memory Stick erases all data, including music data previously saved on other sources. Why can...can view video clips that you want to save music files onto my Memory Stick? Sony is off. Make sure the erasure prevention switch is not responsible for music files that... logo. ! Can I write data to Memory Stick? You may need to reformat your hard disk drive to keep. 1 Copy the data from the copyright holders. Before you reformat Memory Stick,...

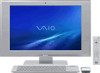
Marketing Specifications (VGCLV140J)
Page 2
..., VAIO logo, MOTION EYE, Memory Stick Pro, Duo and MagicGate are a multitude of varying software packages and add-on the Sony computer are registered trademarks of the Microsoft Corporation in the U.S. and in other factors may vary. 6. Printed 08/08. VGC-LV140J Specifications General Computer Type: Desktop Type of Use: All-in-one billion bytes when referring to hard drive...
..., VAIO logo, MOTION EYE, Memory Stick Pro, Duo and MagicGate are a multitude of varying software packages and add-on the Sony computer are registered trademarks of the Microsoft Corporation in the U.S. and in other factors may vary. 6. Printed 08/08. VGC-LV140J Specifications General Computer Type: Desktop Type of Use: All-in-one billion bytes when referring to hard drive...


