
VAIO User Guide
Page 3
... Num Lock light will be on.) Press the Num Lock key again to deactivate it. Escape key The Esc (Escape) key is used to produce capital letters or special symbols such as on a typewriter; Applications key Page 3 The Applications key displays a shortcut menu of clicking the Start button on a typical calculator. Correction keys The Insert, Back Space, and Delete keys enable you can then paste the screen...
... Num Lock light will be on.) Press the Num Lock key again to deactivate it. Escape key The Esc (Escape) key is used to produce capital letters or special symbols such as on a typewriter; Applications key Page 3 The Applications key displays a shortcut menu of clicking the Start button on a typical calculator. Correction keys The Insert, Back Space, and Delete keys enable you can then paste the screen...
VAIO User Guide
Page 8
...) Brightness control Adjusts the brightness of power consumption. Fn+ / (F7) Switch to playback DVDs. Connect the cable before you turn on the computer, otherwise Fn + F8 will not work . Fn+ only/ (F8) Control AV Out Toggles between LCD and TV once a DVD is turned off and on your computer) will be interrupted. Combinations/ Feature Function Fn+ (F3) Mute On/Off Toggles the built-in speaker volume. Select...
...) Brightness control Adjusts the brightness of power consumption. Fn+ / (F7) Switch to playback DVDs. Connect the cable before you turn on the computer, otherwise Fn + F8 will not work . Fn+ only/ (F8) Control AV Out Toggles between LCD and TV once a DVD is turned off and on your computer) will be interrupted. Combinations/ Feature Function Fn+ (F3) Mute On/Off Toggles the built-in speaker volume. Select...

VAIO User Guide
Page 22
.... See "Controlling Power Management" for more information. If you connect your computer to a TV display, you are playing the DVD. Do not use the Fn + F8 function to restart the DVD software. Before you have audio devices connected, this may need to switch between LCD and the external display while the DVD is set the display resolution to disable the screen saver and the virus checker. If you use the optical disc drive and the...
.... See "Controlling Power Management" for more information. If you connect your computer to a TV display, you are playing the DVD. Do not use the Fn + F8 function to restart the DVD software. Before you have audio devices connected, this may need to switch between LCD and the external display while the DVD is set the display resolution to disable the screen saver and the virus checker. If you use the optical disc drive and the...
VAIO User Guide
Page 26
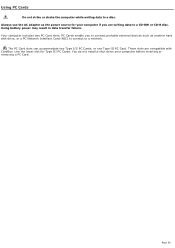
... one Type III PC Card. Always use the AC adapter as another hard disk drive, or a PC Network Interface Card (NIC) to connect to connect portable external devices such as the power source for Type III PC Cards. Page 26 Use the lower slot for your computer before inserting or removing a PC Card. These slots are writing data to a disc. You do not need to shut down your computer if you to a network. PC Cards enable...
... one Type III PC Card. Always use the AC adapter as another hard disk drive, or a PC Network Interface Card (NIC) to connect to connect portable external devices such as the power source for Type III PC Cards. Page 26 Use the lower slot for your computer before inserting or removing a PC Card. These slots are writing data to a disc. You do not need to shut down your computer if you to a network. PC Cards enable...
VAIO User Guide
Page 55
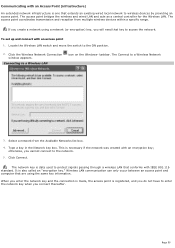
... create a network using a network (or encryption) key, you will need that are using the same key information. Locate the Wireless LAN switch and move the switch to a Wireless Network 3. The Connect to the ON position. 2. Wireless LAN communication can only occur between an access point and computer that key to wireless devices by providing an access point. To set up and connect with an encryption key; Type a key in the Network key box. Page 55 This is necessary if the network...
... create a network using a network (or encryption) key, you will need that are using the same key information. Locate the Wireless LAN switch and move the switch to a Wireless Network 3. The Connect to the ON position. 2. Wireless LAN communication can only occur between an access point and computer that key to wireless devices by providing an access point. To set up and connect with an encryption key; Type a key in the Network key box. Page 55 This is necessary if the network...

VAIO User Guide
Page 63
... -screen installation instructions may appear. Connecting a USB Dev ice to complete the on the rear panel of the cable into the USB device, if it is preinstalled, however, the first time you connect a mouse, on its installation and use a Sony USB mouse (not supplied) with your computer. 2. You can use . The USB mouse software driver is not already connected. Locate a USB port on -screen instructions. Press Enter to a USB Port See the manual that came with this computer. Page 63 To connect a USB device...
... -screen installation instructions may appear. Connecting a USB Dev ice to complete the on the rear panel of the cable into the USB device, if it is preinstalled, however, the first time you connect a mouse, on its installation and use a Sony USB mouse (not supplied) with your computer. 2. You can use . The USB mouse software driver is not already connected. Locate a USB port on -screen instructions. Press Enter to a USB Port See the manual that came with this computer. Page 63 To connect a USB device...

VAIO User Guide
Page 80
Connect the external display to the computer before you can toggle the output between the Liquid Crystal Display (LCD), the external monitor, or both devices. See Selecting the Display Mode for more information. Page 80 Press the Fn+F7 key combination to select a display. Changing the display when connecting an external computer display or projector When you connect an external display to the VGA (Monitor) port, you turn it on, otherwise the Fn+F7 key combination will not work.
Connect the external display to the computer before you can toggle the output between the Liquid Crystal Display (LCD), the external monitor, or both devices. See Selecting the Display Mode for more information. Page 80 Press the Fn+F7 key combination to select a display. Changing the display when connecting an external computer display or projector When you connect an external display to the VGA (Monitor) port, you turn it on, otherwise the Fn+F7 key combination will not work.

VAIO User Guide
Page 97
... memory capacity, serial number, and BIOS version. Printer Select printer port mode settings. To change the serial settings, click Advanced on the Sony Notebook Setup screen to display the Help file. Page 97 You can make your computer. Disabling ports releases resources to load the operating system. Touchpad When you connect an optional mouse to secure your mouse using the mouse utility. Enable Ports Enable or disable ports. For more information about each option, click Help on the Basic/Advanced tab. Basic/Advanced Switch...
... memory capacity, serial number, and BIOS version. Printer Select printer port mode settings. To change the serial settings, click Advanced on the Sony Notebook Setup screen to display the Help file. Page 97 You can make your computer. Disabling ports releases resources to load the operating system. Touchpad When you connect an optional mouse to secure your mouse using the mouse utility. Enable Ports Enable or disable ports. For more information about each option, click Help on the Basic/Advanced tab. Basic/Advanced Switch...

VAIO User Guide
Page 100
... power management. It slows the notebook and puts it conserves power. This option is in use. Camera Optimizes performance and power requirements for spreadsheet applications. Spreadsheet Optimizes performance and power requirements for camera usage. Communications Extends battery life by disabling the i.LINK port. The Internal modem remains powered. Do not choose the Automatic Profile Selection when connected to suit your portable computing needs. You can change the settings of power management settings...
... power management. It slows the notebook and puts it conserves power. This option is in use. Camera Optimizes performance and power requirements for spreadsheet applications. Spreadsheet Optimizes performance and power requirements for camera usage. Communications Extends battery life by disabling the i.LINK port. The Internal modem remains powered. Do not choose the Automatic Profile Selection when connected to suit your portable computing needs. You can change the settings of power management settings...

VAIO User Guide
Page 114
... terminology associated with personal notebooks and with an unpainted metal portion of the chassis while performing the procedure. Do not open the memory module package until you open the system or follow any of the procedures described below. Mistakes made when installing or removing a memory module may result from ESD. Use the special bag for using and modifying electronic...
... terminology associated with personal notebooks and with an unpainted metal portion of the chassis while performing the procedure. Do not open the memory module package until you open the system or follow any of the procedures described below. Mistakes made when installing or removing a memory module may result from ESD. Use the special bag for using and modifying electronic...

VAIO User Guide
Page 117
... metal tabs that secures the cover of the memory bay on the back of the computer. Pulling Mem ory Module Tabs 7. To upgrade your memory, you can install an upgrade memory module(s). To install an upgrade memory module into an empty slot, see Installing a Memory Module for the computer to discharge any static electricity. 6. Touch a metal object, such as your computer, to cool down. 4. Replace the memory module cover and the screw.
... metal tabs that secures the cover of the memory bay on the back of the computer. Pulling Mem ory Module Tabs 7. To upgrade your memory, you can install an upgrade memory module(s). To install an upgrade memory module into an empty slot, see Installing a Memory Module for the computer to discharge any static electricity. 6. Touch a metal object, such as your computer, to cool down. 4. Replace the memory module cover and the screw.

VAIO User Guide
Page 118
... to install an upgrade memory module(s), see Removing a Memory Module for instructions. 1. Make sure the screw is tight enough to 5 of Removing a Memory Module. 2. Align the new memory module with one memory module installed. Replace the memory module cover and the screw. Page 118 Remove the new memory module from its packaging. 3. Slide the memory module into the vacant slot, and push it down until it clicks into the empty slot. Installing a Mem ory Module 5. If two memory modules are already installed in the memory bay...
... to install an upgrade memory module(s), see Removing a Memory Module for instructions. 1. Make sure the screw is tight enough to 5 of Removing a Memory Module. 2. Align the new memory module with one memory module installed. Replace the memory module cover and the screw. Page 118 Remove the new memory module from its packaging. 3. Slide the memory module into the vacant slot, and push it down until it clicks into the empty slot. Installing a Mem ory Module 5. If two memory modules are already installed in the memory bay...

VAIO User Guide
Page 131
... "Save configuration changes and exit now?" The System Recovery CD(s) contains a backup copy of your system data, perform a backup to Original Factory Defaults - All data on Drive C is selected, and press the Enter key. All partitions, custom installations, and changes are removed from the hard disk drive. All data and partitions are removed from the hard disk drive. The System Recovery utility starts from the Recovery CD. The VAIO System Recovery Utility dialog box appears. Turn on -screen instructions. The BIOS setup menu screen appears. 3. Make sure...
... "Save configuration changes and exit now?" The System Recovery CD(s) contains a backup copy of your system data, perform a backup to Original Factory Defaults - All data on Drive C is selected, and press the Enter key. All partitions, custom installations, and changes are removed from the hard disk drive. All data and partitions are removed from the hard disk drive. The System Recovery utility starts from the Recovery CD. The VAIO System Recovery Utility dialog box appears. Turn on -screen instructions. The BIOS setup menu screen appears. 3. Make sure...

VAIO User Guide
Page 160
See To use the Application Recovery CD(s) for more information. Page 160 My PC Card does not work. Make sure the PC Card is installed properly. Make sure the PC Card is compatible with the Microsoft® Windows® operating system. Use the Sony Notebook Setup utility to disable devices you are not currently using. Make sure any necessary drivers were installed properly.
See To use the Application Recovery CD(s) for more information. Page 160 My PC Card does not work. Make sure the PC Card is installed properly. Make sure the PC Card is compatible with the Microsoft® Windows® operating system. Use the Sony Notebook Setup utility to disable devices you are not currently using. Make sure any necessary drivers were installed properly.

VAIO User Guide
Page 172
... and are charged. If you are still experiencing problems, use the center Jog Dial Control to turn it on the speakers. If the speaker volume is not selected, click it to hear sound. 2. If the speakers are powered by batteries, make sure the button is turned up loud enough to turn on . If your computer hardware devices. 4. Double-click DVD/CD-ROM drives. 5. Troubleshooting Audio My speakers...
... and are charged. If you are still experiencing problems, use the center Jog Dial Control to turn it on the speakers. If the speaker volume is not selected, click it to hear sound. 2. If the speakers are powered by batteries, make sure the button is turned up loud enough to turn on . If your computer hardware devices. 4. Double-click DVD/CD-ROM drives. 5. Troubleshooting Audio My speakers...

VAIO User Guide
Page 173
.... The Device Manager dialog box appears, listing your computer is turned up loud enough to cancel the selection. 3. Double-click the listed drive name. 6. If the speakers have connected an audio cable to the Headphone jack, disconnect the cable. If you are using an application that has its own volume control, verify the volume is powered by batteries, make sure the battery packs are properly inserted and are charged...
.... The Device Manager dialog box appears, listing your computer is turned up loud enough to cancel the selection. 3. Double-click the listed drive name. 6. If the speakers have connected an audio cable to the Headphone jack, disconnect the cable. If you are using an application that has its own volume control, verify the volume is powered by batteries, make sure the battery packs are properly inserted and are charged...

VAIO User Guide
Page 179
.... The Wireless Network Connection Properties dialog box appears. 4. You may need to move your computer away from obstructions or closer to any access point you may be using. Make sure the Wireless LAN switch on the computer is in the ON position or the Wireless LAN PC Card is properly inserted. Make sure power to a Wireless LAN Access Point. Click Network and Internet Connections, and then Network Connections. 3. Click Start, and select Control Panel...
.... The Wireless Network Connection Properties dialog box appears. 4. You may need to move your computer away from obstructions or closer to any access point you may be using. Make sure the Wireless LAN switch on the computer is in the ON position or the Wireless LAN PC Card is properly inserted. Make sure power to a Wireless LAN Access Point. Click Network and Internet Connections, and then Network Connections. 3. Click Start, and select Control Panel...

VAIO User Guide
Page 180
... the Wireless LAN PC Card is properly inserted. Make sure power to a Wireless LAN Access Point. Select the Wireless Networks tab, and check if the access point is displayed in the "Available networks" window. 1. Click Network and Internet Connections, and then Network Connections. 3. Page 180 The Wireless Network Connection Properties dialog box appears. 4. Click Start, and select Control Panel. 2. Right-click Wireless Network Connection, and select Properties. Connection availability is displayed in the Available networks box. Make sure the encryption key...
... the Wireless LAN PC Card is properly inserted. Make sure power to a Wireless LAN Access Point. Select the Wireless Networks tab, and check if the access point is displayed in the "Available networks" window. 1. Click Network and Internet Connections, and then Network Connections. 3. Page 180 The Wireless Network Connection Properties dialog box appears. 4. Click Start, and select Control Panel. 2. Right-click Wireless Network Connection, and select Properties. Connection availability is displayed in the Available networks box. Make sure the encryption key...

VAIO User Guide
Page 185
... Windows® operating system installed on your computer and that it has the correct printer drivers. Your connected printer may not function after the computer resumes from a power saving mode. The default setting for the printer port mode is securely connected to open the Properties window. 4. Click Start on the taskbar, and select Control Panel. 2. Click Performance and Maintenance, and then System. Troubleshooting the Printer I cannot print. Make...
... Windows® operating system installed on your computer and that it has the correct printer drivers. Your connected printer may not function after the computer resumes from a power saving mode. The default setting for the printer port mode is securely connected to open the Properties window. 4. Click Start on the taskbar, and select Control Panel. 2. Click Performance and Maintenance, and then System. Troubleshooting the Printer I cannot print. Make...

VAIO User Guide
Page 186
... that is not functioning, and select Properties to open the Properties window. 4. Right-click on the taskbar, and select Control Panel. 2. To reset the printer connection 1. Click Start on the icon of the printer that it has the correct printer drivers. Your connected printer may not function after the computer resumes from a power saving mode. The default setting for the printer port mode is correct...
... that is not functioning, and select Properties to open the Properties window. 4. Right-click on the taskbar, and select Control Panel. 2. To reset the printer connection 1. Click Start on the icon of the printer that it has the correct printer drivers. Your connected printer may not function after the computer resumes from a power saving mode. The default setting for the printer port mode is correct...


