
Users Guide
Page 2
... Network (LAN 31 Setting Up Your Ethernet Connection 32 Connecting Peripheral Devices 33 Connecting the Port Replicator 34 Connecting an External Mouse or Keyboard 37 Connecting a Parallel Port Printer 38 Connecting a USB Printer 39 Connecting an External Display 39 Connecting a TV Display 42 Connecting a Universal Serial Bus (USB) Device ... 43 Connecting an i.LINK® Device 44 Connecting External Speakers 46 Connecting an External Microphone 46 Expanding Your Notebook Capabilities 47 Personal Digital Assistant 47 Wireless LAN Access Point 48 Wireless LAN PC Card 48 2 Power...
... Network (LAN 31 Setting Up Your Ethernet Connection 32 Connecting Peripheral Devices 33 Connecting the Port Replicator 34 Connecting an External Mouse or Keyboard 37 Connecting a Parallel Port Printer 38 Connecting a USB Printer 39 Connecting an External Display 39 Connecting a TV Display 42 Connecting a Universal Serial Bus (USB) Device ... 43 Connecting an i.LINK® Device 44 Connecting External Speakers 46 Connecting an External Microphone 46 Expanding Your Notebook Capabilities 47 Personal Digital Assistant 47 Wireless LAN Access Point 48 Wireless LAN PC Card 48 2 Power...

Users Guide
Page 8
... Screen key keys Shift key Ctrl key Fn key Alt key Windows key Applications key Numeric keypad area Navigation keys Key Numeric keypad area Navigation keys Correction keys Function keys Escape key Description Contains the keys found on .) Several keys are used to a typewriter's, but the keyboard has additional keys that you must press the Num Lock key to activate the numeric keypad. (When you to the next. The task associated with each document is created...
... Screen key keys Shift key Ctrl key Fn key Alt key Windows key Applications key Numeric keypad area Navigation keys Key Numeric keypad area Navigation keys Correction keys Function keys Escape key Description Contains the keys found on .) Several keys are used to a typewriter's, but the keyboard has additional keys that you must press the Num Lock key to activate the numeric keypad. (When you to the next. The task associated with each document is created...

Users Guide
Page 18
... edge and use memory-resident utility software to 640 x 480 and see "Selecting the Display Mode" for instructions. ✍ When a TV is connected to a notebook that comes with SXGA+ panels) To view the DVD video clearly, set to factory settings, a part of a disc may cause reading errors. Fingerprints and dust on CD and DVD media ❑ Do not drop or bend the disc. ❑ Do not touch the surface of the disc is active). Change text...
... edge and use memory-resident utility software to 640 x 480 and see "Selecting the Display Mode" for instructions. ✍ When a TV is connected to a notebook that comes with SXGA+ panels) To view the DVD video clearly, set to factory settings, a part of a disc may cause reading errors. Fingerprints and dust on CD and DVD media ❑ Do not drop or bend the disc. ❑ Do not touch the surface of the disc is active). Change text...

Users Guide
Page 19
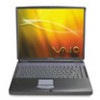
... operation or data loss. Using PC Cards Your notebook includes two PC Card slots. Writing data to CD-RW/CD-R media (For models with a CD-RW/ DVD Combo Drive) You can accommodate two Type I/II PC Cards, or one Type III PC Card. Memory-resident disc utilities, such as another hard disk drive, or to a CD-R or CD-RW. For best results, use Easy CD Creator™ software to write data to connect a network...
... operation or data loss. Using PC Cards Your notebook includes two PC Card slots. Writing data to CD-RW/CD-R media (For models with a CD-RW/ DVD Combo Drive) You can accommodate two Type I/II PC Cards, or one Type III PC Card. Memory-resident disc utilities, such as another hard disk drive, or to a CD-R or CD-RW. For best results, use Easy CD Creator™ software to write data to connect a network...
Users Guide
Page 22
.... See "Displaying the Sony Notebook Setup Screen" for more information. ❑ Be sure to use the most recent software driver provided by observing the battery indicators. 22 You can purchase a second rechargeable battery pack. The second battery pack you insert first charges first. If you have difficulty inserting a card, check that you are orienting the card correctly. Reboot your PC Card for more information on the Device Manager tab...
.... See "Displaying the Sony Notebook Setup Screen" for more information. ❑ Be sure to use the most recent software driver provided by observing the battery indicators. 22 You can purchase a second rechargeable battery pack. The second battery pack you insert first charges first. If you have difficulty inserting a card, check that you are orienting the card correctly. Reboot your PC Card for more information on the Device Manager tab...

Users Guide
Page 24
... "Switch discharge battery" option. 24 If the indicator of the battery pack you can remove either of time the battery lasts, see "Displaying Battery Information" for more information. See also "To charge the battery pack" in your printed QuickStart for more information. Change text in this variable to document title as each document is connected to AC power. Keep the battery pack in the notebook while...
... "Switch discharge battery" option. 24 If the indicator of the battery pack you can remove either of time the battery lasts, see "Displaying Battery Information" for more information. See also "To charge the battery pack" in your printed QuickStart for more information. Change text in this variable to document title as each document is connected to AC power. Keep the battery pack in the notebook while...

Users Guide
Page 29
... power indicator flashes in this mode. You can turn off a specific device such as the LCD or the hard disk. Hibernate Mode In the Hibernate mode, the state of the system in this mode. The power indicator displays green when your notebook is in RAM and switches off . Standby Mode In Standby Mode the notebook saves the current state of the system is saved on the hard drive and power is off . 29 The power indicator is turned...
... power indicator flashes in this mode. You can turn off a specific device such as the LCD or the hard disk. Hibernate Mode In the Hibernate mode, the state of the system in this mode. The power indicator displays green when your notebook is in RAM and switches off . Standby Mode In Standby Mode the notebook saves the current state of the system is saved on the hard drive and power is off . 29 The power indicator is turned...

Users Guide
Page 31
For the detailed settings and devices needed to connect to Standby mode. 31 Connecting cables other type of these connections may result in an electric current overload and could cause a malfunction in the port. Some of network cable or any other than those listed above may result in excess electrical current and could cause a malfunction, excessive heat, or fire in the internal modem. Note that...
For the detailed settings and devices needed to connect to Standby mode. 31 Connecting cables other type of these connections may result in an electric current overload and could cause a malfunction in the port. Some of network cable or any other than those listed above may result in excess electrical current and could cause a malfunction, excessive heat, or fire in the internal modem. Note that...
Users Guide
Page 38
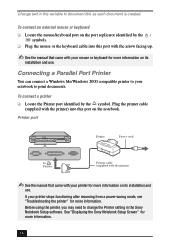
... the notebook. Before using the printer, you may need to document title as each document is created. See "Displaying the Sony Notebook Setup Screen" for more information. 38 If your printer stops functioning after resuming from a power-saving mode, see "Troubleshooting the printer" for more information. Printer port Printer Power cord to print documents. Change text in the Sony Notebook Setup software. To connect an external mouse or keyboard ❑ Locate the mouse/keyboard port on the port replicator...
... the notebook. Before using the printer, you may need to document title as each document is created. See "Displaying the Sony Notebook Setup Screen" for more information. 38 If your printer stops functioning after resuming from a power-saving mode, see "Troubleshooting the printer" for more information. Printer port Printer Power cord to print documents. Change text in the Sony Notebook Setup software. To connect an external mouse or keyboard ❑ Locate the mouse/keyboard port on the port replicator...

Users Guide
Page 43
... more information on its installation and use. ✍ TV Out does not work unless you start your notebook with the TV Out jack plugged in your optical drive to launch your DVD software. ✍ A part of your notebook. Re-insert your DVD to watch a video on your notebook. If you insert a DVD in . ✍ If you want to display the full image, change the resolution of the...
... more information on its installation and use. ✍ TV Out does not work unless you start your notebook with the TV Out jack plugged in your optical drive to launch your DVD software. ✍ A part of your notebook. Re-insert your DVD to watch a video on your notebook. If you insert a DVD in . ✍ If you want to display the full image, change the resolution of the...

Users Guide
Page 51
... loading. Change the volume of your touchpad inactive. You can make your notebook and provides key information about each option, click Help on the Basic/Advanced tab. To change the serial settings, click Advanced on the Sony Notebook Setup screen to PowerPanel Help for more detailed information. Controlling Power Management Sony Notebook Setup Tabs Tab About This Computer Printer Initial Setting Touchpad Power On Password Enable Ports Basic/Advanced Description Display system information, including memory capacity, serial number, and BIOS version...
... loading. Change the volume of your touchpad inactive. You can make your notebook and provides key information about each option, click Help on the Basic/Advanced tab. To change the serial settings, click Advanced on the Sony Notebook Setup screen to PowerPanel Help for more detailed information. Controlling Power Management Sony Notebook Setup Tabs Tab About This Computer Printer Initial Setting Touchpad Power On Password Enable Ports Basic/Advanced Description Display system information, including memory capacity, serial number, and BIOS version...

Users Guide
Page 63
... the memory bay cover. The memory module is released. 1 2 Pull the memory module in the direction of your notebook) to 4 of your notebook. Before you start 3 After the notebook has cooled, loosen and remove the screw that secures the cover of the memory bay on the bottom of "To remove a memory module" . 2 Remove the memory module from its packaging. 63 To install a memory module 1 Follow steps 1 to discharge any static electricity. 5 Remove the memory module. Removing memory module...
... the memory bay cover. The memory module is released. 1 2 Pull the memory module in the direction of your notebook) to 4 of your notebook. Before you start 3 After the notebook has cooled, loosen and remove the screw that secures the cover of the memory bay on the bottom of "To remove a memory module" . 2 Remove the memory module from its packaging. 63 To install a memory module 1 Follow steps 1 to discharge any static electricity. 5 Remove the memory module. Removing memory module...

Users Guide
Page 68
... Intuit Inc. Quicken manages all at a competitive price. RealJukebox Real Networks Inc. Quicken works just like your CD-ROM drive while using an external CD-ROM drive connected with a PC Card, be sure to learn and use. Additionally, do not remove your checkbook, so it is created. PictureGear™ Sony Electronics Inc. Change text in this variable to organize your external CD-ROM drive before starting RealJukebox. This Custom RealJukebox...
... Intuit Inc. Quicken manages all at a competitive price. RealJukebox Real Networks Inc. Quicken works just like your CD-ROM drive while using an external CD-ROM drive connected with a PC Card, be sure to learn and use. Additionally, do not remove your checkbook, so it is created. PictureGear™ Sony Electronics Inc. Change text in this variable to organize your external CD-ROM drive before starting RealJukebox. This Custom RealJukebox...
Users Guide
Page 96
...(s) 1 Turn on -screen instructions to complete the recovery process. ✍ Your system may not need to reinstall all applications. 2 When the Windows desktop appears, insert the Sony Application Recovery CD in the optical drive. Change text in Windows to run the Application Recovery program. you may include one or two Application Recovery CDs. You can also use the Application Recovery CD to install Windows 2000 drivers on your notebook, use...
...(s) 1 Turn on -screen instructions to complete the recovery process. ✍ Your system may not need to reinstall all applications. 2 When the Windows desktop appears, insert the Sony Application Recovery CD in the optical drive. Change text in Windows to run the Application Recovery program. you may include one or two Application Recovery CDs. You can also use the Application Recovery CD to install Windows 2000 drivers on your notebook, use...
Users Guide
Page 103
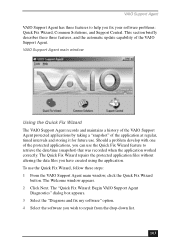
... the date/time (snapshot) that was recorded when the application worked correctly. Should a problem develop with one of the VAIO Support Agent. This section briefly describes these steps: 1 From the VAIO Support Agent main window, click the Quick Fix Wizard button. VAIO Support Agent VAIO Support Agent has three features to help you can use the Quick Fix Wizard feature to repair from the drop-down list. 103 To...
... the date/time (snapshot) that was recorded when the application worked correctly. Should a problem develop with one of the VAIO Support Agent. This section briefly describes these steps: 1 From the VAIO Support Agent main window, click the Quick Fix Wizard button. VAIO Support Agent VAIO Support Agent has three features to help you can use the Quick Fix Wizard feature to repair from the drop-down list. 103 To...
Users Guide
Page 117
... battery pack off the notebook, unplug the power cord and plug it is turned on and working. ❑ If you are adjusted correctly. My notebook does not start. ❑ Check that the notebook is plugged into a power source and that it is no floppy disk in the floppy disk drive. ❑ Confirm that the power cord and all cables are connected firmly, as Power Management tool, scroll function of touchpad, and keyboard...
... battery pack off the notebook, unplug the power cord and plug it is turned on and working. ❑ If you are adjusted correctly. My notebook does not start. ❑ Check that the notebook is plugged into a power source and that it is no floppy disk in the floppy disk drive. ❑ Confirm that the power cord and all cables are connected firmly, as Power Management tool, scroll function of touchpad, and keyboard...

Users Guide
Page 121
... external display mode. Use the PowerPanel utility to change the video resolution of your video resolution. 121 Press any key to activate the screen. ❑ The display mode may be set to change the Thermal Control Strategy setting to show the previous screen. Press the Windows key and D key twice to change your display. ❑ Click Start, point to Settings, point to adjust the image. Troubleshooting the LCD screen My LCD screen is blank. ❑ Check that the notebook is plugged into a power...
... external display mode. Use the PowerPanel utility to change the video resolution of your video resolution. 121 Press any key to activate the screen. ❑ The display mode may be set to change the Thermal Control Strategy setting to show the previous screen. Press the Windows key and D key twice to change your display. ❑ Click Start, point to Settings, point to adjust the image. Troubleshooting the LCD screen My LCD screen is blank. ❑ Check that the notebook is plugged into a power...

Users Guide
Page 122
... connected to starting the notebook. To enable the touchpad: 1 Press the Windows key and use the arrow keys to the double-click action.) 122 Follow these steps: 1 Press the Windows key and use the arrow keys to select Programs, and then Sony Notebook Setup. 2 Select the Touchpad tab using an optional Sony USB mouse PCGA-UMS1 series, check that the mouse is assigned to select Control Panel, and then Mouse. 2 Change the button assignments in the optical drive. I cannot switch the LCD display...
... connected to starting the notebook. To enable the touchpad: 1 Press the Windows key and use the arrow keys to the double-click action.) 122 Follow these steps: 1 Press the Windows key and use the arrow keys to select Programs, and then Sony Notebook Setup. 2 Select the Touchpad tab using an optional Sony USB mouse PCGA-UMS1 series, check that the mouse is assigned to select Control Panel, and then Mouse. 2 Change the button assignments in the optical drive. I cannot switch the LCD display...
Users Guide
Page 127
... the Microphone jack. See "Displaying the Sony Notebook Setup Screen" for details on using an application that has its own volume control, check that the volume is turned up. ❑ Check the volume controls in Device Manager. ❑ If your notebook is powered by batteries, check that the batteries are inserted properly and that they are charged. ❑ If you are charged. ❑ If you have a mute button, make sure it is set to ECP, change...
... the Microphone jack. See "Displaying the Sony Notebook Setup Screen" for details on using an application that has its own volume control, check that the volume is turned up. ❑ Check the volume controls in Device Manager. ❑ If your notebook is powered by batteries, check that the batteries are inserted properly and that they are charged. ❑ If you are charged. ❑ If you have a mute button, make sure it is set to ECP, change...
Users Guide
Page 137
setup tabs 51 Shift key 9 Smart Capture 83 Software list 65 Sony Fax-on-Demand service 102 Sony Notebook Setup screen 50 Sony Service Center 115 speakers external 46 switching 11 troubleshooting 126 volume 11 Standby mode 11, 29, 55 Start button 50 switching display 11 monitor 11 T touchpad 12 Touchpad tab 51 troubleshooting 117 startup 117 U USB connecting 44 connector 44 mouse 44 USB port printer connecting 39 V VAIO Support Agent 102 video camera 44 Video Standby mode 11 137
setup tabs 51 Shift key 9 Smart Capture 83 Software list 65 Sony Fax-on-Demand service 102 Sony Notebook Setup screen 50 Sony Service Center 115 speakers external 46 switching 11 troubleshooting 126 volume 11 Standby mode 11, 29, 55 Start button 50 switching display 11 monitor 11 T touchpad 12 Touchpad tab 51 troubleshooting 117 startup 117 U USB connecting 44 connector 44 mouse 44 USB port printer connecting 39 V VAIO Support Agent 102 video camera 44 Video Standby mode 11 137


