
Limited Warranty (U.S. Only)
Page 1
... WARRANTY HDTV Color TV XBR Projection TV Sony Electronics Inc. ("Sony") warrants this Product is invalid if the factory applied serial number has been altered or removed from the Product. PARTS: In addition, Sony will repair or replace the Product, at its original packaging or packaging affording an equal degree of the Product, including the antenna. In addition, if you must be defective, Sony will supply, at...
... WARRANTY HDTV Color TV XBR Projection TV Sony Electronics Inc. ("Sony") warrants this Product is invalid if the factory applied serial number has been altered or removed from the Product. PARTS: In addition, Sony will repair or replace the Product, at its original packaging or packaging affording an equal degree of the Product, including the antenna. In addition, if you must be defective, Sony will supply, at...

Operating Instructions
Page 2
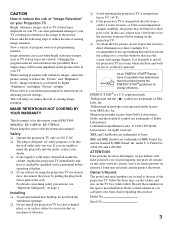
... different from the broadcaster/cable company and/or program owner. Note to CATV system installer This reminder is connected. ❑ Consult the dealer or an experienced radio/TV technician for a Class B digital device pursuant to prevent blade exposure. This symbol is left on UHF, VHF, transmitted by your warranty. 2 Note on convergence adjustment Before you use this television receiver for other outlet...
... different from the broadcaster/cable company and/or program owner. Note to CATV system installer This reminder is connected. ❑ Consult the dealer or an experienced radio/TV technician for a Class B digital device pursuant to prevent blade exposure. This symbol is left on UHF, VHF, transmitted by your warranty. 2 Note on convergence adjustment Before you use this television receiver for other outlet...
Operating Instructions
Page 3
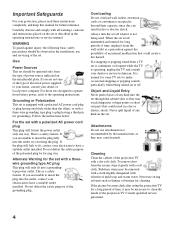
... notice with opaque drapery. MODELS: KP-51HW40, KP-57HW40 Please keep this product meets the ENERGY STAR® guidelines for several days, disconnect the power by qualified service personnel before operating it checked by pulling the plug itself. Never pull on the TV box (white label). When viewing programs with stationary images, adjust the picture setting to your Sony dealer regarding this case, please wait a few hours to let the moisture...
... notice with opaque drapery. MODELS: KP-51HW40, KP-57HW40 Please keep this product meets the ENERGY STAR® guidelines for several days, disconnect the power by qualified service personnel before operating it checked by pulling the plug itself. Never pull on the TV box (white label). When viewing programs with stationary images, adjust the picture setting to your Sony dealer regarding this case, please wait a few hours to let the moisture...
Operating Instructions
Page 4
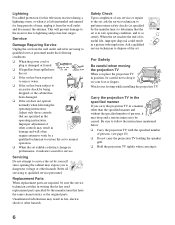
... the projection TV with solution of the polarized plug by the manufacturer, as they may be operated only from battery power, refer to have a suitable outlet installed. Always turn the set is normal for cleaning. Cleaning Clean the cabinet of the grounding plug. Never use and servicing of electrical power supplied to your home, consult your electrician to make occasional snapping or popping sounds, particularly...
... the projection TV with solution of the polarized plug by the manufacturer, as they may be operated only from battery power, refer to have a suitable outlet installed. Always turn the set is normal for cleaning. Cleaning Clean the cabinet of the grounding plug. Never use and servicing of electrical power supplied to your home, consult your electrician to make occasional snapping or popping sounds, particularly...
Operating Instructions
Page 5
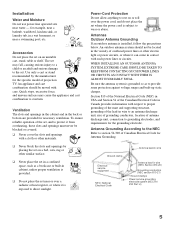
... INVARIABLY FATAL. Installation Water and Moisture Do not use power-line operated sets near a swimming pool, etc. Be sure the antenna system is installed, follow the precautions below. Use only a cart or stand recommended by placing the set on or roll over the power cord, and do not place the set near or over a radiator or heat register, or where it can come in contact...
... INVARIABLY FATAL. Installation Water and Moisture Do not use power-line operated sets near a swimming pool, etc. Be sure the antenna system is installed, follow the precautions below. Use only a cart or stand recommended by placing the set on or roll over the power cord, and do not place the set near or over a radiator or heat register, or where it can come in contact...
Operating Instructions
Page 6
... the operating instructions. Refer all servicing to perform routine safety checks (as the original parts. Be sure to follow the instructions mentioned below. ❑ Carry the projection TV with the specified number of persons. (see page 10) ❑ Do not carry the projection TV holding the speaker grill. ❑ Hold the projection TV tightly when carrying it on your footing while installing the projection TV. Improper adjustment of...
... the operating instructions. Refer all servicing to perform routine safety checks (as the original parts. Be sure to follow the instructions mentioned below. ❑ Carry the projection TV with the specified number of persons. (see page 10) ❑ Do not carry the projection TV holding the speaker grill. ❑ Hold the projection TV tightly when carrying it on your footing while installing the projection TV. Improper adjustment of...
Operating Instructions
Page 7
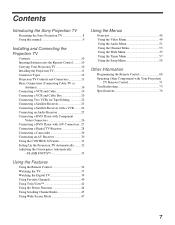
...26 Connecting a DVD Player with Your Projection TV Remote Control 71 Troubleshooting 73 Specifications 76 Using the Features Using the Remote Control 34 Watching the TV 37 Watching the Digital TV 39 Using Favorite Channels 40 Using Twin View 41 Using the Freeze Function 44 Using Scrolling Channel Index 45 Using Wide Screen Mode 47 7 FLASH FOCUS 33 Using the Menus Overview 48 Using the Video Menu 49 Using the Audio Menu 51 Using the Channel Menu 53 Using the Wide Menu 55 Using the Timer Menu 57 Using the Setup Menu 58 Other Information Programming the Remote Control 68...
...26 Connecting a DVD Player with Your Projection TV Remote Control 71 Troubleshooting 73 Specifications 76 Using the Features Using the Remote Control 34 Watching the TV 37 Watching the Digital TV 39 Using Favorite Channels 40 Using Twin View 41 Using the Freeze Function 44 Using Scrolling Channel Index 45 Using Wide Screen Mode 47 7 FLASH FOCUS 33 Using the Menus Overview 48 Using the Video Menu 49 Using the Audio Menu 51 Using the Channel Menu 53 Using the Wide Menu 55 Using the Timer Menu 57 Using the Setup Menu 58 Other Information Programming the Remote Control 68...
Operating Instructions
Page 8
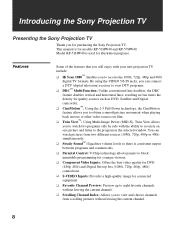
...; Steady Sound™: Equalizes volume levels so there is consistent output between programs and commercials. ❑ Parental Control: V-Chip technology allows parents to block unsuitable programming for younger viewers. ❑ Component Video Inputs: Offers the best video quality for DVD (480p, 480i) and Digital Set-top box (1080i, 720p, 480p, 480i) connections. ❑ S-VIDEO Inputs: Provides a high-quality image for models KP-51HW40 and KP-57HW40. Introducing the Sony Projection TV Presenting the Sony Projection TV Thank you to receive the...
...; Steady Sound™: Equalizes volume levels so there is consistent output between programs and commercials. ❑ Parental Control: V-Chip technology allows parents to block unsuitable programming for younger viewers. ❑ Component Video Inputs: Offers the best video quality for DVD (480p, 480i) and Digital Set-top box (1080i, 720p, 480p, 480i) connections. ❑ S-VIDEO Inputs: Provides a high-quality image for models KP-51HW40 and KP-57HW40. Introducing the Sony Projection TV Presenting the Sony Projection TV Thank you to receive the...
Operating Instructions
Page 9
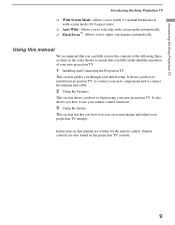
Introducing the Sony Projection TV Introducing the Sony Projection TV ❑ Wide Screen Mode: Allows you to watch 4:3 normal broadcasts in wide screen mode (16:9 aspect ratio). ❑ Auto Wide: Allows you to select the wide screen mode automatically. ❑ Flash Focus™: Allows you to access on the projection TV console. 9 Instructions in the order shown to begin using your initial setup. It also shows you how to use your remote control functions. 3 Using the menus...
Introducing the Sony Projection TV Introducing the Sony Projection TV ❑ Wide Screen Mode: Allows you to watch 4:3 normal broadcasts in wide screen mode (16:9 aspect ratio). ❑ Auto Wide: Allows you to select the wide screen mode automatically. ❑ Flash Focus™: Allows you to access on the projection TV console. 9 Instructions in the order shown to begin using your initial setup. It also shows you how to use your remote control functions. 3 Using the menus...

Operating Instructions
Page 15
... front panel of your VHF/UHF antenna or cable. Devices connected to your DVD player's or Digital Set-top box's component video (Y, PB, PR) and audio (L/R) jacks. Connects to the AUX input cannot be viewed in Twin View. Installing and Connecting the Projection TV Installing and Connecting the Projection TV Connection 1 AUX 2 TO CONVERTER 3 VHF/UHF 4 S VIDEO (Rear and front) 5 VIDEO (L/R)/AUDIO (Rear and front) 6 Y/PB/PR (L/R)/AUDIO 7 TV OUT 8 AUDIO OUT (VAR/FIX) L (MONO)/R Description Allows you set up your projection TV to switch between scrambled channels (through a cable box...
... front panel of your VHF/UHF antenna or cable. Devices connected to your DVD player's or Digital Set-top box's component video (Y, PB, PR) and audio (L/R) jacks. Connects to the AUX input cannot be viewed in Twin View. Installing and Connecting the Projection TV Installing and Connecting the Projection TV Connection 1 AUX 2 TO CONVERTER 3 VHF/UHF 4 S VIDEO (Rear and front) 5 VIDEO (L/R)/AUDIO (Rear and front) 6 Y/PB/PR (L/R)/AUDIO 7 TV OUT 8 AUDIO OUT (VAR/FIX) L (MONO)/R Description Allows you set up your projection TV to switch between scrambled channels (through a cable box...

Operating Instructions
Page 20
... to switch between unscrambled signals coming straight into the projection TV and scrambled signals coming in through the cable box, eliminating the need to use the Twin View feature.) Disconnect all of them (pay channels vs. Installing and Connecting the Projection TV Connecting a VCR and Cable Box Use this setup you need for an external splitter. 3 Using a coaxial cable, connect the cable box's OUT jack to the VCR's IN jack. 4 Using AUDIO and S VIDEO cables, connect the VCR's AUDIO and S VIDEO OUT jacks to the projection TV's AUDIO and S VIDEO...
... to switch between unscrambled signals coming straight into the projection TV and scrambled signals coming in through the cable box, eliminating the need to use the Twin View feature.) Disconnect all of them (pay channels vs. Installing and Connecting the Projection TV Connecting a VCR and Cable Box Use this setup you need for an external splitter. 3 Using a coaxial cable, connect the cable box's OUT jack to the VCR's IN jack. 4 Using AUDIO and S VIDEO cables, connect the VCR's AUDIO and S VIDEO OUT jacks to the projection TV's AUDIO and S VIDEO...

Operating Instructions
Page 22
Rear of the yellow video cable on your VCR. Consult your VCR's operating manual for instructions. ✍ If your VCRs have an S VIDEO jack: For best picture quality, use an S VIDEO connection instead of projection TV VCR (playback) VCR (recording) AUDIO-R (red) AUDIO-L (white) VIDEO (yellow) VMC-810S/820S (not supplied) ✍ To perform tape editing, set the projection TV to the video input intended for Tape Editing If you connect two VCRs, you can record from equipment connected to...
Rear of the yellow video cable on your VCR. Consult your VCR's operating manual for instructions. ✍ If your VCRs have an S VIDEO jack: For best picture quality, use an S VIDEO connection instead of projection TV VCR (playback) VCR (recording) AUDIO-R (red) AUDIO-L (white) VIDEO (yellow) VMC-810S/820S (not supplied) ✍ To perform tape editing, set the projection TV to the video input intended for Tape Editing If you connect two VCRs, you can record from equipment connected to...

Operating Instructions
Page 27
.... 2 Using an S VIDEO cable, connect the DVD player's S VIDEO jack to switch between the VCR, DVD player and cable TV inputs. ✍ If your VCR is not equipped with A/V Connectors Use this hookup if: ❑ Your DVD player does not have component (Y, PB, PR) jacks. ✍ If your DVD player has video component output connectors: for best picture quality use a VIDEO cable (yellow) instead of the S VIDEO cable. 27 Rear of projection TV YC-15V/30V (not supplied) DVD player S VIDEO AUDIO-R (red) AUDIO-L (white) RK-74A (not supplied) ✍ Use TV/VIDEO...
.... 2 Using an S VIDEO cable, connect the DVD player's S VIDEO jack to switch between the VCR, DVD player and cable TV inputs. ✍ If your VCR is not equipped with A/V Connectors Use this hookup if: ❑ Your DVD player does not have component (Y, PB, PR) jacks. ✍ If your DVD player has video component output connectors: for best picture quality use a VIDEO cable (yellow) instead of the S VIDEO cable. 27 Rear of projection TV YC-15V/30V (not supplied) DVD player S VIDEO AUDIO-R (red) AUDIO-L (white) RK-74A (not supplied) ✍ Use TV/VIDEO...

Operating Instructions
Page 34
... projection TV displays the time in minutes (15, 30, 45, 60, or 90) that you want the projection TV to remain on before shutting off . See page 57 for movement of the joystick selects the item. Freezes the window picture. You can view and select from all receivable channels scrolling on page 49. Press when in the Video menu. Adjusts the volume. Using the Features Using the Remote Control...
... projection TV displays the time in minutes (15, 30, 45, 60, or 90) that you want the projection TV to remain on before shutting off . See page 57 for movement of the joystick selects the item. Freezes the window picture. You can view and select from all receivable channels scrolling on page 49. Press when in the Video menu. Adjusts the volume. Using the Features Using the Remote Control...

Operating Instructions
Page 38
... adjust the picture quality (such as a Video Label in the Setup menu, your taste. For details, see "MTS" on page 49. 38 Movie: Select to display a picture with minimum enhancements. qs TV/VIDEO Press repeatedly to display the channel number, current time and channel label (if set). Using the Features qa DISPLAY Press to scroll through the Multi-channel TV Sound (MTS) options (see "Mode" on page 51). To turn the display off, press DISPLAY...
... adjust the picture quality (such as a Video Label in the Setup menu, your taste. For details, see "MTS" on page 49. 38 Movie: Select to display a picture with minimum enhancements. qs TV/VIDEO Press repeatedly to display the channel number, current time and channel label (if set). Using the Features qa DISPLAY Press to scroll through the Multi-channel TV Sound (MTS) options (see "Mode" on page 51). To turn the display off, press DISPLAY...

Operating Instructions
Page 49
... white colors a blue tint. Adjust to exit the menu screen. Adjust to brighten or darken the picture. Option Mode Customized picture viewing Picture Brightness Color Hue Sharpness Color Temp White intensity adjustment Description Vivid Select for Picture, Brightness, Color, Hue, Sharpness and Color Temp ❑ Press RESET on the remote control. Using the Menus Selecting Video Options z To quickly and easily change from three color temperatures: Cool Select to give the white colors a neutral tint. Standard Recommended for professional monitor like , picture. Adjust...
... white colors a blue tint. Adjust to exit the menu screen. Adjust to brighten or darken the picture. Option Mode Customized picture viewing Picture Brightness Color Hue Sharpness Color Temp White intensity adjustment Description Vivid Select for Picture, Brightness, Color, Hue, Sharpness and Color Temp ❑ Press RESET on the remote control. Using the Menus Selecting Video Options z To quickly and easily change from three color temperatures: Cool Select to give the white colors a neutral tint. Standard Recommended for professional monitor like , picture. Adjust...
Operating Instructions
Page 73
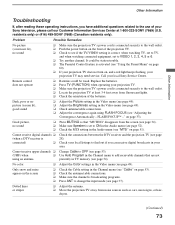
... no picture (screen lit), good sound ❏ Adjust the Picture setting in the Video menu (see page 49). ❏ Adjust the Brightness setting in the Video menu (see "Using the Parent Menu" on page 60). ❏ If your projection TV does not turn on page 51). No color ❏ Adjust the Color settings in the Video menu (see page 49). ❏ Check antenna/cable connections. ❏ Adjust the convergence again using an antenna presently in TV memory (see "MTS" on , and a red light keeps flashing, your local Sony Service Center...
... no picture (screen lit), good sound ❏ Adjust the Picture setting in the Video menu (see page 49). ❏ Adjust the Brightness setting in the Video menu (see "Using the Parent Menu" on page 60). ❏ If your projection TV does not turn on page 51). No color ❏ Adjust the Color settings in the Video menu (see page 49). ❏ Check antenna/cable connections. ❏ Adjust the convergence again using an antenna presently in TV memory (see "MTS" on , and a red light keeps flashing, your local Sony Service Center...

Operating Instructions
Page 74
...; Use a highly directional outdoor antenna or a cable (when the problem is set correctly. Cannot change channels with nothing connected to it will not show in the Channel menu (see page 54). ❏ Check your previous password; Channel Index does not display ❏ Make sure Cable is available. (see page 54). video equipment connected to the projection TV There is a black box on the screen ❏ You have connected a VCR, DVD player or satellite receiver to get closed captioning, select...
...; Use a highly directional outdoor antenna or a cable (when the problem is set correctly. Cannot change channels with nothing connected to it will not show in the Channel menu (see page 54). ❏ Check your previous password; Channel Index does not display ❏ Make sure Cable is available. (see page 54). video equipment connected to the projection TV There is a black box on the screen ❏ You have connected a VCR, DVD player or satellite receiver to get closed captioning, select...
Operating Instructions
Page 78
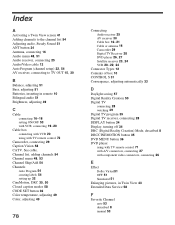
... OFF 51 Simulated 51 Enlarging pictures, in remote 10 Bilingual audio 51 Brightness, adjusting 49 C Cable connecting 16-18 setting ON/OFF 53 with VCR, connecting 19-20 Cable box connecting with VCR 20 using with TV remote control 71 with A/V connectors, connecting 27 with TV remote control 72 Camcorder, connecting 29 Caption Vision 58 CATV. Index A Activating a Twin View screen 41 Adding channels to the channel list 54 Adjusting audio, Steady Sound 51 ANT button 34 Antenna, connecting 16 Audio menu 48, 51 Audio receiver, connecting 25 Audio/Video cable 12 Auto Program (channel setup) 32...
... OFF 51 Simulated 51 Enlarging pictures, in remote 10 Bilingual audio 51 Brightness, adjusting 49 C Cable connecting 16-18 setting ON/OFF 53 with VCR, connecting 19-20 Cable box connecting with VCR 20 using with TV remote control 71 with A/V connectors, connecting 27 with TV remote control 72 Camcorder, connecting 29 Caption Vision 58 CATV. Index A Activating a Twin View screen 41 Adding channels to the channel list 54 Adjusting audio, Steady Sound 51 ANT button 34 Antenna, connecting 16 Audio menu 48, 51 Audio receiver, connecting 25 Audio/Video cable 12 Auto Program (channel setup) 32...

Operating Instructions
Page 79
... blocked programs 62 Rear panel controls and connections 14, 15 Remote control buttons inside panel 36 Function of buttons 37, 38 inserting batteries 10 programming 68-70 Remote control, operating other components with Cable box 72 DVD player 71 Satellite receiver 72 VCR 71 Removing channels from the channel list 54 RESET button 34 Resetting Audio options 51 Timer options 57 Video options 49 S S Video cable 12 SAT/CABLE function button 35 SAT/CABLE power button 35 Satellite receiver connecting 23 using with TV remote control 72 Setting up channels 32, 54 Setup menu 48, 58 Sharpness, adjusting...
... blocked programs 62 Rear panel controls and connections 14, 15 Remote control buttons inside panel 36 Function of buttons 37, 38 inserting batteries 10 programming 68-70 Remote control, operating other components with Cable box 72 DVD player 71 Satellite receiver 72 VCR 71 Removing channels from the channel list 54 RESET button 34 Resetting Audio options 51 Timer options 57 Video options 49 S S Video cable 12 SAT/CABLE function button 35 SAT/CABLE power button 35 Satellite receiver connecting 23 using with TV remote control 72 Setting up channels 32, 54 Setup menu 48, 58 Sharpness, adjusting...


