
Operating Instructions
Page 2
... and grounded cables and connectors must be used to disconnect the unit from the AC outlet immediately. Refer to them whenever you notice an abnormality in the unit, disconnect the main plug from the mains, connect the unit to an easily accessible AC outlet. For the customers in the USA Owner's Record The model and serial numbers are designed...
... and grounded cables and connectors must be used to disconnect the unit from the AC outlet immediately. Refer to them whenever you notice an abnormality in the unit, disconnect the main plug from the mains, connect the unit to an easily accessible AC outlet. For the customers in the USA Owner's Record The model and serial numbers are designed...

Operating Instructions
Page 3
.... 10) Protect the power cord from being walked on a circuit different from that is deemed to qualified service personnel. This equipment must not be determined by turning the equipment off and on, the user is encouraged to try to rain or moisture, does not operate normally, or has been dropped. 3US A grounding type plug has two blades and...
.... 10) Protect the power cord from being walked on a circuit different from that is deemed to qualified service personnel. This equipment must not be determined by turning the equipment off and on, the user is encouraged to try to rain or moisture, does not operate normally, or has been dropped. 3US A grounding type plug has two blades and...
Operating Instructions
Page 4
...; MPEG Layer-3 audio coding technology and patents licensed from Dolby Laboratories. Operation is either a registered trademark or trademark of Dolby Laboratories. The BLUETOOTH® word mark and logos are trademarks of Microsoft Corporation in other countries. The N-Mark is a registered trademark of Sony Computer Entertainment Inc. Apple, the Apple logo, iPhone, iPod, iPod touch, and...
...; MPEG Layer-3 audio coding technology and patents licensed from Dolby Laboratories. Operation is either a registered trademark or trademark of Dolby Laboratories. The BLUETOOTH® word mark and logos are trademarks of Microsoft Corporation in other countries. The N-Mark is a registered trademark of Sony Computer Entertainment Inc. Apple, the Apple logo, iPhone, iPod, iPod touch, and...
Operating Instructions
Page 5
... has been designed to connect specifically to iPod or iPhone, respectively, and has been certified by the developer to meet Apple performance standards. BLUETOOTH technology works with safety and regulatory standards. About these operating instructions The instructions in these Operating Instructions describe the controls on the remote control. Some illustrations are presented as conceptual drawings, and may affect wireless performance. Apple is underlined...
... has been designed to connect specifically to iPod or iPhone, respectively, and has been certified by the developer to meet Apple performance standards. BLUETOOTH technology works with safety and regulatory standards. About these operating instructions The instructions in these Operating Instructions describe the controls on the remote control. Some illustrations are presented as conceptual drawings, and may affect wireless performance. Apple is underlined...
Operating Instructions
Page 6
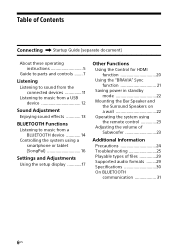
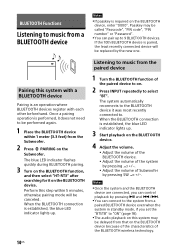
... sound effects 13 BLUETOOTH Functions Listening to music from a BLUETOOTH device 14 Controlling the system using a smartphone or tablet (SongPal 16 Settings and Adjustments Using the setup display 17 Other Functions Using the Control for HDMI function 20 Using the "BRAVIA" Sync function 21 Saving power in standby mode 22 Mounting the Bar Speaker and the Surround Speakers on a wall 22 Operating the system using the remote control 23 Adjusting the volume of Subwoofer 23 Additional Information Precautions 24 Troubleshooting 25 Playable types...
... sound effects 13 BLUETOOTH Functions Listening to music from a BLUETOOTH device 14 Controlling the system using a smartphone or tablet (SongPal 16 Settings and Adjustments Using the setup display 17 Other Functions Using the Control for HDMI function 20 Using the "BRAVIA" Sync function 21 Saving power in standby mode 22 Mounting the Bar Speaker and the Surround Speakers on a wall 22 Operating the system using the remote control 23 Adjusting the volume of Subwoofer 23 Additional Information Precautions 24 Troubleshooting 25 Playable types...
Operating Instructions
Page 14
... new one. Once a pairing operation is established, the blue LED indicator lights up. 3 Start playback on . 2 Press INPUT repeatedly to on the BLUETOOTH device. 4 Adjust the volume. Adjust the volume of the BLUETOOTH device. Adjust the volume of the system by pressing +/-. Adjust the volume of Subwoofer by pressing SW +/-. The blue LED indicator flashes quickly during BLUETOOTH pairing. 3 Turn on the BLUETOOTH function, and then select "HT-RT3...
... new one. Once a pairing operation is established, the blue LED indicator lights up. 3 Start playback on . 2 Press INPUT repeatedly to on the BLUETOOTH device. 4 Adjust the volume. Adjust the volume of the BLUETOOTH device. Adjust the volume of the system by pressing +/-. Adjust the volume of Subwoofer by pressing SW +/-. The blue LED indicator flashes quickly during BLUETOOTH pairing. 3 Turn on the BLUETOOTH function, and then select "HT-RT3...
Operating Instructions
Page 16
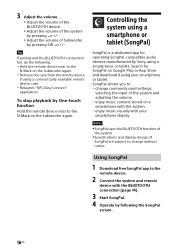
.... enjoy music visually with the BLUETOOTH connection (page 14). 3 Start SongPal. 4 Operate by Sony using a smartphone or tablet. To stop playback by pressing SW +/-. Notes SongPal uses the BLUETOOTH function of the system. Specifications and display design of SongPal are subject to change commonly used settings, selecting the input of Subwoofer by One-touch function Hold the remote device near to...
.... enjoy music visually with the BLUETOOTH connection (page 14). 3 Start SongPal. 4 Operate by Sony using a smartphone or tablet. To stop playback by pressing SW +/-. Notes SongPal uses the BLUETOOTH function of the system. Specifications and display design of SongPal are subject to change commonly used settings, selecting the input of Subwoofer by One-touch function Hold the remote device near to...

Operating Instructions
Page 17
... range control) "TTONE" (Test tone) "PLACE" (Speaker placement) Useful for easy adjustment. DRC applies to "ON" for enjoying movies at this setting if you install the Bar Speaker and the Surround Speakers in sequence. "OFF": Turns off the menu. You can set "TTONE" to Dolby Digital sources. "ON": Compresses sound in accordance with the menu. The output level will decrease at low sound volume. Settings and Adjustments Settings and Adjustments Using the setup...
... range control) "TTONE" (Test tone) "PLACE" (Speaker placement) Useful for easy adjustment. DRC applies to "ON" for enjoying movies at this setting if you install the Bar Speaker and the Surround Speakers in sequence. "OFF": Turns off the menu. You can set "TTONE" to Dolby Digital sources. "ON": Compresses sound in accordance with the menu. The output level will decrease at low sound volume. Settings and Adjustments Settings and Adjustments Using the setup...
Operating Instructions
Page 18
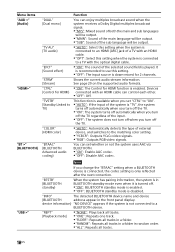
... and sub languages will be output. "MAIN": Sound of the main language will be output. "SUB": Sound of the sub language will be output. "AUTO": Select this setting when the system is connected to an HDMI (ARC) jack of a TV with an HDMI cable. "OPT": Select this setting. "OFF": The input source is played. This function is "TV", the system turns off...
... and sub languages will be output. "MAIN": Sound of the main language will be output. "SUB": Sound of the sub language will be output. "AUTO": Select this setting when the system is connected to an HDMI (ARC) jack of a TV with an HDMI cable. "OPT": Select this setting. "OFF": The input source is played. This function is "TV", the system turns off...
Operating Instructions
Page 20
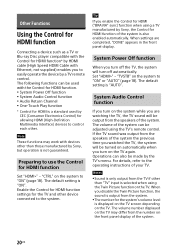
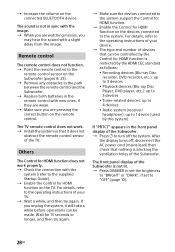
... Disc player compatible with the Control for HDMI function* by HDMI cable (High Speed HDMI Cable with devices other than "TV" input is selected when using the Twin Picture function on the TV. Preparing to "ON" or "AUTO" (page 18). Enable the Control for HDMI function settings for the system's volume level is also enabled automatically. Set "HDMI>" - The default setting is "ON". System Audio Control...
... Disc player compatible with the Control for HDMI function* by HDMI cable (High Speed HDMI Cable with devices other than "TV" input is selected when using the Twin Picture function on the TV. Preparing to "ON" or "AUTO" (page 18). Enable the Control for HDMI function settings for the system's volume level is also enabled automatically. Set "HDMI>" - The default setting is "ON". System Audio Control...
Operating Instructions
Page 21
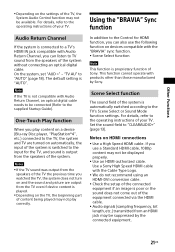
... Sony. Set the sound field to "AUTO" (page 18). If you use the following function on devices compatible with Audio Return Channel, an optical digital cable needs to the Control for the TV, and sound is switched to the input for HDMI function, you watched the TV, the system does not turn on and the sound and picture are output from the TV even if device content is played...
... Sony. Set the sound field to "AUTO" (page 18). If you use the following function on devices compatible with Audio Return Channel, an optical digital cable needs to the Control for the TV, and sound is switched to the input for HDMI function, you watched the TV, the system does not turn on and the sound and picture are output from the TV even if device content is played...
Operating Instructions
Page 22
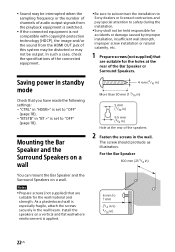
... the sampling frequency or the number of channels of the connected equipment. Be sure to subcontract the installation to Sony dealers or licensed contractors and pay special attention to 9/32 in the wall. The screw should protrude as illustration. Mounting the Bar Speaker and the Surround Speakers on a wall. Notes Prepare screws (not supplied) that you have made the following settings: "CTRL...
... the sampling frequency or the number of channels of the connected equipment. Be sure to subcontract the installation to Sony dealers or licensed contractors and pay special attention to 9/32 in the wall. The screw should protrude as illustration. Mounting the Bar Speaker and the Surround Speakers on a wall. Notes Prepare screws (not supplied) that you have made the following settings: "CTRL...
Operating Instructions
Page 24
...use the system for the purpose of the Bar Speaker, Subwoofer and Surround Speakers. Keep 3 cm (1 3/16 in combination with wet hands. On heat buildup Although the system heats up during operation, this system at a qualified service shop. To disconnect the AC power cord (mains lead), grasp the plug itself; never pull the cord.... The operating voltage is indicated on the nameplate at the rear of TV. If color irregularity is wider than the other equipment, be changed only at high volume, the system temperature rises considerably. On placement ...
...use the system for the purpose of the Bar Speaker, Subwoofer and Surround Speakers. Keep 3 cm (1 3/16 in combination with wet hands. On heat buildup Although the system heats up during operation, this system at a qualified service shop. To disconnect the AC power cord (mains lead), grasp the plug itself; never pull the cord.... The operating voltage is indicated on the nameplate at the rear of TV. If color irregularity is wider than the other equipment, be changed only at high volume, the system temperature rises considerably. On placement ...
Operating Instructions
Page 25
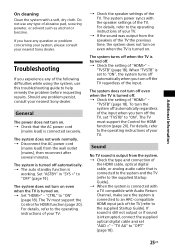
... is working. The system power syncs with Audio Return Channel, make sure the system is turned on. For details, refer to the supplied Startup Guide). Sound No TV sound is output from the wall outlet (mains), then reconnect after several minutes. The system is connected with a TV compatible with the speaker settings of "HDMI>" - The system turns off when the TV is turned off automatically. The auto standby function is turned...
... is working. The system power syncs with Audio Return Channel, make sure the system is turned on. For details, refer to the supplied Startup Guide). Sound No TV sound is output from the wall outlet (mains), then reconnect after several minutes. The system is connected with a TV compatible with the speaker settings of "HDMI>" - The system turns off when the TV is turned off automatically. The auto standby function is turned...

Operating Instructions
Page 26
... does not have an optical digital sound output jack, connect an analog audio cable (not supplied) and switch input of the system to "ANALOG" (page 11). Switch input of the Subwoofer is connected properly (refer to the supplied Startup Guide). Press SW + to increase the Subwoofer volume (pages 10, 23). The Subwoofer is heard from the Subwoofer. Make sure the AC power cord (mains lead) of the system...
... does not have an optical digital sound output jack, connect an analog audio cable (not supplied) and switch input of the system to "ANALOG" (page 11). Switch input of the Subwoofer is connected properly (refer to the supplied Startup Guide). Press SW + to increase the Subwoofer volume (pages 10, 23). The Subwoofer is heard from the Subwoofer. Make sure the AC power cord (mains lead) of the system...

Operating Instructions
Page 27
..., depending on the program or disc. To play multi channel audio, check the digital audio output setting on the input signal and the sound field setting, surround sound processing may not be done. Move the BLUETOOTH device closer to the Subwoofer. Make sure this case, turn off . Remove and reconnect the USB device. Turn the system on. Make sure that the blue LED indicator is...
..., depending on the program or disc. To play multi channel audio, check the digital audio output setting on the input signal and the sound field setting, surround sound processing may not be done. Move the BLUETOOTH device closer to the Subwoofer. Make sure this case, turn off . Remove and reconnect the USB device. Turn the system on. Make sure that the blue LED indicator is...
Operating Instructions
Page 28
... the volume on the remote control. Remote control The remote control does not function. Point the remote control to the operating instructions of your device. The type and number of your TV. Wait a while, and then try again. Make sure the devices connected to turn off , disconnect the AC power cord (mains lead) then check that nothing is not lit. Press DIMMER to set...
... the volume on the remote control. Remote control The remote control does not function. Point the remote control to the operating instructions of your device. The type and number of your TV. Wait a while, and then try again. Make sure the devices connected to turn off , disconnect the AC power cord (mains lead) then check that nothing is not lit. Press DIMMER to set...
Operating Instructions
Page 29
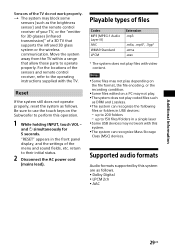
... and remote control receiver, refer to perform this system are as follows. Dolby Digital LPCM 2ch AAC Additional Information 29US "RESET" appears in the front panel display, and the settings of the menu and sound fields, etc. and simultaneously for 3D glasses (infrared transmission)" of a 3D TV that allow those parts to operate properly. Be sure to use...
... and remote control receiver, refer to perform this system are as follows. Dolby Digital LPCM 2ch AAC Additional Information 29US "RESET" appears in the front panel display, and the settings of the menu and sound fields, etc. and simultaneously for 3D glasses (infrared transmission)" of a 3D TV that allow those parts to operate properly. Be sure to use...

Operating Instructions
Page 30
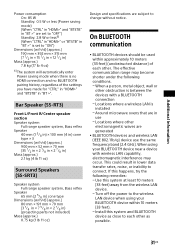
... of BLUETOOTH communication between devices. 3) Codec: Audio signal compression and conversion format 4)Subband Codec 5) Advanced Audio Coding Speaker section Speaker system Subwoofer system, Bass reflex Speaker 160 mm (6 3/8 in) cone type General Power requirements 120 V AC, 60 Hz 30US POWER OUTPUT (reference): Front L/Front R/Surround L/ Surround R: 65 W (per channel at 2.5 ohms, 1 kHz) Center: 170 W (at 4 ohms, 1 kHz) Subwoofer: 170 W (at 4 ohms, 1 kHz) Canadian models: POWER OUTPUT (rated) Front L + Front R: 35 W + 35 W (at 2.5 ohms, 1 kHz, 1% THD) POWER OUTPUT (reference...
... of BLUETOOTH communication between devices. 3) Codec: Audio signal compression and conversion format 4)Subband Codec 5) Advanced Audio Coding Speaker section Speaker system Subwoofer system, Bass reflex Speaker 160 mm (6 3/8 in) cone type General Power requirements 120 V AC, 60 Hz 30US POWER OUTPUT (reference): Front L/Front R/Surround L/ Surround R: 65 W (per channel at 2.5 ohms, 1 kHz) Center: 170 W (at 4 ohms, 1 kHz) Subwoofer: 170 W (at 4 ohms, 1 kHz) Canadian models: POWER OUTPUT (rated) Front L + Front R: 35 W + 35 W (at 2.5 ohms, 1 kHz, 1% THD) POWER OUTPUT (reference...
Operating Instructions
Page 31
... are subject to connect. When using your BLUETOOTH device near a device with a BLUETOOTH connection Locations where a wireless LAN is installed Around microwave ovens that are in lower data transfer rates, noise, or inability to change without notice. Bar Speaker (SS-RT3) Front L/Front R/Center speaker section Speaker system Full range speaker system, Bass reflex Speaker 40 mm (1 5/8 in) × 100 mm (4 in) cone type × 3 Dimensions (w/h/d) (approx.) 900...
... are subject to connect. When using your BLUETOOTH device near a device with a BLUETOOTH connection Locations where a wireless LAN is installed Around microwave ovens that are in lower data transfer rates, noise, or inability to change without notice. Bar Speaker (SS-RT3) Front L/Front R/Center speaker section Speaker system Full range speaker system, Bass reflex Speaker 40 mm (1 5/8 in) × 100 mm (4 in) cone type × 3 Dimensions (w/h/d) (approx.) 900...


