

Operating Guide
Page 1
... more recycled paper using VOC (Volatile Organic Compound) -free vegetable oil based ink. http://www.sony.net/ Printed on this product and answers to frequently asked questions can be found at our Customer Support Website. Printed in Japan US 4-111-862-11(1) Digital HD Video Camera Recorder Operating Guide HDR-FX1000 Enjoying pictures with...
... more recycled paper using VOC (Volatile Organic Compound) -free vegetable oil based ink. http://www.sony.net/ Printed on this product and answers to frequently asked questions can be found at our Customer Support Website. Printed in Japan US 4-111-862-11(1) Digital HD Video Camera Recorder Operating Guide HDR-FX1000 Enjoying pictures with...

Operating Guide
Page 3
...If the provided plug does not fit into your safety. When a cart is used, use caution when moving the cart/apparatus combination to avoid injury from the apparatus. • Only use this apparatus during lightning storms or when unused for replacement of time. IMPORTANT SAFETY...these instructions. • Keep these instructions. • Heed all warnings. • Follow all instructions. • Do not use attachments/accessories specified by the manufacturer. • Use only with the cart, stand, tripod, bracket, or table specified by the manufacturer, or sold with dry cloth. •...
...If the provided plug does not fit into your safety. When a cart is used, use caution when moving the cart/apparatus combination to avoid injury from the apparatus. • Only use this apparatus during lightning storms or when unused for replacement of time. IMPORTANT SAFETY...these instructions. • Keep these instructions. • Heed all warnings. • Follow all instructions. • Do not use attachments/accessories specified by the manufacturer. • Use only with the cart, stand, tripod, bracket, or table specified by the manufacturer, or sold with dry cloth. •...

Operating Guide
Page 4
Servicing is required when the apparatus has been damaged in the U.S.A., use an attachment plug adapter of power source indicated on the marking label. If you are not sure of the type of electrical power supplied to ...
Servicing is required when the apparatus has been damaged in the U.S.A., use an attachment plug adapter of power source indicated on the marking label. If you are not sure of the type of electrical power supplied to ...

Operating Guide
Page 5
...BATTERIES Lithium-Ion batteries are designed to correct the interference by returning your Sony dealer regarding recycling of Conformity Trade Name: SONY Model No.: HDR-FX1000 Responsible Party: Sony Electronics Inc. Model No. Excessive sound pressure from earphones and headphones ...can radiate radio frequency energy and, if not installed and used rechargeable batteries to the following measures: ...
...BATTERIES Lithium-Ion batteries are designed to correct the interference by returning your Sony dealer regarding recycling of Conformity Trade Name: SONY Model No.: HDR-FX1000 Responsible Party: Sony Electronics Inc. Model No. Excessive sound pressure from earphones and headphones ...can radiate radio frequency energy and, if not installed and used rechargeable batteries to the following measures: ...

Operating Guide
Page 6
...following part. PRO-HG Duo") ("Memory Stick "Memory Stick Duo" (This size can be used with your camcorder.) "Memory Stick" (You cannot use any type of your camcorder.) • You cannot use with "Memory Stick PRO" compatible equipment. • Do not attach a label or the ...the "Memory Stick Duo" Adaptor. The supplied interface cable must be used with the equipment in your camcorder You can be used only with your camcorder" (p. 115). 6 For the State of FCC Rules. Your camcorder does not support the Cassette Memory function (p. 110). Increase the separation...
...following part. PRO-HG Duo") ("Memory Stick "Memory Stick Duo" (This size can be used with your camcorder.) "Memory Stick" (You cannot use any type of your camcorder.) • You cannot use with "Memory Stick PRO" compatible equipment. • Do not attach a label or the ...the "Memory Stick Duo" Adaptor. The supplied interface cable must be used with the equipment in your camcorder You can be used only with your camcorder" (p. 115). 6 For the State of FCC Rules. Your camcorder does not support the Cassette Memory function (p. 110). Increase the separation...

Operating Guide
Page 7
These points are operational for effective use . Do not expose your camcorder's viewfinder, lens, or LCD screen to the sun or ...on the countries/regions. On recording • Before starting to record, test the recording function to a malfunction of the camcorder, storage media, etc. • TV color systems differ depending on the screen or in the viewfinder (p. 105). About ...light sources, especially the sun will converge on the viewfinder or lens and damage the internal parts of your camcorder's jacks may be some tiny black points and/or bright points (white, red, blue, or green in ...
These points are operational for effective use . Do not expose your camcorder's viewfinder, lens, or LCD screen to the sun or ...on the countries/regions. On recording • Before starting to record, test the recording function to a malfunction of the camcorder, storage media, etc. • TV color systems differ depending on the screen or in the viewfinder (p. 105). About ...light sources, especially the sun will converge on the viewfinder or lens and damage the internal parts of your camcorder's jacks may be some tiny black points and/or bright points (white, red, blue, or green in ...

Operating Guide
Page 8
... manual for the DV format only This function that can be assigned to playing them back on the icons used when i.LINK cable is connected. Note on other accessories are captured using your camcorder if necessary (p. 25). • Design and specifications of tapes by playing them back on this manual Features available for...
... manual for the DV format only This function that can be assigned to playing them back on the icons used when i.LINK cable is connected. Note on other accessories are captured using your camcorder if necessary (p. 25). • Design and specifications of tapes by playing them back on this manual Features available for...
Operating Guide
Page 9
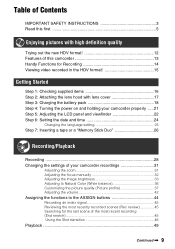
... this first 5 Enjoying pictures with high definition quality Trying out the new HDV format 12 Features of this camcorder 13 Handy Functions for Recording 14 Viewing video recorded in the HDV format 15 Getting Started Step 1: Checking ...7: Inserting a tape or a "Memory Stick Duo 26 Recording/Playback Recording 28 Changing the settings of your camcorder recordings 31 Adjusting the zoom 31 Adjusting the focus manually 32 Adjusting the image brightness 33 Adjusting to Natural ... last scene of the most recent recording (End search 45 Using the Shot transition 46 Playback 49 Continued , 9
... this first 5 Enjoying pictures with high definition quality Trying out the new HDV format 12 Features of this camcorder 13 Handy Functions for Recording 14 Viewing video recorded in the HDV format 15 Getting Started Step 1: Checking ...7: Inserting a tape or a "Memory Stick Duo 26 Recording/Playback Recording 28 Changing the settings of your camcorder recordings 31 Adjusting the zoom 31 Adjusting the focus manually 32 Adjusting the image brightness 33 Adjusting to Natural ... last scene of the most recent recording (End search 45 Using the Shot transition 46 Playback 49 Continued , 9

Operating Guide
Page 10
... Changing the screen 52 Displaying recording data (Data code 52 Displaying the settings in your camcorder (Status check 53 Checking the remaining battery (Battery Info 53 Locating a scene on a tape 54 Searching quickly for a desired scene (Zero set memory 54 Searching ... (Date search 55 Searching for a recording start point (Index search 55 Playing the picture on a TV 56 Using the Menu Using the menu items 62 Menu items 64 (CAMERA SET) menu 66 Settings to adjust your camcorder to the recording conditions (GAIN SETUP/ BACK LIGHT/STEADYSHOT, etc.) (AUDIO SET) menu 73 Settings for...
... Changing the screen 52 Displaying recording data (Data code 52 Displaying the settings in your camcorder (Status check 53 Checking the remaining battery (Battery Info 53 Locating a scene on a tape 54 Searching quickly for a desired scene (Zero set memory 54 Searching ... (Date search 55 Searching for a recording start point (Index search 55 Playing the picture on a TV 56 Using the Menu Using the menu items 62 Menu items 64 (CAMERA SET) menu 66 Settings to adjust your camcorder to the recording conditions (GAIN SETUP/ BACK LIGHT/STEADYSHOT, etc.) (AUDIO SET) menu 73 Settings for...

Operating Guide
Page 11
Troubleshooting Troubleshooting 94 Warning indicators and messages 104 Additional Information Using your camcorder abroad 107 Maintenance and precautions 110 HDV format and recording/playback 110 About the "Memory Stick 111 About the "InfoLITHIUM" battery pack 112 About i.LINK 113 About x.v.Color 114 About handling of your camcorder 115 Specifications 119 Quick Reference Identifying parts and controls 123 Indicators for the LCD screen and viewfinder 128 Index ...131 Spanish Quick Guide/Guía rápida en español 135 11
Troubleshooting Troubleshooting 94 Warning indicators and messages 104 Additional Information Using your camcorder abroad 107 Maintenance and precautions 110 HDV format and recording/playback 110 About the "Memory Stick 111 About the "InfoLITHIUM" battery pack 112 About i.LINK 113 About x.v.Color 114 About handling of your camcorder 115 Specifications 119 Quick Reference Identifying parts and controls 123 Indicators for the LCD screen and viewfinder 128 Index ...131 Spanish Quick Guide/Guía rápida en español 135 11

Operating Guide
Page 13
... Superb external connectability is fitted with the 3-ClearVid CMOS sensor system. Superb spectroscopic characteristics and high definition are achieved by the use of three ClearVid CMOS sensors developed by an i.LINK (HDV/DV) jack, an A/V Remote Connector (for serious filming Extensive... beautiful scenery while traveling, etc., in high definition quality. 1 3-ClearVid CMOS sensor system installed This camcorder is provided by Sony for high definition, enabling reproduction of your camcorder, and a "Memory Stick Duo" slot on distant objects and record in high definition quality. 3...
... Superb external connectability is fitted with the 3-ClearVid CMOS sensor system. Superb spectroscopic characteristics and high definition are achieved by the use of three ClearVid CMOS sensors developed by an i.LINK (HDV/DV) jack, an A/V Remote Connector (for serious filming Extensive... beautiful scenery while traveling, etc., in high definition quality. 1 3-ClearVid CMOS sensor system installed This camcorder is provided by Sony for high definition, enabling reproduction of your camcorder, and a "Memory Stick Duo" slot on distant objects and record in high definition quality. 3...

Operating Guide
Page 14
..., etc., can be shot in your camcorder. Iris ring (p. 33) You can select either [IRIS] or [EXPOSURE] for Recording Still image Dual Rec (p. 30) You can be saved in smooth moving slow-motion. You can adjust the brightness using the iris ring. This enables you to use saved settings data to quickly reproduce...
..., etc., can be shot in your camcorder. Iris ring (p. 33) You can select either [IRIS] or [EXPOSURE] for Recording Still image Dual Rec (p. 30) You can be saved in smooth moving slow-motion. You can adjust the brightness using the iris ring. This enables you to use saved settings data to quickly reproduce...

Operating Guide
Page 15
Enjoying pictures with high definition quality Viewing video recorded in HD (high definition) quality. x Connecting to HDV1080i non-compliant specification Use your camcorder to convert HDV format video to SD (standard definition) quality to DVD from copying movie. The computer will need to SD (...; For details on whether HDV or DV format video is to copy pictures in the HDV format! Viewing on a 16:9 TV/4:3 TV (p. 59) Your camcorder can be copied. Connecting to a computer (p. 91) x Copying movie from tape to a computer You can copy movie to a computer, and save to enable...
Enjoying pictures with high definition quality Viewing video recorded in HD (high definition) quality. x Connecting to HDV1080i non-compliant specification Use your camcorder to convert HDV format video to SD (standard definition) quality to DVD from copying movie. The computer will need to SD (...; For details on whether HDV or DV format video is to copy pictures in the HDV format! Viewing on a 16:9 TV/4:3 TV (p. 59) Your camcorder can be copied. Connecting to a computer (p. 91) x Copying movie from tape to a computer You can copy movie to a computer, and save to enable...

Operating Guide
Page 16
...supplied. • The cassette tape and "Memory Stick Duo" are not included. Getting Started Step 1: Checking supplied items Make sure that you can use on your camcorder. AC Adaptor (1) (p. 18) Large eyecup (1) (p. 23) Rechargeable battery pack NP-F570 (1) (p. 18, 112) Power cord (mains lead) (1)... (p. 18) Lens hood with your camcorder. The number in the parentheses indicates the number of cassette tapes and "Memory Stick Duo" that you have following items supplied with lens cover (1)...
...supplied. • The cassette tape and "Memory Stick Duo" are not included. Getting Started Step 1: Checking supplied items Make sure that you can use on your camcorder. AC Adaptor (1) (p. 18) Large eyecup (1) (p. 23) Rechargeable battery pack NP-F570 (1) (p. 18, 112) Power cord (mains lead) (1)... (p. 18) Lens hood with your camcorder. The number in the parentheses indicates the number of cassette tapes and "Memory Stick Duo" that you have following items supplied with lens cover (1)...

Operating Guide
Page 18
... IN jack AC Adaptor To the wall outlet (wall socket) Power cord (mains lead) 1 Press the battery pack against the back of your camcorder. b Notes • You cannot use batteries other than the "InfoLITHIUM" battery pack (L series) (p. 112). 2 With the B mark on the DC plug facing outwards, connect the... DC plug to the DC IN jack on your camcorder and slide it down. 3 Connect the power cord (mains lead) to the AC Adaptor. 4 Connect...
... IN jack AC Adaptor To the wall outlet (wall socket) Power cord (mains lead) 1 Press the battery pack against the back of your camcorder. b Notes • You cannot use batteries other than the "InfoLITHIUM" battery pack (L series) (p. 112). 2 With the B mark on the DC plug facing outwards, connect the... DC plug to the DC IN jack on your camcorder and slide it down. 3 Connect the power cord (mains lead) to the AC Adaptor. 4 Connect...

Operating Guide
Page 19
... RELEASE (battery release) button and remove the battery pack. Bottom: Recording time when recording with this camcorder. BATT RELEASE (battery release) button To store the battery pack If the battery pack will not be used for details on storage of the battery pack. Disconnect the AC Adaptor from the DC IN jack...
... RELEASE (battery release) button and remove the battery pack. Bottom: Recording time when recording with this camcorder. BATT RELEASE (battery release) button To store the battery pack If the battery pack will not be used for details on storage of the battery pack. Disconnect the AC Adaptor from the DC IN jack...

Operating Guide
Page 20
...Battery Info (p. 53) will not lose its charge even when it in low temperatures. • The recording and playback time will be shorter when you use your camcorder. Using an outside power source You can use the AC Adaptor to the wall outlet (wall socket) via the AC Adaptor. On the AC Adaptor •... °C to 30 °C (50 °F to the DC IN jack of the AC Adaptor or battery terminal with any malfunction occurs while using your camcorder. • Do not use the AC Adaptor placed in a cool place. • The power will not be supplied from the battery as long as the AC Adaptor...
...Battery Info (p. 53) will not lose its charge even when it in low temperatures. • The recording and playback time will be shorter when you use your camcorder. Using an outside power source You can use the AC Adaptor to the wall outlet (wall socket) via the AC Adaptor. On the AC Adaptor •... °C to 30 °C (50 °F to the DC IN jack of the AC Adaptor or battery terminal with any malfunction occurs while using your camcorder. • Do not use the AC Adaptor placed in a cool place. • The power will not be supplied from the battery as long as the AC Adaptor...

Operating Guide
Page 21
... switch. 3 Ensure a good grip, then fasten the grip belt. CAMERA: To record pictures. b Notes • The current date and time appear on your camcorder once you turn off the power Slide the POWER switch to the respective direction. To turn on the LCD screen for the first time, the... [CLOCK SET] screen appears (p. 24). 2 Hold the camcorder properly. Press and hold the green button when you use your camcorder properly To record or play or edit pictures. When you slide the POWER switch from OFF (CHG). b Notes • ...
... switch. 3 Ensure a good grip, then fasten the grip belt. CAMERA: To record pictures. b Notes • The current date and time appear on your camcorder once you turn off the power Slide the POWER switch to the respective direction. To turn on the LCD screen for the first time, the... [CLOCK SET] screen appears (p. 24). 2 Hold the camcorder properly. Press and hold the green button when you use your camcorder properly To record or play or edit pictures. When you slide the POWER switch from OFF (CHG). b Notes • ...

Operating Guide
Page 22
... adjustment lever Move it to the best angle to [ON] (p. 76). 22 This setting is practical when you . z Tips • You can view pictures using the viewfinder to make the battery last longer Press and hold the DISPLAY/BATT INFO button for a few seconds until the picture becomes clear. This... images both on the LCD screen by the setting. z Tips • You can see primary colors shimmering in the viewfinder when you move your camcorder in bright conditions or when you want to save the battery, or when the picture on the recording media. To turn off the LCD backlight...
... adjustment lever Move it to the best angle to [ON] (p. 76). 22 This setting is practical when you . z Tips • You can view pictures using the viewfinder to make the battery last longer Press and hold the DISPLAY/BATT INFO button for a few seconds until the picture becomes clear. This... images both on the LCD screen by the setting. z Tips • You can see primary colors shimmering in the viewfinder when you move your camcorder in bright conditions or when you want to save the battery, or when the picture on the recording media. To turn off the LCD backlight...

Operating Guide
Page 23
Getting Started When the picture in the viewfinder is hard to see If you cannot see the picture in the viewfinder. b Notes • Do not remove the pre-attached eyecup. To attach the large eyecup, stretch it slightly and align it with the protruding part at the top. 23 You can attach the large eyecup facing either the right or left side. Large eyecup (supplied) Attach with the eyecup groove in the viewfinder clearly under bright circumstances, use the supplied large eyecup.
Getting Started When the picture in the viewfinder is hard to see If you cannot see the picture in the viewfinder. b Notes • Do not remove the pre-attached eyecup. To attach the large eyecup, stretch it slightly and align it with the protruding part at the top. 23 You can attach the large eyecup facing either the right or left side. Large eyecup (supplied) Attach with the eyecup groove in the viewfinder clearly under bright circumstances, use the supplied large eyecup.


