

Operating Instructions
Page 3
...modification not expressly approved in this apparatus near any heat sources such as power-supply cord or plug is encouraged to try to Part 15 of the polarized or grounding-type plug. Connect the equipment into your safety. Important Safety Instructions 1) Read these instructions. .... 3) Heed all warnings. 4) Follow all servicing to operate this equipment does cause harmful interference to radio or television reception, which the receiver is no guarantee that produce heat. 9) Do not defeat the safety purpose of the FCC Rules. However, there is connected. - Consult...
...modification not expressly approved in this apparatus near any heat sources such as power-supply cord or plug is encouraged to try to Part 15 of the polarized or grounding-type plug. Connect the equipment into your safety. Important Safety Instructions 1) Read these instructions. .... 3) Heed all warnings. 4) Follow all servicing to operate this equipment does cause harmful interference to radio or television reception, which the receiver is no guarantee that produce heat. 9) Do not defeat the safety purpose of the FCC Rules. However, there is connected. - Consult...
Operating Instructions
Page 5
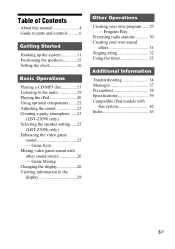
... Mixing video game sound with this manual 4 Guide to parts and controls ..........6 Getting Started Hooking up the system 11 Positioning the speakers 15 Setting the clock 16 Basic Operations Playing a CD/MP3 disc 17 Listening to the radio 19 Playing the iPod 20 Using optional components........22 Adjusting the sound 22 Creating a party atmosphere...
... Mixing video game sound with this manual 4 Guide to parts and controls ..........6 Getting Started Hooking up the system 11 Positioning the speakers 15 Setting the clock 16 Basic Operations Playing a CD/MP3 disc 17 Listening to the radio 19 Playing the iPod 20 Using optional components........22 Adjusting the sound 22 Creating a party atmosphere...

Operating Instructions
Page 6
Top view ej ek el wh wg r; e; Guide to parts and controls This manual mainly explains operations using the buttons on the unit, but the same operations can also be performed using the buttons on the remote having the same or similar names. wa wl ws wd wk wf wj - ra rsrd rg PLAY MODE HS s rf 6US Front view 1234567 89q;qa qs eh qd eg qf ef qg ed qh qj es qk ql ea w; Unit -
Top view ej ek el wh wg r; e; Guide to parts and controls This manual mainly explains operations using the buttons on the unit, but the same operations can also be performed using the buttons on the remote having the same or similar names. wa wl ws wd wk wf wj - ra rsrd rg PLAY MODE HS s rf 6US Front view 1234567 89q;qa qs eh qd eg qf ef qg ed qh qj es qk ql ea w; Unit -

Operating Instructions
Page 7
... of the iPod. Continued l 7US Guide to set the Sleep Timer. B TIMER MENU (pages 16, 32) Press to parts and controls C DISPLAY (pages 16, 21, 27, 28) Press to tune in the display. K TUNING +/- (pages 19... Press to select the tuning mode. M TUNING MODE (pages 19, 31, 37) Press to select the FM monaural or stereo reception. Unit: ENTER (pages 16, 21, 23, 27, 29, 30, 31, 32) Remote: (pages 16, 21, 29, 30..., 32) Press to turn the system on /standby) (pages 13, 14, 16, 20, 34, 37) Press to enter the settings. rl qf qj ej wg...
... of the iPod. Continued l 7US Guide to set the Sleep Timer. B TIMER MENU (pages 16, 32) Press to parts and controls C DISPLAY (pages 16, 21, 27, 28) Press to tune in the display. K TUNING +/- (pages 19... Press to select the tuning mode. M TUNING MODE (pages 19, 31, 37) Press to select the FM monaural or stereo reception. Unit: ENTER (pages 16, 21, 23, 27, 29, 30, 31, 32) Remote: (pages 16, 21, 29, 30..., 32) Press to turn the system on /standby) (pages 13, 14, 16, 20, 34, 37) Press to enter the settings. rl qf qj ej wg...

Operating Instructions
Page 9
..., 37) Press to activate or deactivate X-ROUND mode. Use the tactile dots as references when operating the system. rs (LBT-ZX99i only) X-ROUND ON/OFF (pages 23, 25) Press to select the play mode of CD function. Press to stop ) (pages 17, 19) Press to select the tuning mode. * The VOLUME + and...parts and controls ra (LBT-ZX99i only) MODE (page 23) When X-ROUND is set to on remote: +/- (tuning) (pages 19, 30) Press to tune in a radio station. +/- (pages 17, 29) Press to select a folder of MP3 files. rg Z OPEN/CLOSE (pages 14, 17, 35) Press to select the FM monaural or stereo...
..., 37) Press to activate or deactivate X-ROUND mode. Use the tactile dots as references when operating the system. rs (LBT-ZX99i only) X-ROUND ON/OFF (pages 23, 25) Press to select the play mode of CD function. Press to stop ) (pages 17, 19) Press to select the tuning mode. * The VOLUME + and...parts and controls ra (LBT-ZX99i only) MODE (page 23) When X-ROUND is set to on remote: +/- (tuning) (pages 19, 30) Press to tune in a radio station. +/- (pages 17, 29) Press to select a folder of MP3 files. rg Z OPEN/CLOSE (pages 14, 17, 35) Press to select the FM monaural or stereo...
Operating Instructions
Page 34
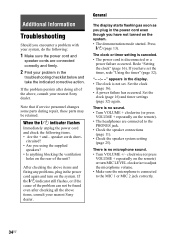
... on the remote). • The headphones are connected correctly and firmly. 2 Find your nearest Sony dealer. If the problem persists after checking all of the above items, consult your nearest Sony dealer. When the "/1 indicator flashes Immediately unplug the power cord and check the following : ...VOLUME +/- There is no sound. • Turn VOLUME + clockwise (or press VOLUME + repeatedly on the system. Note that if service personnel changes some parts during repair, these parts may be found even after doing all the above , consult your problem in the power cord again and turn...
... on the remote). • The headphones are connected correctly and firmly. 2 Find your nearest Sony dealer. If the problem persists after checking all of the above items, consult your nearest Sony dealer. When the "/1 indicator flashes Immediately unplug the power cord and check the following : ...VOLUME +/- There is no sound. • Turn VOLUME + clockwise (or press VOLUME + repeatedly on the system. Note that if service personnel changes some parts during repair, these parts may be found even after doing all the above , consult your problem in the power cord again and turn...


