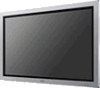
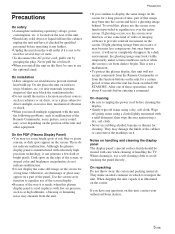
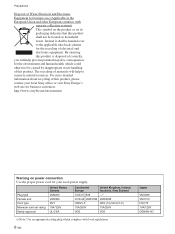
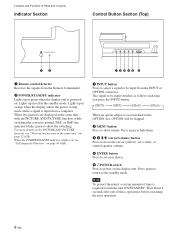
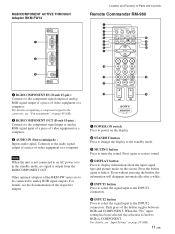
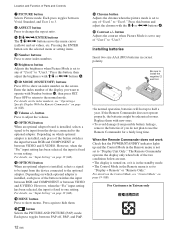
Operating Instructions (Large File - 12.86 MB)
Page 14
ϦϞίϯRM-980 1 2 MUTING DISPLAY STBY ON 3 4 5 qf 6 qg 7 qh 8 qj 9 ENTER 123 0 456 789 qa 0 qk qs ON SET qd ql MONITOR RM-980 1 POWER ONεΠον 2 STANDBYϘλϯ 3 MUTINGϘλϯ 4 DISPLAYϘλϯ 5 INPUT1 Ϙλϯ */165 6 INPUT2 Ϙλϯ */165 3(#ɺ$0.10/&/5 3(#·ͨ $0.10/&/5 1 7 PICTUREϘλϯ 8 ASPECTϘλϯ 9 M/m/
Operating Instructions (Large File - 12.86 MB)
Page 53
... Panel (Left side 10 (GB) Remote Commander RM-980 11 (GB) Caution 13 (GB) Connections 14 (GB) Connecting the Speakers 14 (GB) Connecting the AC Power Cord 14 (GB) Cable management 15 (GB) Using On-screen Menus 16 (GB) Operating Through Menus 16 (GB) GB Menu Guide 16 (GB) Watching the...
Operating Instructions (Large File - 12.86 MB)
Page 54
...) Restoring the Adjust Sound Menu Items to Their Original Settings 35 (GB) Selecting the On-screen Language 36 (GB) Adjusting Color Matrix 36 (GB) Controlling Power On/Off Automatically (Timer Function 37 (GB) Adjusting the time and the day 37 (GB) Displaying the time 37 (GB) On/Off Timer Function 38...
Operating Instructions (Large File - 12.86 MB)
Page 55
...ghosting occurs, use the screen saver function, or use rubbing alcohol, benzine or thinner for several days or more. • To disconnect the AC power cord, pull it any questions on surfaces (rugs, blankets, etc.) or near heat sources such as at high altitudes, a buzzing or humming noise... before entering a command. To avoid this plasma display panel is not a malfunction. • To protect the plasma display, this unit, contact your authorized Sony dealers. 5 (GB) On cleaning • Be sure to use over the entire screen. They may see some kind of the way it , use ...
Operating Instructions (Large File - 12.86 MB)
Page 56
... by inappropriate waste handling of materials will help prevent potential negative consequences for your local Sony office or visit Sony Europe's web site for business customers: http://www.sonybiz.net/environment Warning on power connection Use the proper power cord for the environment and human health, which complies with local regulations. 6 (GB) Japan VM1296...
Operating Instructions (Large File - 12.86 MB)
Page 57
Once you connect the AC power cord, the POWER/STANDBY indicator lights up in red and the display goes into the standby mode. Location and Function of Parts and Controls Front / Rear / Left side / ... 9 (GB) and "Connector Panel (Left side)" on the screen. 5 - AC IN socket Connect the supplied AC power cord to this socket to a wall outlet. For more details on the power cord, see "Connecting the AC Power Cord" on page 14 (GB). 6 Connector panel For details on the connector panel, see "Control Button Section...
Operating Instructions (Large File - 12.86 MB)
Page 58
... two pictures at the same time with the PICTURE AND PICTURE function, while switching the screen to normal, P&P, or PinP, the indicator blinks green to power on page 43 (GB). 1 INPUT button Press to select a signal to be skipped. 2 MENU button Press to turn the unit ON/STANDBY. The signal to... indicator Lights up in red in the standby mode. Lights up in orange when the display enters the power saving mode while a signal is powered on page 32 (GB). When two pictures are displayed at the same time" on . Press again to hide them. 3 4 m/M (cursor/volume) button Press to move...
Operating Instructions (Large File - 12.86 MB)
Page 61
...sub 15-pin) : Connects to the component signal output or analog RGB signal output of a piece of video equipment or a computer. Connects to power on the screen. Note When the unit is not connected to the INPUT2 connectors. Even without pressing the button, the information will disappear automatically after.... 5 INPUT1 button Press to select the signal input to the INPUT1 connectors. 6 INPUT2 button Press to select the signal input to an AC power or is in the standby mode, no signal is fixed to hide it. Other optional adaptors of the button toggles between RGB and COMPONENT. When...
Operating Instructions (Large File - 12.86 MB)
Page 62
Each press toggles between Vivid, Standard, and User 1 to 3. 8 ASPECT button Press to change the aspect ratio. 9 M/m/ Location and Function of Parts and Controls 7 PICTURE button Selects Picture mode.
Operating Instructions (Large File - 12.86 MB)
Page 63
.... Avoid touching the top or rear of the unit when it is attached to the stand (not supplied), do so with qualified Sony personnel for installation. • While the unit is up inside. When using the stand, make sure you cannot use the applicable display... 10 (4) (4) Side 25 (9 7/8) 5 (2) Units: cm (inches) When mounting the display vertically Front 20 (7 7/8) 25 (9 7/8) Side 10 (4) 25 (9 7/8) Make sure that the 1 POWER switch is at least 3 people. Consult with at the lower position. 5 (2) Units: cm (inches) Note When moving or installing the display when it has entered...
Operating Instructions (Large File - 12.86 MB)
Page 64
...channel numbers, etc., of presence by following steps A - A loose connection may be completely removed once they occur. Connecting the AC Power Cord 1 Plug the AC power cord into the jacks. D. Notes on connecting the speakers, see the operating manual that appear with 4:3 video source (conventional TV ... of connected equipment such as DSS, Cable box, video decks, etc. Connections Before you start • First make sure that the power to the left and right that came with a greater sense of connected equipment such as an image like a film negative during picture ...
Operating Instructions (Large File - 12.86 MB)
Page 65
Cable management Using the cable holders You can neatly bundle the cables with the cable holders (×4) provided. Rear Connections 1 2 15 (GB) To remove the AC power cord After squeezing the AC plug holder and freeing it, grasp the plug and pull out the AC power cord. Attach the cable holders as shown in the illustration below.
Operating Instructions (Large File - 12.86 MB)
Page 68
... connector. In that you select "Reduce," the brightness of the picture. Using On-screen Menus CUSTOM SETUP menu You can reduce power consumption or set various kinds of the RGB/COMPONENT connector. Closed Caption Displays closed captions. Color Matrix Sets the Color Matrix to ...RGB Mode: Sync Mode: Remote Input Setting Select Standard Off Off Off Y/PB/PR 1080i DTV H/Comp Selectable Set ENTER Exit MENU Power Saving Reduces power consumption while showing pictures. PIN 13 13/14 2 Input signal and Synchronous mode settings Signal input over the D-sub Synchronous mode ...
Operating Instructions (Large File - 12.86 MB)
Page 70
...Setting an IP address and communication speed" on when a signal is input. Serial Number Indicates the serial number. Note Time spent in the power saving mode, the display unit is automatically turned on page 42 (GB). Information This menu is used to reset all adjustment and setting ...Version: Software Version Indicates the system software version. While in the standby mode, press the 1POWER switch on the display unit or the POWER ON button on the menu only when an optional adaptor with network management capability (such as BKM-FW32, BKMFW50). IP Address Setup Sets ...
Operating Instructions (Large File - 12.86 MB)
Page 71
TIMER/CLOCK menu You can set the timer, adjust time, display the built-in clock, or make the unit power on/off . For details, see "Displaying the time" on page 37 (GB). For details, see "Adjusting the time and the day" on page 39 (GB). ... displayed on page 38 (GB). Auto Dimmer When a still image is automatically turned on the screen when set time on or off at which the power is displayed for long periods of a picture (aspect ratio 4:3). Orbit Changes the position of a picture after a predetermined amount of time. Select Set ENTER Exit MENU...
Operating Instructions (Large File - 12.86 MB)
Page 72
...recommend input source video equipment equipped with a TBC (time base corrector). Watching the Picture Watching the Picture Before you start • Power on the display. • Power on the connected equipment and play a video source. • To display the input signal information and Picture Mode on the screen when... turning on the power or switching the input signal, set value (Only when the signal formats are identical). • Even if the selected input can switch ...
Operating Instructions (Large File - 12.86 MB)
Page 73
... Display Status Information Input signal and Picture Mode information appear on the screen for about five seconds when the power is turned on or when the input signal is "On." CUSTOM SETUP Power Saving: Speaker Out: Closed Caption: Display: Color Matrix: HD Mode: RGB Mode: Sync Mode: Remote Input Setting: Standard Off...
Operating Instructions (Large File - 12.86 MB)
Page 86
...press ENTER. The main menu appears on the screen. The main menu appears on the screen. The following menu appears on the screen. CUSTOM SETUP Power Saving: Speaker Out: Closed Caption: Display: Color Matrix: HD Mode: RGB Mode: Sync Mode: Remote Input Setting: Standard Off Off Off Y/PB.../PR 1080i DTV H/Comp Selectable Select Set ENTER Exit MENU 3 Press M/m to move the cursor (yellow) to "Language" and press ENTER. CUSTOM SETUP Power Saving: Speaker Out: Closed Caption: Display: Color Matrix: HD Mode: RGB Mode: Sync Mode: Remote Input Setting: Standard Off Off Off Y/CPB/PCR Y10...
Operating Instructions (Large File - 12.86 MB)
Page 87
...set and the screen returns to display the current time and set the time to the previous screen. 7 Press MENU. Please contact your authorized Sony dealer to "TIMER/CLOCK" and press ENTER. TIMER/CLOCK Clock Set Clock Display: Off On/Off Timer On Select Set ENTER Exit MENU ... Note If the built-in yellow. 5 Adjust the minute with M/m and press ENTER. TIMER/CLOCK Clock Set Clock Set: 00 : 00 Mon Controlling Power On/Off Automatically (Timer Function) Displaying the time 1 In the TIMER/CLOCK menu, press M/m to move the cursor (yellow) to "Clock Display" and...
Operating Instructions (Large File - 12.86 MB)
Page 88
... minute and press ENTER. When "Day of Week" is selected, you press ENTER with M/m and press ENTER. Select Set ENTER Exit MENU 3 Press ENTER. Controlling Power On/Off Automatically (Timer Function) On/Off Timer Function 1 In the TIMER/CLOCK menu, press M/m to move the cursor (yellow) to set the On Time...