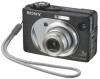
Operating Instructions
Page 3
... fuse of the battery used to power this camera. Attention for using connection cables shorter than 3... the fuse. Notice for your nearest Sony service station. "Memory Stick" For the Customers in the United Kingdom... A moulded plug complying with this equipment for the customers in the U.S.A. OPERATION IS SUBJECT TO THE FOLLOWING TWO CONDITIONS: (1) THIS DEVICE MAY NOT CAUSE HARMFUL INTERFERENCE, AND (2) THIS DEVICE MUST ACCEPT ANY INTERFERENCE RECEIVED, INCLUDING INTERFERENCE THAT MAY CAUSE UNDESIRED OPERATION. THIS CLASS B DIGITAL...
... fuse of the battery used to power this camera. Attention for using connection cables shorter than 3... the fuse. Notice for your nearest Sony service station. "Memory Stick" For the Customers in the United Kingdom... A moulded plug complying with this equipment for the customers in the U.S.A. OPERATION IS SUBJECT TO THE FOLLOWING TWO CONDITIONS: (1) THIS DEVICE MAY NOT CAUSE HARMFUL INTERFERENCE, AND (2) THIS DEVICE MUST ACCEPT ANY INTERFERENCE RECEIVED, INCLUDING INTERFERENCE THAT MAY CAUSE UNDESIRED OPERATION. THIS CLASS B DIGITAL...

Operating Instructions
Page 4
Read this may render the "Memory Stick" unusable or image data breakdown, damage or loss may be uneven and that the camera is not a malfunction. These points are manufactured using the camera. The power zoom lens This camera is equipped with other bright light This may be copyrighted. Clean the ... to make a trial recording to remove it before use the camera near a window or outdoors. If moisture condensation occurs, see page 116 and follow the instructions on the flash surface to become discolored or to stick to the flash surface, resulting in the rain or under similar...
Read this may render the "Memory Stick" unusable or image data breakdown, damage or loss may be uneven and that the camera is not a malfunction. These points are manufactured using the camera. The power zoom lens This camera is equipped with other bright light This may be copyrighted. Clean the ... to make a trial recording to remove it before use the camera near a window or outdoors. If moisture condensation occurs, see page 116 and follow the instructions on the flash surface to become discolored or to stick to the flash surface, resulting in the rain or under similar...

Operating Instructions
Page 5
... of Macromedia, Inc. Trademarks • is a trademark of Sony Corporation. • "Memory Stick," , "Memory Stick PRO", , "Memory Stick Duo", , "Memory Stick PRO Duo", , "MagicGate" and are trademarks of Sony Corporation. • Picture Package is capable of reproducing sharp images with the quality standards of Carl Zeiss in Germany. Carl Zeiss lens This camera is equipped with a Carl Zeiss lens which is...
... of Macromedia, Inc. Trademarks • is a trademark of Sony Corporation. • "Memory Stick," , "Memory Stick PRO", , "Memory Stick Duo", , "Memory Stick PRO Duo", , "MagicGate" and are trademarks of Sony Corporation. • Picture Package is capable of reproducing sharp images with the quality standards of Carl Zeiss in Germany. Carl Zeiss lens This camera is equipped with a Carl Zeiss lens which is...
Operating Instructions
Page 6
... batteries 11 Inserting the batteries 13 Using the AC adaptor 16 Using your camera abroad 16 Turning on a TV screen 39 Deleting still images Deleting images 41 Formatting a "Memory Stick 43 Before advanced operations How to setup and operate your camera 17 How to the subject - Multi Burst 60 Shooting with manual shutter speed...-ups - AF Mode 49 Setting the distance to use the control button 17 Setting the date and time 18 Shooting still images Inserting and removing a "Memory Stick 20 Setting the still image size 21 Image size and quality 22 Basic still image shooting -
... batteries 11 Inserting the batteries 13 Using the AC adaptor 16 Using your camera abroad 16 Turning on a TV screen 39 Deleting still images Deleting images 41 Formatting a "Memory Stick 43 Before advanced operations How to setup and operate your camera 17 How to the subject - Multi Burst 60 Shooting with manual shutter speed...-ups - AF Mode 49 Setting the distance to use the control button 17 Setting the date and time 18 Shooting still images Inserting and removing a "Memory Stick 20 Setting the still image size 21 Image size and quality 22 Basic still image shooting -

Operating Instructions
Page 7
...Enlarging a portion of images that can be saved or shooting time 109 Menu items 110 SET UP items 114 Precautions 116 On "Memory Stick 117 On Nickel-Metal Hydride batteries .......118 On the battery charger 119 Specifications 120 The LCD screen 122 Index Index 126 7 For... back successive images - For Windows users 82 Installing the USB driver 83 Connecting the camera to your computer 84 Copying images 85 Viewing the images on your computer Copying images to your camera 89 Installing "Picture Package 89 Copying images using "Picture Package 91 Using "Picture Package...
...Enlarging a portion of images that can be saved or shooting time 109 Menu items 110 SET UP items 114 Precautions 116 On "Memory Stick 117 On Nickel-Metal Hydride batteries .......118 On the battery charger 119 Specifications 120 The LCD screen 122 Index Index 126 7 For... back successive images - For Windows users 82 Installing the USB driver 83 Connecting the camera to your computer 84 Copying images 85 Viewing the images on your computer Copying images to your camera 89 Installing "Picture Package 89 Copying images using "Picture Package 91 Using "Picture Package...

Operating Instructions
Page 8
You will be unable to firmly secure the camera to tripods having longer screws, and may damage the camera. Identifying the parts See the pages in parentheses for details of operation. 1 2 3 4 5 6 7 8 9 0 qa qs qd qf qg qh qj qk 8 A POWER button (17) B POWER lamp ...timer lamp (29)/ AF illuminator (31, 114) F Lens G RESET button (96) H Speaker I Tripod receptacle J Battery cover (13) K OPEN button (13) L Flash (30) M Finder window N Jack/"Memory Stick" cover O DC IN jack (16) P A/V OUT (MONO) jack (39) Q Access lamp (20) R DC IN jack cover (16) • Use a tripod with a screw length of less...
You will be unable to firmly secure the camera to tripods having longer screws, and may damage the camera. Identifying the parts See the pages in parentheses for details of operation. 1 2 3 4 5 6 7 8 9 0 qa qs qd qf qg qh qj qk 8 A POWER button (17) B POWER lamp ...timer lamp (29)/ AF illuminator (31, 114) F Lens G RESET button (96) H Speaker I Tripod receptacle J Battery cover (13) K OPEN button (13) L Flash (30) M Finder window N Jack/"Memory Stick" cover O DC IN jack (16) P A/V OUT (MONO) jack (39) Q Access lamp (20) R DC IN jack cover (16) • Use a tripod with a screw length of less...

Operating Instructions
Page 15
... SET UP settings - On Mail) Off Approx. 70 Approx. 35 Approx. 150 Approx. 75 • When using Sony alkaline batteries 1) Shooting in the SET UP settings - [AF Mode] is set to [Single] The measurement method is... every ten times - [AF Mode] is set to [Bright] in the following conditions: - The camera has been turned on CIPA standard. (CIPA: Camera & Imaging Products Association) Viewing still images2) NH-AA-DA (2) (supplied) Image size No. The ... be recorded or viewed take into account changing the supplied "Memory Stick" as the number of uses increases and over time (page 118).
... SET UP settings - On Mail) Off Approx. 70 Approx. 35 Approx. 150 Approx. 75 • When using Sony alkaline batteries 1) Shooting in the SET UP settings - [AF Mode] is set to [Single] The measurement method is... every ten times - [AF Mode] is set to [Bright] in the following conditions: - The camera has been turned on CIPA standard. (CIPA: Camera & Imaging Products Association) Viewing still images2) NH-AA-DA (2) (supplied) Image size No. The ... be recorded or viewed take into account changing the supplied "Memory Stick" as the number of uses increases and over time (page 118).

Operating Instructions
Page 20
... lit, the camera is securely seated in until it is recording or reading an image. Never remove the "Memory Stick" or turn off the power at this time. The data may not be corrupted. 20 To remove a "Memory Stick" Open the jack/"Memory Stick" cover, then push the "Memory Stick" to record or display images with the "Memory Stick." 3 Access lamp...
... lit, the camera is securely seated in until it is recording or reading an image. Never remove the "Memory Stick" or turn off the power at this time. The data may not be corrupted. 20 To remove a "Memory Stick" Open the jack/"Memory Stick" cover, then push the "Memory Stick" to record or display images with the "Memory Stick." 3 Access lamp...

Operating Instructions
Page 22
...; 1944 pixels=5,038,848 pixels 1944 480 Display size: VGA (E-Mail) Image size: VGA 640 pixels × 480 pixels=307,200 pixels Examples based on a "Memory Stick" decreases. The image size is the highest image quality on the right and choose the image size and image quality appropriate to shoot. It is... example, a 5M (2592×1944) size image indicates that can select from Fine (high quality) or Standard image quality. Refer to the table on this camera. 2) Images are 2592 pixels horizontally and 1944 pixels vertically.
...; 1944 pixels=5,038,848 pixels 1944 480 Display size: VGA (E-Mail) Image size: VGA 640 pixels × 480 pixels=307,200 pixels Examples based on a "Memory Stick" decreases. The image size is the highest image quality on the right and choose the image size and image quality appropriate to shoot. It is... example, a 5M (2592×1944) size image indicates that can select from Fine (high quality) or Standard image quality. Refer to the table on this camera. 2) Images are 2592 pixels horizontally and 1944 pixels vertically.

Operating Instructions
Page 23
...; Number of shooting images can resize the images later (Resize function, see page 46. • When images recorded using earlier Sony models are played back on this camera, the display may differ from the actual image size. • When the images are shown below. (Units: number of remaining... image quality • For recording a larger number of images Standard High compression (normal) The number of images that can be saved in a "Memory Stick"3) The number of images that can be saved in other modes, see page 109. 4) For more information about the image quality (compression ratio), ...
...; Number of shooting images can resize the images later (Resize function, see page 46. • When images recorded using earlier Sony models are played back on this camera, the display may differ from the actual image size. • When the images are shown below. (Units: number of remaining... image quality • For recording a larger number of images Standard High compression (normal) The number of images that can be saved in a "Memory Stick"3) The number of images that can be saved in other modes, see page 109. 4) For more information about the image quality (compression ratio), ...

Operating Instructions
Page 24
Basic still image shooting - Using auto adjustment mode Holding the camera correctly Mode dial When shooting pictures with the camera, be stored in the "Memory Stick" (page 47). 2 , Hold the camera steadily with both hands and position the subject in the center of the focus frame. • The minimum focal distance ...) mode (page 28). • The frame indicated on the power or when the zoom function is working (page 26). • This camera can create new folders and select folders to be careful so that your fingers do not block the lens portion, finder window, flash emitter, ...
Basic still image shooting - Using auto adjustment mode Holding the camera correctly Mode dial When shooting pictures with the camera, be stored in the "Memory Stick" (page 47). 2 , Hold the camera steadily with both hands and position the subject in the center of the focus frame. • The minimum focal distance ...) mode (page 28). • The frame indicated on the power or when the zoom function is working (page 26). • This camera can create new folders and select folders to be careful so that your fingers do not block the lens portion, finder window, flash emitter, ...

Operating Instructions
Page 25
...4 , Press the shutter button fully down the batteries (page 17). When the recording lamp (page 9) goes out, you do not operate the camera for a split second depending on , the AE/AF lock indicator changes to flashing slowly. In such cases, release the shutter button, then recompose the ... playback, the camera turns off automatically to the subject position and size, and "AF mode" which sets the focus start/finish timing. See page 48 for shooting. (The LCD screen may have difficulty working under the following conditions. The beep sounds but in the "Memory Stick." The shutter ...
...4 , Press the shutter button fully down the batteries (page 17). When the recording lamp (page 9) goes out, you do not operate the camera for a split second depending on , the AE/AF lock indicator changes to flashing slowly. In such cases, release the shutter button, then recompose the ... playback, the camera turns off automatically to the subject position and size, and "AF mode" which sets the focus start/finish timing. See page 48 for shooting. (The LCD screen may have difficulty working under the following conditions. The beep sounds but in the "Memory Stick." The shutter ...

Operating Instructions
Page 43
...this process is also called "initialization." • The "Memory Stick" supplied with b on the control button, then press z. To cancel deleting Select [Exit] with your camera and commercially available "Memory Stick" are already formatted, and can be used immediately. ... to format into the camera. • The term "formatting" means preparing a "Memory Stick" to record images; The message "Access" appears, and the images with B on the control button, then press z. Formatting a "Memory Stick" 1 , Insert the "Memory Stick" you format a "Memory Stick," be permanently erased. Select...
...this process is also called "initialization." • The "Memory Stick" supplied with b on the control button, then press z. To cancel deleting Select [Exit] with your camera and commercially available "Memory Stick" are already formatted, and can be used immediately. ... to format into the camera. • The term "formatting" means preparing a "Memory Stick" to record images; The message "Access" appears, and the images with B on the control button, then press z. Formatting a "Memory Stick" 1 , Insert the "Memory Stick" you format a "Memory Stick," be permanently erased. Select...

Operating Instructions
Page 44
folder: Cancel Change REC. OK Cancel 2 , Set the mode dial to SET UP, and turn on the power. 3 , Select (Memory Stick Tool) with v on the control button. Select [OK] with B, then press B. To cancel the formatting Select [Cancel] with V on the control button, then press z. 4 , Select [OK] with v/V on the control button, then press z. The message "Formatting" appears. Mode dial Memory Stick Tool Format: OK Create REC. When this message disappears, the format is complete. 44 Select [Format] with v, then press z. folder: 1 2 Format All data will be erased Ready?
folder: Cancel Change REC. OK Cancel 2 , Set the mode dial to SET UP, and turn on the power. 3 , Select (Memory Stick Tool) with v on the control button. Select [OK] with B, then press B. To cancel the formatting Select [Cancel] with V on the control button, then press z. 4 , Select [OK] with v/V on the control button, then press z. The message "Formatting" appears. Mode dial Memory Stick Tool Format: OK Create REC. When this message disappears, the format is complete. 44 Select [Format] with v, then press z. folder: 1 2 Format All data will be erased Ready?

Operating Instructions
Page 47
...step 2 or 3. • Once you create a new folder, you cannot delete the new folder with v/V, [Change REC. b Select (Memory Stick Tool) with the camera. • Images are recorded in the newly created folder until a different folder is created with a number one folder. Select REC. Of ... 4,000 images can create multiple folders within a "Memory Stick." Mode dial MENU Control button • Up to "999MSDCF." OK Cancel c Select [OK] with v/V, [Create REC. Before advanced operations Creating or selecting a folder Your camera can be stored in one higher than the largest...
...step 2 or 3. • Once you create a new folder, you cannot delete the new folder with v/V, [Change REC. b Select (Memory Stick Tool) with the camera. • Images are recorded in the newly created folder until a different folder is created with a number one folder. Select REC. Of ... 4,000 images can create multiple folders within a "Memory Stick." Mode dial MENU Control button • Up to "999MSDCF." OK Cancel c Select [OK] with v/V, [Create REC. Before advanced operations Creating or selecting a folder Your camera can be stored in one higher than the largest...

Operating Instructions
Page 59
...with v/V. +: Makes the flash level higher than normal. a Set the mode dial to M, you press and hold down the shutter button, the camera records the maximum number of images you press the shutter button. • When the mode dial is set to normal mode Select [Normal] in ...is set to , P, M, , or . Shooting continuously This mode is full, recording stops even if you cannot 59 select shutter speeds of the "Memory Stick" is used for continuous shooting. b Press MENU. The menu appears. If you can shoot per one shooting depends on the image size and image quality...
...with v/V. +: Makes the flash level higher than normal. a Set the mode dial to M, you press and hold down the shutter button, the camera records the maximum number of images you press the shutter button. • When the mode dial is set to normal mode Select [Normal] in ...is set to , P, M, , or . Shooting continuously This mode is full, recording stops even if you cannot 59 select shutter speeds of the "Memory Stick" is used for continuous shooting. b Press MENU. The menu appears. If you can shoot per one shooting depends on the image size and image quality...

Operating Instructions
Page 62
...; SINGLE DISPLAY • When no images are stored. To cancel the selection In step 5, select [Cancel]. b Press MENU. When multiple folders are created in the "Memory Stick" When the first or last image in this folder" appears. 62 Mode dial MENU Control button a Set the mode dial to both the previous and...
...; SINGLE DISPLAY • When no images are stored. To cancel the selection In step 5, select [Cancel]. b Press MENU. When multiple folders are created in the "Memory Stick" When the first or last image in this folder" appears. 62 Mode dial MENU Control button a Set the mode dial to both the previous and...

Operating Instructions
Page 64
b Press MENU. All: Plays back all images stored in a continuous loop. Repeat On: Plays back images in the "Memory Stick." To cancel the slide show playback Press z, select [Exit] with B, then press z again. To stop slide show setting Select [Cancel] in the selected recording folder, ...
b Press MENU. All: Plays back all images stored in a continuous loop. Repeat On: Plays back images in the "Memory Stick." To cancel the slide show playback Press z, select [Exit] with B, then press z again. To stop slide show setting Select [Cancel] in the selected recording folder, ...

Operating Instructions
Page 67
...single-image mode a Set the mode dial to display a sixteen-image index screen. To cancel the protection Press z again in the "Memory Stick" even if images are protected, and these images cannot be recovered. • It may take some time to display the index (nine...protected. c Press MENU. d Select - (Protect) with v/V/b/B, then press z. The menu appears. Mode dial MENU Control button • Note that formatting the "Memory Stick" erases all the data in step 4 or 5. g Press MENU. 67 Still image editing Press (index) twice to . Protecting images - In index (nine...
...single-image mode a Set the mode dial to display a sixteen-image index screen. To cancel the protection Press z again in the "Memory Stick" even if images are protected, and these images cannot be recovered. • It may take some time to display the index (nine...protected. c Press MENU. d Select - (Protect) with v/V/b/B, then press z. The menu appears. Mode dial MENU Control button • Note that formatting the "Memory Stick" erases all the data in step 4 or 5. g Press MENU. 67 Still image editing Press (index) twice to . Protecting images - In index (nine...

Operating Instructions
Page 77
... camera starts recording the image and sound. Each time you set the image size to [640(Fine)] while connecting the A/V connecting cable to . A histogram is full. Inserting the date and time • When you press , the status of the indicators, see page 109. Shooting movies You can be recorded only on "Memory Stick... PRO." • Recording stops when the "Memory Stick" is not displayed. Flash -
... camera starts recording the image and sound. Each time you set the image size to [640(Fine)] while connecting the A/V connecting cable to . A histogram is full. Inserting the date and time • When you press , the status of the indicators, see page 109. Shooting movies You can be recorded only on "Memory Stick... PRO." • Recording stops when the "Memory Stick" is not displayed. Flash -


