Handycam® Handbook
Page 9
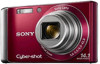
Table of contents Operation Search MENU/Settings Search Adjusting exposure EV 44 Changing focus position Focus 48 Face Detection 54 Changing image size Image Size 40 Deleting images Delete 36, 63 Format... a series of Slideshow 58 images in order Shooting/Viewing with Easy Shooting 20 easy-to-see indicators Printing images with the date Using the "PMB (Picture Motion Browser)" 101 Changing date and time settings Area Setting 94 Date & Time Setting 95 Initializing settings Initialize 79 Printing images Print 107 Viewing on TVs Viewing images on a TV 96 Index 9GB
Table of contents Operation Search MENU/Settings Search Adjusting exposure EV 44 Changing focus position Focus 48 Face Detection 54 Changing image size Image Size 40 Deleting images Delete 36, 63 Format... a series of Slideshow 58 images in order Shooting/Viewing with Easy Shooting 20 easy-to-see indicators Printing images with the date Using the "PMB (Picture Motion Browser)" 101 Changing date and time settings Area Setting 94 Date & Time Setting 95 Initializing settings Initialize 79 Printing images Print 107 Viewing on TVs Viewing images on a TV 96 Index 9GB
Handycam® Handbook
Page 13
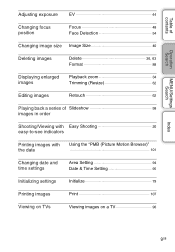
Operation Search MENU/Settings Search Index 13GB Table of contents Categories Clock Settings Items Area Setting Date & Time Setting Notes • [Shooting Settings] appears only when settings have been entered from shooting mode. • [Memory Card Tool] appears only when a memory card is inserted in the camera, while [Internal Memory Tool] appears only when a memory card is not inserted.
Operation Search MENU/Settings Search Index 13GB Table of contents Categories Clock Settings Items Area Setting Date & Time Setting Notes • [Shooting Settings] appears only when settings have been entered from shooting mode. • [Memory Card Tool] appears only when a memory card is inserted in the camera, while [Internal Memory Tool] appears only when a memory card is not inserted.

Handycam® Handbook
Page 16
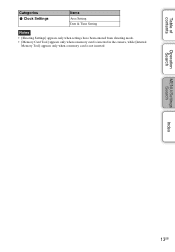
...Settings Search B Display z ISO400 125 F3.6 +2.0EV REC Standby 0:12 101-0012 2010 1 1 9:30 AM C Display 96 12/12 100Min Indication AE/AF lock ISO number NR slow shutter Shutter speed Aperture value Exposure Value AF range finder frame indicator Recording a movie/Standby a movie Recording time (m:s) Folder-file number Recorded date/time... of the playback image Indication Recording folder Playback folder Number of recordable images Image number/Number of images recorded in date range, selected folder Recordable time Recording/Playback...
...Settings Search B Display z ISO400 125 F3.6 +2.0EV REC Standby 0:12 101-0012 2010 1 1 9:30 AM C Display 96 12/12 100Min Indication AE/AF lock ISO number NR slow shutter Shutter speed Aperture value Exposure Value AF range finder frame indicator Recording a movie/Standby a movie Recording time (m:s) Folder-file number Recorded date/time... of the playback image Indication Recording folder Playback folder Number of recordable images Image number/Number of images recorded in date range, selected folder Recordable time Recording/Playback...

Handycam® Handbook
Page 35
...yet again to view images with the Calendar while playing back in [Date View]. 3 To return to (Easy Shooting), you cannot view images in index mode, select the date with the Calendar When [View Mode] is set to the single-image screen, select an image with v/V. zDisplaying ...images of contents Operation Search MENU/Settings Search Image Index Displays multiple images at the same time. 1 Press the (Playback) button to switch...
...yet again to view images with the Calendar while playing back in [Date View]. 3 To return to (Easy Shooting), you cannot view images in index mode, select the date with the Calendar When [View Mode] is set to the single-image screen, select an image with v/V. zDisplaying ...images of contents Operation Search MENU/Settings Search Image Index Displays multiple images at the same time. 1 Press the (Playback) button to switch...

Handycam® Handbook
Page 59
... the images in order. Music Specifies the music to be played during slideshows. Music2 The default setting for a [Stylish] slideshow. All Plays a slideshow of a movie scene. If the playback time of images with music] t z on the control button to display the volume control screen, ...is Folder View. You can thoroughly enjoy your images. Music3 The default setting for a [Nostalgic] slideshow. Notes • You cannot play back panoramic images. • Settings other than one background music track. This Date Plays a slideshow of a movie is long, an image is taken from...
... the images in order. Music Specifies the music to be played during slideshows. Music2 The default setting for a [Stylish] slideshow. All Plays a slideshow of a movie scene. If the playback time of images with music] t z on the control button to display the volume control screen, ...is Folder View. You can thoroughly enjoy your images. Music3 The default setting for a [Nostalgic] slideshow. Notes • You cannot play back panoramic images. • Settings other than one background music track. This Date Plays a slideshow of a movie is long, an image is taken from...

Handycam® Handbook
Page 95
... Operation Search Date & Time Setting Sets the date and time again. 1 MENU t (Settings) t (Clock Settings) t [Date & Time Setting] t desired setting t z on images. Note • The camera does not have a feature for superimposing dates on the control button 2 Set the numeric value and desired settings with the date. By using "PMB" in the CDROM (supplied), you can print or save images with v/V/b/B. 3 [OK] t z Date & Time Format Daylight Savings Date & Time You can...
... Operation Search Date & Time Setting Sets the date and time again. 1 MENU t (Settings) t (Clock Settings) t [Date & Time Setting] t desired setting t z on images. Note • The camera does not have a feature for superimposing dates on the control button 2 Set the numeric value and desired settings with the date. By using "PMB" in the CDROM (supplied), you can print or save images with v/V/b/B. 3 [OK] t z Date & Time Format Daylight Savings Date & Time You can...
Handycam® Handbook
Page 102
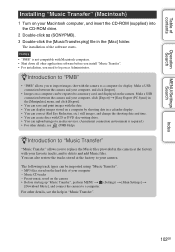
...correct (Red Eye Reduction, etc.) still images, and change the shooting date and time. • You can create discs with the date. • You can also restore the tracks stored at the factory with your camera. Make a USB connection between the camera and your computer, and click [... • Images on the camera • Before starting up "Music Transfer", perform MENU t (Settings) t [Main Settings] t [Download Music], and connect the camera to your favorite tracks, and to media services. (An internet connection environment is not compatible with the camera to a computer for display....
...correct (Red Eye Reduction, etc.) still images, and change the shooting date and time. • You can create discs with the date. • You can also restore the tracks stored at the factory with your camera. Make a USB connection between the camera and your computer, and click [... • Images on the camera • Before starting up "Music Transfer", perform MENU t (Settings) t [Main Settings] t [Download Music], and connect the camera to your favorite tracks, and to media services. (An internet connection environment is not compatible with the camera to a computer for display....
Handycam® Handbook
Page 108
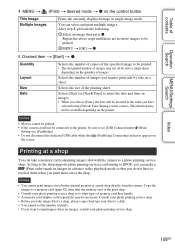
...Settings) to the printer, be available depending on a sheet. You can take image data to a shop, always copy (back up) your photo printing service shop. • Before you take a memory card containing images shot with the camera to reselect them out at a shop You can select and print multiple images. Selects [Date] or [Day&Time...] to insert the date and time on the control button This Image Multiple Images...
...Settings) to the printer, be available depending on a sheet. You can take image data to a shop, always copy (back up) your photo printing service shop. • Before you take a memory card containing images shot with the camera to reselect them out at a shop You can select and print multiple images. Selects [Date] or [Day&Time...] to insert the date and time on the control button This Image Multiple Images...
Handycam® Handbook
Page 111
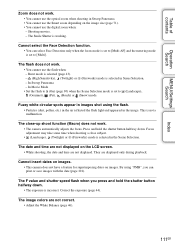
... with the date (page 101). Focus adjustment may take some time when shooting a close -up shoot function (Macro) does not work. • The camera automatically adjusts the focus. The flash does not work. • You cannot use the digital zoom when: - In Movie Mode • Set the flash .... In Sweep Panorama - Table of contents Operation Search MENU/Settings Search Index Zoom does not work. • You cannot use the optical zoom when shooting in Scene Selection. - Fuzzy white circular spots appear in images shot using "PMB", you press and hold the shutter button halfway...
... with the date (page 101). Focus adjustment may take some time when shooting a close -up shoot function (Macro) does not work. • The camera automatically adjusts the focus. The flash does not work. • You cannot use the digital zoom when: - In Movie Mode • Set the flash .... In Sweep Panorama - Table of contents Operation Search MENU/Settings Search Index Zoom does not work. • You cannot use the optical zoom when shooting in Scene Selection. - Fuzzy white circular spots appear in images shot using "PMB", you press and hold the shutter button halfway...
Handycam® Handbook
Page 112
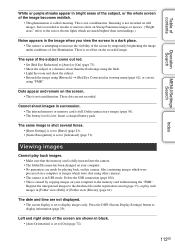
...cameras. • The camera is in bright areas of the subject, or the whole screen of the image becomes reddish. • This phenomenon is set to [Burst] (page 43). • [Scene Recognition] is called smearing. The same image is shot several times. • [Burst Settings] is set....) Noise appears in the image when you view the screen in [Folder view (Still)] or [Folder view (Movie)] (page 61). Smearing is not recorded on the...USB connection (page 104). • This is set to display information (page 29). The date and time are much brighter than the flash range using the ...
...cameras. • The camera is in bright areas of the subject, or the whole screen of the image becomes reddish. • This phenomenon is set to [Burst] (page 43). • [Scene Recognition] is called smearing. The same image is shot several times. • [Burst Settings] is set....) Noise appears in the image when you view the screen in [Folder view (Still)] or [Folder view (Movie)] (page 61). Smearing is not recorded on the...USB connection (page 104). • This is set to display information (page 29). The date and time are much brighter than the flash range using the ...
Handycam® Handbook
Page 116
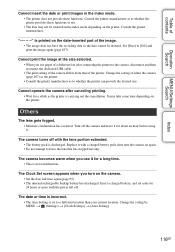
... these functions. Consult the printer manufacturer as the printer is printed on the date-inserted part of contents Operation Search MENU/Settings Search Index Cannot insert the date or print images in the index mode depending on the camera. • Set the date and time again (page 95). • The internal rechargeable backup battery has discharged. Replace...
... these functions. Consult the printer manufacturer as the printer is printed on the date-inserted part of contents Operation Search MENU/Settings Search Index Cannot insert the date or print images in the index mode depending on the camera. • Set the date and time again (page 95). • The internal rechargeable backup battery has discharged. Replace...
Handycam® Handbook
Page 119
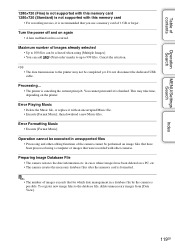
... be executed in a database file by the camera is recommended that were recorded with other editing functions of the camera cannot be performed on again • A lens malfunction has occurred. Table of contents Operation Search MENU/Settings Search Index 1280×720 (Fine) is ... then download a new Music files. Preparing Image Database File • The camera restores the date information etc. To register new image files to the printer may take time, depending on a PC, etc. • The camera creates the necessary database files after the memory card is formatted. • The...
... be executed in a database file by the camera is recommended that were recorded with other editing functions of the camera cannot be performed on again • A lens malfunction has occurred. Table of contents Operation Search MENU/Settings Search Index 1280×720 (Fine) is ... then download a new Music files. Preparing Image Database File • The camera restores the date information etc. To register new image files to the printer may take time, depending on a PC, etc. • The camera creates the necessary database files after the memory card is formatted. • The...
Handycam® Handbook
Page 125
... Guide 77 G Gourmet 25 Grid Line 69 H HDMI jack 97 HDMI Resolution 80 High Sensitivity 25 Index 125GB Table of contents Operation Search MENU/Settings Search Index Numerics 1080i 80 480p/576p 80 A AF Illuminator 68 AF range finder frame 48 Anti Blink 57 Area...Change REC.Folder 90 Clock Settings 95 Computer 100 Importing images 103 Connecting Computer 103 Printer 107 TV 96 Continuous Playback 58 Control button 14 Copy 92 Create REC.Folder 89 CTRL FOR HDMI 81 D Date & Time Setting 95 Delete 36, 63 Delete REC.Folder 91 Demo Mode 78 Digital Zoom 71 DISP 29 Disp...
... Guide 77 G Gourmet 25 Grid Line 69 H HDMI jack 97 HDMI Resolution 80 High Sensitivity 25 Index 125GB Table of contents Operation Search MENU/Settings Search Index Numerics 1080i 80 480p/576p 80 A AF Illuminator 68 AF range finder frame 48 Anti Blink 57 Area...Change REC.Folder 90 Clock Settings 95 Computer 100 Importing images 103 Connecting Computer 103 Printer 107 TV 96 Continuous Playback 58 Control button 14 Copy 92 Create REC.Folder 89 CTRL FOR HDMI 81 D Date & Time Setting 95 Delete 36, 63 Delete REC.Folder 91 Demo Mode 78 Digital Zoom 71 DISP 29 Disp...

Instruction Manual
Page 17
...: Selects Daylight Savings On/Off. x Setting the date and time again Press the MENU button, then select (Settings) t (Clock Settings). GB 17 The camera is indicated as 12:00 AM, and noon as 12:00 PM. 4 Follow the instructions on the control button, then press z. 5 Select [OK], then press z. Date & Time: Sets the date and time. ON/OFF (Power) button 2 Select...
...: Selects Daylight Savings On/Off. x Setting the date and time again Press the MENU button, then select (Settings) t (Clock Settings). GB 17 The camera is indicated as 12:00 AM, and noon as 12:00 PM. 4 Follow the instructions on the control button, then press z. 5 Select [OK], then press z. Date & Time: Sets the date and time. ON/OFF (Power) button 2 Select...
Instruction Manual
Page 26
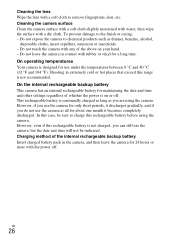
... you can still use the camera for only short periods, it becomes completely discharged. Charging method of the above on or off . Cleaning the camera surface Clean the camera surface with a soft cloth slightly moistened with water, then wipe the surface with rubber or vinyl for maintaining the date and time and other settings regardless of whether...
... you can still use the camera for only short periods, it becomes completely discharged. Charging method of the above on or off . Cleaning the camera surface Clean the camera surface with a soft cloth slightly moistened with water, then wipe the surface with rubber or vinyl for maintaining the date and time and other settings regardless of whether...


