
Operating Instructions
Page 5
... camera. Please consult with the limits sets out in the EMC Directive for the Customers in the U.S.A. and Canada THIS DEVICE COMPLIES WITH PART 15 OF THE FCC RULES. THIS CLASS B DIGITAL APPARATUS COMPLIES WITH CANADIAN ICES-003. 5 Attention The electromagnetic fields at the specific frequencies may regulate disposal of this product. "Memory Stick...
... camera. Please consult with the limits sets out in the EMC Directive for the Customers in the U.S.A. and Canada THIS DEVICE COMPLIES WITH PART 15 OF THE FCC RULES. THIS CLASS B DIGITAL APPARATUS COMPLIES WITH CANADIAN ICES-003. 5 Attention The electromagnetic fields at the specific frequencies may regulate disposal of this product. "Memory Stick...

Operating Instructions
Page 6
...guaranteed. Unauthorized recording of such materials may cause malfunctions. If moisture condensation occurs, see page 94 and follow the instructions on "Memory Stick" This camera turns off whenever you may want to make a trial recording to a malfunction of the pixels are operational for long periods may ...before using extremely high-precision technology so over 99.99% of your camera Trial recording Before you record one-time events, you remove the batteries or the "Memory Stick." Do not open the battery/"Memory Stick" cover while the access lamp is not possible due to make ...
...guaranteed. Unauthorized recording of such materials may cause malfunctions. If moisture condensation occurs, see page 94 and follow the instructions on "Memory Stick" This camera turns off whenever you may want to make a trial recording to a malfunction of the pixels are operational for long periods may ...before using extremely high-precision technology so over 99.99% of your camera Trial recording Before you record one-time events, you remove the batteries or the "Memory Stick." Do not open the battery/"Memory Stick" cover while the access lamp is not possible due to make ...

Operating Instructions
Page 7
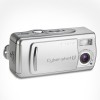
... the U.S. However, the ™ or ® marks are not actual images shot using this manual. How to hold the camera When shooting an image with the camera, be careful not to obstruct the flash or the lens with your fingers. 7... all cases in general, trademarks or registered trademarks of Sony Corporation. • Microsoft and Windows are , in this camera. Trademarks • "Memory Stick," and "MagicGate Memory Stick" are trademarks of Sony Corporation. • "Memory Stick Duo" and are trademarks of Sony Corporation. • "MagicGate" and are trademarks of their...
... the U.S. However, the ™ or ® marks are not actual images shot using this manual. How to hold the camera When shooting an image with the camera, be careful not to obstruct the flash or the lens with your fingers. 7... all cases in general, trademarks or registered trademarks of Sony Corporation. • Microsoft and Windows are , in this camera. Trademarks • "Memory Stick," and "MagicGate Memory Stick" are trademarks of Sony Corporation. • "Memory Stick Duo" and are trademarks of Sony Corporation. • "MagicGate" and are trademarks of their...

Operating Instructions
Page 8
... the LCD screen 51 Deleting images Deleting images 53 Formatting a "Memory Stick 55 Copying images Copying images to your computer 57 1 Installing the USB driver and application .......... 59 2 Preparing your camera 68 3 Connecting your camera to your computer ........ 69 4 Copying images 71 Changing "Image ...Transfer" settings 76 5 Viewing the images on your camera 19 Setting the date and time 20 Shooting still images Inserting and removing a "Memory Stick 22 Setting the still image size 23 Basic still image shooting (using auto adjustment mode...
... the LCD screen 51 Deleting images Deleting images 53 Formatting a "Memory Stick 55 Copying images Copying images to your computer 57 1 Installing the USB driver and application .......... 59 2 Preparing your camera 68 3 Connecting your camera to your computer ........ 69 4 Copying images 71 Changing "Image ...Transfer" settings 76 5 Viewing the images on your camera 19 Setting the date and time 20 Shooting still images Inserting and removing a "Memory Stick 22 Setting the still image size 23 Basic still image shooting (using auto adjustment mode...

Operating Instructions
Page 9
Troubleshooting Troubleshooting 81 Warnings and messages 88 Self-diagnosis display 89 Additional information Menu items 90 Precautions 93 On "Memory Stick 95 On Nickel Metal Hydride batteries 96 Specifications 97 LCD screen displays 99 Index 102 9
Troubleshooting Troubleshooting 81 Warnings and messages 88 Self-diagnosis display 89 Additional information Menu items 90 Precautions 93 On "Memory Stick 95 On Nickel Metal Hydride batteries 96 Specifications 97 LCD screen displays 99 Index 102 9

Operating Instructions
Page 11
...LCD screen B Flash charge lamp (orange) (33) C MENU button D Control button Menu on: v/V Menu off: /SCENE (32, 36) E EXEC button 6 F Hook for neck strap G Battery/"Memory Stick" cover 1 7 H OPEN button (15) I Access lamp (23) 2 8 J USB jack (69) K USB jack cover 9 L RESET button (bottom surface) (81) 3 0 How to... use the control button and EXEC button To change the current settings of the camera, 4 qa bring up the menu, and use the control button to make the changes. 5 qs For each item, press MENU and press v/V on...
...LCD screen B Flash charge lamp (orange) (33) C MENU button D Control button Menu on: v/V Menu off: /SCENE (32, 36) E EXEC button 6 F Hook for neck strap G Battery/"Memory Stick" cover 1 7 H OPEN button (15) I Access lamp (23) 2 8 J USB jack (69) K USB jack cover 9 L RESET button (bottom surface) (81) 3 0 How to... use the control button and EXEC button To change the current settings of the camera, 4 qa bring up the menu, and use the control button to make the changes. 5 qs For each item, press MENU and press v/V on...

Operating Instructions
Page 15
...Battery remaining guidelines Sufficient power remaining Battery half full Battery low, recording/playback will stop soon. Inserting the batteries 1 , Open the battery/"Memory Stick" cover. Getting started Battery remaining indicator (when using Nickel Metal Hydride batteries) As the battery power decreases with MENU and v/V on the... control button to turn it on. • Based on the conditions under which the camera is being used and the state of the charge, or on the environment, this information may not be correctly indicated. • The ...
...Battery remaining guidelines Sufficient power remaining Battery half full Battery low, recording/playback will stop soon. Inserting the batteries 1 , Open the battery/"Memory Stick" cover. Getting started Battery remaining indicator (when using Nickel Metal Hydride batteries) As the battery power decreases with MENU and v/V on the... control button to turn it on. • Based on the conditions under which the camera is being used and the state of the charge, or on the environment, this information may not be correctly indicated. • The ...

Operating Instructions
Page 16
...terminals and contacts can significantly shorten the operating time provided by the batteries. 3 , Close the battery/"Memory Stick" cover. To remove the batteries Hold the camera with the battery/"Memory Stick" cover facing upward, open the cover, and remove the batteries. • Be careful not to the... +/- Close the battery/"Memory Stick" cover while holding the batteries in. marks inside the battery case. • From ...
...terminals and contacts can significantly shorten the operating time provided by the batteries. 3 , Close the battery/"Memory Stick" cover. To remove the batteries Hold the camera with the battery/"Memory Stick" cover facing upward, open the cover, and remove the batteries. • Be careful not to the... +/- Close the battery/"Memory Stick" cover while holding the batteries in. marks inside the battery case. • From ...

Operating Instructions
Page 17
... of 1280×960 can be recorded or viewed take into account changing the supplied "Memory Stick" as necessary. Shooting still images Under the average conditions*1) Image size NH-AAA-DI (2) No. The power turns on this camera. 17 Getting started Battery life and number of images that can be recorded/viewed The...
... of 1280×960 can be recorded or viewed take into account changing the supplied "Memory Stick" as necessary. Shooting still images Under the average conditions*1) Image size NH-AAA-DI (2) No. The power turns on this camera. 17 Getting started Battery life and number of images that can be recorded/viewed The...

Operating Instructions
Page 22
... record or display images in until it clicks. • Push the "Memory Stick" all of the arrow 1 while pressing OPEN. The battery/"Memory Stick" cover opens in the connector. Inserting and removing a "Memory Stick" Shooting still images Connector side 1 , Open the battery/"Memory Stick" cover. Holding the "Memory Stick" as shown in the illustration, insert it all the way in...
... record or display images in until it clicks. • Push the "Memory Stick" all of the arrow 1 while pressing OPEN. The battery/"Memory Stick" cover opens in the connector. Inserting and removing a "Memory Stick" Shooting still images Connector side 1 , Open the battery/"Memory Stick" cover. Holding the "Memory Stick" as shown in the illustration, insert it all the way in...

Operating Instructions
Page 23
..., it means that image data is being read or written. The menu appears on the power, then press MENU. To remove a "Memory Stick" Open the battery/"Memory Stick" cover, then push the "Memory Stick" to STILL, and turn on the LCD screen. • Open the lens cover when closed. 23 Shooting still images Setting the still...
..., it means that image data is being read or written. The menu appears on the power, then press MENU. To remove a "Memory Stick" Open the battery/"Memory Stick" cover, then push the "Memory Stick" to STILL, and turn on the LCD screen. • Open the lens cover when closed. 23 Shooting still images Setting the still...

Operating Instructions
Page 25
... size 1632×1224 640×480 Usage Printing A4 size images Attaching to e-mail Number of images that you can record in a "Memory Stick" (Units: number of images) Image size 1632×1224 Capacity 640×480 8MB 15 80 16MB 30 160 32MB 61 325 64MB 122 655 ... an image size appropriate for the kind of pixels. 25 You can choose from the following table. Images viewed on the LCD screen of the camera all appear the same size. • The actual number of images may differ depending on a personal computer.
... size 1632×1224 640×480 Usage Printing A4 size images Attaching to e-mail Number of images that you can record in a "Memory Stick" (Units: number of images) Image size 1632×1224 Capacity 640×480 8MB 15 80 16MB 30 160 32MB 61 325 64MB 122 655 ... an image size appropriate for the kind of pixels. 25 You can choose from the following table. Images viewed on the LCD screen of the camera all appear the same size. • The actual number of images may differ depending on a personal computer.

Operating Instructions
Page 27
... occasions appear while recording a still image. When "RECORDING" disappears, you can shoot the next image. • When operating the camera using batteries, if you release the shutter button, the recording will be canceled. • The minimum focal distance to the subject is...camera for about three minutes during recording or playback, the camera turns off automatically to prevent wearing down the batteries (page 19). • Depending on the subject and the recording conditions, the message "SHOOT AGAIN" may on the LCD screen, and the image will be recorded in the "Memory Stick...
... occasions appear while recording a still image. When "RECORDING" disappears, you can shoot the next image. • When operating the camera using batteries, if you release the shutter button, the recording will be canceled. • The minimum focal distance to the subject is...camera for about three minutes during recording or playback, the camera turns off automatically to prevent wearing down the batteries (page 19). • Depending on the subject and the recording conditions, the message "SHOOT AGAIN" may on the LCD screen, and the image will be recorded in the "Memory Stick...

Operating Instructions
Page 49
... on the LCD screen and the camera starts recording the image. The maximum recording time is 15 seconds. • The auto focus function can set the focus at a closer distance than 1.0 m, select 0.2 m or 0.5 m with the Focus preset function (page 37). • Recording stops when the "Memory Stick" is full. • For details on...
... on the LCD screen and the camera starts recording the image. The maximum recording time is 15 seconds. • The auto focus function can set the focus at a closer distance than 1.0 m, select 0.2 m or 0.5 m with the Focus preset function (page 37). • Recording stops when the "Memory Stick" is full. • For details on...

Operating Instructions
Page 51
... time The shooting time is 15 seconds per recording. • The shooting time may vary, depending on the shooting conditions. • For numbers of the "Memory Stick." Viewing movies on the LCD screen 18/18 PLAY 0:00 MOV00018 2003 7 4 12:00PM POWER button 1 , Set the mode switch to PLAY, and press ...the POWER button to the following chart when you shot appears on the capacity of still images that can be recordable, see page 25. Image size Capacity 8MB 16MB 32MB 64MB 128MB 160×112...
... time The shooting time is 15 seconds per recording. • The shooting time may vary, depending on the shooting conditions. • For numbers of the "Memory Stick." Viewing movies on the LCD screen 18/18 PLAY 0:00 MOV00018 2003 7 4 12:00PM POWER button 1 , Set the mode switch to PLAY, and press ...the POWER button to the following chart when you shot appears on the capacity of still images that can be recordable, see page 25. Image size Capacity 8MB 16MB 32MB 64MB 128MB 160×112...

Operating Instructions
Page 54
"MEMORY STICK ACCESS" appears on the LCD screen. EXEC 4 , Select [OK] with v/V on the control button, then press EXEC. RETURN DELETE DELETE ALL INDEX DPOF DELETE OK CANCEL EXEC 3 , Select [DELETE] with v/V on the control button, then press EXEC. The image has not yet been deleted at this message disappears, the image has been deleted. To delete all the images Select [DELETE ALL] in step 4. 54 To cancel deleting Select [CANCEL] in step 3. When this point.
"MEMORY STICK ACCESS" appears on the LCD screen. EXEC 4 , Select [OK] with v/V on the control button, then press EXEC. RETURN DELETE DELETE ALL INDEX DPOF DELETE OK CANCEL EXEC 3 , Select [DELETE] with v/V on the control button, then press EXEC. The image has not yet been deleted at this message disappears, the image has been deleted. To delete all the images Select [DELETE ALL] in step 4. 54 To cancel deleting Select [CANCEL] in step 3. When this point.

Operating Instructions
Page 55
... remain sufficient power, as "FORMAT ERROR" may occur. • The term "formatting" means preparing a "Memory Stick" to format into the camera. Doing so could damage the "Memory Stick." • When you format a "Memory Stick," be used immediately. Formatting a "Memory Stick" Deleting images 1 , Insert the "Memory Stick" you want to record images; MENU 2 RETURN DELETE DELETE ALL INDEX DPOF POWER button , Press...
... remain sufficient power, as "FORMAT ERROR" may occur. • The term "formatting" means preparing a "Memory Stick" to format into the camera. Doing so could damage the "Memory Stick." • When you format a "Memory Stick," be used immediately. Formatting a "Memory Stick" Deleting images 1 , Insert the "Memory Stick" you want to record images; MENU 2 RETURN DELETE DELETE ALL INDEX DPOF POWER button , Press...

Operating Instructions
Page 58
...provided, you connect two or more USB equipment to a single computer at the factory, and a slot loading type CD-ROM drive - http://www.sony.net/ 58 iMac with the Mac OS 8.6 installed at the factory USB connector: Provided as standard Display: 800 × 600 dots or higher...operate depending on your camera, may not recover at the factory. See the Sony Website for a USB connection, [NORMAL] and [PTP]* modes. iBook or Power Mac G4 with Mac OS 8.6 installed at the same time, some equipment, including your computer When neither a USB connector nor a "Memory Stick" slot is not ...
...provided, you connect two or more USB equipment to a single computer at the factory, and a slot loading type CD-ROM drive - http://www.sony.net/ 58 iMac with the Mac OS 8.6 installed at the factory USB connector: Provided as standard Display: 800 × 600 dots or higher...operate depending on your camera, may not recover at the factory. See the Sony Website for a USB connection, [NORMAL] and [PTP]* modes. iBook or Power Mac G4 with Mac OS 8.6 installed at the same time, some equipment, including your computer When neither a USB connector nor a "Memory Stick" slot is not ...

Operating Instructions
Page 68
2 Preparing your camera 1 "Memory Stick" , Insert the "Memory Stick" with the images you want to copy into the camera. • For further details on your camera is recommended in order to a computer, it draws power from the computer side. Removing the Nickel Metal Hydride batteries before connecting the camera is connected to prevent battery deterioration. 2 , Turn on the "Memory Stick", see page 22. • When your computer. 68
2 Preparing your camera 1 "Memory Stick" , Insert the "Memory Stick" with the images you want to copy into the camera. • For further details on your camera is recommended in order to a computer, it draws power from the computer side. Removing the Nickel Metal Hydride batteries before connecting the camera is connected to prevent battery deterioration. 2 , Turn on the "Memory Stick", see page 22. • When your computer. 68

Operating Instructions
Page 70
..., the POWER button, lens cover and other controls on the camera do not function. For Windows 98 or 98SE users Do only step 5 above. 70 Never open the battery/"Memory Stick" cover at the lower right of the screen. 2 Click (Sony DSC), then click [Stop]. 3 Confirm the device on the LCD... screen. USB MODE:NORMAL 3 "USB MODE: NORMAL " appears on the confirmation screen, then click [OK]. 4 Click [OK]. Wait for Windows XP users. 5 Disconnect the USB cable or remove the "Memory Stick." For Windows 2000, Me,...
..., the POWER button, lens cover and other controls on the camera do not function. For Windows 98 or 98SE users Do only step 5 above. 70 Never open the battery/"Memory Stick" cover at the lower right of the screen. 2 Click (Sony DSC), then click [Stop]. 3 Confirm the device on the LCD... screen. USB MODE:NORMAL 3 "USB MODE: NORMAL " appears on the confirmation screen, then click [OK]. 4 Click [OK]. Wait for Windows XP users. 5 Disconnect the USB cable or remove the "Memory Stick." For Windows 2000, Me,...


