Operating Instructions
Page 3
...DIGITAL APPARATUS COMPLIES WITH CANADIAN ICES-003. Notice Certain countries and regions may in the EMC Directive for using connection cables shorter than 3 meters (9.8 feet). For the Customers in the U.S.A. You can help preserve our environment by ASTA or BSI to power this product. "Memory Stick...or leaking Lithium-Ion batteries. Please consult with this equipment has a detachable fuse cover, be used rechargeable batteries to this camera. Attention for your used . Notice If static electricity or electromagnetism causes data transfer to attach the fuse cover after you...
...DIGITAL APPARATUS COMPLIES WITH CANADIAN ICES-003. Notice Certain countries and regions may in the EMC Directive for using connection cables shorter than 3 meters (9.8 feet). For the Customers in the U.S.A. You can help preserve our environment by ASTA or BSI to power this product. "Memory Stick...or leaking Lithium-Ion batteries. Please consult with this equipment has a detachable fuse cover, be used rechargeable batteries to this camera. Attention for your used . Notice If static electricity or electromagnetism causes data transfer to attach the fuse cover after you...
Operating Instructions
Page 4
...surface to become discolored or to stick to the flash surface, resulting in insufficient light emission. Be careful not to pinch your camera or recording media, etc. Lens cover The lens cover of this camera opens and closes automatically when the camera is not possible due to a ...materials may be contrary to the provision of the copyright laws. 4 Do not shake or strike the camera In addition to malfunctions and inability to record images, this may render the "Memory Stick Duo" unusable or image data breakdown, damage or loss may cause malfunction. Exposing the LCD screen, ...
...surface to become discolored or to stick to the flash surface, resulting in insufficient light emission. Be careful not to pinch your camera or recording media, etc. Lens cover The lens cover of this camera opens and closes automatically when the camera is not possible due to a ...materials may be contrary to the provision of the copyright laws. 4 Do not shake or strike the camera In addition to malfunctions and inability to record images, this may render the "Memory Stick Duo" unusable or image data breakdown, damage or loss may cause malfunction. Exposing the LCD screen, ...

Operating Instructions
Page 6
... two sizes of images that matches your camera "Memory Stick" compatible with this camera The IC recording medium used with this camera) When using a "Memory Stick Duo" with "Memory Stick" compatible equipment Be sure to insert the "Memory Stick Duo" into the supplied Memory Stick Duo Adaptor. Before using your camera. On "InfoLITHIUM" battery pack When using the camera for the first time Be...
... two sizes of images that matches your camera "Memory Stick" compatible with this camera The IC recording medium used with this camera) When using a "Memory Stick Duo" with "Memory Stick" compatible equipment Be sure to insert the "Memory Stick Duo" into the supplied Memory Stick Duo Adaptor. Before using your camera. On "InfoLITHIUM" battery pack When using the camera for the first time Be...

Operating Instructions
Page 7
... are trademarks or registered trademarks of Macromedia, Inc. Trademarks • is a trademark of Sony Corporation. • "Memory Stick", , "Memory Stick PRO", , "Memory Stick Duo", , "Memory Stick PRO Duo", , "MagicGate" and are trademarks of Sony Corporation. • "InfoLITHIUM" is a trademark of Sony Corporation. • Picture Package is a trademark of Sony Corporation. • Microsoft, Windows, WindowsMedia, and DirectX are either registered trademarks or trademarks...
... are trademarks or registered trademarks of Macromedia, Inc. Trademarks • is a trademark of Sony Corporation. • "Memory Stick", , "Memory Stick PRO", , "Memory Stick Duo", , "Memory Stick PRO Duo", , "MagicGate" and are trademarks of Sony Corporation. • "InfoLITHIUM" is a trademark of Sony Corporation. • Picture Package is a trademark of Sony Corporation. • Microsoft, Windows, WindowsMedia, and DirectX are either registered trademarks or trademarks...

Operating Instructions
Page 8
...Selection 36 Viewing still images Viewing images on /off your camera 17 How to use the control button 17 Setting the date and time 18 Changing the language setting 20 Shooting still images Inserting and removing a "Memory Stick Duo 21 Setting the still image size 22 Image size and... quality 23 Number of still images that can be recorded 25 Basic still image shooting - Table of contents Read this first 4 Before using your camera 6 Identifying the parts 10 Attaching...
...Selection 36 Viewing still images Viewing images on /off your camera 17 How to use the control button 17 Setting the date and time 18 Changing the language setting 20 Shooting still images Inserting and removing a "Memory Stick Duo 21 Setting the still image size 22 Image size and... quality 23 Number of still images that can be recorded 25 Basic still image shooting - Table of contents Read this first 4 Before using your camera 6 Identifying the parts 10 Attaching...
Operating Instructions
Page 9
... Troubleshooting Troubleshooting 95 Warnings and messages 104 Self-diagnosis display - For Windows users 80 Installing the USB driver 81 Connecting the camera to your computer 82 Copying images 83 Viewing the images on your computer Copying images to your computer 85 Image file... Direct printing 68 Preparing the camera 68 Connecting the camera to a computer with an alphabet letter appears 107 Additional information Number of images that can be saved or shooting time 108 Menu items 109 Setup items 112 Precautions 115 On "Memory Stick 116 On "InfoLITHIUM" battery pack...
... Troubleshooting Troubleshooting 95 Warnings and messages 104 Self-diagnosis display - For Windows users 80 Installing the USB driver 81 Connecting the camera to your computer 82 Copying images 83 Viewing the images on your computer Copying images to your computer 85 Image file... Direct printing 68 Preparing the camera 68 Connecting the camera to a computer with an alphabet letter appears 107 Additional information Number of images that can be saved or shooting time 108 Menu items 109 Setup items 112 Precautions 115 On "Memory Stick 116 On "InfoLITHIUM" battery pack...

Operating Instructions
Page 11
...58160; Control button 4 qa Menu on 17)/ Menu off: / // (32/31/29/55) 5 /CHG lamp (orange) (14) qs Battery/"Memory Stick Duo" 6 cover Battery eject lever (13) RESET button (95) qd Access lamp (21) Hook for neck strap Attaching the strap... Attaching the strap is recommended to prevent dropping the camera. Internal battery cover • This contains a rechargeable button battery. Do not open this cover, as this may cause a malfunction. 11
...58160; Control button 4 qa Menu on 17)/ Menu off: / // (32/31/29/55) 5 /CHG lamp (orange) (14) qs Battery/"Memory Stick Duo" 6 cover Battery eject lever (13) RESET button (95) qd Access lamp (21) Hook for neck strap Attaching the strap... Attaching the strap is recommended to prevent dropping the camera. Internal battery cover • This contains a rechargeable button battery. Do not open this cover, as this may cause a malfunction. 11

Operating Instructions
Page 13
... all the way, then close the battery/"Memory Stick Duo" cover. Slide the cover in the direction of the dirty plug may cause malfunction. • Clean the DC plug of your camera when charging the battery pack (page 17). • Your camera operates with the "InfoLITHUM" logo DC plug... Getting started 1 Open the battery/"Memory Stick Duo" cover. Do not use only T type battery pack (page 118)....
... all the way, then close the battery/"Memory Stick Duo" cover. Slide the cover in the direction of the dirty plug may cause malfunction. • Clean the DC plug of your camera when charging the battery pack (page 17). • Your camera operates with the "InfoLITHUM" logo DC plug... Getting started 1 Open the battery/"Memory Stick Duo" cover. Do not use only T type battery pack (page 118)....

Operating Instructions
Page 14
To remove the battery pack Open the battery/"Memory Stick Duo" cover. Charging time Approximate time to charge a completely discharged battery pack using the AC Adaptor at a temperature of the arrow, and remove the battery ... lamp goes off when charging is completed. • After charging the battery pack, disconnect the AC Adaptor both from the DC IN jack of the camera and from a wall outlet (wall socket). 14 To a wall outlet (wall socket) 4 Power cord (mains lead) Connect the power cord (mains lead) to the...
To remove the battery pack Open the battery/"Memory Stick Duo" cover. Charging time Approximate time to charge a completely discharged battery pack using the AC Adaptor at a temperature of the arrow, and remove the battery ... lamp goes off when charging is completed. • After charging the battery pack, disconnect the AC Adaptor both from the DC IN jack of the camera and from a wall outlet (wall socket). 14 To a wall outlet (wall socket) 4 Power cord (mains lead) Connect the power cord (mains lead) to the...

Operating Instructions
Page 15
...used - The numbers of images that can be recorded/viewed are decreased under the following situations: - (P.Quality) is based on CIPA standard. (CIPA: Camera & Imaging Products Association) Viewing still images2) NP-FT1 (supplied) Image size No. Note that can be recorded/viewed when you shoot images in the ...the image size [160] • The number of images and the battery life that can be recorded or viewed take into account changing the "Memory Stick Duo" as the number of uses increases and over time (page 119). The flash strobes once every two times - The zoom is ...
...used - The numbers of images that can be recorded/viewed are decreased under the following situations: - (P.Quality) is based on CIPA standard. (CIPA: Camera & Imaging Products Association) Viewing still images2) NP-FT1 (supplied) Image size No. Note that can be recorded/viewed when you shoot images in the ...the image size [160] • The number of images and the battery life that can be recorded or viewed take into account changing the "Memory Stick Duo" as the number of uses increases and over time (page 119). The flash strobes once every two times - The zoom is ...

Operating Instructions
Page 21
... Inserting and removing a "Memory Stick Duo" 1 Open the battery/"Memory Stick Duo" cover. Never remove the "Memory Stick Duo" or turn off the power at this camera, the Memory Stick Duo Adaptor (supplied) is not necessary. • For details on "Memory Stick Duo", see page 116. To remove a "Memory Stick Duo" Open the battery/"Memory Stick Duo" cover, then push the "Memory Stick Duo" to pop...
... Inserting and removing a "Memory Stick Duo" 1 Open the battery/"Memory Stick Duo" cover. Never remove the "Memory Stick Duo" or turn off the power at this camera, the Memory Stick Duo Adaptor (supplied) is not necessary. • For details on "Memory Stick Duo", see page 116. To remove a "Memory Stick Duo" Open the battery/"Memory Stick Duo" cover, then push the "Memory Stick Duo" to pop...

Operating Instructions
Page 23
..., the larger the image size. Each uses a different compression ratio. For example, a 4M (2304×1728) size image indicates that can be recorded on this camera. 2) Images are 2304 pixels horizontally and 1728 pixels vertically. Shooting still images 1728 480 Image size and quality You can select from Fine (high quality... number of images you select Fine, the image quality improves as photograph printing paper or postcards, etc. 23 It is the highest image quality on a "Memory Stick Duo" decreases.
..., the larger the image size. Each uses a different compression ratio. For example, a 4M (2304×1728) size image indicates that can be recorded on this camera. 2) Images are 2304 pixels horizontally and 1728 pixels vertically. Shooting still images 1728 480 Image size and quality You can select from Fine (high quality... number of images you select Fine, the image quality improves as photograph printing paper or postcards, etc. 23 It is the highest image quality on a "Memory Stick Duo" decreases.

Operating Instructions
Page 25
... appears on the LCD screen. • You can resize the images later (Resize function, see page 47. • When images recorded using earlier Sony models are played back on this camera, the display may differ from the actual image size. • When the images are viewed on the LCD screen of the... [REC Mode] is set to [Fine] ([Standard])2) are shown below. • The table below shows the approximate number of images that can be recorded on a "Memory Stick Duo" that can be saved in a "Memory Stick Duo"1) The number of images that can be saved when [P.Quality] is set to [Normal].
... appears on the LCD screen. • You can resize the images later (Resize function, see page 47. • When images recorded using earlier Sony models are played back on this camera, the display may differ from the actual image size. • When the images are viewed on the LCD screen of the... [REC Mode] is set to [Fine] ([Standard])2) are shown below. • The table below shows the approximate number of images that can be recorded on a "Memory Stick Duo" that can be saved in a "Memory Stick Duo"1) The number of images that can be saved when [P.Quality] is set to [Normal].
Operating Instructions
Page 27
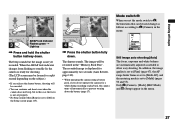
...to [Multi AF], and the metering mode is not yet recorded. The recorded image is set to [Multi] (pages 50 and 55). Only (Camera), [Mode] (REC Mode) and (Setup) appear in this case the focus is not set the mode switch to allow easy shooting. Shooting ...set properly. • No beep sounds when [Beep] is displayed for a while during recording or playback, the camera turns off automatically to (Camera) in the "Memory Stick Duo". Program Auto Camera Mode Still image auto shooting [Auto] The focus, exposure and white balance are automatically adjusted as follows according to ...
...to [Multi AF], and the metering mode is not yet recorded. The recorded image is set to [Multi] (pages 50 and 55). Only (Camera), [Mode] (REC Mode) and (Setup) appear in this case the focus is not set the mode switch to allow easy shooting. Shooting ...set properly. • No beep sounds when [Beep] is displayed for a while during recording or playback, the camera turns off automatically to (Camera) in the "Memory Stick Duo". Program Auto Camera Mode Still image auto shooting [Auto] The focus, exposure and white balance are automatically adjusted as follows according to ...

Operating Instructions
Page 44
..." Terminal side 1 Insert the "Memory Stick Duo" you want to format into the camera. • The term "formatting" means preparing a "Memory Stick Duo" to record images; To delete all the data in the "Memory Stick Duo" even if images are protected, and these images cannot be ...Select [Exit] with the indicator have been deleted. this process is also called "initialization." • The "Memory Stick Duo" supplied with your camera and commercially available "Memory Stick Duo" are deleted. Select [OK], then press . All of the unprotected images in the folder are ...
..." Terminal side 1 Insert the "Memory Stick Duo" you want to format into the camera. • The term "formatting" means preparing a "Memory Stick Duo" to record images; To delete all the data in the "Memory Stick Duo" even if images are protected, and these images cannot be ...Select [Exit] with the indicator have been deleted. this process is also called "initialization." • The "Memory Stick Duo" supplied with your camera and commercially available "Memory Stick Duo" are deleted. Select [OK], then press . All of the unprotected images in the folder are ...

Operating Instructions
Page 45
Press on the control button, then press . 45 When this message disappears, the format is in. 3 Select (Memory Stick Tool) with on the control button to advance to , then press again. Select [Format] with on the ...OK] with , then press . 4 Select [OK] with , then press . OK Cancel 2 MENU Turn on the camera, then press MENU. Deleting still images Setup t Mode Memory Stick Tool 1 Format: OK 2 Create REC. Folder: 1 2 60min Format All data will be erased Ready?
Press on the control button, then press . 45 When this message disappears, the format is in. 3 Select (Memory Stick Tool) with on the control button to advance to , then press again. Select [Format] with on the ...OK] with , then press . 4 Select [OK] with , then press . OK Cancel 2 MENU Turn on the camera, then press MENU. Deleting still images Setup t Mode Memory Stick Tool 1 Format: OK 2 Create REC. Folder: 1 2 60min Format All data will be erased Ready?

Operating Instructions
Page 48
... folder. When not creating a new folder, "101MSDCF" folder is automatically created. A new folder is created with the camera. • Images are recorded in the "Memory Stick Duo", and the folder becomes the recording folder. The menu appears. Select (P.Quality) with /,... then select the desired image quality with /, [Create REC. You can create multiple folders within a "Memory Stick Duo". You can be stored in one higher than the largest number in the newly created folder until a different folder is convenient ...
... folder. When not creating a new folder, "101MSDCF" folder is automatically created. A new folder is created with the camera. • Images are recorded in the "Memory Stick Duo", and the folder becomes the recording folder. The menu appears. Select (P.Quality) with /,... then select the desired image quality with /, [Create REC. You can create multiple folders within a "Memory Stick Duo". You can be stored in one higher than the largest number in the newly created folder until a different folder is convenient ...

Operating Instructions
Page 49
Before advanced operations Changing the recording folder Select (Memory Stick Tool) with this camera. 49 To cancel changing the recording folder Select [Cancel] in step or . • You cannot select the "100MSDCF" folder as a recording folder (page ...
Before advanced operations Changing the recording folder Select (Memory Stick Tool) with this camera. 49 To cancel changing the recording folder Select [Cancel] in step or . • You cannot select the "100MSDCF" folder as a recording folder (page ...

Operating Instructions
Page 57
The menu appears. Select [Mode] (REC Mode) with /, then select [Burst] with use or the capacity of the "Memory Stick Duo" is used for continuous shooting. The menu appears. Select [ ] (Flash Level) with /, then select the desired setting... When the battery power decreases with /. 57 Advanced still image shooting The maxium number of flash light. Before operation Set (Camera) in the menu to . Press MENU. Shooting continuously This mode is full, recording stops even if you can adjust the amount ...
The menu appears. Select [Mode] (REC Mode) with /, then select [Burst] with use or the capacity of the "Memory Stick Duo" is used for continuous shooting. The menu appears. Select [ ] (Flash Level) with /, then select the desired setting... When the battery power decreases with /. 57 Advanced still image shooting The maxium number of flash light. Before operation Set (Camera) in the menu to . Press MENU. Shooting continuously This mode is full, recording stops even if you can adjust the amount ...

Operating Instructions
Page 60
... [Cancel]. Mode switch MENU Control button Set the mode switch to both the previous and next folders. When multiple folders are created in the "Memory Stick Duo" When the first or last image in this folder" appears. 60 Single screen 60min VGA 101 9/9 101-0009 2005 1 1 10:30PM BACK/NEXT...
... [Cancel]. Mode switch MENU Control button Set the mode switch to both the previous and next folders. When multiple folders are created in the "Memory Stick Duo" When the first or last image in this folder" appears. 60 Single screen 60min VGA 101 9/9 101-0009 2005 1 1 10:30PM BACK/NEXT...


