Help Guide (Printable PDF)
Page 7
Grid Line [120] Auto Review [121] FINDER/MONITOR [122] Release w/o Card [123] Viewing Viewing still images Playing back images [124] Playback zoom [125] Image Index [126] Switching the screen display (during playback) [127] Deleting images Deleting a displayed image [128] Deleting multiple selected images [129] Playing back movies Playing back movies [130] Motion Shot Video [131] Viewing panoramic images Playing back panoramic images [132] Printing Specify Printing [133] Using viewing functions View Mode [134] Display Rotation [135] Slide Show [136]
Grid Line [120] Auto Review [121] FINDER/MONITOR [122] Release w/o Card [123] Viewing Viewing still images Playing back images [124] Playback zoom [125] Image Index [126] Switching the screen display (during playback) [127] Deleting images Deleting a displayed image [128] Deleting multiple selected images [129] Playing back movies Playing back movies [130] Motion Shot Video [131] Viewing panoramic images Playing back panoramic images [132] Printing Specify Printing [133] Using viewing functions View Mode [134] Display Rotation [135] Slide Show [136]
Help Guide (Printable PDF)
Page 88
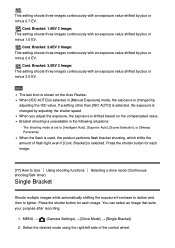
... minus 1.0 EV. Bracket shooting is unavailable in [Manual Exposure] mode, the exposure is shown on the compensated value. Bracket] is shifted based on the Auto Review. Press the shutter button for each image. You can select an image that suits your purpose after recording. 1. Select the desired mode using the right...
... minus 1.0 EV. Bracket shooting is unavailable in [Manual Exposure] mode, the exposure is shown on the compensated value. Bracket] is shifted based on the Auto Review. Press the shutter button for each image. You can select an image that suits your purpose after recording. 1. Select the desired mode using the right...
Help Guide (Printable PDF)
Page 90
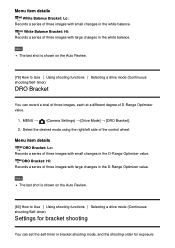
... mode using the right/left side of three images with small changes in the white balance. Note The last shot is shown on the Auto Review. [80] How to Use Using shooting functions shooting/Self-timer) DRO Bracket Selecting a drive mode (Continuous You can set the self-timer in bracket ...shooting mode, and the shooting order for exposure Note The last shot is shown on the Auto Review. [79] How to Use Using shooting functions Selecting a drive mode (Continuous shooting/Self-timer) Settings for bracket shooting You can record a total of three ...
... mode using the right/left side of three images with small changes in the white balance. Note The last shot is shown on the Auto Review. [80] How to Use Using shooting functions shooting/Self-timer) DRO Bracket Selecting a drive mode (Continuous You can set the self-timer in bracket ...shooting mode, and the shooting order for exposure Note The last shot is shown on the Auto Review. [79] How to Use Using shooting functions Selecting a drive mode (Continuous shooting/Self-timer) Settings for bracket shooting You can record a total of three ...
Help Guide (Printable PDF)
Page 120
...Place a subject on the diagonal line to determine the quality of the composition when shooting landscape, close to Use Using shooting functions Auto Review Setting the other functions of this product You can check the recorded image on the screen right after the shooting. Off: Does not display...display the grid line. [121] How to one of the grid lines that image using the magnified scale. MENU → (Custom Settings) → [Auto Review] → desired setting. MENU → (Custom Settings) → [Grid Line] → desired setting. Menu item details 10 Sec/5 Sec/2 Sec: ...
...Place a subject on the diagonal line to determine the quality of the composition when shooting landscape, close to Use Using shooting functions Auto Review Setting the other functions of this product You can check the recorded image on the screen right after the shooting. Off: Does not display...display the grid line. [121] How to one of the grid lines that image using the magnified scale. MENU → (Custom Settings) → [Auto Review] → desired setting. MENU → (Custom Settings) → [Grid Line] → desired setting. Menu item details 10 Sec/5 Sec/2 Sec: ...
Help Guide (Printable PDF)
Page 121
Viewfinder: Switch between Electronic Viewfinder and the screen. 1. Note When the Electronic Viewfinder is pushed down, the images are applied for the Auto Review display. [122] How to Use Using shooting functions Setting the other functions of this product FINDER/MONITOR Sets the method for switching the display between ...
Viewfinder: Switch between Electronic Viewfinder and the screen. 1. Note When the Electronic Viewfinder is pushed down, the images are applied for the Auto Review display. [122] How to Use Using shooting functions Setting the other functions of this product FINDER/MONITOR Sets the method for switching the display between ...
Help Guide (Printable PDF)
Page 124
The DISP (Display Setting) settings are applied for the Auto Review display. Press the (Delete) button. 3. The screen display switches in the following situations: During movie playback During scrolling playback of the control [129] How to ...
The DISP (Display Setting) settings are applied for the Auto Review display. Press the (Delete) button. 3. The screen display switches in the following situations: During movie playback During scrolling playback of the control [129] How to ...
Help Guide (Printable PDF)
Page 158
... operation. The application PlayMemories Mobile must be installed on smartphone will not launch even if you record movies using a smartphone as [EV], [Self-Timer] and [Review Check]. Connection setting methods differ among smartphones. 3. When the product is in standby connection status. [Smart Remote Embedded] is ready for this product using that...
... operation. The application PlayMemories Mobile must be installed on smartphone will not launch even if you record movies using a smartphone as [EV], [Self-Timer] and [Review Check]. Connection setting methods differ among smartphones. 3. When the product is in standby connection status. [Smart Remote Embedded] is ready for this product using that...
Instruction Manual
Page 26
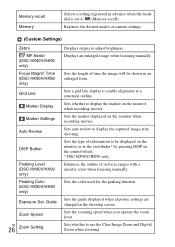
...enlarged form. Sets the marker displayed on the monitor when recording movies. Time (DSC-HX90V/HX90 only) Grid Line Marker Display Marker Settings Auto Review DISP Button Peaking Level (DSC-HX90V/HX90 only) Peaking Color (DSC-HX90V/HX90 only) Exposure Set. Sets the length of time the image will be... displayed on the monitor or in the viewfinder* by pressing DISP on the control wheel. * DSC-HX90V/HX90 only Enhances the...
...enlarged form. Sets the marker displayed on the monitor when recording movies. Time (DSC-HX90V/HX90 only) Grid Line Marker Display Marker Settings Auto Review DISP Button Peaking Level (DSC-HX90V/HX90 only) Peaking Color (DSC-HX90V/HX90 only) Exposure Set. Sets the length of time the image will be... displayed on the monitor or in the viewfinder* by pressing DISP on the control wheel. * DSC-HX90V/HX90 only Enhances the...

