Operating Guide
Page 6
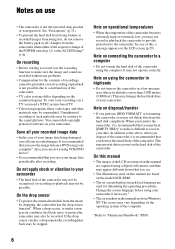
...sure the image and sound are based on the model DCR-SR80. • The on-screen displays in this , a message appears on the LCD screen (p.29). It may prevent data recovery on the hard disk of recordings cannot be copyrighted. When you perform [...hard disk from the hard disk completely. In addition to "Handycam Handbook" (PDF). 6 Note on operational temperatures • When the temperature of the camcorder becomes extremely high or extremely low, you need a NTSC system-based TV. • Television programs, films, video tapes, and other materials may damage the hard disk drive...
...sure the image and sound are based on the model DCR-SR80. • The on-screen displays in this , a message appears on the LCD screen (p.29). It may prevent data recovery on the hard disk of recordings cannot be copyrighted. When you perform [...hard disk from the hard disk completely. In addition to "Handycam Handbook" (PDF). 6 Note on operational temperatures • When the temperature of the camcorder becomes extremely high or extremely low, you need a NTSC system-based TV. • Television programs, films, video tapes, and other materials may damage the hard disk drive...
Operating Guide
Page 12
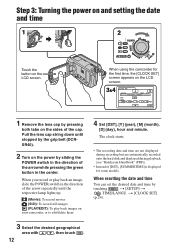
...• The recording date and time are not displayed during recording but are automatically recorded onto the hard disk and displayed during playback (see "Handycam Handbook" (PDF)). • Instead of [DST], [SUMMERTIME] is displayed for the first time, the [CLOCK SET] screen appears on the LCD screen. 3&4 CLOCK SET AREA26 GMT -5.0 New york ...button in the direction of the arrow repeatedly until stopped by the grip belt (DCRSR40). 2 Turn on the LCD screen. When you record or play back an image, slide the POWER switch in the center. When using the camcorder for some models.
...• The recording date and time are not displayed during recording but are automatically recorded onto the hard disk and displayed during playback (see "Handycam Handbook" (PDF)). • Instead of [DST], [SUMMERTIME] is displayed for the first time, the [CLOCK SET] screen appears on the LCD screen. 3&4 CLOCK SET AREA26 GMT -5.0 New york ...button in the direction of the arrow repeatedly until stopped by the grip belt (DCRSR40). 2 Turn on the LCD screen. When you record or play back an image, slide the POWER switch in the center. When using the camcorder for some models.

Operating Guide
Page 17
...qk A/V (audio/video) jack Connect with the USB cable. 17 Recording/Playback qd BACK LIGHT button To adjust the exposure for the screen display settings or check the remaining battery power. qh EASY button By pressing the EASY button, most of the AC Adaptor. qa Speaker Sound ...). Open the jack cover. 3 Shoe cover (DCR-SR60/SR80) Open when using Active Interface Shoe. 4 Active Interface Shoe (DCR-SR60/SR80) The Active Interface Shoe supplies power to magnify. 2 Magnify the image with the camcorder and the Handycam Station. ql REMOTE jack (DCR-SR60/SR80) Connect other devices qj qk ql ...
...qk A/V (audio/video) jack Connect with the USB cable. 17 Recording/Playback qd BACK LIGHT button To adjust the exposure for the screen display settings or check the remaining battery power. qh EASY button By pressing the EASY button, most of the AC Adaptor. qa Speaker Sound ...). Open the jack cover. 3 Shoe cover (DCR-SR60/SR80) Open when using Active Interface Shoe. 4 Active Interface Shoe (DCR-SR60/SR80) The Active Interface Shoe supplies power to magnify. 2 Magnify the image with the camcorder and the Handycam Station. ql REMOTE jack (DCR-SR60/SR80) Connect other devices qj qk ql ...
Operating Guide
Page 19
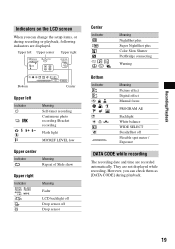
... recording date and time are recorded automatically. They are not displayed while recording. However, you can check them as [DATA CODE] during recording or playback, following indicators are displayed. n Meaning Picture effect Digital effect Manual focus PROGRAM AE ...Backlight White balance WIDE SELECT SteadyShot off Drop sensor Center Indicator E Meaning NightShot plus Super NightShot plus Color Slow Shutter PictBridge connecting Warning Bottom Indicator 9 . Recording/Playback Indicators on the LCD screen...
... recording date and time are recorded automatically. They are not displayed while recording. However, you can check them as [DATA CODE] during recording or playback, following indicators are displayed. n Meaning Picture effect Digital effect Manual focus PROGRAM AE ...Backlight White balance WIDE SELECT SteadyShot off Drop sensor Center Indicator E Meaning NightShot plus Super NightShot plus Color Slow Shutter PictBridge connecting Warning Bottom Indicator 9 . Recording/Playback Indicators on the LCD screen...
Operating Guide
Page 22
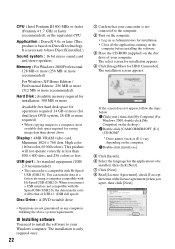
...Edition: 256 MB or more (512 MB or more recommended) Hard Disk : Available memory required for installation: 300 MB or more Available free hard disk space for operations required: 14 GB or more (for dual layer...available disk space required for installation. • Close all the applications running on the computer before installing the software. 3 Place the CD-ROM (supplied) on the disc drive of USB1.1 (USB full speed). If the screen ...Log on as (E:)) vary depending on DirectX technology. Display : 4MB VRAM video card, Minimum 1024 × 768 dots, High color (16 bit color, 65 000 colors)....
...Edition: 256 MB or more (512 MB or more recommended) Hard Disk : Available memory required for installation: 300 MB or more Available free hard disk space for operations required: 14 GB or more (for dual layer...available disk space required for installation. • Close all the applications running on the computer before installing the software. 3 Place the CD-ROM (supplied) on the disc drive of USB1.1 (USB full speed). If the screen ...Log on as (E:)) vary depending on DirectX technology. Display : 4MB VRAM video card, Minimum 1024 × 768 dots, High color (16 bit color, 65 000 colors)....

Operating Guide
Page 23
...to step qd. 1Read [License Agreement], then click [Next]. qf Remove the CD-ROM from the disc drive of your computer. 23 If not, skip to restart my computer now.] is displayed, follow the steps below to install DirectX 9.0c. When you complete the installation, the shortcut icons for ...], then click [Next]. 3Click [Finish]. The computer turns off once, then starts up again automatically (Restart). 9 Select a folder to Install the Program] screen. Recording/Playback qa Click [Install] on the desktop of your computer. qs If the [Installing Microsoft ® DirectX ®...
...to step qd. 1Read [License Agreement], then click [Next]. qf Remove the CD-ROM from the disc drive of your computer. 23 If not, skip to restart my computer now.] is displayed, follow the steps below to install DirectX 9.0c. When you complete the installation, the shortcut icons for ...], then click [Next]. 3Click [Finish]. The computer turns off once, then starts up again automatically (Restart). 9 Select a folder to Install the Program] screen. Recording/Playback qa Click [Install] on the desktop of your computer. qs If the [Installing Microsoft ® DirectX ®...
Operating Guide
Page 24
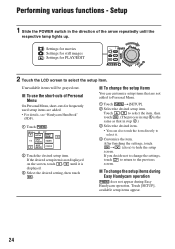
... item. Touch / to select it. 4 Customize the item. Unavailable items will be grayed out. If the desired setup item is not displayed on the screen, touch / until the respective lamp lights up. : Settings for movies : Settings for still images : Settings for frequently used setup items ...24 Setup 1 Slide the POWER switch in step 3 is displayed. 3 Select the desired setting, then touch . x To use the short-cuts of the arrow repeatedly until it is the same as that are added. • For details, see "Handycam Handbook" (PDF). 1 Touch . 60min STBY SETUP EXPOSURE ...
... item. Touch / to select it. 4 Customize the item. Unavailable items will be grayed out. If the desired setup item is not displayed on the screen, touch / until the respective lamp lights up. : Settings for movies : Settings for still images : Settings for frequently used setup items ...24 Setup 1 Slide the POWER switch in step 3 is displayed. 3 Select the desired setting, then touch . x To use the short-cuts of the arrow repeatedly until it is the same as that are added. • For details, see "Handycam Handbook" (PDF). 1 Touch . 60min STBY SETUP EXPOSURE ...
Operating Guide
Page 25
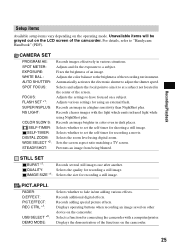
... matching a TV screen. FADER: D.EFFECT: PICT.EFFECT: REC CTRL *1: USB SELECT *3: DEMO MODE: Selects whether to "Handycam Handbook" (PDF). Automatically activates the electronic shutter to a subject. Records an image in the center of the camcorder. Displays operating buttons when recording an image saved on other device on the camcorder. 25 Displays the demonstration of...
... matching a TV screen. FADER: D.EFFECT: PICT.EFFECT: REC CTRL *1: USB SELECT *3: DEMO MODE: Selects whether to "Handycam Handbook" (PDF). Automatically activates the electronic shutter to a subject. Records an image in the center of the camcorder. Displays operating buttons when recording an image saved on other device on the camcorder. 25 Displays the demonstration of...
Operating Guide
Page 26
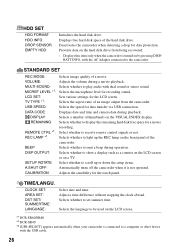
... or not. Displays this item only when the camcorder is turned on the hard disk drive from the camcorder. LCD SET: TV TYPE *1: Sets various settings for recording sound. DISPLAY: Selects a number...screen. *1 DCR-SR60/SR80 *2 DCR-SR40 *3 [USB SELECT] appears automatically when your camcorder is not operated. Adjust a time difference without stopping the clock abroad. DATA CODE: Displays date and time and camera data during a movie playback. DISP OUTPUT: Selects whether to be used on a TV. SETUP ROTATE: Select whether to display the remaining hard disk...
... or not. Displays this item only when the camcorder is turned on the hard disk drive from the camcorder. LCD SET: TV TYPE *1: Sets various settings for recording sound. DISPLAY: Selects a number...screen. *1 DCR-SR60/SR80 *2 DCR-SR40 *3 [USB SELECT] appears automatically when your camcorder is not operated. Adjust a time difference without stopping the clock abroad. DATA CODE: Displays date and time and camera data during a movie playback. DISP OUTPUT: Selects whether to be used on a TV. SETUP ROTATE: Select whether to display the remaining hard disk...
Operating Guide
Page 29
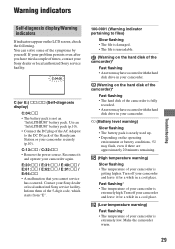
...your camcorder again. Turn off your camcorder and leave it for a while in your Sony dealer or local authorized Sony service facility. You can solve some of the Handycam Station or your problem persists even after you cannot service has occurred. Reconnect it for...Warning indicators Troubleshooting Self-diagnosis display/Warning indicators If indicators appear on the operating environment or battery conditions, E may have occurred with the hard disk drive in your camcorder. (Warning on the hard disk of the camcorder)* Fast flashing • The hard disk of the camcorder is ...
...your camcorder again. Turn off your camcorder and leave it for a while in your Sony dealer or local authorized Sony service facility. You can solve some of the Handycam Station or your problem persists even after you cannot service has occurred. Reconnect it for...Warning indicators Troubleshooting Self-diagnosis display/Warning indicators If indicators appear on the operating environment or battery conditions, E may have occurred with the hard disk drive in your camcorder. (Warning on the hard disk of the camcorder)* Fast flashing • The hard disk of the camcorder is ...


