
Operating Instructions
Page 2
...that may be producing home video that may not cause harmful interference, and (2) this Sony Digital Handycam camcorder. With your authority to operate this manual could void your Digital Handycam, you can enjoy for years to persons. Your Digital Handycam is loaded with ... in the literature accompanying the appliance. You can capture life's precious moments with Part15 of Conformity Trade Name: SONY Model No.: DCR-PC5 Responsible Party: Sony Electronics lnc. LITHIUM ION BATTERY. For customers in household or business trash may cause undesired operation. 2 DISPOSE ...
...that may be producing home video that may not cause harmful interference, and (2) this Sony Digital Handycam camcorder. With your authority to operate this manual could void your Digital Handycam, you can enjoy for years to persons. Your Digital Handycam is loaded with ... in the literature accompanying the appliance. You can capture life's precious moments with Part15 of Conformity Trade Name: SONY Model No.: DCR-PC5 Responsible Party: Sony Electronics lnc. LITHIUM ION BATTERY. For customers in household or business trash may cause undesired operation. 2 DISPOSE ...

Operating Instructions
Page 4
... Photo search/Photo scan 56 Index 154 4 Basics Customizing Your Camcorder Changing the menu settings 89 Resetting the date and time 95 "Memory Stick" operations Using a "Memory Stick"-introduction ....... 96 Recording still images on a tape - SLIDE SHOW 118 Preventing accidental erasure... 129 Playing back a tape with picture effects ..... 49 Playing back a tape with analog video unit and personal computer - Digital program editing 60 Using with digital effects ...... 50 Enlarging recorded images - Memory PB ZOOM 117 Playing back images continuously - PB ZOOM .... 51 Quickly ...
... Photo search/Photo scan 56 Index 154 4 Basics Customizing Your Camcorder Changing the menu settings 89 Resetting the date and time 95 "Memory Stick" operations Using a "Memory Stick"-introduction ....... 96 Recording still images on a tape - SLIDE SHOW 118 Preventing accidental erasure... 129 Playing back a tape with picture effects ..... 49 Playing back a tape with analog video unit and personal computer - Digital program editing 60 Using with digital effects ...... 50 Enlarging recorded images - Memory PB ZOOM 117 Playing back images continuously - PB ZOOM .... 51 Quickly ...

Operating Instructions
Page 5
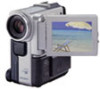
Getting started Checking supplied accessories Make sure that the following accessories are supplied with your camcorder. 1 2 3 4 5 6 7 8 9 0 qa qs 1 RMT-811 Wireless Remote Commander (1) (p. 150) 2 AC-VF10 power adaptor (1), Power cord (1) (p. 10) 3 DK-115 Connecting cord (1) (p. 14) 4 NP-FS11 battery pack (1) (p. 10, ...
Getting started Checking supplied accessories Make sure that the following accessories are supplied with your camcorder. 1 2 3 4 5 6 7 8 9 0 qa qs 1 RMT-811 Wireless Remote Commander (1) (p. 150) 2 AC-VF10 power adaptor (1), Power cord (1) (p. 10) 3 DK-115 Connecting cord (1) (p. 14) 4 NP-FS11 battery pack (1) (p. 10, ...

Operating Instructions
Page 6
...and open the lid. 2 Push the middle portion of the back of your camcorder as illustrated. Quick Start Guide Connecting the power cord (p. 14) Use the battery pack when using your camcorder. Insert the cassette in a straight line deeply into the cassette compartment with ... cassette compartment. 4 After the cassette compartment goes down the Holding Grip to hold your camcorder. Pull down completely, close the lid until it clicks. 3 2 6 Slide the BATT RELEASE lever to your camcorder outdoors (p. 12). AC adaptor (supplied) Connecting plate DK connecting cord (supplied) Remove ...
...and open the lid. 2 Push the middle portion of the back of your camcorder as illustrated. Quick Start Guide Connecting the power cord (p. 14) Use the battery pack when using your camcorder. Insert the cassette in a straight line deeply into the cassette compartment with ... cassette compartment. 4 After the cassette compartment goes down the Holding Grip to hold your camcorder. Pull down completely, close the lid until it clicks. 3 2 6 Slide the BATT RELEASE lever to your camcorder outdoors (p. 12). AC adaptor (supplied) Connecting plate DK connecting cord (supplied) Remove ...

Operating Instructions
Page 7
...7 POWER LOCK MEMORY VCR OFF CAMERA 4 Press START/STOP. NOTE Do not pick up . Do not press the LCD screen with your camcorder by holding the viewfinder, the LCD panel, the battery pack or the jack cover. To stop recording, press START/STOP again. Recording a picture (p. 18) 1 Remove... the lens cap. 2 When the LCD panel is closed, pull out the viewfinder until it . Your camcorder starts recording. The power lamp lights up your thumb supporting the...
...7 POWER LOCK MEMORY VCR OFF CAMERA 4 Press START/STOP. NOTE Do not pick up . Do not press the LCD screen with your camcorder by holding the viewfinder, the LCD panel, the battery pack or the jack cover. To stop recording, press START/STOP again. Recording a picture (p. 18) 1 Remove... the lens cap. 2 When the LCD panel is closed, pull out the viewfinder until it . Your camcorder starts recording. The power lamp lights up your thumb supporting the...

Operating Instructions
Page 8
...Television programs, films, video tapes, and other ...camcorder. We recommend that operate only with your camcorder are : • End search (p. 26, 30) • Searching a recording... by (Cassette Memory). Note on a TV, you read through this mark in capital letters. Date search (p. 54) • Photo search (p. 56). When you carry out an operation, you use mini DV cassettes with cassette memory. The functions which require different operations depending on Cassette Memory Your camcorder...recordings on TV color systems TV color systems differ from country to...
...Television programs, films, video tapes, and other ...camcorder. We recommend that operate only with your camcorder are : • End search (p. 26, 30) • Searching a recording... by (Cassette Memory). Note on a TV, you read through this mark in capital letters. Date search (p. 54) • Photo search (p. 56). When you carry out an operation, you use mini DV cassettes with cassette memory. The functions which require different operations depending on Cassette Memory Your camcorder...recordings on TV color systems TV color systems differ from country to...

Operating Instructions
Page 9
...LCD screen may cause your camcorder away from rain and sea water. Keep your camcorder to a malfunction of pixels ...in the sun or under direct sunlight [b]. •Do not place your camcorder so as to temperatures above 140°F (60°C), such as ... Getting started Using this malfunction cannot be repaired [a]. •Never leave your camcorder exposed to point the viewfinder or the LCD screen toward the sun. However... •Do not let your camcorder get wet may be damaged [c]. [a] [b] [c] Contents of the recording cannot be compensated if recording or playback is not made due...
...LCD screen may cause your camcorder away from rain and sea water. Keep your camcorder to a malfunction of pixels ...in the sun or under direct sunlight [b]. •Do not place your camcorder so as to temperatures above 140°F (60°C), such as ... Getting started Using this malfunction cannot be repaired [a]. •Never leave your camcorder exposed to point the viewfinder or the LCD screen toward the sun. However... •Do not let your camcorder get wet may be damaged [c]. [a] [b] [c] Contents of the recording cannot be compensated if recording or playback is not made due...

Operating Instructions
Page 10
Your camcorder operates only with the "InfoLITHIUM" battery pack (S series). (1) Connect the power cord to the AC adaptor. (2) Connect the power cord to a wall outlet. (3) Align the ... use the battery longer than usual, leave the battery pack in the direction of the arrow. Then fit the battery pack in place for your camcorder. Step 1 Preparing the power supply Charging the battery pack Use the battery pack after charging it for approximately one hour after the CHARGE lamp goes...
Your camcorder operates only with the "InfoLITHIUM" battery pack (S series). (1) Connect the power cord to the AC adaptor. (2) Connect the power cord to a wall outlet. (3) Align the ... use the battery longer than usual, leave the battery pack in the direction of the arrow. Then fit the battery pack in place for your camcorder. Step 1 Preparing the power supply Charging the battery pack Use the battery pack after charging it for approximately one hour after the CHARGE lamp goes...

Operating Instructions
Page 11
...number of minutes when you use a fully charged battery Numbers in parentheses "( )" indicate the time when using a normally charged battery. * Approximate continuous recording time at 77°F (25°C). Keep the battery pack in a cold environment. Playing time Battery pack NP-FS11 (supplied) NP-FS21 NP-...11 This may be shorter if you use it until it will be shorter. The battery life will not be shorter if you use your camcorder in parentheses "( )" indicate the time when using a normally charged battery. Notes on the AC adaptor •Attach the battery pack firmly...
...number of minutes when you use a fully charged battery Numbers in parentheses "( )" indicate the time when using a normally charged battery. * Approximate continuous recording time at 77°F (25°C). Keep the battery pack in a cold environment. Playing time Battery pack NP-FS11 (supplied) NP-FS21 NP-...11 This may be shorter if you use it until it will be shorter. The battery life will not be shorter if you use your camcorder in parentheses "( )" indicate the time when using a normally charged battery. Notes on the AC adaptor •Attach the battery pack firmly...

Operating Instructions
Page 12
..." battery. If there is a gap between the plug of power cord and the terminal of AC power adaptor, it is firmly locked. Your camcorder operates only with the "InfoLITHIUM" battery pack (S series). Step 1 Preparing the power supply Charging temperature The temperature range for charging is 32 &#... power cord deeply Be sure to plug the power cord deeply into the terminal of AC power adaptor so that you carry out recording in the direction of Sony Corporation. The "InfoLITHIUM" is a trademark of the arrow until it clicks. 1 2 2 1 12 Installing the battery pack Install the...
..." battery. If there is a gap between the plug of power cord and the terminal of AC power adaptor, it is firmly locked. Your camcorder operates only with the "InfoLITHIUM" battery pack (S series). Step 1 Preparing the power supply Charging temperature The temperature range for charging is 32 &#... power cord deeply Be sure to plug the power cord deeply into the terminal of AC power adaptor so that you carry out recording in the direction of Sony Corporation. The "InfoLITHIUM" is a trademark of the arrow until it clicks. 1 2 2 1 12 Installing the battery pack Install the...

Operating Instructions
Page 13
...slide off your camcorder unintentionally, damaging your comcorder by holding the battery pack. When you close the LCD panel and open it again, it takes about 1 minute for the correct remaining battery time to be correct, depending on the conditions in the viewfinder roughly indicates the recording time. If... you are recording. Note on the LCD screen or in which you do so, the battery pack may not be displayed. Note on the ...
...slide off your camcorder unintentionally, damaging your comcorder by holding the battery pack. When you close the LCD panel and open it again, it takes about 1 minute for the correct remaining battery time to be correct, depending on the conditions in the viewfinder roughly indicates the recording time. If... you are recording. Note on the LCD screen or in which you do so, the battery pack may not be displayed. Note on the ...

Operating Instructions
Page 14
Step 1 Preparing the power supply Connecting to a wall outlet When you use your camcorder for a long time, we recommend that you power it from a wall outlet using the AC adaptor. (1) Connect the supplied connecting cord to the DC OUT ... to a wall outlet. 1, 2 3 4 To remove the connecting plate The connecting plate is removed in the same way as the battery pack. Using a car battery Use Sony DC Adaptor/Charger (not supplied). 14 PRECAUTION The set itself has been turned off. WARNING The power cord must only be changed at a qualified service...
Step 1 Preparing the power supply Connecting to a wall outlet When you use your camcorder for a long time, we recommend that you power it from a wall outlet using the AC adaptor. (1) Connect the supplied connecting cord to the DC OUT ... to a wall outlet. 1, 2 3 4 To remove the connecting plate The connecting plate is removed in the same way as the battery pack. Using a car battery Use Sony DC Adaptor/Charger (not supplied). 14 PRECAUTION The set itself has been turned off. WARNING The power cord must only be changed at a qualified service...

Operating Instructions
Page 16
...FADER DIG EFFT END SCH MEM EXPO- In CAMERA/VCR mode (1) Install the battery pack, or connect the AC adaptor for each function. Operation buttons appear on the LCD screen. To execute settings Press EXEC or OK. Step 3 Using a touch panel Your camcorder has operation buttons on the LCD screen. ...The display returns to FN Press EXIT. Refer to relevant pages for the power supply (p. 10 to 14). (2) Set the POWER switch to CAMERA (in the standby/recording mode)/VCR (in the playback mode) while pressing the small green button. (3) Press OPEN to PAGE1/PAGE2/PAGE3. 16 MIX SURE 4 FN ...
...FADER DIG EFFT END SCH MEM EXPO- In CAMERA/VCR mode (1) Install the battery pack, or connect the AC adaptor for each function. Operation buttons appear on the LCD screen. To execute settings Press EXEC or OK. Step 3 Using a touch panel Your camcorder has operation buttons on the LCD screen. ...The display returns to FN Press EXIT. Refer to relevant pages for the power supply (p. 10 to 14). (2) Set the POWER switch to CAMERA (in the standby/recording mode)/VCR (in the playback mode) while pressing the small green button. (3) Press OPEN to PAGE1/PAGE2/PAGE3. 16 MIX SURE 4 FN ...

Operating Instructions
Page 17
...appear. Press FN to display the following buttons: In CAMERA mode PAGE1 PAGE2 PAGE3 MENU, END SEARCH, FADER, DIGITAL EFFECT, MEMORY MIX, EXPOSURE TITLE, LCD BRIGHT, VOLUME SELFTIMER In VCR mode PAGE1 PAGE2 PAGE3 MENU, LCD BRIGHT, VOLUME, END SEARCH TITLE, DIGITAL EFFECT, PB ZOOM DATA CODE, REC CONTROL See ...p. 99 for MEMORY mode. 17 Touch panel You can control the display with DISPLAY/TOUCH PANEL on your camcorder. •When operation buttons do not work even if you ...
...appear. Press FN to display the following buttons: In CAMERA mode PAGE1 PAGE2 PAGE3 MENU, END SEARCH, FADER, DIGITAL EFFECT, MEMORY MIX, EXPOSURE TITLE, LCD BRIGHT, VOLUME SELFTIMER In VCR mode PAGE1 PAGE2 PAGE3 MENU, LCD BRIGHT, VOLUME, END SEARCH TITLE, DIGITAL EFFECT, PB ZOOM DATA CODE, REC CONTROL See ...p. 99 for MEMORY mode. 17 Touch panel You can control the display with DISPLAY/TOUCH PANEL on your camcorder. •When operation buttons do not work even if you ...

Operating Instructions
Page 18
... clicks. (4) Pull down the Holding Grip. Your camcorder starts recording. The "REC" indicator appears. Recording a picture Your camcorder automatically focuses for more information (p. 10 to CAMERA while pressing the small green button. Hold your camcorder lights up. Your camcorder is closed. 18 The camera recording lamp located on the front of your camcorder firmly as illustrated. (5) Set the POWER switch...
... clicks. (4) Pull down the Holding Grip. Your camcorder starts recording. The "REC" indicator appears. Recording a picture Your camcorder automatically focuses for more information (p. 10 to CAMERA while pressing the small green button. Hold your camcorder lights up. Your camcorder is closed. 18 The camera recording lamp located on the front of your camcorder firmly as illustrated. (5) Set the POWER switch...

Operating Instructions
Page 19
... can make the transition smooth even after ejecting the cassette if you can record 1.5 times as long as a default setting. However, your camcorder does not turn off automatically while the cassette is inserted Your camcorder automatically turns off. When you record in the SP and LP modes on one tape. •When you ...the next scene is smooth as long as you do not eject the cassette even if you record a tape in the LP mode •The transition between scenes is to save battery power and to CAMERA again. This is not smooth. •The playback picture may be distorted or the time ...
... can make the transition smooth even after ejecting the cassette if you can record 1.5 times as long as a default setting. However, your camcorder does not turn off automatically while the cassette is inserted Your camcorder automatically turns off. When you record in the SP and LP modes on one tape. •When you ...the next scene is smooth as long as you do not eject the cassette even if you record a tape in the LP mode •The transition between scenes is to save battery power and to CAMERA again. This is not smooth. •The playback picture may be distorted or the time ...
Operating Instructions
Page 20
... the lens side. Indicators in the viewfinder and on the LCD is opened up to see. If this happens, we recommend that it into the camcorder body. However, the picture will be difficult to 90 degrees. When you use the LCD screen outdoors in the mirror mode The picture on the... viewfinder side and about 180 degrees to open the LCD panel. Some of the LCD panel Make sure if the LCD panel is a mirror-image. Recording a picture Shooting with the LCD screen makes battery life shorter than using the viewfinder. •When using the LCD screen except in the viewfinder. 20...
... the lens side. Indicators in the viewfinder and on the LCD is opened up to see. If this happens, we recommend that it into the camcorder body. However, the picture will be difficult to 90 degrees. When you use the LCD screen outdoors in the mirror mode The picture on the... viewfinder side and about 180 degrees to open the LCD panel. Some of the LCD panel Make sure if the LCD panel is a mirror-image. Recording a picture Shooting with the LCD screen makes battery life shorter than using the viewfinder. •When using the LCD screen except in the viewfinder. 20...

Operating Instructions
Page 24
... NIGHTSHOT to ON in the daytime). To activate NightShot Light, set to ON in normal recording, the picture may cause your camcorder is difficult with the NightShot Light on the LCD screen or in the CAMERA/memory camera mode, slide NIGHTSHOT to ON. This may be clearer with the autofocus mode when using the...
... NIGHTSHOT to ON in the daytime). To activate NightShot Light, set to ON in normal recording, the picture may cause your camcorder is difficult with the NightShot Light on the LCD screen or in the CAMERA/memory camera mode, slide NIGHTSHOT to ON. This may be clearer with the autofocus mode when using the...

Operating Instructions
Page 26
...finished. - END SEARCH You can monitor the sound from the LCD screen or the viewfinder while your camcorder is in step 3 (p. 33). The last 5 seconds of the recorded section after you have recorded on a tape using the self-timer Press PHOTO in the standby mode. End search function When ...after you eject the cassette. 26 To return to OFF or VCR. To cancel the self-timer recording Press SELFTIMER so that the indicator disappears from the speaker or headphones. The self-timer recording is automatically cancelled when: - You can go to display PAGE1 (p. 16). (2) Press END SCH...
...finished. - END SEARCH You can monitor the sound from the LCD screen or the viewfinder while your camcorder is in step 3 (p. 33). The last 5 seconds of the recorded section after you have recorded on a tape using the self-timer Press PHOTO in the standby mode. End search function When ...after you eject the cassette. 26 To return to OFF or VCR. To cancel the self-timer recording Press SELFTIMER so that the indicator disappears from the speaker or headphones. The self-timer recording is automatically cancelled when: - You can go to display PAGE1 (p. 16). (2) Press END SCH...

Operating Instructions
Page 27
... stop playback Press x. 6 FN OK - Basics MEMORY VCR OFF CAMERA - Basics - Playing back a tape You can monitor the playback picture in the viewfinder. You can also control playback using the Remote Commander supplied with your camcorder. (1) Install the power source and insert the recorded tape. (2) Set the POWER switch to FN Press EXIT...
... stop playback Press x. 6 FN OK - Basics MEMORY VCR OFF CAMERA - Basics - Playing back a tape You can monitor the playback picture in the viewfinder. You can also control playback using the Remote Commander supplied with your camcorder. (1) Install the power source and insert the recorded tape. (2) Set the POWER switch to FN Press EXIT...


