Operating Instructions
Page 2
...don't place lighted candles on the apparatus. If this apparatus to constitute a risk of the FCC Rules. CAUTION You are designed to the grounding system of the building, as it for proper grounding and, in a confined space, such as a CLASS 1 LASER product. To 2GB To prevent ...authority to the point of time. DAV-DX155/DAV-DX255/DAV-DX315 Serial No WARNING This equipment has been tested and found to which the receiver is no guarantee that to comply with this product will not occur in this manual could void your Sony dealer regarding this equipment. For the...
...don't place lighted candles on the apparatus. If this apparatus to constitute a risk of the FCC Rules. CAUTION You are designed to the grounding system of the building, as it for proper grounding and, in a confined space, such as a CLASS 1 LASER product. To 2GB To prevent ...authority to the point of time. DAV-DX155/DAV-DX255/DAV-DX315 Serial No WARNING This equipment has been tested and found to which the receiver is no guarantee that to comply with this product will not occur in this manual could void your Sony dealer regarding this equipment. For the...
Operating Instructions
Page 3
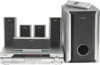
... materials (curtains, draperies) that may condense inside the DVD Home Theatre System and cause damage to a warm location, wait for about 30 minutes before operating the unit. disconnect the cord, pull it for purchasing Sony DVD Home Theatre System. Welcome! When you first install the unit, or when... you for future reference. 3GB Before operating this system, please read this manual thoroughly and retain it out by the plug, never by the...
... materials (curtains, draperies) that may condense inside the DVD Home Theatre System and cause damage to a warm location, wait for about 30 minutes before operating the unit. disconnect the cord, pull it for purchasing Sony DVD Home Theatre System. Welcome! When you first install the unit, or when... you for future reference. 3GB Before operating this system, please read this manual thoroughly and retain it out by the plug, never by the...
Operating Instructions
Page 4
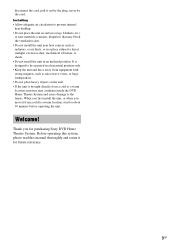
BASIC - Step 1: Assembling the Speakers 10 Step 2: Connecting the System and TV 13 Step 3: Positioning the System ...18 Step 4: Performing the Quick Setup 19 Getting Started - ADVANCED - Turning off the Demonstration 22 Installing the Speakers on a Wall.......... 23 TV Hookup (Advanced 24 ... 60 Using the THEATRE SYNC Function 60 Using the Sound Effect 61 Using the Sleep Timer 62 Changing the Brightness of Contents Welcome 3 About This Manual 6 This System Can Play the Following Discs 7 Getting Started - Table of the Front Panel Display 62 4GB
BASIC - Step 1: Assembling the Speakers 10 Step 2: Connecting the System and TV 13 Step 3: Positioning the System ...18 Step 4: Performing the Quick Setup 19 Getting Started - ADVANCED - Turning off the Demonstration 22 Installing the Speakers on a Wall.......... 23 TV Hookup (Advanced 24 ... 60 Using the THEATRE SYNC Function 60 Using the Sound Effect 61 Using the Sleep Timer 62 Changing the Brightness of Contents Welcome 3 About This Manual 6 This System Can Play the Following Discs 7 Getting Started - Table of the Front Panel Display 62 4GB
Operating Instructions
Page 6
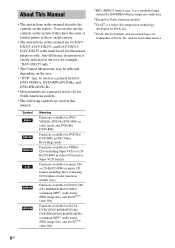
...system if they have the same or similar names as those on the remote. • The instructions in this manual describe the controls on the area. • "DVD" may be different depending on the remote. About This Manual • The instructions in this manual are for DAVDX155, DAV-DX255, and DAV...-DX315. Any difference in operation is clearly indicated in the text, for example, "DAV-DX155 only." • The Control Menu items may be used as...
...system if they have the same or similar names as those on the remote. • The instructions in this manual describe the controls on the area. • "DVD" may be different depending on the remote. About This Manual • The instructions in this manual are for DAVDX155, DAV-DX255, and DAV...-DX315. Any difference in operation is clearly indicated in the text, for example, "DAV-DX155 only." • The Control Menu items may be used as...

Operating Instructions
Page 31
... to the TV/VCR jacks on the rear of the unit or to the AUDIO IN jack on the rear panel. Refer to the operation manual supplied with the components for further information on the component connected. To prevent this, you press FUNCTION, the mode of the other components connected to... the TV/VCR jacks on the front panel. Changing the input level of the sound from the sound of the system changes in the following sequence. The AMP menu turns off. This is not a malfunction and will depend on the operation. Basic Operations Enjoying the Radio...
... to the TV/VCR jacks on the rear of the unit or to the AUDIO IN jack on the rear panel. Refer to the operation manual supplied with the components for further information on the component connected. To prevent this, you press FUNCTION, the mode of the other components connected to... the TV/VCR jacks on the front panel. Changing the input level of the sound from the sound of the system changes in the following sequence. The AMP menu turns off. This is not a malfunction and will depend on the operation. Basic Operations Enjoying the Radio...
Operating Instructions
Page 58
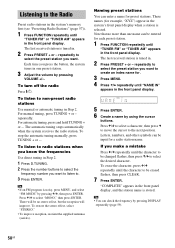
...the frequencies Use direct tuning in Step 2. 1 Press D.TUNING. 2 Press the number buttons to select the frequency number you press the button, the system tunes in . 2 Press PRESET + or - Tip • If an FM program is tuned in Step 2. The last received station is noisy, ...automatic tuning in . 2 Press PRESET + or - If you want. For manual tuning, press TUNING + or - To stop the automatic tuning manually, press TUNING + or -. Tip • You can enter a name for example, "XYZ") appear in the system's memory first (see "Presetting Radio Stations" (page 57)). 1 Press FUNCTION ...
...the frequencies Use direct tuning in Step 2. 1 Press D.TUNING. 2 Press the number buttons to select the frequency number you press the button, the system tunes in . 2 Press PRESET + or - Tip • If an FM program is tuned in Step 2. The last received station is noisy, ...automatic tuning in . 2 Press PRESET + or - If you want. For manual tuning, press TUNING + or - To stop the automatic tuning manually, press TUNING + or -. Tip • You can enter a name for example, "XYZ") appear in the system's memory first (see "Presetting Radio Stations" (page 57)). 1 Press FUNCTION ...
Operating Instructions
Page 83
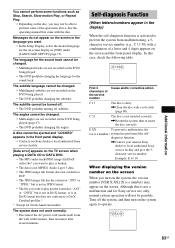
...13 The disc is not a malfunction and for North American models. See the operating manual that came with a soft cloth (page 80). E XX To prevent a malfunction, the (xx is not inserted correctly. ,Restart the system, then re-insert the disc correctly. VER.X.XX 83GB The subtitle cannot be changed ... display) When the self-diagnosis function is in DivX format but does not conform to a DivX Certified profiles.* * Except for Sony service use only, normal system operation will not be changed . • Multi-angles are not recorded on the disc, you may appear on the TV screen...
...13 The disc is not a malfunction and for North American models. See the operating manual that came with a soft cloth (page 80). E XX To prevent a malfunction, the (xx is not inserted correctly. ,Restart the system, then re-insert the disc correctly. VER.X.XX 83GB The subtitle cannot be changed ... display) When the self-diagnosis function is in DivX format but does not conform to a DivX Certified profiles.* * Except for Sony service use only, normal system operation will not be changed . • Multi-angles are not recorded on the disc, you may appear on the TV screen...


