Primary User Manual
Page 3
... up optional components ........ 18 Listening to music - Daily Timer 16 Optional Components Hooking up to audio from a connected component 18 Recording on a connected component ... 18 ...Troubleshooting Problems and remedies 19 Additional Information Precautions 21 Specifications 22 * European model only 3GB Table of Contents List of Button Locations and Reference Pages Main unit 4 Remote Control 5 Getting Started Hooking up the system 6 Inserting two size-AA (R6) batteries into the remote control 7 Setting the clock...
... up optional components ........ 18 Listening to music - Daily Timer 16 Optional Components Hooking up to audio from a connected component 18 Recording on a connected component ... 18 ...Troubleshooting Problems and remedies 19 Additional Information Precautions 21 Specifications 22 * European model only 3GB Table of Contents List of Button Locations and Reference Pages Main unit 4 Remote Control 5 Getting Started Hooking up the system 6 Inserting two size-AA (R6) batteries into the remote control 7 Setting the clock...
Primary User Manual
Page 7
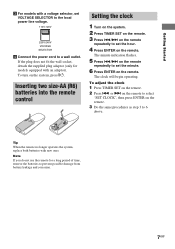
... two size-AA (R6) batteries into the remote control e EE e Setting the clock 1 Turn on the system. 2 Press TIMER SET on the remote. 3 Press ./> on the remote repeatedly to a wall outlet. or > on the remote to select "SET CLOCK", then press ENTER on the remote. 3 Do the same procedures as step... 3 to set the hour. 4 Press ENTER on the remote. To adjust the clock 1 Press TIMER SET on the system, press @/1. The minute indication flashes. 5 Press ./> on the ...
... two size-AA (R6) batteries into the remote control e EE e Setting the clock 1 Turn on the system. 2 Press TIMER SET on the remote. 3 Press ./> on the remote repeatedly to a wall outlet. or > on the remote to select "SET CLOCK", then press ENTER on the remote. 3 Do the same procedures as step... 3 to set the hour. 4 Press ENTER on the remote. To adjust the clock 1 Press TIMER SET on the system, press @/1. The minute indication flashes. 5 Press ./> on the ...
Primary User Manual
Page 14
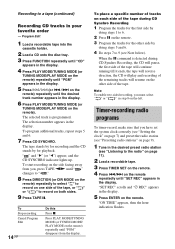
...on the remote. To program additional tracks, repeat steps 5 and 6. 7 Press CD SYNCHRO. Note To enable two-sided recording, you have set the system clock correctly (see "Setting the clock" on page 7) and preset the radio station (see "Presetting radio stations" on page 9). 1 Tune in the desired preset radio station ...(or TUNING MODE/PLAY MODE on the remote) repeatedly until "PGM" appears in the display. 5 Press l/L (or ./> on the remote) repeatedly until "SET REC" appears in step 8 on the left. Timer-recording radio programs To timer-record, make sure that you must select " " or " " in...
...on the remote. To program additional tracks, repeat steps 5 and 6. 7 Press CD SYNCHRO. Note To enable two-sided recording, you have set the system clock correctly (see "Setting the clock" on page 7) and preset the radio station (see "Presetting radio stations" on page 9). 1 Tune in the desired preset radio station ...(or TUNING MODE/PLAY MODE on the remote) repeatedly until "PGM" appears in the display. 5 Press l/L (or ./> on the remote) repeatedly until "SET REC" appears in step 8 on the left. Timer-recording radio programs To timer-record, make sure that you must select " " or " " in...
Primary User Manual
Page 16
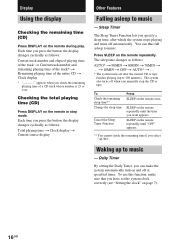
Daily Timer By setting the Daily Timer, you have set the system clock correctly (see "Setting the clock" on and off at specified times. To use this function, make the system automatically turn on page 7). 16GB Press SLEEP on the remote once. To Check the remaining sleep time** Change the sleep time Cancel the Sleep Timer ...
Daily Timer By setting the Daily Timer, you have set the system clock correctly (see "Setting the clock" on and off at specified times. To use this function, make the system automatically turn on page 7). 16GB Press SLEEP on the remote once. To Check the remaining sleep time** Change the sleep time Cancel the Sleep Timer ...
Primary User Manual
Page 19
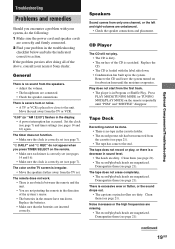
..."AM 12:00") flashes in Program or Shuffle Play. Set the clock (see page 7) and timer settings (see page 21). Speakers Sound comes from the TV set (see page 7). CD Player The CD will not play , or there is a decrease in the system. Press PLAY MODE/TUNING MODE (or TUNING MODE/PLAY ... doing all of the CD is scratched. Optional Components/Troubleshooting Troubleshooting Problems and remedies Should you press TIMER SELECT on the remote. • Make sure each timer is correctly set (see pages 14 and 16). • Make sure the clock is correctly set (see page 7). Clean them (see page 21...
..."AM 12:00") flashes in Program or Shuffle Play. Set the clock (see page 7) and timer settings (see page 21). Speakers Sound comes from the TV set (see page 7). CD Player The CD will not play , or there is a decrease in the system. Press PLAY MODE/TUNING MODE (or TUNING MODE/PLAY ... doing all of the CD is scratched. Optional Components/Troubleshooting Troubleshooting Problems and remedies Should you press TIMER SELECT on the remote. • Make sure each timer is correctly set (see pages 14 and 16). • Make sure the clock is correctly set (see page 7). Clean them (see page 21...


