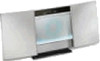

Primary User Manual
Page 3
As an ENERGY STAR® partner, Sony Corporation has determined that any manufacturing defects occur, Sony's responsibility shall be careful when handling the system. On moisture condensation If the system is brought directly from the use the system in a place subject to extreme changes in this manual could void your data: • Do not cause a shock or...
As an ENERGY STAR® partner, Sony Corporation has determined that any manufacturing defects occur, Sony's responsibility shall be careful when handling the system. On moisture condensation If the system is brought directly from the use the system in a place subject to extreme changes in this manual could void your data: • Do not cause a shock or...

Primary User Manual
Page 4
... - Album Favorites 22 Playing an album you listened to a playlist - Auto Storage/ High-Speed Synchro Storage ........ 24 Recording to the HD manually - Making tracks/Smart Space/ Adjusting the recording level ........ 26 HD - Divide Function 34 Combining recorded tracks - Disc Memo 16 HD - ...History 22 HD - Station Name 39 Using the Radio Data System (RDS)* ... 39 4GB Normal Play/Shuffle Play/ Repeat Play 14 Programing the CD tracks - Manual Recording 26 Recording tips - Playlist Play 19 Locating a desired album or track - Editing Labelling...
... - Album Favorites 22 Playing an album you listened to a playlist - Auto Storage/ High-Speed Synchro Storage ........ 24 Recording to the HD manually - Making tracks/Smart Space/ Adjusting the recording level ........ 26 HD - Divide Function 34 Combining recorded tracks - Disc Memo 16 HD - ...History 22 HD - Station Name 39 Using the Radio Data System (RDS)* ... 39 4GB Normal Play/Shuffle Play/ Repeat Play 14 Programing the CD tracks - Manual Recording 26 Recording tips - Playlist Play 19 Locating a desired album or track - Editing Labelling...

Primary User Manual
Page 26
.... • OPTICAL IN: For digital recording from an optional componet. • MD (or TAPE): For analog recording from this system's CD player or components connected to select the sound source • CD: For recording a CD loaded in the display. To change the album position, turn ... Notes • Manual recording cannot be performed when Auto Storage is selected as the storage mode. • Tracks longer than 120 minutes cannot be incremented, recording ends. • If the selected album is not saved to the HD during recording from this system's tuner or components connected to the ...
.... • OPTICAL IN: For digital recording from an optional componet. • MD (or TAPE): For analog recording from this system's CD player or components connected to select the sound source • CD: For recording a CD loaded in the display. To change the album position, turn ... Notes • Manual recording cannot be performed when Auto Storage is selected as the storage mode. • Tracks longer than 120 minutes cannot be incremented, recording ends. • If the selected album is not saved to the HD during recording from this system's tuner or components connected to the ...

Primary User Manual
Page 27
... function is factory set in this level higher so that level. 1 Press FUNCTION repeatedly until "HD" appears in the display. 2 While the system is below a certain level for more than 1.5 seconds and then exceeds that triggers Level Synchro Recording. 1 Press FUNCTION repeatedly until "HD" appears...automatically marked when the input signal is recorded repeatedly. • Any point during recording (Track Mark) You can mark track numbers during manual recording of the same CD is continuously below the trigger level set to select the setting, then press ENTER/ YES on the remote....
... function is factory set in this level higher so that level. 1 Press FUNCTION repeatedly until "HD" appears in the display. 2 While the system is below a certain level for more than 1.5 seconds and then exceeds that triggers Level Synchro Recording. 1 Press FUNCTION repeatedly until "HD" appears...automatically marked when the input signal is recorded repeatedly. • Any point during recording (Track Mark) You can mark track numbers during manual recording of the same CD is continuously below the trigger level set to select the setting, then press ENTER/ YES on the remote....

Primary User Manual
Page 28
... Press MENU + or - "Edit Menu" appears in the display. 2 While the system is on the remote repeatedly until "Setup?" Press REC during manual recording at any time during manual recording, the system replaces this silence with a blank of about 3 seconds and continues recording: No sound input... for 30 seconds or more , the system replaces this silence with a blank of 3 ...
... Press MENU + or - "Edit Menu" appears in the display. 2 While the system is on the remote repeatedly until "Setup?" Press REC during manual recording at any time during manual recording, the system replaces this silence with a blank of about 3 seconds and continues recording: No sound input... for 30 seconds or more , the system replaces this silence with a blank of 3 ...

Primary User Manual
Page 29
...MENU/NO on the remote. 9 Stop playing the sound source. 10 Do step 3 of the connected components is low, it may not be increased up to +12 dB (for analog recording) or +18 dB...Setup?" Adjusting the recording level You can only be possible to set the recording level to the HD manually" on the remote repeatedly until "LevelAdjust?" Therefore, if the output level of "Recording to maximum. ... recordings. 1 Do steps 1 and 2 of the sound source with Smart Space. • If the system continues recording pause for digital recording) (0.0 dB is not affected when you record from a CD, Smart ...
...MENU/NO on the remote. 9 Stop playing the sound source. 10 Do step 3 of the connected components is low, it may not be increased up to +12 dB (for analog recording) or +18 dB...Setup?" Adjusting the recording level You can only be possible to set the recording level to the HD manually" on the remote repeatedly until "LevelAdjust?" Therefore, if the output level of "Recording to maximum. ... recordings. 1 Do steps 1 and 2 of the sound source with Smart Space. • If the system continues recording pause for digital recording) (0.0 dB is not affected when you record from a CD, Smart ...

Primary User Manual
Page 37
.../YES on the remote. 5 Press TUNING + or - repeatedly to tune in the desired station. 4 Press MENU/NO on the remote repeatedly until "MANUAL" appears in the display. 3 Press TUNING + or - continued 37GB The frequency changes as described in steps 2 to store the preset stations. At that...MODE on the remote. repeatedly to stop Set the frequency of the desired radio station as the system scans for stereo program only) appear. Tuner Tuner Presetting radio stations The system can then tune in any of those stations simply by selecting the corresponding preset number. A preset ...
.../YES on the remote. 5 Press TUNING + or - repeatedly to tune in the desired station. 4 Press MENU/NO on the remote repeatedly until "MANUAL" appears in the display. 3 Press TUNING + or - continued 37GB The frequency changes as described in steps 2 to store the preset stations. At that...MODE on the remote. repeatedly to stop Set the frequency of the desired radio station as the system scans for stereo program only) appear. Tuner Tuner Presetting radio stations The system can then tune in any of those stations simply by selecting the corresponding preset number. A preset ...

Primary User Manual
Page 38
...tuning interval is static during an FM broadcast, press FM MODE on the remote in "Setting presets through manual tuning". To switch the AM tuning interval, tune in the system's memory for some areas). repeatedly to the original interval, repeat the same procedure. Presetting radio stations (...in the display, and then press TUNING + or -. Pressing and holding down FUNCTION, turn off the system. Listening to a radio station either by selecting a preset station or by manually tuning in the display. Listening to the radio You can label the preset stations (see "Labelling the ...
...tuning interval is static during an FM broadcast, press FM MODE on the remote in "Setting presets through manual tuning". To switch the AM tuning interval, tune in the system's memory for some areas). repeatedly to the original interval, repeat the same procedure. Presetting radio stations (...in the display, and then press TUNING + or -. Pressing and holding down FUNCTION, turn off the system. Listening to a radio station either by selecting a preset station or by manually tuning in the display. Listening to the radio You can label the preset stations (see "Labelling the ...

Primary User Manual
Page 54
... software (continued) Notes • After uninstalling M-crew, the "Database" and "Jacket" folders created under the "M-crew for CMT-L7HD table of contents will be no more need for them manually, if there is no longer available also in M-crew. Quitting the software 1 Click on the Main bar. M-crew for... CMT-L7HD is displayed immediately after M-crew for CMT-L7HD ends. 54GB The bar below is started up and the Main bar...
... software (continued) Notes • After uninstalling M-crew, the "Database" and "Jacket" folders created under the "M-crew for CMT-L7HD table of contents will be no more need for them manually, if there is no longer available also in M-crew. Quitting the software 1 Click on the Main bar. M-crew for... CMT-L7HD is displayed immediately after M-crew for CMT-L7HD ends. 54GB The bar below is started up and the Main bar...

Primary User Manual
Page 57
... audio cord. In this case, connect the component to "MD", do the following procedure. 1 Turn on the system. 2 Press FUNCTION repeatedly until "MD" appears. 3 Press MENU/NO on page 56. 2 Start recording manually. Optional Components 57GB See "Hooking up optional components" on the remote. See "Hooking up optional components" on the remote. appears. 4 Press ENTER/YES...
... audio cord. In this case, connect the component to "MD", do the following procedure. 1 Turn on the system. 2 Press FUNCTION repeatedly until "MD" appears. 3 Press MENU/NO on page 56. 2 Start recording manually. Optional Components 57GB See "Hooking up optional components" on the remote. See "Hooking up optional components" on the remote. appears. 4 Press ENTER/YES...
Primary User Manual
Page 59
... as the "Readme.txt" file installed on for CMT-L7HD", and then click "Readme". continued 59GB Troubleshooting General "- -:- -" appears in for servicing, be set the timer, make sure to press `/1 to bring the speaker system (SS-L7) along with the label side facing ... To open and "LOCKED" appears. • Consult your nearest Sony dealer. The sound of noise. • Connect the system to a different wall outlet. • Install a noise filter (commercially available) to your computer's manual, as well as possible. • Connect the supplied speakers. Troubleshooting...
... as the "Readme.txt" file installed on for CMT-L7HD", and then click "Readme". continued 59GB Troubleshooting General "- -:- -" appears in for servicing, be set the timer, make sure to press `/1 to bring the speaker system (SS-L7) along with the label side facing ... To open and "LOCKED" appears. • Consult your nearest Sony dealer. The sound of noise. • Connect the system to a different wall outlet. • Install a noise filter (commercially available) to your computer's manual, as well as possible. • Connect the supplied speakers. Troubleshooting...

Primary User Manual
Page 62
...loading the CD. You tried to the HD with "AUTO" selected as the sound source. Cannot STORAGE You tried to record to perform manual recording from the CD with less than 240 minutes of a CD. This does not affect the recorded material. While recording from the ... A moment's lighting is copying the text data. 62GB Cannot Edit You tried to edit in the system. You pressed STORAGE MODE during digital recording. Wait until "Initialize" disappears from a digital component connected through the DIGITAL OPTICAL IN jack, the digital connecting cable was unplugged or the digital...
...loading the CD. You tried to the HD with "AUTO" selected as the sound source. Cannot STORAGE You tried to record to perform manual recording from the CD with less than 240 minutes of a CD. This does not affect the recorded material. While recording from the ... A moment's lighting is copying the text data. 62GB Cannot Edit You tried to edit in the system. You pressed STORAGE MODE during digital recording. Wait until "Initialize" disappears from a digital component connected through the DIGITAL OPTICAL IN jack, the digital connecting cable was unplugged or the digital...

