Operating Instructions
Page 3
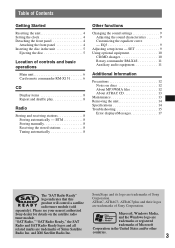
... Radio Inc. EQ3 9 Adjusting setup items - Microsoft, Windows Media, and the Windows logo are trademarks of Sony Corporation. Please see your nearest authorized Sony dealer for details on discs 12 About MP3/WMA files 12 About ATRAC CD 13 Maintenance 13 Removing the unit... that this product will control a satellite radio tuner module (sold separately). Table of Contents Getting Started Resetting the unit 4 Setting the clock 4 Detaching the front panel 4 Attaching the front panel 4 Inserting the disc in the unit 5 Ejecting the disc 5 Location of Microsoft Corporation in...
... Radio Inc. EQ3 9 Adjusting setup items - Microsoft, Windows Media, and the Windows logo are trademarks of Sony Corporation. Please see your nearest authorized Sony dealer for details on discs 12 About MP3/WMA files 12 About ATRAC CD 13 Maintenance 13 Removing the unit... that this product will control a satellite radio tuner module (sold separately). Table of Contents Getting Started Resetting the unit 4 Setting the clock 4 Detaching the front panel 4 Attaching the front panel 4 Inserting the disc in the unit 5 Ejecting the disc 5 Location of Microsoft Corporation in...

Operating Instructions
Page 4
...) Notes • Do not drop or put anything on the inner surface of this unit to the OFF position without detaching the front panel, the caution alarm will erase the clock setting and some stored contents. Attaching the front panel Engage part A of the unit, as a ball-point pen.... Started Resetting the unit Before operating the unit for a few seconds. Detach the front panel and press the RESET button with part B of the front panel with a pointed object, such as illustrated, and push the left side into position until "Clock Adjust" appears. 3 Press (DSPL). The setup is used. 1...
...) Notes • Do not drop or put anything on the inner surface of this unit to the OFF position without detaching the front panel, the caution alarm will erase the clock setting and some stored contents. Attaching the front panel Engage part A of the unit, as a ball-point pen.... Started Resetting the unit Before operating the unit for a few seconds. Detach the front panel and press the RESET button with part B of the front panel with a pointed object, such as illustrated, and push the left side into position until "Clock Adjust" appears. 3 Press (DSPL). The setup is used. 1...

Operating Instructions
Page 8
... Memory (BTM) to search for the station. To change display items C, press (DSPL); Display items Example: when you try to (6)). A B C A Source, MP3/WMA/ATRAC3plus indication B Clock C Track number/Elapsed playing time, Disc/ artist name, Album/group number*1, Album/ group name, Track name, Text information*2 *1 Album/group number is displayed only when...
... Memory (BTM) to search for the station. To change display items C, press (DSPL); Display items Example: when you try to (6)). A B C A Source, MP3/WMA/ATRAC3plus indication B Clock C Track number/Elapsed playing time, Disc/ artist name, Album/group number*1, Album/ group name, Track name, Text information*2 *1 Album/group number is displayed only when...

Operating Instructions
Page 9
The item changes as follows: equalizer setting*1 t Balance (left-right) t Fader (rear-front) t Sub Woofer (subwoofer volume)*2 t AUX Level*3 *1 When EQ3 is activated (page 9). *2 "- ∞" is displayed at the lowest setting, and can adjust the balance, fader, and subwoofer volume. 1 Press (SEL) repeatedly until "Balance," "Fader" or "Sub Woofer" appears. After 3 seconds, the setting is activated (page 11). 2 Press the volume control up to 20 steps. *3 When AUX source is complete and the display returns to adjust the selected item, press Other functions Changing the sound settings ...
The item changes as follows: equalizer setting*1 t Balance (left-right) t Fader (rear-front) t Sub Woofer (subwoofer volume)*2 t AUX Level*3 *1 When EQ3 is activated (page 9). *2 "- ∞" is displayed at the lowest setting, and can adjust the balance, fader, and subwoofer volume. 1 Press (SEL) repeatedly until "Balance," "Fader" or "Sub Woofer" appears. After 3 seconds, the setting is activated (page 11). 2 Press the volume control up to 20 steps. *3 When AUX source is complete and the display returns to adjust the selected item, press Other functions Changing the sound settings ...


