
Service Manual
Page 1
... ADJUSTMENT MANUAL VII" (9-973-801-11). Video camera recorder System Video recording system 2 Rotary heads Helical scanning FM system Audio recording system Rotary heads, FM system Video signal NTSC color, EIA standards Usable cassette 8mm video format cassette CCD-TR315/TR416/TR416PK CCD-TRV16/TRV16PK : standard 8 CCD-TR516/TR516PK/TR716 CCD-TRV36/TRV36PK/TRV43/TRV46/ TRV46PK : Hi8...
... ADJUSTMENT MANUAL VII" (9-973-801-11). Video camera recorder System Video recording system 2 Rotary heads Helical scanning FM system Audio recording system Rotary heads, FM system Video signal NTSC color, EIA standards Usable cassette 8mm video format cassette CCD-TR315/TR416/TR416PK CCD-TRV16/TRV16PK : standard 8 CCD-TR516/TR516PK/TR716 CCD-TRV36/TRV36PK/TRV43/TRV46/ TRV46PK : Hi8...

Service Manual
Page 2
...consumption(when using the battery pack) During camera recording CCD-TR416/TR416PK/TR516/ TR516PK : 2.4 W CCD-TR315/TR716 : 2.5 W During camera recording using LCD CCD-TRV16/TRV16PK/TRV36/ TRV36PK : 3.1 W CCD-TRV43/TRV46/TRV46PK : 3.2 W Viewfinder CCD-TRV16/TRV16PK/TRV36/ TRV36PK : 2.5 W CCD-TRV43/TRV46/TRV46PK : 2.6 W Operating temperature 32...CURITÉ!! SAFETY-RELATED COMPONENT WARNING !! REPLACE THESE COMPONENTS WITH SONY PARTS WHOSE PART NUMBERS APPEAR AS SHOWN IN THIS MANUAL OR IN SUPPLEMENTS PUBLISHED BY SONY. 5. Check the entire board surface for unauthorized replacement parts, ...
...consumption(when using the battery pack) During camera recording CCD-TR416/TR416PK/TR516/ TR516PK : 2.4 W CCD-TR315/TR716 : 2.5 W During camera recording using LCD CCD-TRV16/TRV16PK/TRV36/ TRV36PK : 3.1 W CCD-TRV43/TRV46/TRV46PK : 3.2 W Viewfinder CCD-TRV16/TRV16PK/TRV36/ TRV36PK : 2.5 W CCD-TRV43/TRV46/TRV46PK : 2.6 W Operating temperature 32...CURITÉ!! SAFETY-RELATED COMPONENT WARNING !! REPLACE THESE COMPONENTS WITH SONY PARTS WHOSE PART NUMBERS APPEAR AS SHOWN IN THIS MANUAL OR IN SUPPLEMENTS PUBLISHED BY SONY. 5. Check the entire board surface for unauthorized replacement parts, ...

Service Manual
Page 6
... blinks at 3.2 Hz C 31 11 Display window Repairede by : Block Detailed Code Refer to page7 Self-diagnosis Code table C : Corrected by service engineer 31 ... tion manual. selfdiagnosis display and service mode display. SELF-DIAGNOSIS FUNCTION 1. Service Mode Display The service mode display shows up [3] C : 3 1 : 1 1 Backup No. Display Method While pressing the...
... blinks at 3.2 Hz C 31 11 Display window Repairede by : Block Detailed Code Refer to page7 Self-diagnosis Code table C : Corrected by service engineer 31 ... tion manual. selfdiagnosis display and service mode display. SELF-DIAGNOSIS FUNCTION 1. Service Mode Display The service mode display shows up [3] C : 3 1 : 1 1 Backup No. Display Method While pressing the...

Service Manual
Page 7
... CN551 of VC-215 board) when focusing is performed when the focus dial is rotated in the Difficult to adjust focus E 6 1 0 0 (Cannot initialize focus.) focus manual mode and the focus motor drive circuit (IC552 of VC215 board) when zooming is not performed. Inspect the lens block zoom reset sensor (Pin @¡...
... CN551 of VC-215 board) when focusing is performed when the focus dial is rotated in the Difficult to adjust focus E 6 1 0 0 (Cannot initialize focus.) focus manual mode and the focus motor drive circuit (IC552 of VC215 board) when zooming is not performed. Inspect the lens block zoom reset sensor (Pin @¡...

Service Manual
Page 8
... 1-8 Using the wide mode function 1-8 Using the PROGRAM AE function 1-9 Focusing manually 1-9 Enjoying picture effect 1-10 Adjusting the exposure 1-10 Superimposing a title 1-11 Making your camcorder abroad 1-17 Truoble check 1-17 Self-diagnosis display 1-18 Identifying the parts 1-...out a Cassette when not Eject (Force Eject 5 Self-Diagnosis Function 1. GENERAL This section is extacked from instruction manual of Battery Panel Block 2-3 2-7. Removal of CCD-TRV36/TRV43/TRV46. Removal of Control Switch Block (FK-8500 2-4 2-9. Removal of Cabinet (L) Block 2-4 2-8. ...
... 1-8 Using the wide mode function 1-8 Using the PROGRAM AE function 1-9 Focusing manually 1-9 Enjoying picture effect 1-10 Adjusting the exposure 1-10 Superimposing a title 1-11 Making your camcorder abroad 1-17 Truoble check 1-17 Self-diagnosis display 1-18 Identifying the parts 1-...out a Cassette when not Eject (Force Eject 5 Self-Diagnosis Function 1. GENERAL This section is extacked from instruction manual of Battery Panel Block 2-3 2-7. Removal of CCD-TRV36/TRV43/TRV46. Removal of Control Switch Block (FK-8500 2-4 2-9. Removal of Cabinet (L) Block 2-4 2-8. ...

Service Manual
Page 11
CCD-TR315/TR416/TR416PK/TR516/TR516PK/TR716 CCD-TRV16/TRV16PK/TRV36/TRV36PK/TRV43/TRV46/TRV46PK SECTION 1 GENERAL This section is extracted from instruction manual of CCD-TRV36/TRV43/TRV46.
CCD-TR315/TR416/TR416PK/TR516/TR516PK/TR716 CCD-TRV16/TRV16PK/TRV36/TRV36PK/TRV43/TRV46/TRV46PK SECTION 1 GENERAL This section is extracted from instruction manual of CCD-TRV36/TRV43/TRV46.

Service Manual
Page 38
...) FP-621 Function key (FK-8500) FP-249 FP-56 FP-248 FP-221 Capstan motor Video head Drum motor FP-642...TRV series only Manual forcus (MF-8500) FP-620...TR716 & TRV series only FP-220 CIRCUIT BOARDS LOCATION LB-54...Color EVF models only VF-119...Color EVF models...-90...TR series PJ-91...TRV series (AV Out) VF-99...B/W EVF models only (B/W EVF) CD-210...TR series only CD-211...TRV series only (CCD imager) PD-107...TRV series only RGB decoder, LCD, LCD drive, Back light VC-215 Camera, Y/C prosessor, IN/OUT, REC.PB head amp, Servo/System...
...) FP-621 Function key (FK-8500) FP-249 FP-56 FP-248 FP-221 Capstan motor Video head Drum motor FP-642...TRV series only Manual forcus (MF-8500) FP-620...TR716 & TRV series only FP-220 CIRCUIT BOARDS LOCATION LB-54...Color EVF models only VF-119...Color EVF models...-90...TR series PJ-91...TRV series (AV Out) VF-99...B/W EVF models only (B/W EVF) CD-210...TR series only CD-211...TRV series only (CCD imager) PD-107...TRV series only RGB decoder, LCD, LCD drive, Back light VC-215 Camera, Y/C prosessor, IN/OUT, REC.PB head amp, Servo/System...

Service Manual
Page 86
... given order. Black White 1189 mm 841 mm Fig. 5-1-6. POWER switch (MA-345/346 board CAMERA 2. STEADY SHOT (Menu display OFF 6. FOCUS switch (MF-8500 MANUAL 8. if adjustments are performed using the color bar chart. (Standard picture frame) 2) White pattern (Standard picture frame) Remove the color bar chart from the pattern...
... given order. Black White 1189 mm 841 mm Fig. 5-1-6. POWER switch (MA-345/346 board CAMERA 2. STEADY SHOT (Menu display OFF 6. FOCUS switch (MF-8500 MANUAL 8. if adjustments are performed using the color bar chart. (Standard picture frame) 2) White pattern (Standard picture frame) Remove the color bar chart from the pattern...

Service Manual
Page 89
1-2. Note : If copy the data built in the different model, the camcorder may not operate. 3) When changing the data, press the PAUSE button of the adjusting remote commander each time when setting new data to write the data in the following tables by manual input. Initializing the D,E,F Page Data Note 1: If "Initializing the...
1-2. Note : If copy the data built in the different model, the camcorder may not operate. 3) When changing the data, press the PAUSE button of the adjusting remote commander each time when setting new data to write the data in the following tables by manual input. Initializing the D,E,F Page Data Note 1: If "Initializing the...

Service Manual
Page 97
... to 7B.) 7) Select page: 2, address: 02, and check that the data of the adjusting remote commander. (The adjustment data will be deviated during auto focusing/manual focusing. 3-1. Processing after Completing Adjustments 1) Select page: 0, address: 01, and set data: 01. 3) Check that the data is the initial value (See table below). Flange...
... to 7B.) 7) Select page: 2, address: 02, and check that the data of the adjusting remote commander. (The adjustment data will be deviated during auto focusing/manual focusing. 3-1. Processing after Completing Adjustments 1) Select page: 0, address: 01, and set data: 01. 3) Check that the data is the initial value (See table below). Flange...

Service Manual
Page 115
... supply ON mode 12 Forced camera power supply ON mode ........ 11 [Processing after completing adjustments. Be sure to the separate "8 mm Video Mechanical Adjustment Manual VII (B Mechanism)". 9) Perform "Processing after operations", after Operations] 1) Select page: 0, address: 01, and set data: 01. 2) Select page...) 8) Check that the mechanical deck can be operated.) 2) Connect the adjusting remote commander to the separate volume"8 mm Video Mechanism Adjustment Manual VII B Mechanism ". 2-1. Channel 1: Pin 6 of CN910 of VC-215 board External trigger: Pin !¡ of CN910 of VC-...
... supply ON mode 12 Forced camera power supply ON mode ........ 11 [Processing after completing adjustments. Be sure to the separate "8 mm Video Mechanical Adjustment Manual VII (B Mechanism)". 9) Perform "Processing after operations", after Operations] 1) Select page: 0, address: 01, and set data: 01. 2) Select page...) 8) Check that the mechanical deck can be operated.) 2) Connect the adjusting remote commander to the separate volume"8 mm Video Mechanism Adjustment Manual VII B Mechanism ". 2-1. Channel 1: Pin 6 of CN910 of VC-215 board External trigger: Pin !¡ of CN910 of VC-...

Service Manual
Page 124
...: IC604 (¶) EXPOSURE BACK LIGHT FADER FOCUS FOCUS AUTO FOCUS (CF-60/61 S012) (CF-60/61 S017) (MF-8500 S002) INFINITY (MF-8500 S001) MANUAL (MF-8500 S001) (MF-8500 S001) 65 DATE COUNTER END SEARCH TITLE DISPLAY (AD5: (CF-60/61 S003) RESET (CF-61 S013) (CF-60/61...
...: IC604 (¶) EXPOSURE BACK LIGHT FADER FOCUS FOCUS AUTO FOCUS (CF-60/61 S012) (CF-60/61 S017) (MF-8500 S002) INFINITY (MF-8500 S001) MANUAL (MF-8500 S001) (MF-8500 S001) 65 DATE COUNTER END SEARCH TITLE DISPLAY (AD5: (CF-60/61 S003) RESET (CF-61 S013) (CF-60/61...

Service Manual
Page 175
...:CND/TRV46:CND) 3-865-333-31 MANUAL, INSTRUCTION (Spanish,Portuguese) (TRV16:E,HK,TW/TRV16PK/TRV36PK/TRV46:E,HK/TRV46PK) 3-865-333-41 MANUAL, INSTRUCTION (Chinese) (TRV16:E,HK,TW/TRV16PK/TRV36PK/TRV46:E,HK/TRV46PK) 3-865-333-51 MANUAL, INSTRUCTION (Korean) (TRV16:E,TW/TRV16PK/TRV36PK/TRV46:E,HK/TRV46PK) 3-865-333-61 MANUAL, INSTRUCTION (English) (TRV16:E,HK,TW/TRV16PK/TRV36PK/TRV46:E,HK...
...:CND/TRV46:CND) 3-865-333-31 MANUAL, INSTRUCTION (Spanish,Portuguese) (TRV16:E,HK,TW/TRV16PK/TRV36PK/TRV46:E,HK/TRV46PK) 3-865-333-41 MANUAL, INSTRUCTION (Chinese) (TRV16:E,HK,TW/TRV16PK/TRV36PK/TRV46:E,HK/TRV46PK) 3-865-333-51 MANUAL, INSTRUCTION (Korean) (TRV16:E,TW/TRV16PK/TRV36PK/TRV46:E,HK/TRV46PK) 3-865-333-61 MANUAL, INSTRUCTION (English) (TRV16:E,HK,TW/TRV16PK/TRV36PK/TRV46:E,HK...
Operating Instructions
Page 1
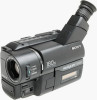
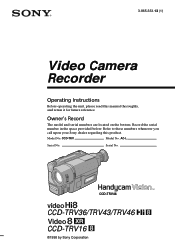
Owner's Record The model and serial numbers are located on the bottom. Serial No. 3-865-333-13 (1) Video Camera Recorder Operating Instructions Before operating the unit, please read this product. Model No. Record the serial number in the space provided below. AC-L Serial No. CCD-TRV Model No. Refer to these numbers whenever you call upon your Sony dealer regarding this manual thoroughly, and retain it for future reference. CCD-TRV46 CCD-TRV36/TRV43/TRV46 CCD-TRV16 ©1998 by Sony Corporation
Owner's Record The model and serial numbers are located on the bottom. Serial No. 3-865-333-13 (1) Video Camera Recorder Operating Instructions Before operating the unit, please read this product. Model No. Record the serial number in the space provided below. AC-L Serial No. CCD-TRV Model No. Refer to these numbers whenever you call upon your Sony dealer regarding this manual thoroughly, and retain it for future reference. CCD-TRV46 CCD-TRV36/TRV43/TRV46 CCD-TRV16 ©1998 by Sony Corporation
Operating Instructions
Page 2
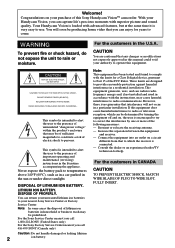
...with superior picture and sound quality. With your Handycam Vision, you call 1-800-222-SONY (United States only) For the Sony Factory Service Center nearest you can radiate radio frequency energy and, if not installed and used in this manual could void your nearest Sony Service Center or Factory Service Center. You ... shock to comply with advanced features, but at the same time it is intended to alert the user to use. If this Sony Handycam VisionTM camcorder. For the customers in a particular installation. This symbol is very easy to the presence of the FCC Rules. Your...
...with superior picture and sound quality. With your Handycam Vision, you call 1-800-222-SONY (United States only) For the Sony Factory Service Center nearest you can radiate radio frequency energy and, if not installed and used in this manual could void your nearest Sony Service Center or Factory Service Center. You ... shock to comply with advanced features, but at the same time it is intended to alert the user to use. If this Sony Handycam VisionTM camcorder. For the customers in a particular installation. This symbol is very easy to the presence of the FCC Rules. Your...
Operating Instructions
Page 3
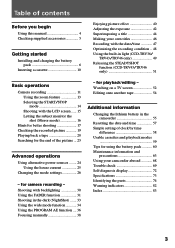
... of contents Before you begin Using this manual 4 Checking supplied accessories 5 Getting started Installing and charging the battery pack 6 Inserting a cassette 10 Enjoying picture effect 40 Adjusting the exposure 42 Superimposing a title 44 Making your camcorder abroad 68 Trouble check 69 Self-diagnosis display... with the date/time 47 Optimizing the recording condition .. 48 Using the built-in light (CCD-TRV36/ TRV43/TRV46 only 49 Releasing the STEADYSHOT function (CCD-TRV43/TRV46 only 51 Basic operations Camera recording 11 Using the zoom feature 13 Selecting the START...
... of contents Before you begin Using this manual 4 Checking supplied accessories 5 Getting started Installing and charging the battery pack 6 Inserting a cassette 10 Enjoying picture effect 40 Adjusting the exposure 42 Superimposing a title 44 Making your camcorder abroad 68 Trouble check 69 Self-diagnosis display... with the date/time 47 Optimizing the recording condition .. 48 Using the built-in light (CCD-TRV36/ TRV43/TRV46 only 49 Releasing the STEADYSHOT function (CCD-TRV43/TRV46 only 51 Basic operations Camera recording 11 Using the zoom feature 13 Selecting the START...
Operating Instructions
Page 4
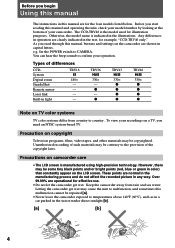
... 140°F (60°C), such as in a car parked in this manual are for example, "CCD-TRV46 only." r TRV43 H 330× r r r r TRV46 H 330× r r r r Note on camcorder care •The LCD screen is manufactured using high-precision technology. However, ...camcorder get wet may be contrary to CAMERA. Set the POWER switch to the provision of your operation. e.g. TRV36 H 330× - To view your recordings on copyright Television programs, films, video tapes, and other materials may be some tiny black points and/or bright points (red, blue or green in light TRV16...
... 140°F (60°C), such as in a car parked in this manual are for example, "CCD-TRV46 only." r TRV43 H 330× r r r r TRV46 H 330× r r r r Note on camcorder care •The LCD screen is manufactured using high-precision technology. However, ...camcorder get wet may be contrary to CAMERA. Set the POWER switch to the provision of your operation. e.g. TRV36 H 330× - To view your recordings on copyright Television programs, films, video tapes, and other materials may be some tiny black points and/or bright points (red, blue or green in light TRV16...
Operating Instructions
Page 21
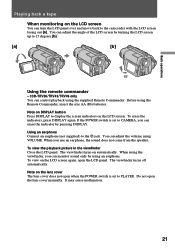
To erase the indicators, press DISPLAY again. Using an earphone Connect an earphone (not supplied) to the camcorder with the LCD screen facing out [a]. The viewfinder turns on the lens cover The lens cover does not open when the POWER switch is set ... DISPLAY button Press DISPLAY to display the screen indicators on the LCD screen again, open the lens cover manually. It may cause malfunction. 21 You can control playback using an earphone. Before using VOLUME. CCD-TRV36/TRV43/TRV46 only You can adjust the volume using the Remote Commander, insert the size AA...
To erase the indicators, press DISPLAY again. Using an earphone Connect an earphone (not supplied) to the camcorder with the LCD screen facing out [a]. The viewfinder turns on the lens cover The lens cover does not open when the POWER switch is set ... DISPLAY button Press DISPLAY to display the screen indicators on the LCD screen again, open the lens cover manually. It may cause malfunction. 21 You can control playback using an earphone. Before using VOLUME. CCD-TRV36/TRV43/TRV46 only You can adjust the volume using the Remote Commander, insert the size AA...
Operating Instructions
Page 30
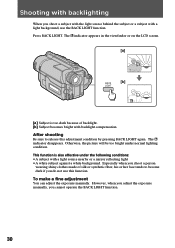
... clothes made of backlight. [b] Subject becomes bright with a light background, use this adjustment condition by pressing BACK LIGHT again. However, when you adjust the exposure manually, you cannot operate the BACK LIGHT function. 30 The c indicator appears in the viewfinder or on the LCD screen. [a] BACK [b] LIGHT [a] Subject is also effective... When you shoot a subject with the light source behind the subject or a subject with backlight compensation. To make a fine adjustment You can adjust the exposure manually.
... clothes made of backlight. [b] Subject becomes bright with a light background, use this adjustment condition by pressing BACK LIGHT again. However, when you adjust the exposure manually, you cannot operate the BACK LIGHT function. 30 The c indicator appears in the viewfinder or on the LCD screen. [a] BACK [b] LIGHT [a] Subject is also effective... When you shoot a subject with the light source behind the subject or a subject with backlight compensation. To make a fine adjustment You can adjust the exposure manually.
Operating Instructions
Page 33
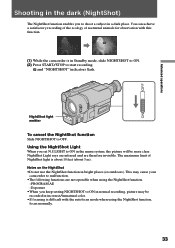
...in the menu system, the picture will be recorded in incorrect/unnatural color. •If focusing is difficult with this function. (1) While the camcorder is about 10 feet (about 3 m). NightShot light emitter To cancel the NightShot function Slide NIGHTSHOT to ON in a dark place. Using the..., picture may be more clear. NightShot Light rays are infrared and are not operable when using the NightShot function, focus manually. 33 This may cause your camcorder to start recording. Notes on the NightShot •Do not use the NightShot function in Standby mode, slide NIGHTSHOT to ON...
...in the menu system, the picture will be recorded in incorrect/unnatural color. •If focusing is difficult with this function. (1) While the camcorder is about 10 feet (about 3 m). NightShot light emitter To cancel the NightShot function Slide NIGHTSHOT to ON in a dark place. Using the..., picture may be more clear. NightShot Light rays are infrared and are not operable when using the NightShot function, focus manually. 33 This may cause your camcorder to start recording. Notes on the NightShot •Do not use the NightShot function in Standby mode, slide NIGHTSHOT to ON...


