Instruction Manual
Page 4
... added protection for this indicates a need for long periods of other controls may result in safe operating condition. 4 When the power cord or plug is in damage and will prevent damage to the set due to lightning and power-line surges. Adjust only those controls that the set to service the set does not operate normally when following conditions: - If the set yourself as opening or removing covers...
... added protection for this indicates a need for long periods of other controls may result in safe operating condition. 4 When the power cord or plug is in damage and will prevent damage to the set due to lightning and power-line surges. Adjust only those controls that the set to service the set does not operate normally when following conditions: - If the set yourself as opening or removing covers...
Instruction Manual
Page 6
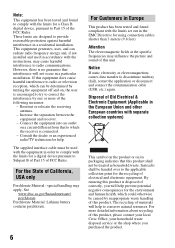
... by turning the equipment off and on its packaging indicates that interference will help to the applicable collection point for help prevent potential negative consequences for using connection cables shorter than 3 meters (9.8 feet). special handling may influence the picture and sound of this product is disposed of FCC Rules. Notice If static electricity or electromagnetism causes data transfer to Subpart B of Part...
... by turning the equipment off and on its packaging indicates that interference will help to the applicable collection point for help prevent potential negative consequences for using connection cables shorter than 3 meters (9.8 feet). special handling may influence the picture and sound of this product is disposed of FCC Rules. Notice If static electricity or electromagnetism causes data transfer to Subpart B of Part...
Instruction Manual
Page 11
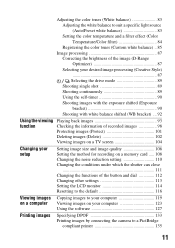
... the drive mode 89 Shooting single shot 89 Shooting continuously 89 Using the self-timer 90 Shooting images with the exposure shifted (Exposure bracket 90 Shooting with white balance shifted (WB bracket) ... 92 Using the viewing Playing back images 93 function Checking the information of recorded images 98 Protecting images (Protect 101 Deleting images (Delete 102 Viewing images on a TV screen 104 Changing your setup Setting image size and image quality 106 Setting the method for recording on a memory card ..... 108 Changing the noise reduction setting 110 Changing the...
... the drive mode 89 Shooting single shot 89 Shooting continuously 89 Using the self-timer 90 Shooting images with the exposure shifted (Exposure bracket 90 Shooting with white balance shifted (WB bracket) ... 92 Using the viewing Playing back images 93 function Checking the information of recorded images 98 Protecting images (Protect 101 Deleting images (Delete 102 Viewing images on a TV screen 104 Changing your setup Setting image size and image quality 106 Setting the method for recording on a memory card ..... 108 Changing the noise reduction setting 110 Changing the...

Instruction Manual
Page 29
... images that can be recorded on a memory card formatted with another one, or delete images in yellow, the memory card is displayed on the shooting conditions. The values may vary depending on the LCD monitor. Preparing the camera Checking the number of recordable images Once you insert a memory card into the camera and set the POWER switch to ON, the number of the [3:2] aspect ratio. 29 Note • If "0" is flashing in the current memory card...
... images that can be recorded on a memory card formatted with another one, or delete images in yellow, the memory card is displayed on the shooting conditions. The values may vary depending on the LCD monitor. Preparing the camera Checking the number of recordable images Once you insert a memory card into the camera and set the POWER switch to ON, the number of the [3:2] aspect ratio. 29 Note • If "0" is flashing in the current memory card...
Instruction Manual
Page 72
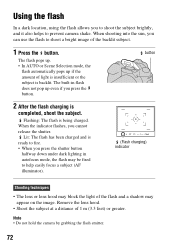
... help easily focus a subject (AF illuminator). (Flash charging) indicator Shooting techniques • The lens or lens hood may appear on the image. When shooting into the sun, you can use the flash to fire. • When you press the shutter button halfway down under dark lighting in flash does not pop up if the amount of the backlit subject. 1 Press the button. The flash pops up. • In AUTO...
... help easily focus a subject (AF illuminator). (Flash charging) indicator Shooting techniques • The lens or lens hood may appear on the image. When shooting into the sun, you can use the flash to fire. • When you press the shutter button halfway down under dark lighting in flash does not pop up if the amount of the backlit subject. 1 Press the button. The flash pops up. • In AUTO...
Instruction Manual
Page 79
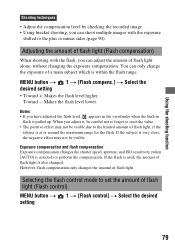
... flash control mode to the limited amount of a main subject which is also changed. Adjusting the amount of flash light (Flash compensation) When shooting with the flash, you adjust it, be careful not to forget to reset the value. • The positive effect may not be visible due to set the amount of flash light alone, without changing the exposure compensation. Exposure compensation and flash compensation Exposure compensation changes the shutter speed, aperture, and ISO...
... flash control mode to the limited amount of a main subject which is also changed. Adjusting the amount of flash light (Flash compensation) When shooting with the flash, you adjust it, be careful not to forget to reset the value. • The positive effect may not be visible due to set the amount of flash light alone, without changing the exposure compensation. Exposure compensation and flash compensation Exposure compensation changes the shutter speed, aperture, and ISO...
Instruction Manual
Page 86
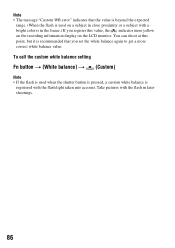
... you set the white balance again to get a more correct white balance value. To call the custom white balance setting Fn button t [White balance] t (Custom) Note • If the flash is used on the LCD monitor. You can shoot at this value, the indicator turns yellow on the recording information display on a subject in close proximity or a subject with a bright color is in later shootings. 86 Note • The message "Custom WB error" indicates...
... you set the white balance again to get a more correct white balance value. To call the custom white balance setting Fn button t [White balance] t (Custom) Note • If the flash is used on the LCD monitor. You can shoot at this value, the indicator turns yellow on the recording information display on a subject in close proximity or a subject with a bright color is in later shootings. 86 Note • The message "Custom WB error" indicates...

Instruction Manual
Page 93
... shooting mode Press the button again. Each time you press the DISP button, the screen changes as on the controller. Using the viewing function With recording data Histogram display With recording data Without recording data Note • The DISP button switches the recording data display on and off in the portrait position MENU button t 2 t [PlaybackDisplay] t Select the desired setting 93 button To return to five images. Using the viewing function Playing back images The last recorded image is displayed on the LCD monitor. 1 Press the button. 2 Select an image...
... shooting mode Press the button again. Each time you press the DISP button, the screen changes as on the controller. Using the viewing function With recording data Histogram display With recording data Without recording data Note • The DISP button switches the recording data display on and off in the portrait position MENU button t 2 t [PlaybackDisplay] t Select the desired setting 93 button To return to five images. Using the viewing function Playing back images The last recorded image is displayed on the LCD monitor. 1 Press the button. 2 Select an image...

Instruction Manual
Page 99
Histogram display Using the viewing function A Display 100-0003 DPOF3 Indication Folder - file number (124) Protect (101) DPOF set (133) Image quality (106) Image size (106) Battery remaining warning (17) B Display Indication Histogram (100) P A S M Mode dial (48) Display 35mm Indication Focal length (141) Creative Style (87) AWB +1 5500K M1 2008 1 1 10:37AM 3/7 White balance (Auto, Preset, Color temperature, Color filter, Custom) (83) D-Range Optimizer (87) Date of recording File number/total number of images 1/125 Shutter speed (61) F3.5 Aperture (59) ISO100 ISO sensitivity (...
Histogram display Using the viewing function A Display 100-0003 DPOF3 Indication Folder - file number (124) Protect (101) DPOF set (133) Image quality (106) Image size (106) Battery remaining warning (17) B Display Indication Histogram (100) P A S M Mode dial (48) Display 35mm Indication Focal length (141) Creative Style (87) AWB +1 5500K M1 2008 1 1 10:37AM 3/7 White balance (Auto, Preset, Color temperature, Color filter, Custom) (83) D-Range Optimizer (87) Date of recording File number/total number of images 1/125 Shutter speed (61) F3.5 Aperture (59) ISO100 ISO sensitivity (...
Instruction Manual
Page 119
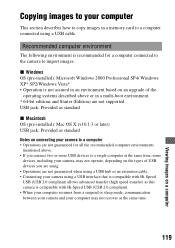
... upgrade of USB devices you connect two or more USB devices to a single computer at the same time. 119 Viewing images on connecting your camera to a computer • Operations are not guaranteed for a computer connected to the camera to import images. x Windows OS (pre-installed): Microsoft Windows 2000 Professional SP4/ Windows XP* SP2/Windows Vista* • Operation is compatible with Hi-Speed USB (USB 2.0 compliant). • When your computer resumes from a suspend or sleep mode...
... upgrade of USB devices you connect two or more USB devices to a single computer at the same time. 119 Viewing images on connecting your camera to a computer • Operations are not guaranteed for a computer connected to the camera to import images. x Windows OS (pre-installed): Microsoft Windows 2000 Professional SP4/ Windows XP* SP2/Windows Vista* • Operation is compatible with Hi-Speed USB (USB 2.0 compliant). • When your computer resumes from a suspend or sleep mode...
Instruction Manual
Page 126
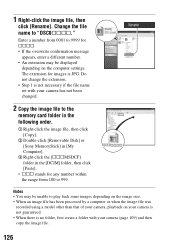
... the image file, then click [Rename]. Do not change the extension. • Step 1 is not necessary if the file name set with your camera has not been changed. 2 Copy the image file to play back some images depending on the image size. • When an image file has been processed by a computer or when the image file was recorded using a model other than that of your camera, playback on the computer settings. Change the file name...
... the image file, then click [Rename]. Do not change the extension. • Step 1 is not necessary if the file name set with your camera has not been changed. 2 Copy the image file to play back some images depending on the image size. • When an image file has been processed by a computer or when the image file was recorded using a model other than that of your camera, playback on the computer settings. Change the file name...
Instruction Manual
Page 129
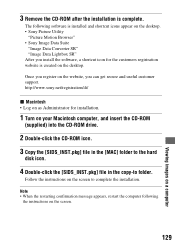
... instructions on the screen. 129 Viewing images on a computer Once you register on the website, you install the software, a shortcut icon for installation. 1 Turn on your Macintosh computer, and insert the CD-ROM (supplied) into the CD-ROM drive. 2 Double-click the CD-ROM icon. 3 Copy the [SIDS_INST.pkg] file in the [MAC] folder to the hard disk icon. 4 Double-click the [SIDS_INST.pkg] file in the copy...
... instructions on the screen. 129 Viewing images on a computer Once you register on the website, you install the software, a shortcut icon for installation. 1 Turn on your Macintosh computer, and insert the CD-ROM (supplied) into the CD-ROM drive. 2 Double-click the CD-ROM icon. 3 Copy the [SIDS_INST.pkg] file in the [MAC] folder to the hard disk icon. 4 Double-click the [SIDS_INST.pkg] file in the copy...

Instruction Manual
Page 130
...] t [Help] t [Picture Motion Browser Guide]. To start "Picture Motion Browser Guide," click [Start] t [All Programs] (in Windows 2000, [Programs]) t [Sony Picture Utility] t [Picture Motion Browser]. This function informs you can change the shooting date and more. • Print or save still images with the date. • Create a data disc using a CD burner drive or DVD burner drive. Select [Start]. For details on the upper-right corner of the screen. Note • The confirmation message...
...] t [Help] t [Picture Motion Browser Guide]. To start "Picture Motion Browser Guide," click [Start] t [All Programs] (in Windows 2000, [Programs]) t [Sony Picture Utility] t [Picture Motion Browser]. This function informs you can change the shooting date and more. • Print or save still images with the date. • Create a data disc using a CD burner drive or DVD burner drive. Select [Start]. For details on the upper-right corner of the screen. Note • The confirmation message...
Instruction Manual
Page 139
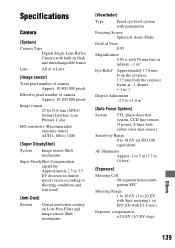
... Primary Color ISO sensitivity (Recommended exposure index) AUTO, 100 to 3200 [Super SteadyShot] System Image sensor-Shift mechanism Super SteadyShot Compensation capability Approximately 2.5 to 3.5 EV decrease in shutter speed (varies according to shooting conditions and lens used) [Anti-Dust] System Charge protection coating on Low-Pass Filter and image sensor-Shift mechanism [Viewfinder] Type Fixed eye-level system with pentamirror Focusing Screen Spherical Acute Matte Field of View...
... Primary Color ISO sensitivity (Recommended exposure index) AUTO, 100 to 3200 [Super SteadyShot] System Image sensor-Shift mechanism Super SteadyShot Compensation capability Approximately 2.5 to 3.5 EV decrease in shutter speed (varies according to shooting conditions and lens used) [Anti-Dust] System Charge protection coating on Low-Pass Filter and image sensor-Shift mechanism [Viewfinder] Type Fixed eye-level system with pentamirror Focusing Screen Spherical Acute Matte Field of View...

Instruction Manual
Page 144
... the free capacity of time, the camera turns to power saving mode and nearly shuts down (page 48). Use the focus-lock or manual focus function (pages 69, 71). This is not attached properly. Shooting images Nothing is displayed on the LCD monitor when the power is turned on . • In the default setting, the LCD monitor will turn the LCD monitor on (page 39). The power turns off . Change the memory card. • You cannot record images while charging the built...
... the free capacity of time, the camera turns to power saving mode and nearly shuts down (page 48). Use the focus-lock or manual focus function (pages 69, 71). This is not attached properly. Shooting images Nothing is displayed on the LCD monitor when the power is turned on . • In the default setting, the LCD monitor will turn the LCD monitor on (page 39). The power turns off . Change the memory card. • You cannot record images while charging the built...
Instruction Manual
Page 145
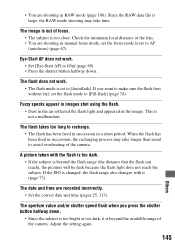
... succession in manual focus mode, set the flash mode to [On] (page 69). • Press the shutter button halfway down . • Since the subject is not a malfunction. Check the minimum focal distance of the lens. • You are recorded incorrectly. • Set the correct date and time (pages 25, 113). Fuzzy specks appear in images shot using the flash. • Dust in the air reflected the flash light and...
... succession in manual focus mode, set the flash mode to [On] (page 69). • Press the shutter button halfway down . • Since the subject is not a malfunction. Check the minimum focal distance of the lens. • You are recorded incorrectly. • Set the correct date and time (pages 25, 113). Fuzzy specks appear in images shot using the flash. • Dust in the air reflected the flash light and...
Instruction Manual
Page 150
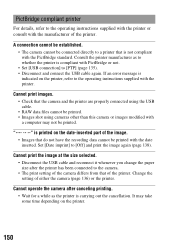
... camera and the printer are properly connected using cameras other than this camera or images modified with the PictBridge standard. Change the setting of the camera differs from that is indicated on the printer. 150 If an error message is not compliant with a computer may take some time depending on the printer, refer to the operating instructions supplied with the date inserted. Cannot print the image at the size selected. • Disconnect the USB cable...
... camera and the printer are properly connected using cameras other than this camera or images modified with the PictBridge standard. Change the setting of the camera differs from that is indicated on the printer. 150 If an error message is not compliant with a computer may take some time depending on the printer, refer to the operating instructions supplied with the date inserted. Cannot print the image at the size selected. • Disconnect the USB cable...
Instruction Manual
Page 151
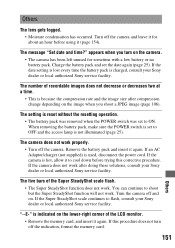
... message "Set date and time?" The number of the LCD monitor. • Remove the memory card, and insert it (page 154). The camera does not work . If the date setting is lost every time the battery pack is used, disconnect the power cord. "--E-" is indicated on the lower-right corner of recordable images does not decrease or decreases two at a time. • This is set to ON. When removing the battery pack, make sure the POWER switch is...
... message "Set date and time?" The number of the LCD monitor. • Remove the memory card, and insert it (page 154). The camera does not work . If the date setting is lost every time the battery pack is used, disconnect the power cord. "--E-" is indicated on the lower-right corner of recordable images does not decrease or decreases two at a time. • This is set to ON. When removing the battery pack, make sure the POWER switch is...
Instruction Manual
Page 152
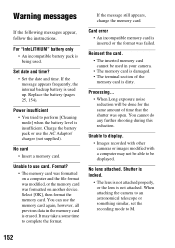
Card error • An incompatible memory card is dirty. You cannot do any further shooting during this reduction. Unable to display. • Images recorded with other cameras or images modified with a computer may take a some time to use the AC Adaptor/ charger (not supplied). Set date and time? • Set the date and time. Replace the battery (pages 25, 154). No card • Insert a memory card. Reinsert the card. • The inserted memory card cannot be displayed. Power insufficient • You...
Card error • An incompatible memory card is dirty. You cannot do any further shooting during this reduction. Unable to display. • Images recorded with other cameras or images modified with a computer may take a some time to use the AC Adaptor/ charger (not supplied). Set date and time? • Set the date and time. Replace the battery (pages 25, 154). No card • Insert a memory card. Reinsert the card. • The inserted memory card cannot be displayed. Power insufficient • You...
Instruction Manual
Page 155
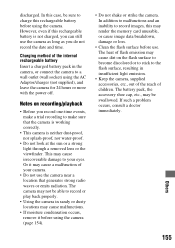
... a strong light through a removed lens or the viewfinder. Charging method of the internal rechargeable battery Insert a charged battery pack in insufficient light emission. • Keep the camera, supplied accessories, etc., out of the reach of your eyes. The camera may not be sure to charge this may cause irrecoverable damage to record images, this rechargeable battery before using the camera. This may render the memory card unusable, or cause image data breakdown...
... a strong light through a removed lens or the viewfinder. Charging method of the internal rechargeable battery Insert a charged battery pack in insufficient light emission. • Keep the camera, supplied accessories, etc., out of the reach of your eyes. The camera may not be sure to charge this may cause irrecoverable damage to record images, this rechargeable battery before using the camera. This may render the memory card unusable, or cause image data breakdown...


