User Guide
Page 2
... user to the presence of electric shock to constitute a risk of important operating and maintenance instructions in the literature accompanying the appliance. PLEASE READ THIS MANUAL THROUGHLY BEFORE OPERATING THE UNIT. TO REDUCE THE RISK OF FIRE OR ELECTRIC SHOCK, DO NOT EXPOSE THIS APPLIANCE TO RAIN OR MOISTURE. CAUTION: TO...
... user to the presence of electric shock to constitute a risk of important operating and maintenance instructions in the literature accompanying the appliance. PLEASE READ THIS MANUAL THROUGHLY BEFORE OPERATING THE UNIT. TO REDUCE THE RISK OF FIRE OR ELECTRIC SHOCK, DO NOT EXPOSE THIS APPLIANCE TO RAIN OR MOISTURE. CAUTION: TO...
User Guide
Page 5
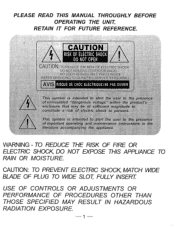
... to the product, be sure the service technician has used a replacement plug specified by items placed upon or against voltage surges and built- See Instruction Manual for replacement or resetting ofprotective device. up static charges. Do not defeat the safety purpose of the grounding-type plug. 13. This plug will fit...
... to the product, be sure the service technician has used a replacement plug specified by items placed upon or against voltage surges and built- See Instruction Manual for replacement or resetting ofprotective device. up static charges. Do not defeat the safety purpose of the grounding-type plug. 13. This plug will fit...
User Guide
Page 12
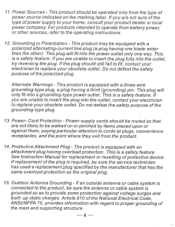
... tuner preset memories for example it finds. Repeat this procedure until the desired frequency appears in the display. • Manual Tuning : Repeatedly press the TUNING 44 or 0+ buttons to manually move the display up or down until the display starts to store setting. 11 Press MEM / PGM button again to... select desired preset channel number. 6. B. The Tuner will appear on 100.85 MHz instead of 100.8 MHz, use the manual tuning method to " fine tune " to the exact frequency of setting. 9k / 10kHz SETTING In case the unit is moved to different country with ...
... tuner preset memories for example it finds. Repeat this procedure until the desired frequency appears in the display. • Manual Tuning : Repeatedly press the TUNING 44 or 0+ buttons to manually move the display up or down until the display starts to store setting. 11 Press MEM / PGM button again to... select desired preset channel number. 6. B. The Tuner will appear on 100.85 MHz instead of 100.8 MHz, use the manual tuning method to " fine tune " to the exact frequency of setting. 9k / 10kHz SETTING In case the unit is moved to different country with ...

User Guide
Page 15
... seconds to exit setting mode. After the fourth time the alarm shuts off until the next day. • You may also activate the Snooze function manually after the alarm sounds by pressing the SNOOZE button or SNZ button on the display. SETTING MONTH & DATE 1. ALARM CLOCK SETTING SETTING ALARM 1. It stops...
... seconds to exit setting mode. After the fourth time the alarm shuts off until the next day. • You may also activate the Snooze function manually after the alarm sounds by pressing the SNOOZE button or SNZ button on the display. SETTING MONTH & DATE 1. ALARM CLOCK SETTING SETTING ALARM 1. It stops...
User Guide
Page 16
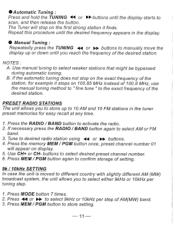
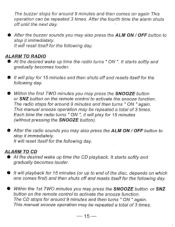
.... ALARM TO RADIO • At the desired wake up time the CD playback. The radio stops for around 9 minutes and then turns " ON " again. This manual snooze operation may also press the ALM ON / OFF button to stop it immediately. It will reset itself for the following day. It starts softly...SNOOZE button). • After the radio sounds you may press the SNOOZE button or SNZ button on again This operation can be repeated 3 times. This manual snooze operation may also press the ALM ON / OFF button to stop it immediately. Each time the radio turns " ON ", it will play for 15...
.... ALARM TO RADIO • At the desired wake up time the CD playback. The radio stops for around 9 minutes and then turns " ON " again. This manual snooze operation may also press the ALM ON / OFF button to stop it immediately. It will reset itself for the following day. It starts softly...SNOOZE button). • After the radio sounds you may press the SNOOZE button or SNZ button on again This operation can be repeated 3 times. This manual snooze operation may also press the ALM ON / OFF button to stop it immediately. Each time the radio turns " ON ", it will play for 15...
User Guide
Page 20
... parts which fail to conform to this product, please fill in the appropriate model's instruction manual, or (B) the repair of its option) the productand any of any cause beyond the... IS REQUESTED. For your own personal records. WARRANTY FISHER MICRO AUDIO SYSTEM•MODEL SLIM-1400 LIMITED WARRANTY OBLIGATIONS In order to obtain factory warranty service, call FACTORY SERVICE 1-800-421... factory warranty service, product operation or problem resolution, call the toll-free number below , SANYO FISHER COMPANY (SFC) warrants this unit to the retail store for your protection in order ...
... parts which fail to conform to this product, please fill in the appropriate model's instruction manual, or (B) the repair of its option) the productand any of any cause beyond the... IS REQUESTED. For your own personal records. WARRANTY FISHER MICRO AUDIO SYSTEM•MODEL SLIM-1400 LIMITED WARRANTY OBLIGATIONS In order to obtain factory warranty service, call FACTORY SERVICE 1-800-421... factory warranty service, product operation or problem resolution, call the toll-free number below , SANYO FISHER COMPANY (SFC) warrants this unit to the retail store for your protection in order ...


