User Manual (user Manual) (ver.1.0) (English)
Page 2
Additional Functions 230 • Using Samsung Apps 236 • AllShare™ 267 • Anynet+(HDMI-CEC) 273 Other Information • TroubleShooting 286 • Anti-theft Kensington Lock 298 • ... • Using the Channel Menu • Using the Favorite Channels • Memorizing Channels • Other Features Basic Features • Changing the Preset Picture Mode • Adjusting Picture Settings • Changing the Picture Size • Changing the Picture Options • Using the TV with Your PC • Changing the Preset Sound Modes • Adjusting Sound...
Additional Functions 230 • Using Samsung Apps 236 • AllShare™ 267 • Anynet+(HDMI-CEC) 273 Other Information • TroubleShooting 286 • Anti-theft Kensington Lock 298 • ... • Using the Channel Menu • Using the Favorite Channels • Memorizing Channels • Other Features Basic Features • Changing the Preset Picture Mode • Adjusting Picture Settings • Changing the Picture Size • Changing the Picture Options • Using the TV with Your PC • Changing the Preset Sound Modes • Adjusting Sound...
User Manual (user Manual) (ver.1.0) (English)
Page 34
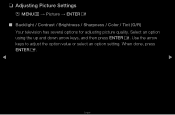
Use the arrow keys to adjust the option value or select an option setting. Select an option using the up and down arrow keys, and then press ENTERE. When done, press ENTERE. ◀ ▶ English ❑❑ Adjusting Picture Settings OO MENUm → Picture → ENTERE ■■ Backlight / Contrast / Brightness / Sharpness / Color / Tint (G/R) Your television has several options for adjusting picture quality.
Use the arrow keys to adjust the option value or select an option setting. Select an option using the up and down arrow keys, and then press ENTERE. When done, press ENTERE. ◀ ▶ English ❑❑ Adjusting Picture Settings OO MENUm → Picture → ENTERE ■■ Backlight / Contrast / Brightness / Sharpness / Color / Tint (G/R) Your television has several options for adjusting picture quality.
User Manual (user Manual) (ver.1.0) (English)
Page 35
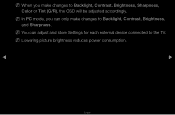
NN In PC mode, you make changes to the TV. NN You can only make changes to Backlight, Contrast, Brightness, Sharpness, Color or Tint (G/R), the OSD will be adjusted accordingly. NN When you can adjust and store Settings for each external device connected to Backlight, Contrast, Brightness, and Sharpness. NN Lowering picture brightness reduces power consumption. ◀ ▶ English
NN In PC mode, you make changes to the TV. NN You can only make changes to Backlight, Contrast, Brightness, Sharpness, Color or Tint (G/R), the OSD will be adjusted accordingly. NN When you can adjust and store Settings for each external device connected to Backlight, Contrast, Brightness, and Sharpness. NN Lowering picture brightness reduces power consumption. ◀ ▶ English
User Manual (user Manual) (ver.1.0) (English)
Page 36
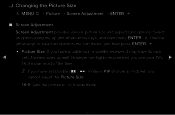
...its own ◀ set Double (à, Œ) mode in PIP (Picture-in the sub-menu, and then press ENTERE. ●● Picture Size: If you use your TV's ▶ 16:9 mode most of screen sizes as well. ❑❑ Changing the Picture Size OO MENUm → Picture → Screen ...Adjustment → ENTERE ■■ Screen Adjustment Screen Adjustment provides various picture size and aspect ratio options. However, we highly recommend you have a cable box or satellite receiver, it may have set of the time. Select an option using the up and down arrow keys,...
...its own ◀ set Double (à, Œ) mode in PIP (Picture-in the sub-menu, and then press ENTERE. ●● Picture Size: If you use your TV's ▶ 16:9 mode most of screen sizes as well. ❑❑ Changing the Picture Size OO MENUm → Picture → Screen ...Adjustment → ENTERE ■■ Screen Adjustment Screen Adjustment provides various picture size and aspect ratio options. However, we highly recommend you have a cable box or satellite receiver, it may have set of the time. Select an option using the up and down arrow keys,...

User Manual (user Manual) (ver.1.0) (English)
Page 37
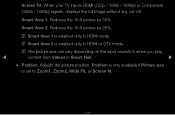
Zoom1: Use for a long time. Wide Fit: Enlarges the aspect ratio of the screen may cause image ◀ retention (screen burn) which is not covered by the warranty. ▶ English NN Available with HD 1080i / 720p signals in 16:9 mode. 4:3: Sets the picture to 4:3 format for moderate magnification. Cuts off the top and sides. NN Do not set your TV to basic (4:3) mode. Zoom2: Use for a stronger magnification. The borders displayed on the left and right, or top and bottom of the picture so it fits the entire screen.
Zoom1: Use for a long time. Wide Fit: Enlarges the aspect ratio of the screen may cause image ◀ retention (screen burn) which is not covered by the warranty. ▶ English NN Available with HD 1080i / 720p signals in 16:9 mode. 4:3: Sets the picture to 4:3 format for moderate magnification. Cuts off the top and sides. NN Do not set your TV to basic (4:3) mode. Zoom2: Use for a stronger magnification. The borders displayed on the left and right, or top and bottom of the picture so it fits the entire screen.
User Manual (user Manual) (ver.1.0) (English)
Page 38
NN Smart View 1 is enabled only in Smart Hub. ▶ ●● Position: Adjusts the picture position. Smart View 2: Reduces the 16:9 picture by 50%. NN The picture size can vary depending on the input resolution when you play ◀ content from Videos in HDMI mode. Screen Fit: When your...720p / 1080i / 1080p) or Component (1080i / 1080p) signals, displays the full image without any cut-off. Position is only available if Picture size is enabled only in HDMI or DTV mode. NN Smart View 2 is set to Zoom1, Zoom2, Wide Fit, or Screen fit. Smart View 1: Reduces the 16...
NN Smart View 1 is enabled only in Smart Hub. ▶ ●● Position: Adjusts the picture position. Smart View 2: Reduces the 16:9 picture by 50%. NN The picture size can vary depending on the input resolution when you play ◀ content from Videos in HDMI mode. Screen Fit: When your...720p / 1080i / 1080p) or Component (1080i / 1080p) signals, displays the full image without any cut-off. Position is only available if Picture size is enabled only in HDMI or DTV mode. NN Smart View 2 is set to Zoom1, Zoom2, Wide Fit, or Screen fit. Smart View 1: Reduces the 16...
User Manual (user Manual) (ver.1.0) (English)
Page 39
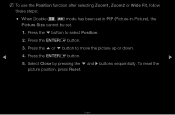
Select Close by pressing the d and r buttons sequentially. To reset the picture position, press Reset. Press the u or d button to select Position. 2. Press the d button to move the picture up or down. ◀ 4. Press the ENTERE button. ▶ 5. Press the ENTERE button. 3. English NN To use the Position function after selecting Zoom1, Zoom2 or Wide Fit, follow these steps: ●● When Double (à, Œ) mode has been set in PIP (Picture-in-Picture), the Picture Size cannot be set. 1.
Select Close by pressing the d and r buttons sequentially. To reset the picture position, press Reset. Press the u or d button to select Position. 2. Press the d button to move the picture up or down. ◀ 4. Press the ENTERE button. ▶ 5. Press the ENTERE button. 3. English NN To use the Position function after selecting Zoom1, Zoom2 or Wide Fit, follow these steps: ●● When Double (à, Œ) mode has been set in PIP (Picture-in-Picture), the Picture Size cannot be set. 1.
User Manual (user Manual) (ver.1.0) (English)
Page 40
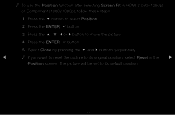
Press the u, d, l or r button to its default position. Press the ENTERE button. 3. Select Close by pressing the d and r buttons sequentially. ◀ NN If you want to reset the picture to move the picture. 4. English The picture will be set to select Position. 2. Press the d button to its original position, select Reset in HDMI (1080i/1080p) or Component (1080i/1080p), follow these steps: 1. Press the ENTERE button. 5. NN To use the Position function after selecting Screen Fit in the ▶ Position screen.
Press the u, d, l or r button to its default position. Press the ENTERE button. 3. Select Close by pressing the d and r buttons sequentially. ◀ NN If you want to reset the picture to move the picture. 4. English The picture will be set to select Position. 2. Press the d button to its original position, select Reset in HDMI (1080i/1080p) or Component (1080i/1080p), follow these steps: 1. Press the ENTERE button. 5. NN To use the Position function after selecting Screen Fit in the ▶ Position screen.

User Manual (user Manual) (ver.1.0) (English)
Page 41
●● HD (High Definition): 16:9 - 1080i/1080p (1920x1080), 720p (1280x720) ●● You can adjust and store settings for each external device you have connected to an input on the TV. ●● Picture Sizes available by Input Source: Input Source Picture Size ATV, AV, Component (480i, 480p) 16:9, Zoom1, Zoom2, 4:3 HDMI (720p, 1080i, 1080p) Smart View 1 DTV(1080i), HDMI (720p, 1080i, 1080p) Smart View 2 ◀ DTV(1080i), Component (1080i, 1080p), HDMI (720p, 1080i, 1080p) ▶ 16:9, 4:3, Wide Fit, Screen Fit PC 16:9, 4:3 English
●● HD (High Definition): 16:9 - 1080i/1080p (1920x1080), 720p (1280x720) ●● You can adjust and store settings for each external device you have connected to an input on the TV. ●● Picture Sizes available by Input Source: Input Source Picture Size ATV, AV, Component (480i, 480p) 16:9, Zoom1, Zoom2, 4:3 HDMI (720p, 1080i, 1080p) Smart View 1 DTV(1080i), HDMI (720p, 1080i, 1080p) Smart View 2 ◀ DTV(1080i), Component (1080i, 1080p), HDMI (720p, 1080i, 1080p) ▶ 16:9, 4:3, Wide Fit, Screen Fit PC 16:9, 4:3 English

User Manual (user Manual) (ver.1.0) (English)
Page 42
... In PC mode, you can only make Advanced Settings Black Tone Off changes to change the value or setting, and then press RGB Only Mode Off ENTERE. ❑❑ Changing the Picture Options ■■ Advanced Settings OO MENUm → Picture → Advanced Settings → ENTERE All Advanced Settings are available in the Standard and Movie modes...
... In PC mode, you can only make Advanced Settings Black Tone Off changes to change the value or setting, and then press RGB Only Mode Off ENTERE. ❑❑ Changing the Picture Options ■■ Advanced Settings OO MENUm → Picture → Advanced Settings → ENTERE All Advanced Settings are available in the Standard and Movie modes...
User Manual (user Manual) (ver.1.0) (English)
Page 45
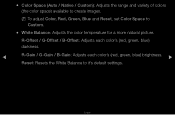
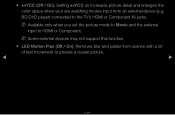
●● Color Space (Auto / Native / Custom): Adjusts the range and variety of colors (the color space) available to it's default settings. R-Offset / G-Offset / B-Offset: Adjusts each color's (red, green, blue) darkness. ◀ R-Gain / G-Gain / B-Gain: Adjusts each color's (red, green, blue) brightness. ▶ Reset: Resets the White Balance to create images. English NN To adjust Color, Red, Green, Blue and Reset, set Color Space to Custom. ●● White Balance: Adjusts the color temperature for a more natural picture.
●● Color Space (Auto / Native / Custom): Adjusts the range and variety of colors (the color space) available to it's default settings. R-Offset / G-Offset / B-Offset: Adjusts each color's (red, green, blue) darkness. ◀ R-Gain / G-Gain / B-Gain: Adjusts each color's (red, green, blue) brightness. ▶ Reset: Resets the White Balance to create images. English NN To adjust Color, Red, Green, Blue and Reset, set Color Space to Custom. ●● White Balance: Adjusts the color temperature for a more natural picture.

User Manual (user Manual) (ver.1.0) (English)
Page 46
Red: Adjust the red level. NN Some external devices may not support this function. Interval: Select interval to Movie. English ●● 10p White Balance (Off / On): Controls the white balance in 10 point intervals by adjusting the red, green, and blue brightness. NN Available for all inputs when you set the picture mode to adjust. Green: Adjust the green level. ◀ Blue: Adjust the blue level. ▶ Reset: Resets the 10p White Balance to its default settings.
Red: Adjust the red level. NN Some external devices may not support this function. Interval: Select interval to Movie. English ●● 10p White Balance (Off / On): Controls the white balance in 10 point intervals by adjusting the red, green, and blue brightness. NN Available for all inputs when you set the picture mode to adjust. Green: Adjust the green level. ◀ Blue: Adjust the blue level. ▶ Reset: Resets the 10p White Balance to its default settings.

User Manual (user Manual) (ver.1.0) (English)
Page 47
NN 3D is in motion. NN When you change the Contrast, the TV sets Motion Lightning to Off. ◀ ▶ English ●● Flesh Tone: Emphasizes pink "Flesh Tone." ●● Edge Enhancement (Off / On): Emphasizes object boundaries. ●● Motion Lighting (Off / On): Reduces power consumption by reducing screen brightness when the picture on the screen is not supported.
NN 3D is in motion. NN When you change the Contrast, the TV sets Motion Lightning to Off. ◀ ▶ English ●● Flesh Tone: Emphasizes pink "Flesh Tone." ●● Edge Enhancement (Off / On): Emphasizes object boundaries. ●● Motion Lighting (Off / On): Reduces power consumption by reducing screen brightness when the picture on the screen is not supported.
User Manual (user Manual) (ver.1.0) (English)
Page 48
NN Some external devices may not support this function. ●● LED Motion Plus (Off / On): Removes blur and judder from an external device (e.g. ●● xvYCC (Off / On): Setting xvYCC on increases picture detail and enlarges the color space when your are watching movies input from scenes with a lot of fast movement to HDMI or Component. NN Available only when you set the picture mode to Movie and the external input to provide a clearer picture. ◀ ▶ English BD/DVD player) connected to the TV's HDMI or Component IN jacks.
NN Some external devices may not support this function. ●● LED Motion Plus (Off / On): Removes blur and judder from an external device (e.g. ●● xvYCC (Off / On): Setting xvYCC on increases picture detail and enlarges the color space when your are watching movies input from scenes with a lot of fast movement to HDMI or Component. NN Available only when you set the picture mode to Movie and the external input to provide a clearer picture. ◀ ▶ English BD/DVD player) connected to the TV's HDMI or Component IN jacks.
User Manual (user Manual) (ver.1.0) (English)
Page 49
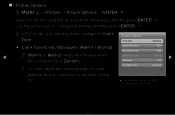
...In PC mode, you can adjust and store settings for each Auto Motion Plus Standard external device connected to change the setting, and then press ENTERE. ■■ Picture Options OO MENUm → Picture → Picture Options → ENTERE Select an option using the... up and down arrow keys, and the press ENTERE. Picture Options Color Tone Standard ●●...
...In PC mode, you can adjust and store settings for each Auto Motion Plus Standard external device connected to change the setting, and then press ENTERE. ■■ Picture Options OO MENUm → Picture → Picture Options → ENTERE Select an option using the... up and down arrow keys, and the press ENTERE. Picture Options Color Tone Standard ●●...

User Manual (user Manual) (ver.1.0) (English)
Page 51
...NN Available in HDMI mode. ●● Film Mode (Off / Auto1 / Auto2): Sets the TV so that it senses and then processes film signals from scenes with large amounts of rapid movement to provide a clearer picture. NN Available only in TV, AV, COMPONENT (480i / 1080i) and HDMI (480i ...9679; Auto Motion Plus (Off / Clear / Standard / Smooth / Custom / Demo): ▶ Removes blur and judder from all sources automatically and adjusts the picture for optimum quality. English ●● HDMI Black Level (Normal / Low): Lets you adjust the screen depth by selecting a black level.
...NN Available in HDMI mode. ●● Film Mode (Off / Auto1 / Auto2): Sets the TV so that it senses and then processes film signals from scenes with large amounts of rapid movement to provide a clearer picture. NN Available only in TV, AV, COMPONENT (480i / 1080i) and HDMI (480i ...9679; Auto Motion Plus (Off / Clear / Standard / Smooth / Custom / Demo): ▶ Removes blur and judder from all sources automatically and adjusts the picture for optimum quality. English ●● HDMI Black Level (Normal / Low): Lets you adjust the screen depth by selecting a black level.

User Manual (user Manual) (ver.1.0) (English)
Page 52
This displayed frequency is not the frequency of the picture the TV is displaying when you have Auto Motion Plus on your TV displays the resolution and frequency of the incoming video signal (60 Hz). ... control Blur Reduction and Judder Reduction manually and use Reset to reset both to Off. NN If you set Auto Motion Plus to Demo, you can compare the difference ◀ between a picture with Auto Motion Plus on the screen, please set Auto Motion Plus to Custom, you set Auto Motion Plus to their default...
This displayed frequency is not the frequency of the picture the TV is displaying when you have Auto Motion Plus on your TV displays the resolution and frequency of the incoming video signal (60 Hz). ... control Blur Reduction and Judder Reduction manually and use Reset to reset both to Off. NN If you set Auto Motion Plus to Demo, you can compare the difference ◀ between a picture with Auto Motion Plus on the screen, please set Auto Motion Plus to Custom, you set Auto Motion Plus to their default...
User Manual (user Manual) (ver.1.0) (English)
Page 138
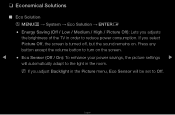
...→ Eco Solution → ENTERE ●● Energy Saving (Off / Low / Medium / High / Picture Off): Lets you adjusts the brightness of the TV in the room. If you adjust Backlight in the Picture menu, Eco Sensor will automatically adapt to the light in order to turn on . Press any... button except the volume button to reduce power consumption. NN If you select Picture Off, the screen is turned off, but the sound remains on the screen. ◀ ●● Eco Sensor (Off / On): To enhance your power savings, the picture settings ▶ will be set to Off. English
...→ Eco Solution → ENTERE ●● Energy Saving (Off / Low / Medium / High / Picture Off): Lets you adjusts the brightness of the TV in the room. If you adjust Backlight in the Picture menu, Eco Sensor will automatically adapt to the light in order to turn on . Press any... button except the volume button to reduce power consumption. NN If you select Picture Off, the screen is turned off, but the sound remains on the screen. ◀ ●● Eco Sensor (Off / On): To enhance your power savings, the picture settings ▶ will be set to Off. English
User Manual (user Manual) (ver.1.0) (English)
Page 290
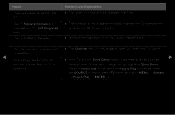
...the picture to view the default picture settings (go to MENU - Incorrect or loose connections may cause color problems or a blank screen. Reset Picture) ◀ ▶ English Picture - Issues Solutions and Explanations Color is not bright enough. •• Adjust the Picture options in the TV menu (go to Picture Mode... / Color / Brightness / Sharpness) •• Adjust the Energy Saving option in the TV menu (go to MENU - The color is poor or the picture is wrong or missing. •...
...the picture to view the default picture settings (go to MENU - Incorrect or loose connections may cause color problems or a blank screen. Reset Picture) ◀ ▶ English Picture - Issues Solutions and Explanations Color is not bright enough. •• Adjust the Picture options in the TV menu (go to Picture Mode... / Color / Brightness / Sharpness) •• Adjust the Energy Saving option in the TV menu (go to MENU - The color is poor or the picture is wrong or missing. •...
User Manual (user Manual) (ver.1.0) (English)
Page 298
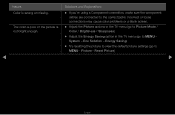
...; This smell is normal and will reset audio and picture ▶ settings every 30 minutes. The TV is a plastic smell from the TV. Issues There is tilted to the side. English The channel menu is greyed out (unavailable). ◀ Your settings are lost after 30 minutes or every time the TV... Self Diagnosis menu. Press the SOURCE button to select TV mode, and go to Home Use mode using the Plug & Play procedure. Change the settings from the TV and reassemble it will dissipate over time. •• This function is unavailable in the Store Demo mode, it . The TV...
...; This smell is normal and will reset audio and picture ▶ settings every 30 minutes. The TV is a plastic smell from the TV. Issues There is tilted to the side. English The channel menu is greyed out (unavailable). ◀ Your settings are lost after 30 minutes or every time the TV... Self Diagnosis menu. Press the SOURCE button to select TV mode, and go to Home Use mode using the Plug & Play procedure. Change the settings from the TV and reassemble it will dissipate over time. •• This function is unavailable in the Store Demo mode, it . The TV...


