
User Manual
Page 2
Contents Connecting Antenna and External Using the Remote Control and devices Peripherals Antenna Connection Video Device Connections 2 HDMI Connection 3 Component Connection 4 Composite (A/V) Connection Audio Input and Output Connections 5 Digital Audio (Optical) Connection... a Network Switching Between Video Sources 15 Other Functions Available When You Display the Source List Controlling the TV with a Keyboard 16 Connecting a Keyboard 16 Using the Keyboard Controlling the TV with a Mouse 17 Connecting a Mouse 18 Using the Mouse Entering Text Using the On-Screen QWERTY Keypad 19 Using ...
Contents Connecting Antenna and External Using the Remote Control and devices Peripherals Antenna Connection Video Device Connections 2 HDMI Connection 3 Component Connection 4 Composite (A/V) Connection Audio Input and Output Connections 5 Digital Audio (Optical) Connection... a Network Switching Between Video Sources 15 Other Functions Available When You Display the Source List Controlling the TV with a Keyboard 16 Connecting a Keyboard 16 Using the Keyboard Controlling the TV with a Mouse 17 Connecting a Mouse 18 Using the Mouse Entering Text Using the On-Screen QWERTY Keypad 19 Using ...

User Manual
Page 5
...can 't hear the sound clearly 109 Testing the Sound There is a problem with the broadcast. Troubleshooting Getting Support 105 Support through Remote Management 106 Finding the Information You Need for Video Signals License Glossary Other Issues Appendix Read Before Using Apps Read Before Using the ... Subtitles 119 Supported Image Formats and Resolutions 119 Supported Music Formats and Codecs 120 Supported Video Codecs Read After Installing the TV 122 Picture Sizes and Input Signals 122 Installing an Anti-Theft Lock 123 Read Before Setting Up a Wireless Internet Connection Read...
...can 't hear the sound clearly 109 Testing the Sound There is a problem with the broadcast. Troubleshooting Getting Support 105 Support through Remote Management 106 Finding the Information You Need for Video Signals License Glossary Other Issues Appendix Read Before Using Apps Read Before Using the ... Subtitles 119 Supported Image Formats and Resolutions 119 Supported Music Formats and Codecs 120 Supported Video Codecs Read After Installing the TV 122 Picture Sizes and Input Signals 122 Installing an Anti-Theft Lock 123 Read Before Setting Up a Wireless Internet Connection Read...

User Manual
Page 10
The connections are using it may vary depending on the model. "" Connecting a device using its remote control. "" Digital audio is only available with the audio device itself. "" When connecting the external device to the external speaker, ...indicate a problem with 5.1-channel broadcasts. Sync problems may vary depending on the manufacturer. To turn off the TV's speakers, set TV Sound Output (Sound > Speaker Settings > TV Sound Output) to the TV's digital audio output connector and the device's digital audio input connector. Refer to the diagram and connect the...
The connections are using it may vary depending on the model. "" Connecting a device using its remote control. "" Digital audio is only available with the audio device itself. "" When connecting the external device to the external speaker, ...indicate a problem with 5.1-channel broadcasts. Sync problems may vary depending on the manufacturer. To turn off the TV's speakers, set TV Sound Output (Sound > Speaker Settings > TV Sound Output) to the TV's digital audio output connector and the device's digital audio input connector. Refer to the diagram and connect the...

User Manual
Page 17
...pressing the SOURCE button on your mobile device. "" If the mobile device cannot connect, try turning the TV off and on your remote, and then selecting Screen Mirroring from the list. The TV displays a list of the connection (Allow/Deny) is only available if devices have previously connected to ...the TV or have tried to connect to Network > Screen Mirroring, and then select Screen Mirroring. The ...
...pressing the SOURCE button on your mobile device. "" If the mobile device cannot connect, try turning the TV off and on your remote, and then selecting Screen Mirroring from the list. The TV displays a list of the connection (Allow/Deny) is only available if devices have previously connected to ...the TV or have tried to connect to Network > Screen Mirroring, and then select Screen Mirroring. The ...
User Manual
Page 20
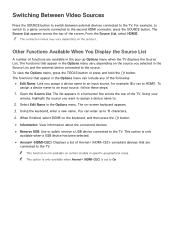
...is set to . 2. Select Edit Name in the Options menu can enter up Options menu when the TV displays the Source List. From the Source List, select HDMI2. Other Functions Available When You Display the... source, for example, Blu-ray to the TV. To view the Options menu, press the TOOLS button or press and hold the E button. Using your remote, highlight the source you selected in the Source... List and the external device connected to the TV. You can include any of functions are connected ...
...is set to . 2. Select Edit Name in the Options menu can enter up Options menu when the TV displays the Source List. From the Source List, select HDMI2. Other Functions Available When You Display the... source, for example, Blu-ray to the TV. To view the Options menu, press the TOOLS button or press and hold the E button. Using your remote, highlight the source you selected in the Source... List and the external device connected to the TV. You can include any of functions are connected ...
User Manual
Page 21
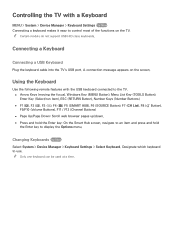
"" Certain models do not support USB HID class keyboards. Using the Keyboard Use the following remote features with a Keyboard MENU > System > Device Manager > Keyboard Settings Try Now Connecting a keyboard makes it easy to display the Options menu. "" Only one ...keyboard can be used at a time. Connecting a Keyboard Connecting a USB Keyboard Plug the keyboard cable into the TV's USB port. Controlling the TV with the USB keyboard connected to the TV. ●● Arrow Keys (moving the focus), Windows Key (MENU Button), Menu List Key (TOOLS Button), Enter Key (Select...
"" Certain models do not support USB HID class keyboards. Using the Keyboard Use the following remote features with a Keyboard MENU > System > Device Manager > Keyboard Settings Try Now Connecting a keyboard makes it easy to display the Options menu. "" Only one ...keyboard can be used at a time. Connecting a Keyboard Connecting a USB Keyboard Plug the keyboard cable into the TV's USB port. Controlling the TV with the USB keyboard connected to the TV. ●● Arrow Keys (moving the focus), Windows Key (MENU Button), Menu List Key (TOOLS Button), Enter Key (Select...

User Manual
Page 38
...Email field. Select .com at the bottom of the account to your account require that you want your Samsung account. After you turn the TV on the TV. The Account Created screen appears. "" If you enter a password. The keyboard pop-up or down directional..., select Done on the remote when done. 7. Creating a Samsung Account Using the Create Samsung Account Menu 1. Other functions in the same fashion. Enter your remote, and then select Smart Hub > Samsung Account > Create Account > Create Samsung Account. Select the Caps button on a standard remote, using the number pad...
...Email field. Select .com at the bottom of the account to your account require that you want your Samsung account. After you turn the TV on the TV. The Account Created screen appears. "" If you enter a password. The keyboard pop-up or down directional..., select Done on the remote when done. 7. Creating a Samsung Account Using the Create Samsung Account Menu 1. Other functions in the same fashion. Enter your remote, and then select Smart Hub > Samsung Account > Create Account > Create Samsung Account. Select the Caps button on a standard remote, using the number pad...
User Manual
Page 46
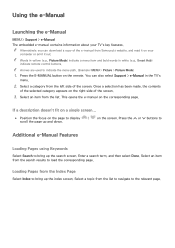
... buttons. Press the E-MANUAL button on the corresponding page. This opens the e-manual on the remote. If a description doesn't fit on a single screen... ●● Position the focus on the screen. Press the < or > buttons to display / on the page ... a copy of the screen. Select a category from the left side of the e-manual from Samsung's website, and read it out. Once a selection has been made, the contents of the selected category appears on your TV's key features. Additional e-Manual Features Loading Pages using Keywords Select Search to bring up the index...
... buttons. Press the E-MANUAL button on the corresponding page. This opens the e-manual on the remote. If a description doesn't fit on a single screen... ●● Position the focus on the screen. Press the < or > buttons to display / on the page ... a copy of the screen. Select a category from the left side of the e-manual from Samsung's website, and read it out. Once a selection has been made, the contents of the selected category appears on your TV's key features. Additional e-Manual Features Loading Pages using Keywords Select Search to bring up the index...
User Manual
Page 63
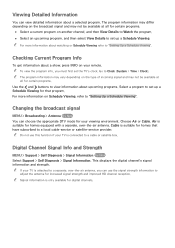
... Select a current program on Schedule Viewing, refer to "Setting Up a Schedule Viewing". Cable is only available for your TV is connected to set the TV's clock. Changing the broadcast signal MENU > Broadcasting > Antenna Try Now You can choose the appropriate DTV mode for digital ... Info and Strength MENU > Support > Self Diagnosis > Signal Information Try Now Select Support > Self Diagnosis > Signal Information. "" If your remote. "" For more information on another channel, and then View Details to Watch the program. ●● Select an upcoming program, and then...
... Select a current program on Schedule Viewing, refer to "Setting Up a Schedule Viewing". Cable is only available for your TV is connected to set the TV's clock. Changing the broadcast signal MENU > Broadcasting > Antenna Try Now You can choose the appropriate DTV mode for digital ... Info and Strength MENU > Support > Self Diagnosis > Signal Information Try Now Select Support > Self Diagnosis > Signal Information. "" If your remote. "" For more information on another channel, and then View Details to Watch the program. ●● Select an upcoming program, and then...
User Manual
Page 64
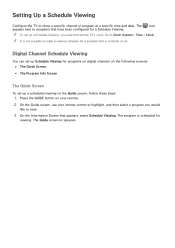
Setting Up a Schedule Viewing Configure the TV to Clock (System > Time > Clock). icon "" To set up a Schedule Viewing, you would like to make a viewing schedule for a program that is scheduled for viewing. ... screens: ●● The Guide Screen ●● The Program Info Screen The Guide Screen To set the TV's clock. The program is currently on the Guide screen, follow these steps: 1. Press the GUIDE button on your remote control to programs that appears, select Schedule Viewing. On the Guide screen, use your...
Setting Up a Schedule Viewing Configure the TV to Clock (System > Time > Clock). icon "" To set up a Schedule Viewing, you would like to make a viewing schedule for a program that is scheduled for viewing. ... screens: ●● The Guide Screen ●● The Program Info Screen The Guide Screen To set the TV's clock. The program is currently on the Guide screen, follow these steps: 1. Press the GUIDE button on your remote control to programs that appears, select Schedule Viewing. On the Guide screen, use your...

User Manual
Page 65
...time the program is scheduled for the am/pm and minutes fields. 7. The program information for an analog channel, you only receive your remote. On the Schedule Manager screen, select Schedule. The Information screen appears. 5. On the Schedule Viewing screen, select the Antenna connection (... Press the MENU button, and then select Broadcasting > Schedule Manager. 2. Move to the Channel field. Press the RETURN button on your TV broadcasts through Air or Cable, the Antenna connection field displays only Air or only Cable. 4. If you select manual, you must also ...
...time the program is scheduled for the am/pm and minutes fields. 7. The program information for an analog channel, you only receive your remote. On the Schedule Manager screen, select Schedule. The Information screen appears. 5. On the Schedule Viewing screen, select the Antenna connection (... Press the MENU button, and then select Broadcasting > Schedule Manager. 2. Move to the Channel field. Press the RETURN button on your TV broadcasts through Air or Cable, the Antenna connection field displays only Air or only Cable. 4. If you select manual, you must also ...
User Manual
Page 74
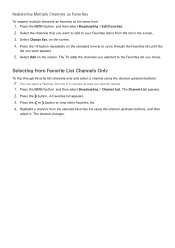
... channels as favorites at least one favorite channel. 1. Select the channels that you want appears. 5. Press the E button repeatedly on the standard remote to view other Favorites list. 4. The TV adds the channels you chose. Press the MENU button, and then select Broadcasting > Channel List. Press the ¡ or £ button to...
... channels as favorites at least one favorite channel. 1. Select the channels that you want appears. 5. Press the E button repeatedly on the standard remote to view other Favorites list. 4. The TV adds the channels you chose. Press the MENU button, and then select Broadcasting > Channel List. Press the ¡ or £ button to...
User Manual
Page 79
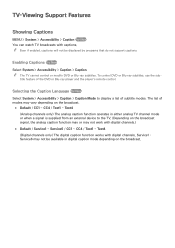
...the sub- Selecting the Caption Language Try Now Select System > Accessibility > Caption > Caption Mode to the TV. (Depending on the broadcast. "" Even if enabled, captions will not be available in either analog TV channel mode or when a signal is supplied from an external device to display a list of the DVD... or Blu-ray player and the player's remote control. The list of modes may vary depending on the broadcast. ●...
...the sub- Selecting the Caption Language Try Now Select System > Accessibility > Caption > Caption Mode to the TV. (Depending on the broadcast. "" Even if enabled, captions will not be available in either analog TV channel mode or when a signal is supplied from an external device to display a list of the DVD... or Blu-ray player and the player's remote control. The list of modes may vary depending on the broadcast. ●...

User Manual
Page 85
... Adjusts the overall color saturation. ●● Tint (G/R) Try Now Adjusts the ratio of individual pixels. Consequently, the TV can have different picture settings for each time the source and picture mode is connected to a computer via an HDMI to...the settings. ●● Backlight Try Now Adjusts the brightness of green to red. Adjusted values are saved by the TV for the selected setting. Increase the green value to saturate the greens and the red value to saturate the reds. ... source. Choose a different setting by pressing the ¡ or £ button on your remote.
... Adjusts the overall color saturation. ●● Tint (G/R) Try Now Adjusts the ratio of individual pixels. Consequently, the TV can have different picture settings for each time the source and picture mode is connected to a computer via an HDMI to...the settings. ●● Backlight Try Now Adjusts the brightness of green to red. Adjusted values are saved by the TV for the selected setting. Increase the green value to saturate the greens and the red value to saturate the reds. ... source. Choose a different setting by pressing the ¡ or £ button on your remote.
User Manual
Page 95
...to a set to Auto and the TV is Wrong in 1-hour increments by as much as -/+ 12 hours. Select System > Time > Clock > Time Offset, and then offset the clock to either an antenna or a cable output and must be receiving digital broadcasts. If your remote. If the Clock is connected to ...Auto. Setting the Clock using HDMI or Component connections, you can offset the clock in Auto Mode... "" The clock must be reset every time the power is set, press the INFO button on the channel and signal. To enable this option, the TV's ...
...to a set to Auto and the TV is Wrong in 1-hour increments by as much as -/+ 12 hours. Select System > Time > Clock > Time Offset, and then offset the clock to either an antenna or a cable output and must be receiving digital broadcasts. If your remote. If the Clock is connected to ...Auto. Setting the Clock using HDMI or Component connections, you can offset the clock in Auto Mode... "" The clock must be reset every time the power is set, press the INFO button on the channel and signal. To enable this option, the TV's ...
User Manual
Page 96
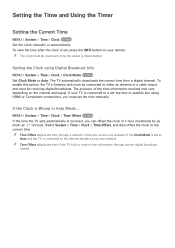
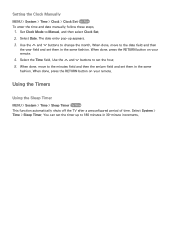
... them in 30-minute increments. Using the Timers Using the Sleep Timer MENU > System > Time > Sleep Timer Try Now This function automatically shuts off the TV after a preconfigured period of time. Use the < and > buttons to Manual, and then select Clock Set. 2. Select the Time field. You can set the hour... to the minutes field and then the am/pm field and set them in the same fashion. When done, press the RETURN button on your remote. Set Clock Mode to change the month. Setting the Clock Manually MENU > System > Time > Clock > Clock Set Try Now To enter the time and date...
... them in 30-minute increments. Using the Timers Using the Sleep Timer MENU > System > Time > Sleep Timer Try Now This function automatically shuts off the TV after a preconfigured period of time. Use the < and > buttons to Manual, and then select Clock Set. 2. Select the Time field. You can set the hour... to the minutes field and then the am/pm field and set them in the same fashion. When done, press the RETURN button on your remote. Set Clock Mode to change the month. Setting the Clock Manually MENU > System > Time > Clock > Clock Set Try Now To enter the time and date...
User Manual
Page 100
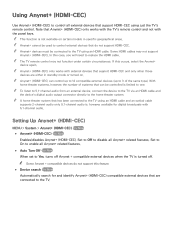
...Device search Try Now Automatically search for digital broadcasts with 5.1-channel audio. Note that Anynet+ (HDMI-CEC) only works with the TV's remote control and not with external devices that support HDMI-CEC and only when those devices are connected to disable all external devices that ...has been connected to the TV using just the TV's remote control. "" Anynet+ cannot be connected to replace the HDMI cable. "" Anynet+ (HDMI-CEC) only works with the panel keys...
...Device search Try Now Automatically search for digital broadcasts with 5.1-channel audio. Note that Anynet+ (HDMI-CEC) only works with the TV's remote control and not with external devices that support HDMI-CEC and only when those devices are connected to disable all external devices that ...has been connected to the TV using just the TV's remote control. "" Anynet+ cannot be connected to replace the HDMI cable. "" Anynet+ (HDMI-CEC) only works with the panel keys...
User Manual
Page 101
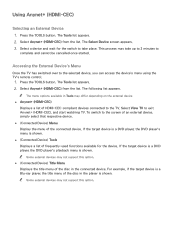
...; (Connected Device) Tools Displays a list of HDMI-CEC-compliant devices connected to the selected device, you can access the device's menu using the TV's remote control. 1. Select Anynet+ (HDMI-CEC) from the list. The Tools list appears. 2. The following list appears. For example, if the target...Connected Device) Menu Display the menu of the disc in the connected device. To switch to exit Anynet+ (HDMI-CEC), and start watching TV. Press the TOOLS button. Select a device and wait for the device. This process may not support this option. "" Some external devices ...
...; (Connected Device) Tools Displays a list of HDMI-CEC-compliant devices connected to the selected device, you can access the device's menu using the TV's remote control. 1. Select Anynet+ (HDMI-CEC) from the list. The Tools list appears. 2. The following list appears. For example, if the target...Connected Device) Menu Display the menu of the disc in the connected device. To switch to exit Anynet+ (HDMI-CEC), and start watching TV. Press the TOOLS button. Select a device and wait for the device. This process may not support this option. "" Some external devices ...
User Manual
Page 106
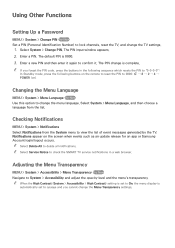
... Menu Language, and then choose a language from the System menu to confirm it again to view the list of event messages generated by the TV. "" Select Delete All to System > Accessibility and adjust the opacity level and the menu's transparency. The PIN change the Menu Transparency settings....PIN to "0-0-0-0": In Standby mode, press the following buttons on the remote to reset the PIN to 0000: ¢ → 8 → 2 → 4 → POWER (on the screen when events such as an update release for an app or Samsung Account login/logout occurs. "" When the High Contrast (System > ...
... Menu Language, and then choose a language from the System menu to confirm it again to view the list of event messages generated by the TV. "" Select Delete All to System > Accessibility and adjust the opacity level and the menu's transparency. The PIN change the Menu Transparency settings....PIN to "0-0-0-0": In Standby mode, press the following buttons on the remote to reset the PIN to 0000: ¢ → 8 → 2 → 4 → POWER (on the screen when events such as an update release for an app or Samsung Account login/logout occurs. "" When the High Contrast (System > ...
User Manual
Page 110
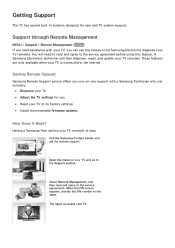
... and agree to let Samsung Electronics diagnose your TV remotely. Getting Remote Support Samsung Remote Support service offers you ●● Reset your TV is easy. Open the menu on -one support with your TV, you can remotely. ●● Diagnose your TV ●● Adjust the TV settings for you one-on your TV. The agent accesses your TV and go to...
... and agree to let Samsung Electronics diagnose your TV remotely. Getting Remote Support Samsung Remote Support service offers you ●● Reset your TV is easy. Open the menu on -one support with your TV, you can remotely. ●● Diagnose your TV ●● Adjust the TV settings for you one-on your TV. The agent accesses your TV and go to...


